Quick Answer
Windhawk is a community-driven marketplace with a range of mods. You can install and configure these mods to customize the UI elements of Windows and installed programs or add new functionality to your PC. For instance, you can customize the Start Menu, show file sizes in MBs/GBs, and restore the old context menu, among other things.
One of the best things about Windows is you can customize it to your requirements. You’ll find plenty of programs that give you this ability. However, the one that stands out and you’ve probably heard the most about is Windhawk.

Known for its user-friendly approach, Windhawk makes it really easy to customize the user interface and programs on your Windows PC. Let’s check out Windhawk in detail and explore some of its popular customization options.
Table of Contents
What Is Windhawk?
Windhawk is a free program that lets you customize various aspects of the Windows operating system and the programs installed on your computer. You can think of it as a community-driven marketplace with plenty of mods you can browse and install with a few simple clicks.
A Windhawk mod is essentially a module that lets you modify the UI elements and behavior of the Windows operating system and Windows programs. You’ll find documentation for most mods within the program outlining the instructions on using the different options they offer.
What Can You Do With Windhawk?
Windhawk packs a range of mods that allow you to customize various UI elements of the operating system and enhance the functionality of different programs on your Windows PC. Here’s what you can do with these mods.
Customize the Start Menu with Windows 11 Start Menu Styler
As the name implies, this mod lets you customize the Start Menu on your PC. It does this by giving you access to a bunch of themes that you can quickly preview and apply to change the appearance and position of the Start Menu.
For example, if you like the Windows 10-style Start Menu, you can replace your Windows 11’s Start Menu with it using the Windows 10 theme. Similarly, if you don’t like the Recommended section in Windows 11’s Start Menu, you can remove it with the NoRecommendedSection theme.
Customize the Taskbar with Windows 11 Taskbar Styler
Just like the Start Menu, you can also customize the appearance of your Taskbar. Windhawk has a good selection of themes, including those for older versions of Windows dating back to Windows XP.
A few popular themes include Translucent Taskbar to turn the Taskbar translucent, DockLike to transform the Taskbar into a dock, and CleanSlate to get a nice and clean Taskbar that dynamically adjusts to your theme.
Show File Sizes in MBs and GBs with Better File Sizes in Explorer Details
By default, File Explore shows file sizes in kilobytes (KBs). However, this isn’t ideal for large files and requires conversion into megabytes (MBs) and gigabytes (GBs) for better comprehension.
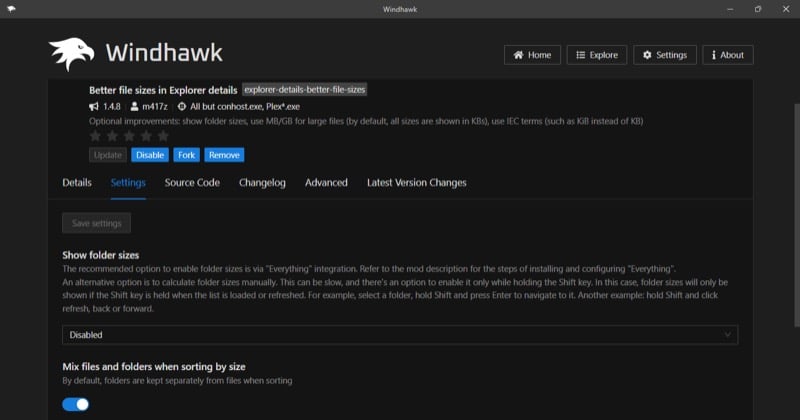
Windhawk’s Better File Sizes in Explorer Details mod saves you this hassle. Once installed, File Explorer will use MBs and GBs to represent the size of large files on your computer.
You can also enable the mod for folders. To do this, open the mod in Windhawk and head to the Settings tab. Click the drop-down under the Show Folder Sizes section and choose your preferred option. I suggest setting it to Enabled, Calculate Manually While Holding the Shift Key. This won’t slow down File Explorer, as it’ll only show the folder size when you hold down the Shift key.
Scroll Mouse to Switch Between Tabs with Chrome/Edge Scroll Tabs with Mouse Wheel
You can move between your open tabs in Chrome or Edge with the Ctrl+Tab keyboard shortcut. However, if you predominantly use a mouse for navigation, you can scroll tabs using the mouse wheel, thanks to the Chrome/Edge Scroll Tabs with Mouse Wheel mod.
Once you install and enable it in Windhawk, you can simply hover over the tabs and scroll the mouse wheel to move between your open tabs. If you use a laptop, you may use the trackpad, though the experience may not be as fluid.
This mod only works in Chrome and Edge, as you can tell by its name.
Make the Taskbar More Functional with Click on Empty Taskbar Space
If you’re left with some empty space in your Taskbar after having all your essential apps, it’s best to put it to good use. You can do this using the Click on Empty Taskbar Space mod.
After you install it, the mod lets you assign your preferred action (from a bunch of available actions) to the double-click or middle-click gesture. Show Desktop, Task Manager, Mute System Volume, and Start Application, are some handy actions you’ll find in the mod.
Once done, simply double-click or middle-click an empty area in your Taskbar, and the mod will perform the associated action.
Get Back the Old Context Menu with Classic Context Menu on Windows 11
If you’re not a fan of Windows 11’s modern context menu, you can hold down the Shift key while performing the right-click to access the old context menu temporarily. However, if you don’t want to do this, Windhawk’s Classic Context Menu on Windows 11 mod permanently restores the classic context menu on your computer.
Once installed, close File Explorer. Then, right-click on an empty area or selected items, and you’ll see the old context menu. If you want to use the new context menu for some reason, hold down the Ctrl key while right-clicking.
How to Use Windhawk to Customize Your Windows 11 PC
Windhawk is easy to use. Start by downloading the program from the link below and installing it on your Windows PC.
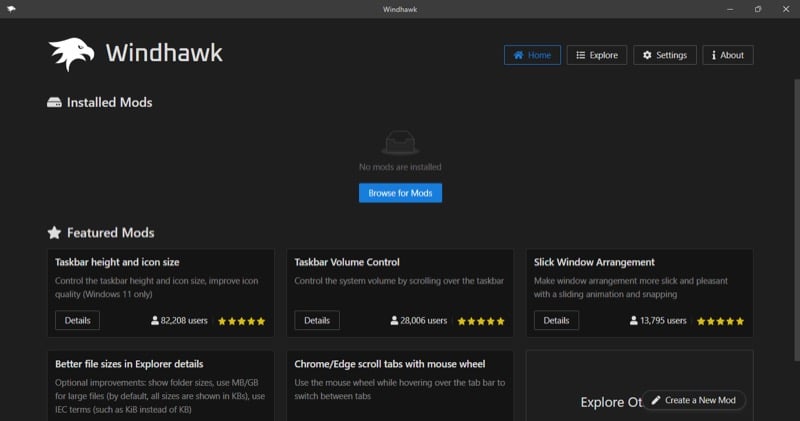
Once the installation finishes, launch Windhawk. You’ll now be on the Home tab. Here, you can see a bunch of mods under Featured Mods. In addition, any mods you install on your computer will also appear here under Installed Mods.
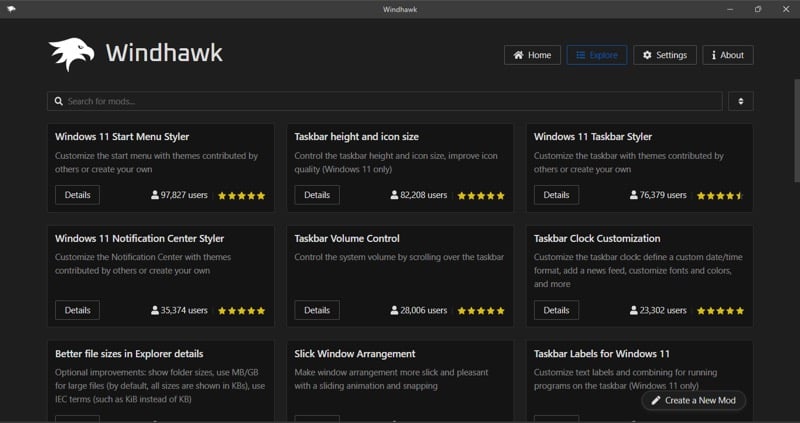
To view more mods, click the Explore tab in the upper-right corner. You can also search for mods by typing their name in the search box that reads Search for Mods. In addition, you can sort mods by clicking the up-down arrow button next to the search bar and selecting a criterion.
When you want more information about a Windhawk mode, click the Details button on its card. This will open a detailed page with all the details about it, including how to use it, source code (if available), and changelog.
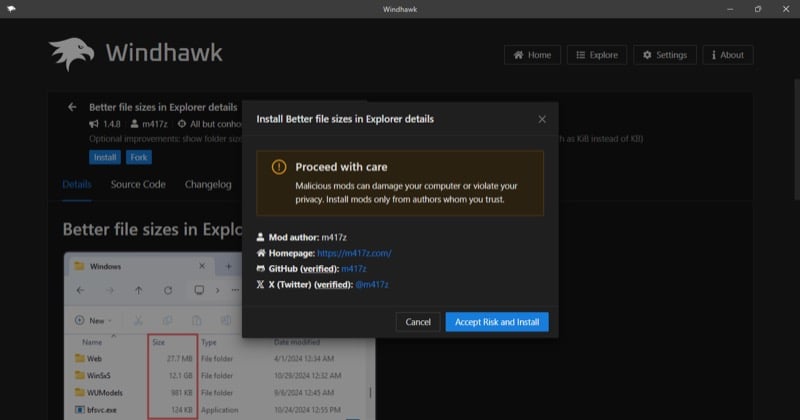
To install a mod, click the Install button and confirm by clicking Accept Risk and Install on the confirmation prompt.
When the installation is complete, click the Enable button on the mod details page.

You can also adjust some of the mod’s settings. Simply go to the Settings tab (if available), and you’ll see all the available settings for the mod.
At any point, if you want to pause a Windhawk mod temporarily, open it in the program and click the Disable button. If it’s no longer needed, you can uninstall it. Click the Remove button on the mod’s main page and confirm by clicking Remove Mod.

Is Windhawk Safe to Use?
Windhawk is safe to use as long as you’re mindful of the mods you’re installing and what you’re doing with them. This is because the open-source nature of Windhawk increases the transparency with the underlying code of the mods available on the platform. Similarly, almost all modifications you carry out on the system or installed programs with Windhawk mods are reversible with a simple click of the Disable button.
Of course, it goes without saying that you must back up your PC before performing any modifications. That way, if something goes wrong, you can easily restore everything to normal.
Transform Your Windows Experience With Windhawk
Many Windows customizations typically involve modifying the Registry or using programs with a steep learning curve. However, Windhawk is different, allowing you to customize things on your Windows PC per your preference with a few simple clicks. So go ahead, experiment with the program, and transform your Windows experience by modifying the visuals or adding new functionality.
