At a time when AI has infiltrated almost every aspect of our lives, everyone should know how to use AI properly to make their lives easier. Recently, Microsoft updated its video editing app Clipchamp on Windows 11 with an AI-based text-to-speech converter. This allows anyone to simply type the script into the app and generate a professional voiceover in minutes. Whether you’re a content creator, work in business or are an aspiring podcaster, the impact of a well-crafted voiceover can take your projects to new heights. In this article, we’ll show you how to create a professional voiceover with Clipchamp on Windows 11. Let’s get started.

Table of Contents
What Is Clipchamp?
Clipchamp is a versatile and easy-to-use online video editing platform that empowers creators with the tools to bring their visions to life effortlessly. Clipchamp offers a range of templates, effects and transitions that make the editing process both efficient and creative.
With the addition of the AI text-to-speech converter, Clipchamp has become even more useful for creators. This feature is very versatile and offers multiple options such as different voices, languages, cadences, accents, and much more. Now, Clipchamp can be used by beginners and professionals alike.
How to Create Professional Voiceovers With AI Using Clipchamp on Windows 11
Here you will find step-by-step instructions on how to use the text-to-speech function in Microsoft Clipchamp to create professional voiceovers:
- Download Microsoft Clipchamp from the Microsoft Store if it is not already installed.
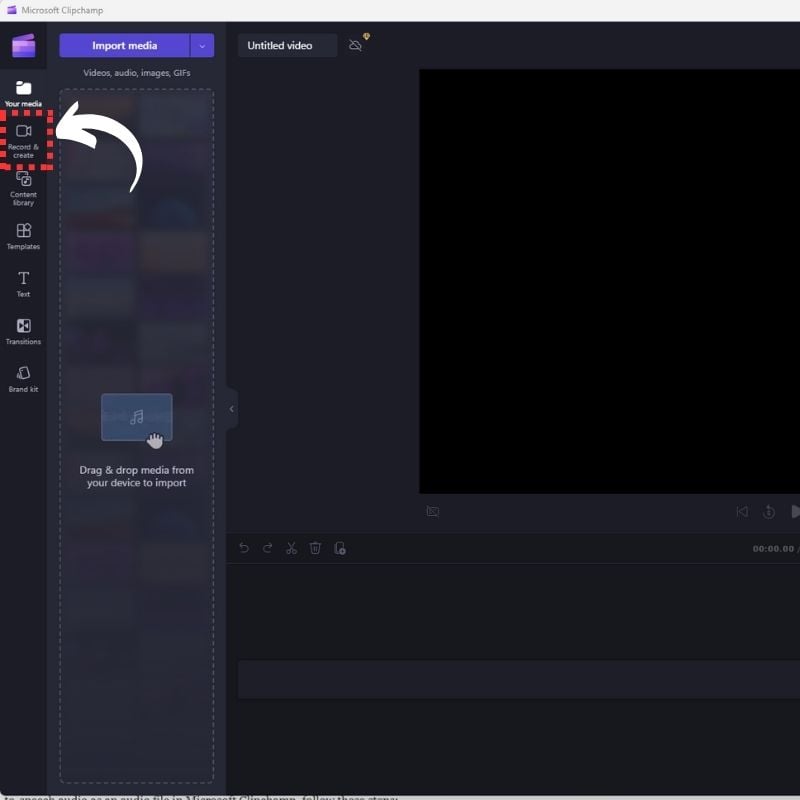
- Open Microsoft Clipchamp and start editing a new video or open an existing one.

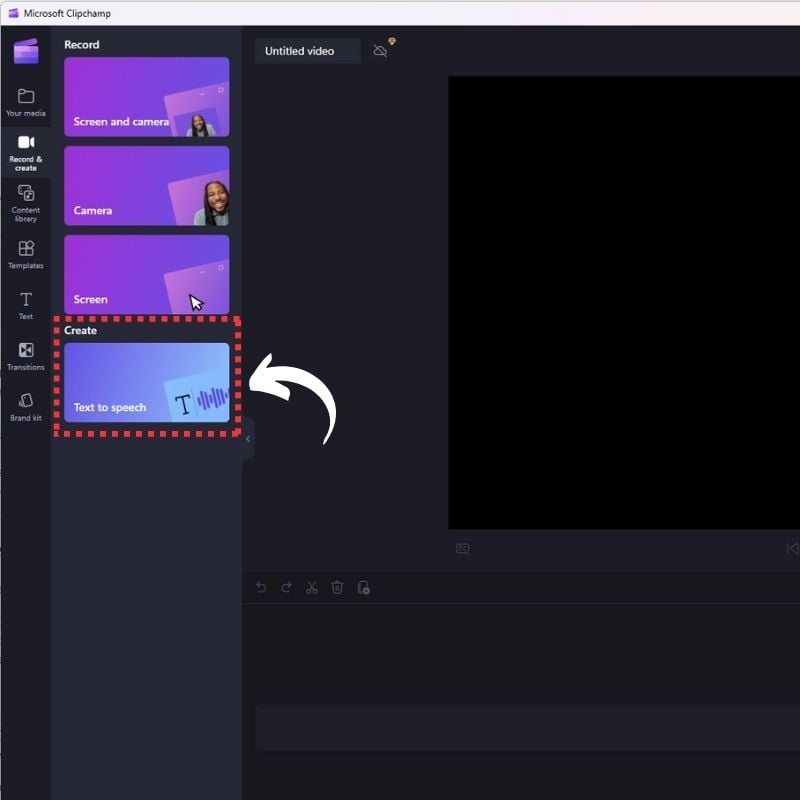
- Select the Record & create option on the left sidebar.
- Choose the Text-to-speech button to get started.
- Select a voice from the list of 400 unique voices with different accents, ages, and sounds. You can also choose from 170 languages.
- Type the text you want to convert to speech and select the Preview button to hear a sample of the voice.

- Adjust the punctuation to get the perfect pronunciation. Full stops/periods will add a moderate pause to your text-to-speech before the next sentence begins. Commas will add a short pause before the sentence continues.
- When you’re happy with the text-to-speech audio, select Save to Media Library.

- Add the voiceover to your project by dragging and dropping it where you want to add audio to the timeline.
That’s it! You can now use the text-to-speech feature in Microsoft Clipchamp to create natural voiceover audio in different accents.
How to Export the Voiceovers to Use Anywhere?
To export your text-to-speech audio as an audio file in Microsoft Clipchamp, follow these steps:
- After adding the text-to-speech audio to your project, select the Export button in the top right corner of the screen.
- Choose an option from the list of export options.
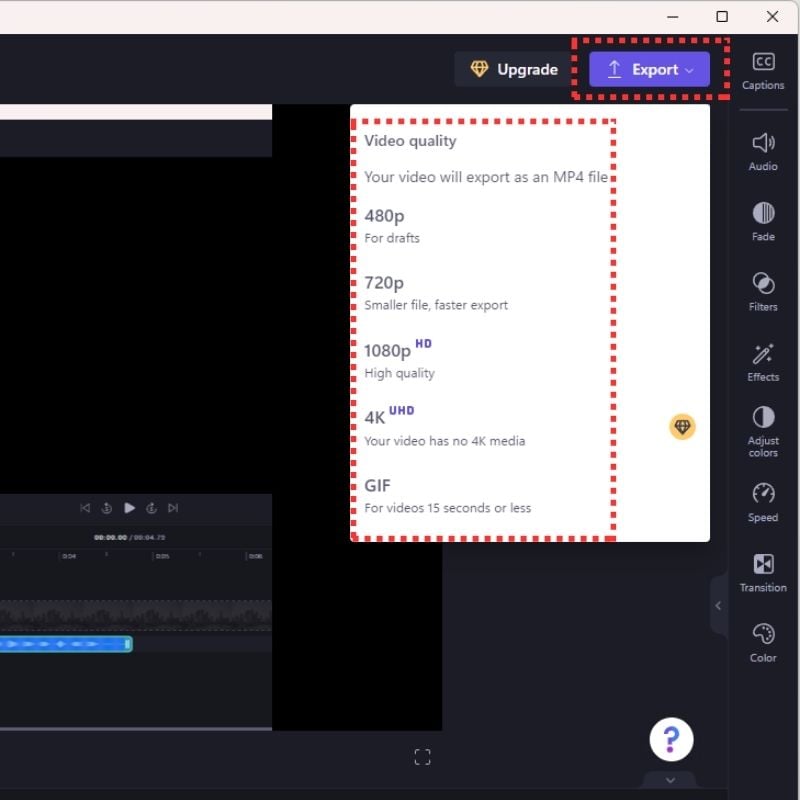
- Select the desired format from the list of available formats.
- Click the Export button to save the voiceover to your device.
Create Professional Sounding Voiceovers With AI on Windows 11

The intersection of technology and creativity has never been more exciting. The seamless integration of artificial intelligence into audio production opens up a world of possibilities for creators of all disciplines. Experiment with the tools and techniques discussed in this article until you find your own flavor. AI is here to simplify our lives, and this is one of the many use cases where AI is helping us on our creative journey. From voiceovers to video production, as technology evolves, we will see more and more applications of AI in every aspect of our technology-driven lives. If you have any questions or suggestions, leave them below in the comments.
FAQs About Creating Professional Voiceovers With Clipchamp in Windows 11
1. What tools are available for creating professional voiceovers with AI in Windows 11?
Windows 11 includes an AI-powered voiceover tool that allows users to generate professional voice annotations. This feature utilizes advanced artificial intelligence algorithms to produce natural and polished audio and create your projects with ease.
2. Can I customize the voice generated by the AI in Windows 11?
Yes, Windows 11 offers customization options that allow you to adjust the pitch, inflection, and tempo of the generated voice. This flexibility ensures that you can customize the voiceover to the specific tone and style of your content.
3. How user-friendly is the AI voiceover feature in Windows 11?
Windows 11 places great emphasis on ease of use, making the AI Voiceover feature accessible to those with limited technical knowledge. The intuitive user interface and simple controls ensure that both beginners and experienced content creators can use the feature with ease.
4. Can I use the AI voiceover feature for different types of content, such as presentations, videos, and podcasts?
Absolutely. The AI Voiceover feature of Windows 11 is versatile and works well for different types of content creation. Whether you’re working on presentations, videos, podcasts, or other projects, the AI adapts and provides a professional and engaging voiceover.
5. Is there a collaborative aspect to using AI for voiceovers in Windows 11?
Yes, the cloud-based accessibility of Windows 11 facilitates collaboration, as users can access their projects from any device. This feature promotes seamless teamwork and ensures that your Voiceover projects can be easily shared and edited on different platforms.
6. How does the integration of AI impact the overall quality of voiceovers in Windows 11?
The integration of AI in Windows 11 significantly improves the overall quality of voiceovers. The algorithms have been developed to produce natural-sounding and professional audio, giving users a powerful tool to increase the impact of their content.
7. Are there any limitations to consider when using AI for voiceovers in Windows 11?
While Windows 11 offers a robust AI-powered voiceover solution, it’s important to experiment and fine-tune the settings to achieve the desired result. It’s advisable to try out different variants to find the perfect balance for your own project.
