Quick Answer
Open the Google Photos app. Click on the + icon and select Movie on Android. On iOS, click on the + icon and choose Highlight video to create a movie from your photo album.
The Google Photos Movie Creation Tool is convenient, especially for creating short videos by combining all your favorite clips.
Recently, I wanted to create a video for my dog’s birthday without fancy editing or crazy transitions. I wanted a simple video that combined all my memories and that I could share quickly with my friends.

This is where the Google Photos movie creation tool came into handy. I mostly use the Instagram reel editor to create simple videos without a watermark, but the Google Photos movie creator tool is more straightforward and makes it easier to create movies without manually picking each clip.
If you want to create a quick video or combine all your memories into a movie, the Google Photos movie creation tool might be your best option. In this guide, I will share the detailed process of using the Google Photos movie creation tool.
Before that, please note that the Google Photos Movie Creation Tool has been removed from the latest version of Google Photos for iOS and the web (it is still available for Android). Google has introduced a new highlight video that works similarly to the movie creation tool.
Table of Contents
How to Use the Google Photos Movie Feature
Feature | Android | iPhone |
|---|---|---|
Steps to create a movie | Open Google photos, tap on '+' icon > Select 'Movie' | Open Google photos, tap on '+' icon > Select 'Highlight video’ |
Themes | Available (e.g., Love Story, Selfie) | Not available |
Create Own Movie | Yes | Yes |
Editing Options | Rearrange, add custom music,Trim clips | Trim, add music from app's library. |
Save | Tap 'Save' | Tap 'Save' |
Share | Email, SMS, social media, Sharable link | Email, SMS, social media, Create Sharable link |
Create Movie from Google Photos On Android:
Step 1: Navigate to the Movie Creation Tool:
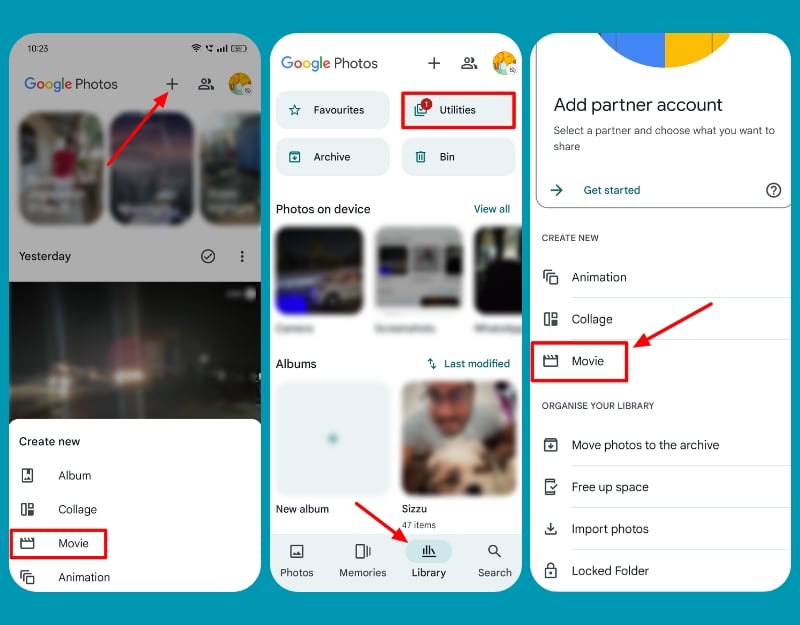
- Open the Google Photos app on your smartphone, click the + icon on the top, and select Movie.
- Alternatively, Tap on the Library tab at the bottom of the screen. Select Utilities and tap Movie.
Step 2: Choose a Theme:
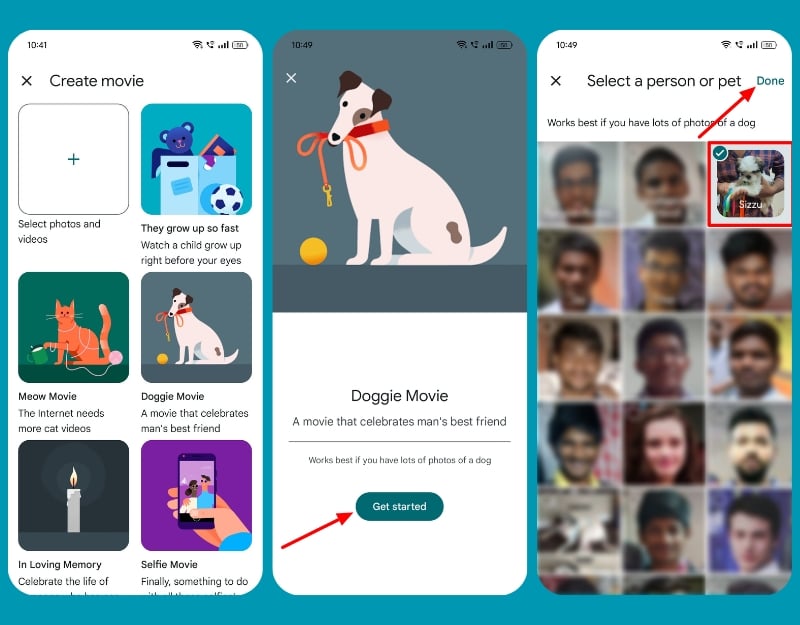
- Select from the preset theme you want and click on Get Started.
- Pick the album you want to use and click on Done.
- Your movie will be generated. Wait a few minutes; you will receive a notification when the movie is ready.
Step 3: Create your movie theme:
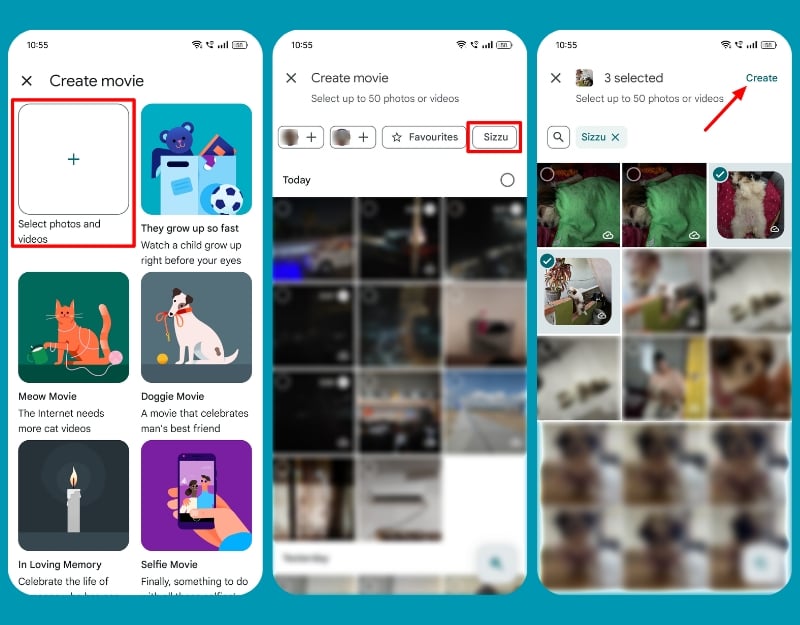
- Alternatively, you can create a movie from scratch.
- Click on the + icon on the Create page and choose the photos and videos you want to include in your movie.
Step 4: Edit Your Movie:
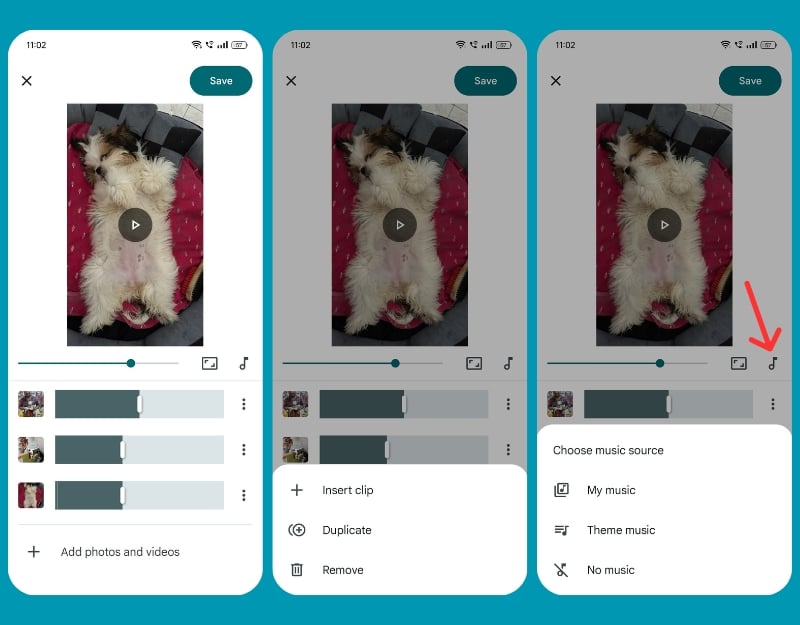
- You can perform basic edits to the clips.
- Rearrange your clips: Select the clips and drag and drop them in your desired order.
- Add music: Tap the music icon and choose from your library or the app’s library.
- Similarly, you can trim the length of each video and enable motion for each image to bring movie effects.
Step 5: Preview and Save:
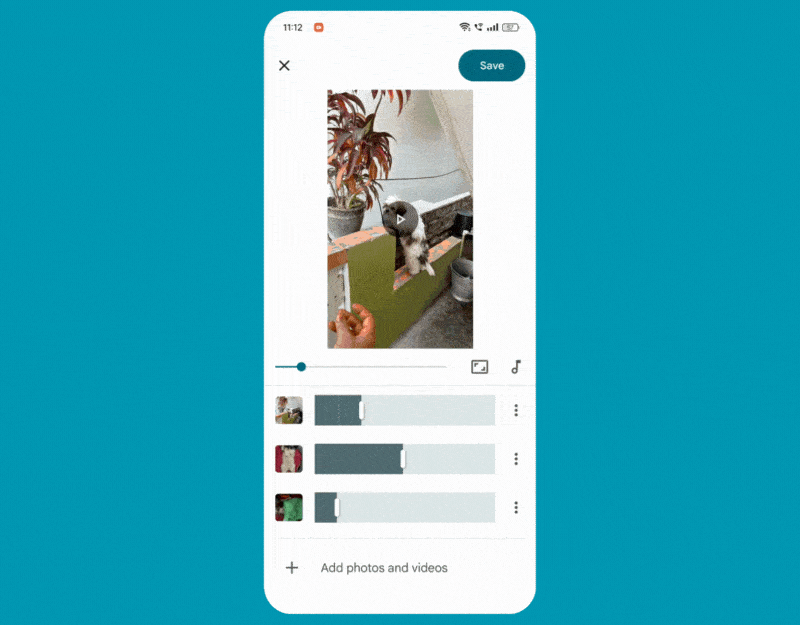
- Tap the play button to preview your movie.
- Make any necessary adjustments to the video. Tap Save to store your movie in Google Photos.
Step 6: View and Share Your Movie:
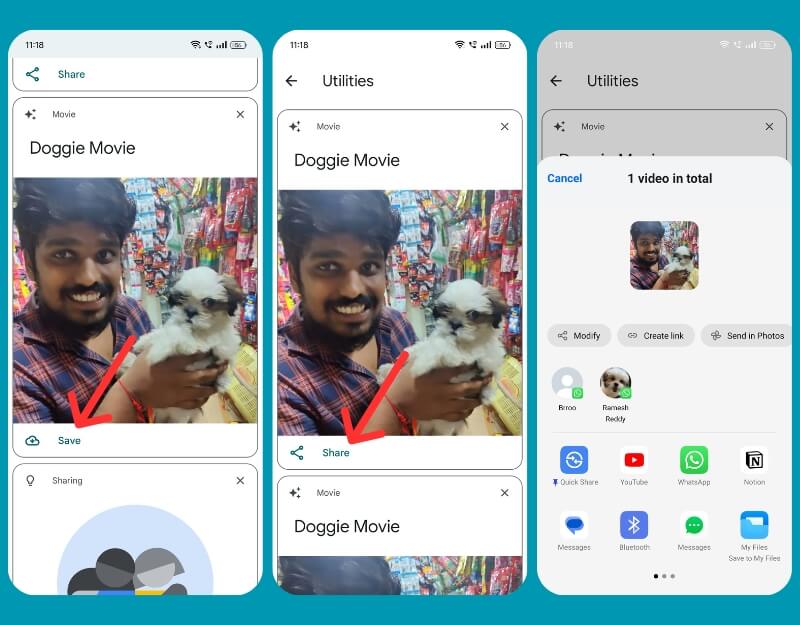
- View the movie in the utility folder (Libraries tab > Utilities).
- Click on the Save and wait for it to download. Now click on the Share. You can share via email, SMS, social media, or generate a shareable link.
Create Movie from Google Photos on iPhone:
You can create a movie using the highlight video feature on the Google Photos iOS app. It works similarly to the Movie creation tool but has a few limitations. It doesn’t support templates, so you can only create a video manually. Additionally, you cannot add custom music to your video.
How to Use Highlight Videos on iOS
Step 1: Navigate to the Highlight Creation Tool:
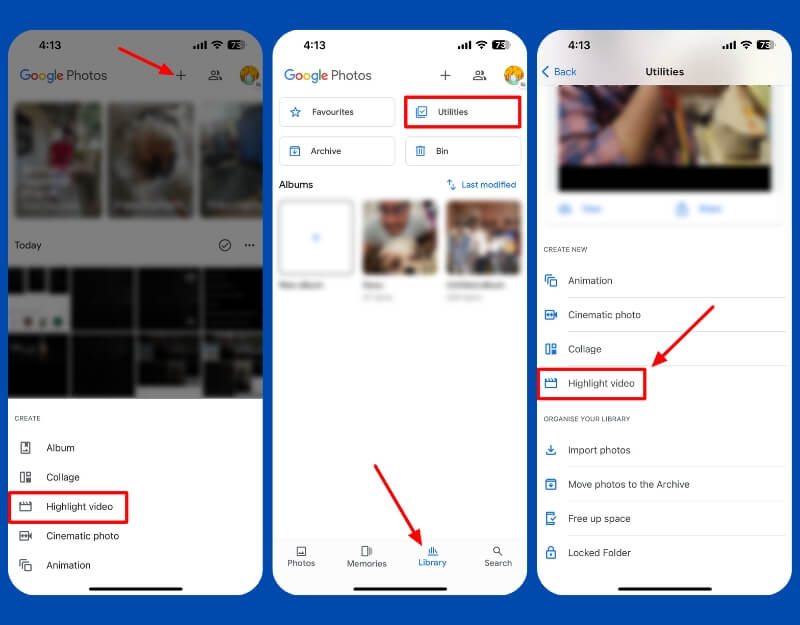
- Open the Google Photos app on your iPhone, click the + button at the top, and select Highlights.
- Alternatively, Tap on the Library tab at the bottom of the screen.
- Select Utilities and tap “Highlight video” under the CREATE NEW section.
Step 2: Select the clips you want to add

- Select items from your albums or Click Select Photos to view your entire photo library.
- Select the photos and click on the Create.
Step 3: Edit Your Movie
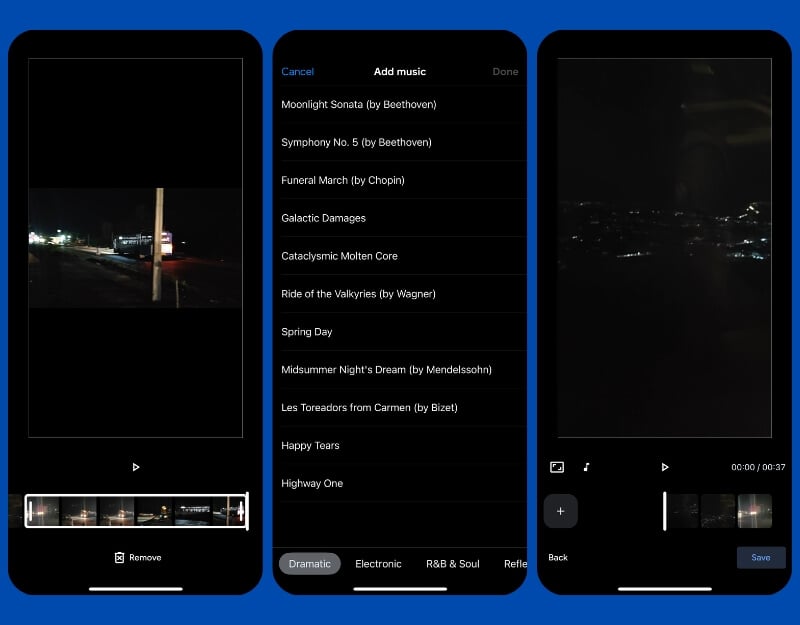
- You can make simple changes to the video.
- Trim Your Clips: Tap on the video and trim the length of the video.
- Add Music: Tap the music icon and select the soundtrack.
Step 4: Preview and save
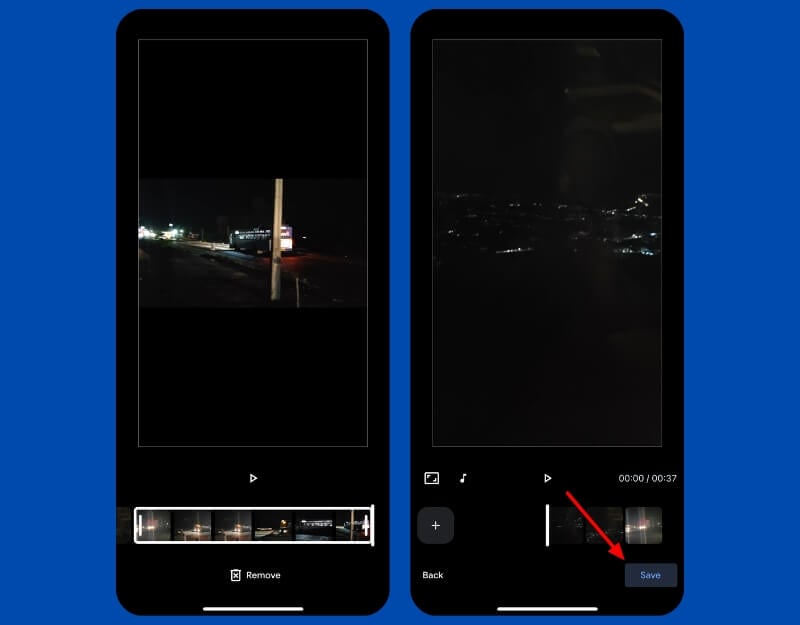
- Tap the play button to preview your movie. Tap Save to save the movie to Google Photos.
- You will receive a notification after completing the video. You can find the video in the Photos tab.
Step 5: Share your video

- Open the video and click the share button to share the video with others.
- You can follow the same process on the web.
FAQs on Creating Movies With Google Photos
Are there any limits to the number of photos and videos I can use in a movie?
You can use up to 50 photos or videos to create a movie in Google Photos.
Can I use Google Photos’ movie creation features on my smartphone and tablet, or is it limited to Chromebooks?
The Google Photos movie creation feature is available for all Android users in the Google Photos app. In the latest iOS and web versions, Google has removed Movies and added a new Highlight video feature in the place of the movie creator tool.
Can I manually edit the movies I create in Google Photos?
Yes, you can manually edit the movies you created in Google Photos. You can trim the movie, remove items, change music, and more. Open the movie created with Google Photos, then click the edit button.
Can I share the movies I create directly from Google Photos?
You can share via email, SMS, social media, or generate a shareable link. Open the movie, click the share icon, and select the media you want to create. To generate a sharable link, click on the create link.
