Quick Answer
Use the Command + Shift + (.)Period shortcut to show hidden files in the finder. To find all hidden files on your Mac, use the Terminal and use this command: “defaults write com.apple.finder AppleShowAllFiles true” to unhide all files on your Mac. After unhiding, use the Spotlight search to find the file you are looking for. You can also use a third-party file manager, the Go to folder option, to find hidden files on your Mac.
MacOS allows you to hide files and folders by adding a simple period (.) to the file name. This can be handy if you want to share your MacBook with others and hide personal folders that other users don’t want to stumble upon.
Moreover, by default, macOS hides critical application settings and configuration files of apps and files to make any critical changes. While these can help you improve your privacy, keep your Mac safe, and prevent tampering with critical files, they can also be a hassle, especially if you don’t know about Mac’s hidden capabilities.
Adding a simple period (.) to the file name while rearranging your folder can hide it forever. Fortunately, if you have recently accidentally hidden your important files and are finding it hard to locate them, you can easily view and retrieve hidden files on your MacBook using various methods. In this guide, you will learn about all the methods to easily unhide files on your Mac and access critical hidden files from Mac apps.
Table of Contents
How To Find Hidden Files on Your Mac
S.no | Method | Steps |
|---|---|---|
1 | Finder Shortcut | Press Command + Shift + . to find hidden files in the folder from the |
2 | Terminal Command | Use ''defaults write com.apple.finder AppleShowAllFiles true'' command to Unhide all hidden files system-wide. |
3 | Go to Folder | Press Command + Shift + G + Enter File Path to access specific hidden folders directly. |
4 | Third-Party Tools | Install Commander One and Enable Hidden Files |
5 | Library Folder Access | Go to Finder > Go > Library to access hidden ~/Library folder for app troubleshooting or cache cleanup. |
Using Finder Shortcut (Command + Shift + .)
You can use the Shift + Command + (.)Period shortcut to view these hidden files on your Mac. This shortcut lets you toggle hidden file visibility on and off and works on any Finder window. However, it does not show files outside the Finder; it is only a temporary toggle that resets once the Finder restarts. However, it is a quick and easy way to quickly find hidden files within the folder using this simple shortcut.
How to view hidden files in Mac using shortcuts:
- Open Finder and go to the folder where you suspect hidden files might exist.
- On your keyboard, Press ‘Command + Shift + .’ (Period).
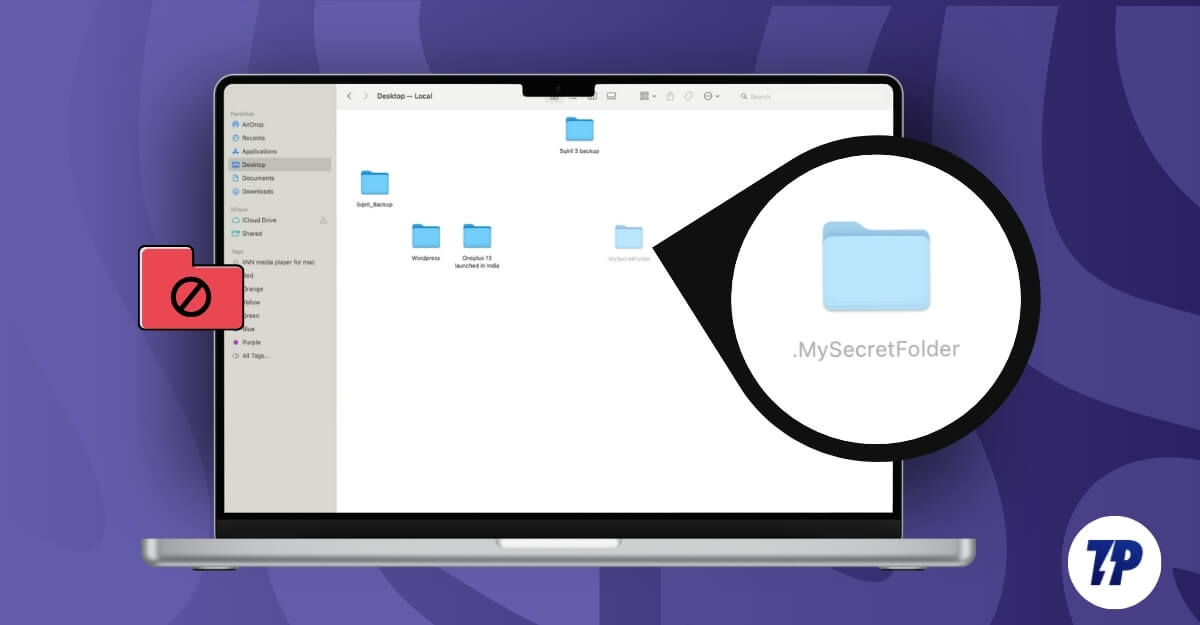
- Now, hidden files will appear grayed out. To unhide files, Right-click on the file, select Rename, and remove the period (.) from the file name. Example: .Secret folder to Secret folder and save.

- Restart the finder, and the hidden file will now appear as a folder without being grayed out. Follow the same process for all hidden files to unhide.
- If you cannot rename the file, Open Terminal, copy the file or the folder path, and use the mv (move) command ”mv /path/yourfilename /path/.yourfilename” to rename the file or the folder. Replace ”/path/to/yourfilename and /path/to/.yourfilename” with the actual file or folder path you want to hide or unhide. Copy and paste this command in the Terminal. Remember to include the file path.
- For example, I want to unhide my Secret folder on the desktop. I can use mv ~/Desktop/.MySecretFolder ~/Desktop/MySecretFolder. You can use Command + Option + C to get the file path of the folder or the file you want to hide or unhide.

- To hide files again, You can rename the file using the same terminal command (mv ~/Desktop/MySecretFolder ~/Desktop/.MySecretFolder) and Press Command + Shift + Period (.) shortcut to hide the files again.
- Lets you quickly view hidden files within a folder.
- Fast and easy method.
- Requires no technical knowledge.
- You can unhide and rename files.
- Limited to finder.
- Resets hidden files when the finder restarts.
Use Terminal Command to Show All Hidden Files
While the simple Finder command lets you quickly find hidden files within the folder, Using Terminal, you can view all hidden files on your Mac, including both the files hidden by the user and the system. However, it does not change the file permissions and also reveals files excluded by Finder settings. You can re-hide them again using the same command.
How to unhide all files on your Mac using Terminal:

- Open Terminal on your Mac, and use the following command: “defaults write com.apple.finder AppleShowAllFiles true” and press enter.
- To apply changes, use this command, killall Finder, and enter.
- Now, you can open Finder and view all the hidden files on your Mac. To unhide individual files, you can rename them using the terminal command above.
- To unhide all files again, Open the terminal again and enter the command: defaults write com.apple.finder AppleShowAllFiles False. To apply changes, killall Finder and press enter. This will hide all the unchanged files you have unhidden previously.
If you rename or modify the file name of folders that were previously hidden, for instance, if you change ‘.Secret folder’ to ‘Secret folder,’ which removes the period, the file will remain visible even after re-hiding the files using the same command.
Also, if you rename any files using the period, all the files will be hidden in the Finder. Keep in mind that if you want to hide files using the Terminal, the method may seem complex.
These files are only hidden from casual view in Finder. Anyone with Terminal commands or using the simple command prompt Finder shortcut can reveal the hidden file names. This change is permanent and does not reset after the Finder restarts.
- Unhide all hidden files at once.
- Permanent method.
- You can revert and re-hide files at any time.
- Requires terminal knowledge.
- Search and find all unhidden files.
- Does not reveal files excluded by Finder settings.
Find Hidden Files Using the “Go to Folder” Finder Feature
The ‘Go to Folder’ feature allows you to directly access files, including the hidden files in the directory or the file. This can be useful if you know the exact location of the file or the folder you are trying to access and you want quick access to hidden files within the directory without changing the visibility settings.
You can also access system-hidden directories and files hidden by the user using this method. However, as I said, it does not reveal all the hidden files at once, and it also does not modify the existing file visibility settings.
To access hidden files using Finder’s Go to Folder:

- Open Finder on your Mac.
- Press Command + Shift + G.
- Enter the full path of the hidden directory. To get the file path, Select the folder and use Command+Option+C to copy the folder or file path.
- You must enter the accurate path to view the files.
- View files without unhiding them
- Easy to find hidden files within a folder
- Requires the exact location of the folder.
- You can view hidden files in a specific folder.
Find Hidden Files Using Third-Party File Managers
You can also use free third-party file managers to find hidden files on macOS. Compared to the built-in Finder and Terminal methods, third-party file managers offer a user-friendly interface that lets you easily hide and unhide files without requiring you to deal with shortcuts and Terminal commands.
Additionally, these third-party file managers offer more advanced features such as batch renaming, advanced filters, faster access to restricted and protected files without requiring admin permissions, and tools to quickly review and manage files, including hiding and unhiding attributes with ease.
There are plenty of free and third-party file manager apps for macOS. After testing a few, I found Commander One‘s free version to be the best option (not sponsored). It is not only free but also helps you view hidden files easily with a simple user interface. It also offers an appealing interface, supports batch file operations, and is suitable for any user looking to easily manage files apart from the built-in Finder. While there are also other options like ForkLift and Path Finder, which help you find hidden files easily on macOS, these require a premium version to access such features.
How to Use Commander One to Find Hidden Files on macOS:
- Download the Commander One File Manager. Visit the website and click on the Download option. (Download the file directly from the website to get it for free).

- Double-click on the file and go through the steps to install the Commander One file manager on your Mac.
- Open the application using Finder under Applications.
- In Commander One, navigate to the folder where you want to view the hidden files.
- Enable the Show Hidden Files option from the top.

- Unhide files with a user-friendly interface
- Offers more advanced features than built-in finder
- Free to use
- Requires installing a third-party software.
- Requires premium for most advanced features
Access Hidden Library Folder on macOS
If you are troubleshooting an app or want to manage app configurations, you can access the library folder and make changes. By default, macOS automatically hides the ~Library folder, which contains critical app configurations, cache data, and other essential data related to your Mac.
However, it does not reveal any other hidden folders. If you have accidentally changed the file name, hide it. It is only useful for troubleshooting app issues and does not make files permanently visible.
How to Use the Finder Menu to Access the Library Folder on macOS
- Open Finder, click on Go in the top menu, and select the Library option.

- You can also use Go to Folder to open the Library folder:
- Open Finder and press Command + Shift + G to open the “Go to Folder” dialog.
- Enter the path ~/Library and press Enter.
- If you want to use Terminal, open Terminal and enter the following command to open the Library folder: open ~/Library
Access Hidden Files on macOS
Those are the five different ways you can use to access and find hidden files on your macOS. If you have accidentally hidden files, you can easily find them using Terminal and Finder. However, if you have accidentally deleted it, you can use data recovery tools to recover deleted files on your Mac. You can also use the Spotlight search to find most of the hidden files by adjusting the Spotlight settings in System Preferences under Spotlight and Privacy. You can also change it to display all file types to find hidden files on your MacOS quickly.

FAQs on Accessing Hidden Files on Mac
Are hidden files completely secure, and can other users unhide them?
Hidden files on macOS are not secure with any encryption or password; they are only hidden from the Finder view. Any user who has access to the Mac can easily unhide files using all the methods that I have listed above. If you want to secure files, you password protect your Mac folders.
What’s the difference between user-hidden files and system-hidden files?
System hidden files are critical app system configuration files that are essential for the app to function. However, user-hidden files are third-party files or folders that are created and hidden by the user using the period prefix. Both of these files can be unhidden using Finder shortcuts and third-party managers. However, if you want to easily unhide a user-created file permanently, you can remove the prefix period from the file name or folder name.
Can I view hidden files on external drives or USB devices?
You can use the above methods to find hidden files on external devices or USB drives connected to your macOS. Go to the folder and use the keyboard shortcut 'Command + Shift +.'.Here, you can see all the hidden files. In the same way, you can use the Terminal command to view all hidden files in the external drive directory. You can also use third-party free or file Commander One to view hidden files in the specific directory.
Can I unhide files without using a period or the Terminal?
You can also use third-party file managers to find hidden files on your Mac; using Finder and Terminal is the easiest and most reliable method without requiring third-party software.
