Quick Answer
To turn off Instagram Instants, go to your profile > Settings > Content Preferences and enable “Hide Instants in Inbox.” If you accidentally sent a photo, quickly tap the Undo button or delete it from the Instants archive before the recipient opens it.
Instagram quietly dropped a new feature called “Instants” on May 13, 2026. It is a new way to share unfiltered and instant photos with followers. Once your friends have viewed the photo, the image disappears. This is Meta’s new way of letting Instagram users share raw day-to-day moments without any edits. While the intention is noble on paper, the execution is a bit questionable. Instagram Instants lives inside the DM, and with a simple tap on the camera, you can share photos with close friends or mutuals.
However, many people, out of curiosity about exploring this feature, have unintentionally shared images that they never wanted to share. If you have also accidentally shared a blurry image of your ceiling or a private snapshot of your grocery list and don’t know what to do, don’t worry. In this article, we will show you how you can turn off Instagram Instants and retract shared photos.
Table of Contents
What is Instagram Instants?
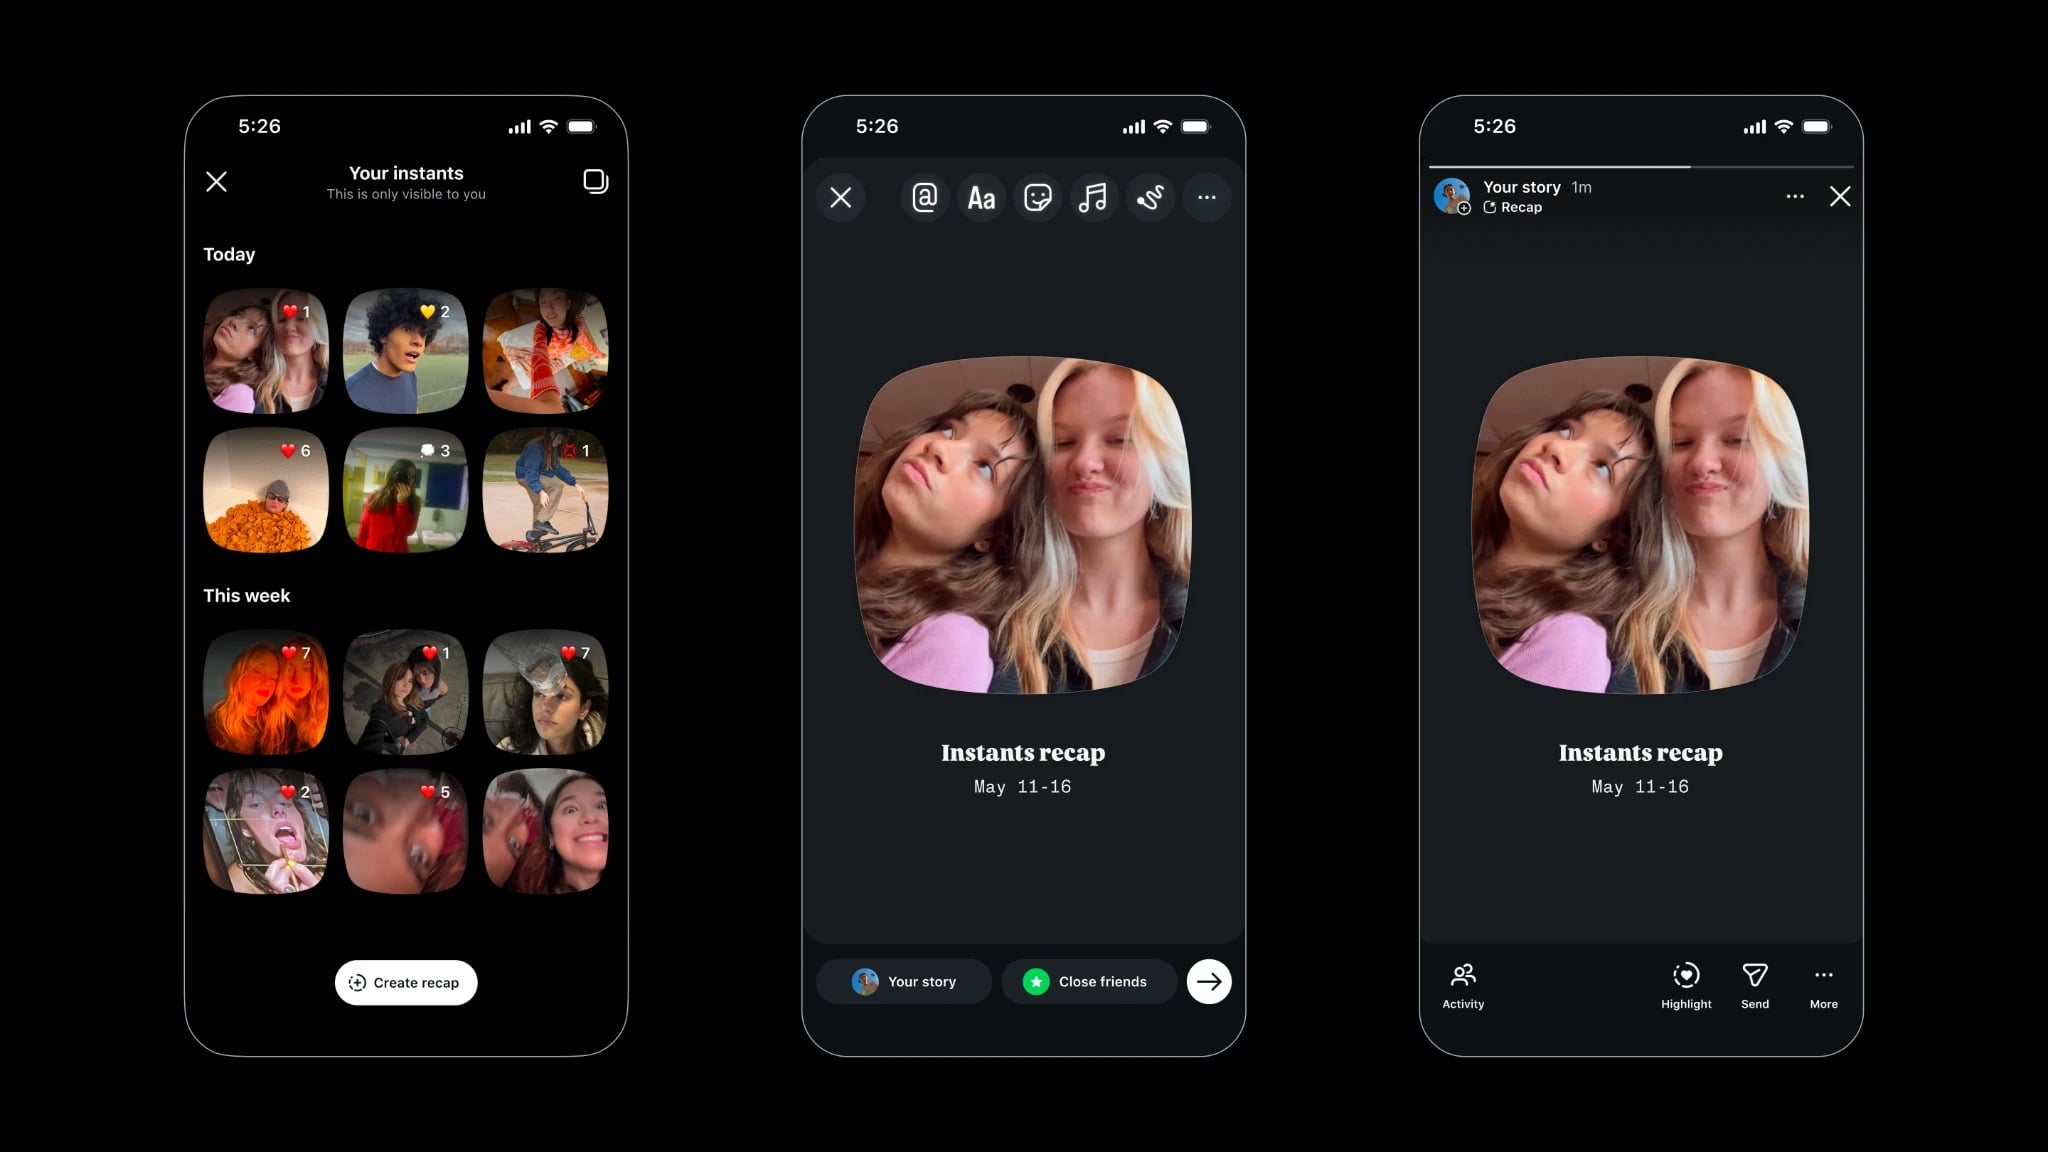
Instagram Instants is the app’s newest way to share photos. However, it is a bit different from the regular posting on your feed or putting something up on a Story. It is Instagram’s version of Snap (Snapchat users will know), except it lives inside your Instagram DMs. You open the Instants camera from the DMs, take a photo right then and there (no selecting from gallery, no filters), and it gets sent out to your friends. The photo disappears after the other person views it, and anything that is not opened vanishes on its own within 24 hours.
The social media giant is so positive towards this feature that they have released a dedicated Instants app, available on the Google Play Store and Apple App Store. It connects directly to your Instagram account. So, photos show up in your inbox anyway. Instagram calls it an authentic, in-the-moment sharing experience. It gives users a break from sharing edited-to-death content that the platform has become famous for.
What’s wrong with Instagram Instants?
While the feature is good, here is where things get messy, and this is the part where most users have felt frustrated since Instants launched.
When you open Instagram Instants feature for the first time, Instagram does walk you through a brief intro screen, and explains everything about the new feature. Then it takes you to the camera. There is a shutter button and a small toggle that lets you switch between “Friends” and “Close friends.” And here is the most annoying thing that is catching people off guard — it is set to “Friends” by default.
This means the moment you tap that shutter button, the photo goes out immediately to everyone on your friend’s list. There is no preview screen, and no “Are you sure” confirmation pop-up. It just sends. Instagram does show you a small “Undo” button right after you take the photo, but if you are not expecting the photo to go out instantly, you will miss the button, and the experience is a bit of a shock.
People are used to Instagram working in a different way. On this platform, you always have the option to choose which type of content you want to share — Reels, posts, or Stories — and go on a rampage with editing and filters, before it goes out anywhere. Instagram Instants does the opposite. If you tap the shutter button, your photo is already on its way to your friends.
The good thing is that you can turn it off completely and also retract photos that you have accidentally shared, which we have mentioned in the section below.
How to turn off Instagram Instants completely?
After listening and experiencing the horrors of Instagram Instants, if you have decided that it is not for you, then here is how exactly you can make it disappear from your DMs:
- Go to your Instagram profile page by tapping your profile picture on the bottom-right corner of the app interface.
- Tap the three-horizontal line icon in the top-right corner of your profile page to open the Settings page.
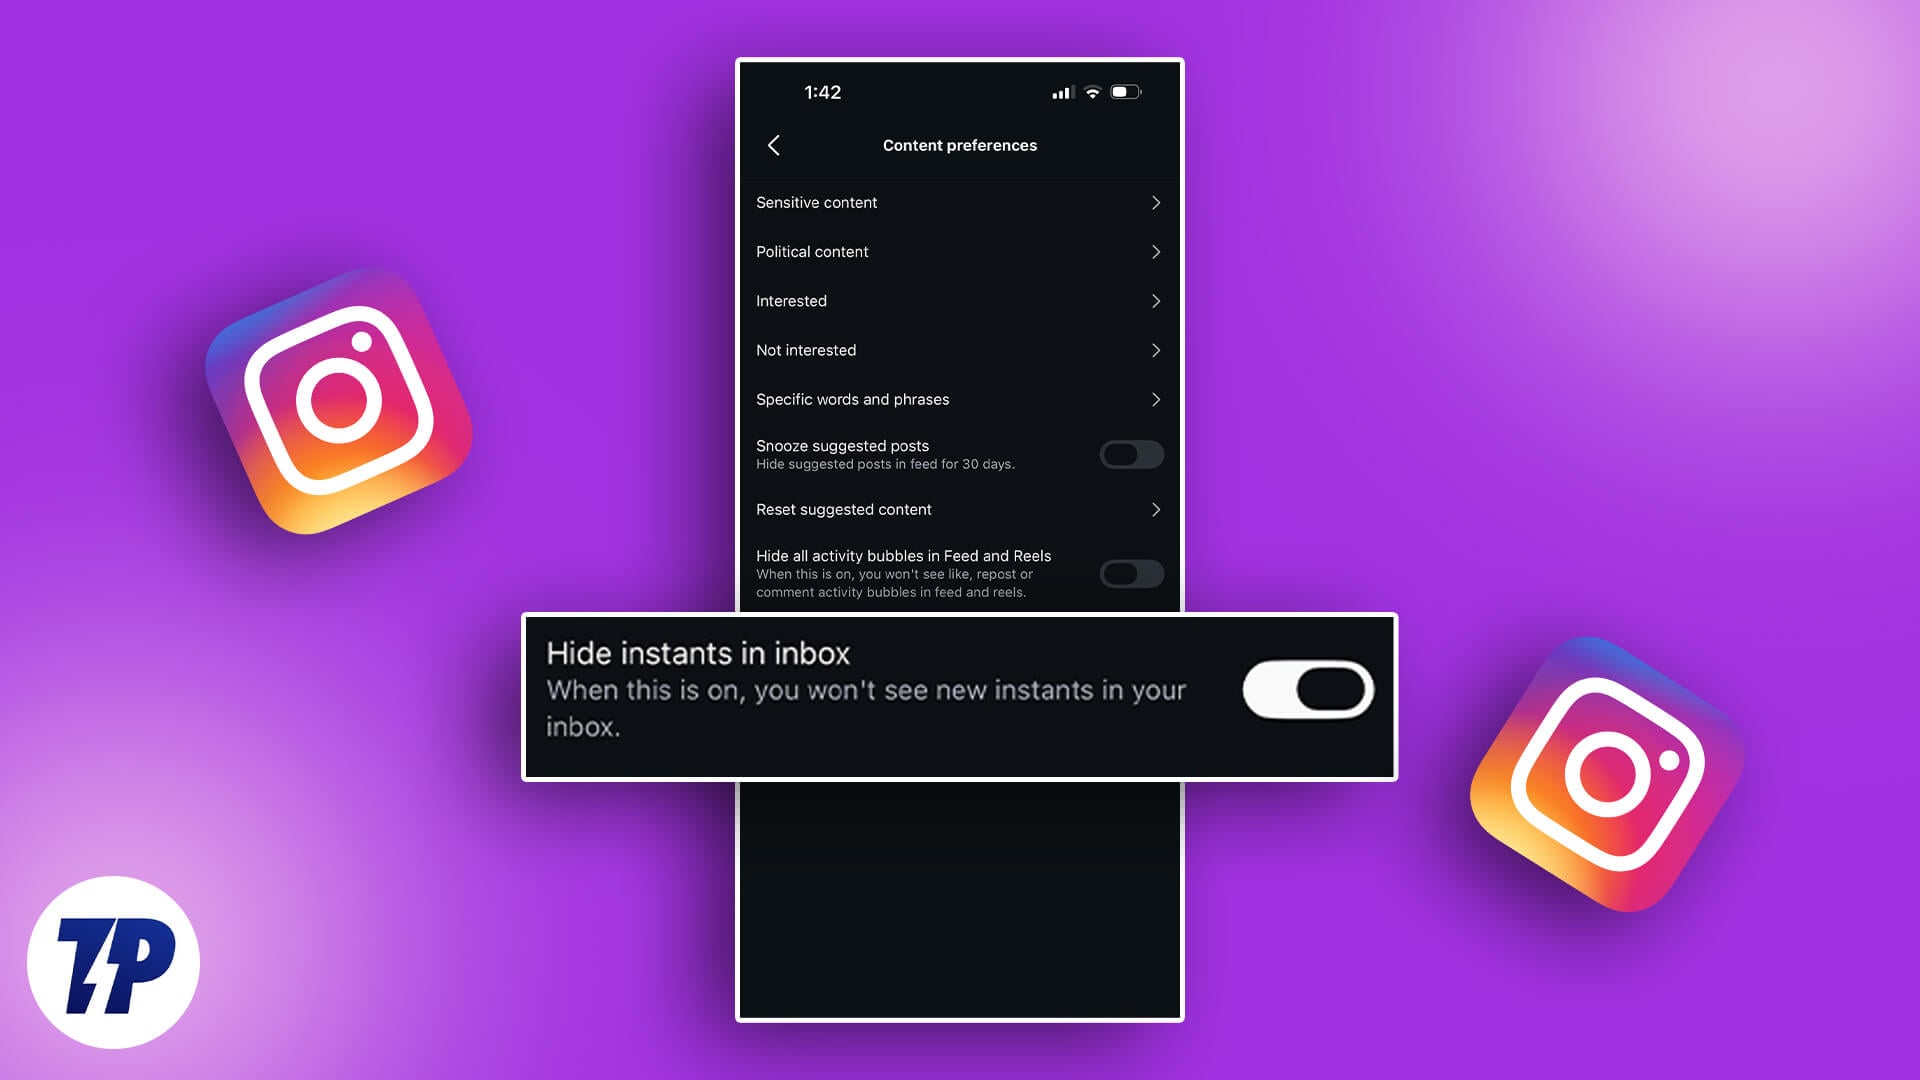
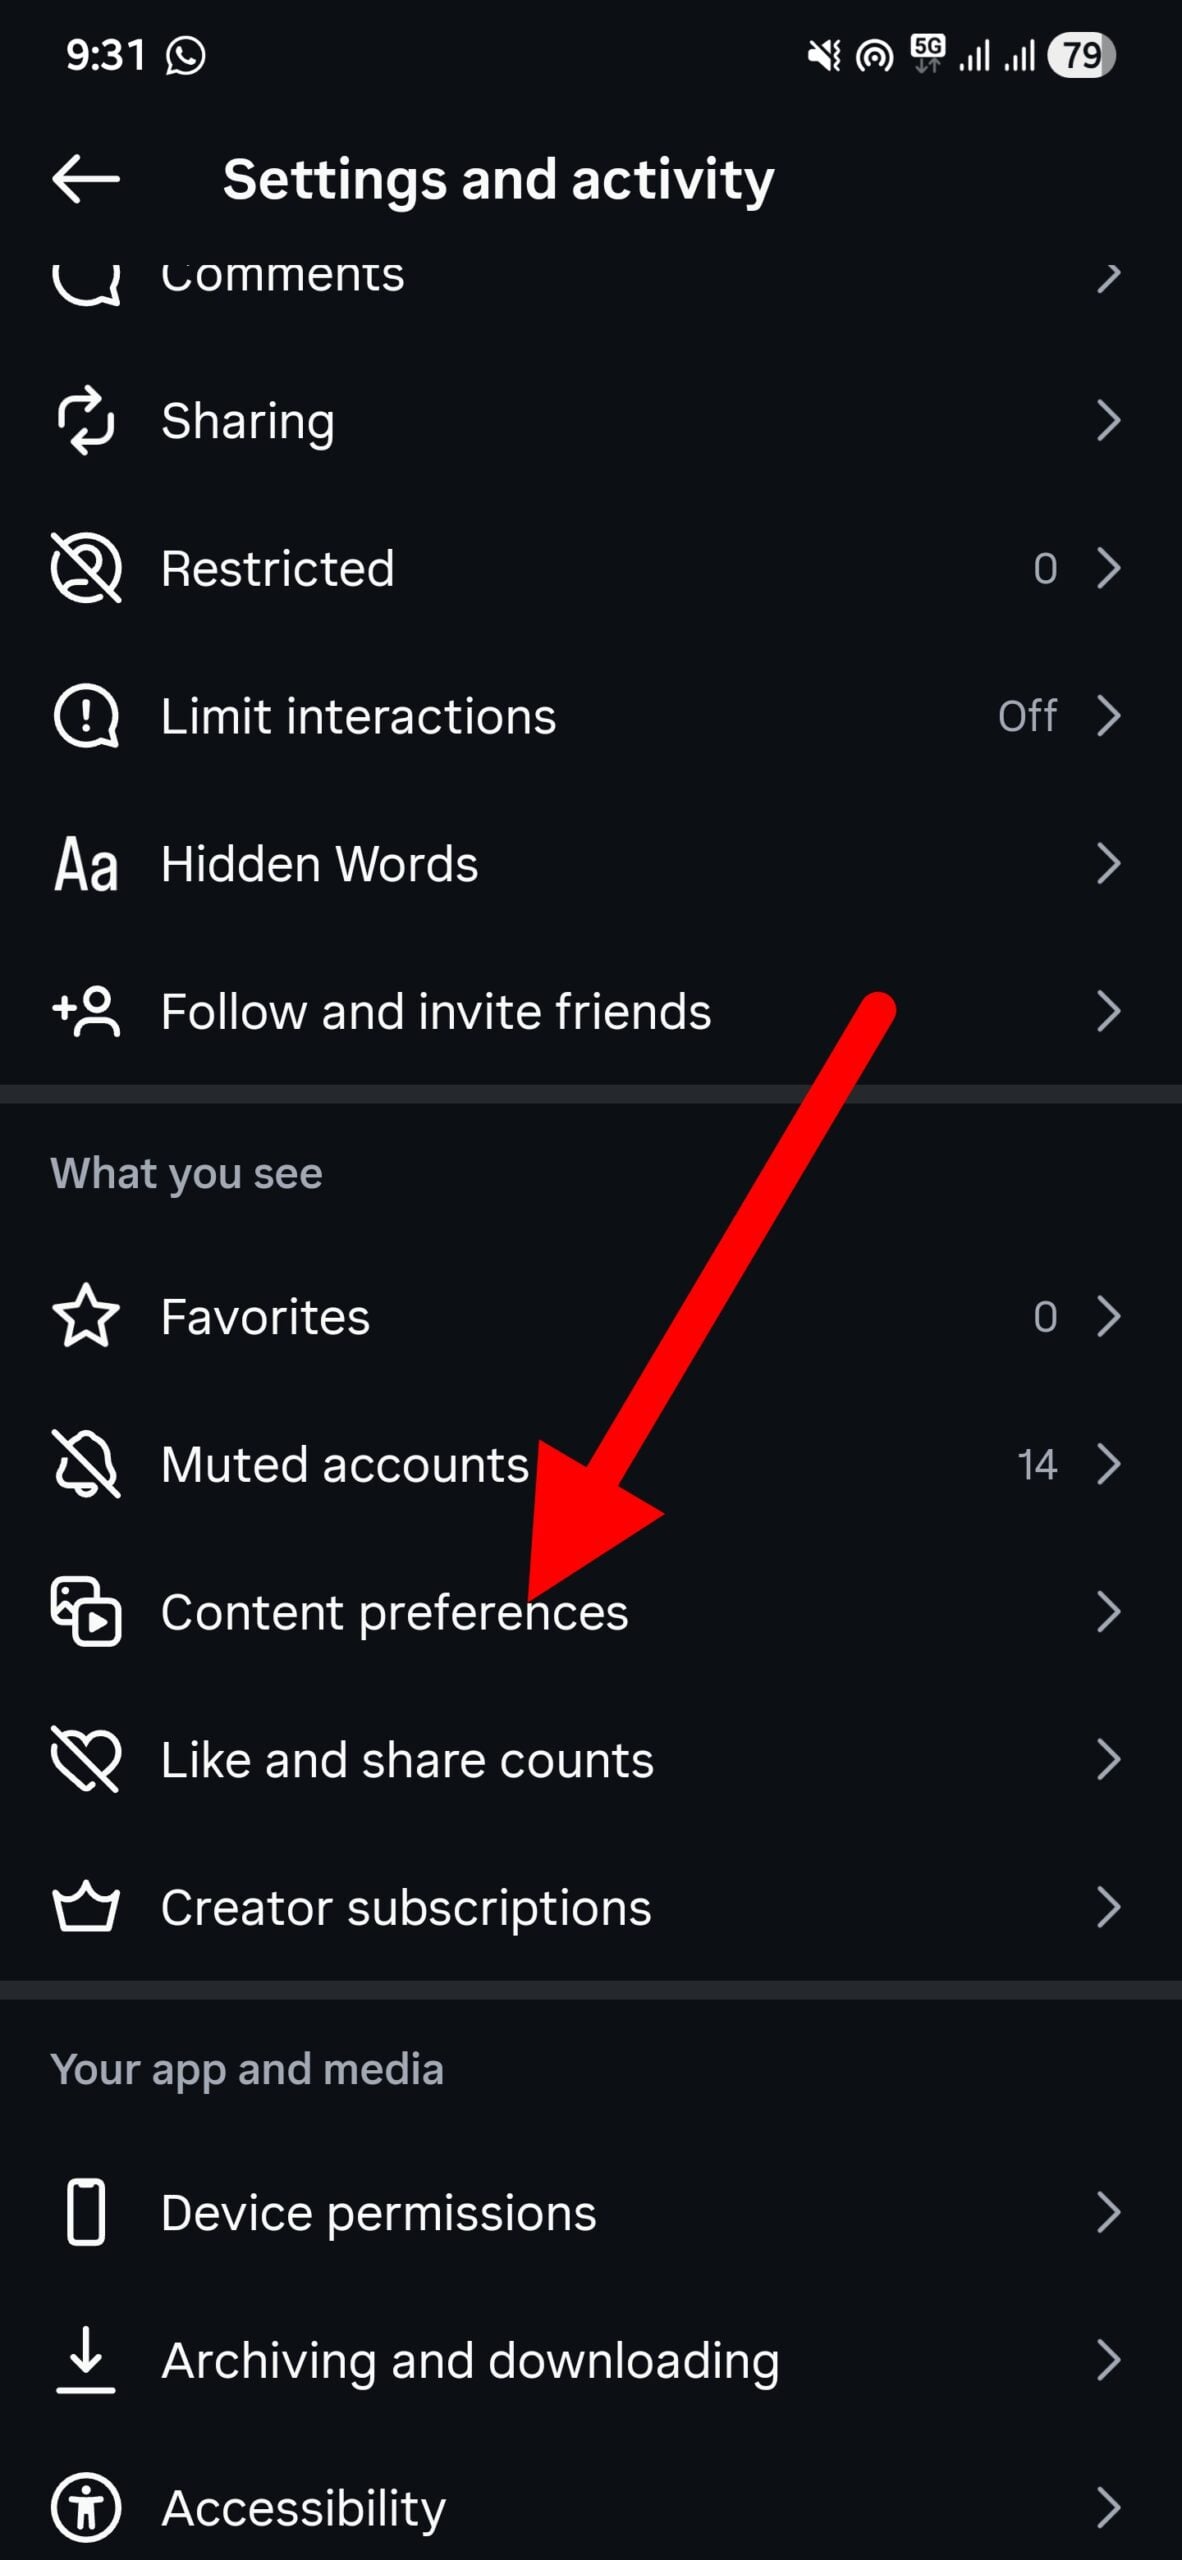
- Scroll down and tap on Content Preferences.
- Toggle on the Hide Instants in Inbox button.
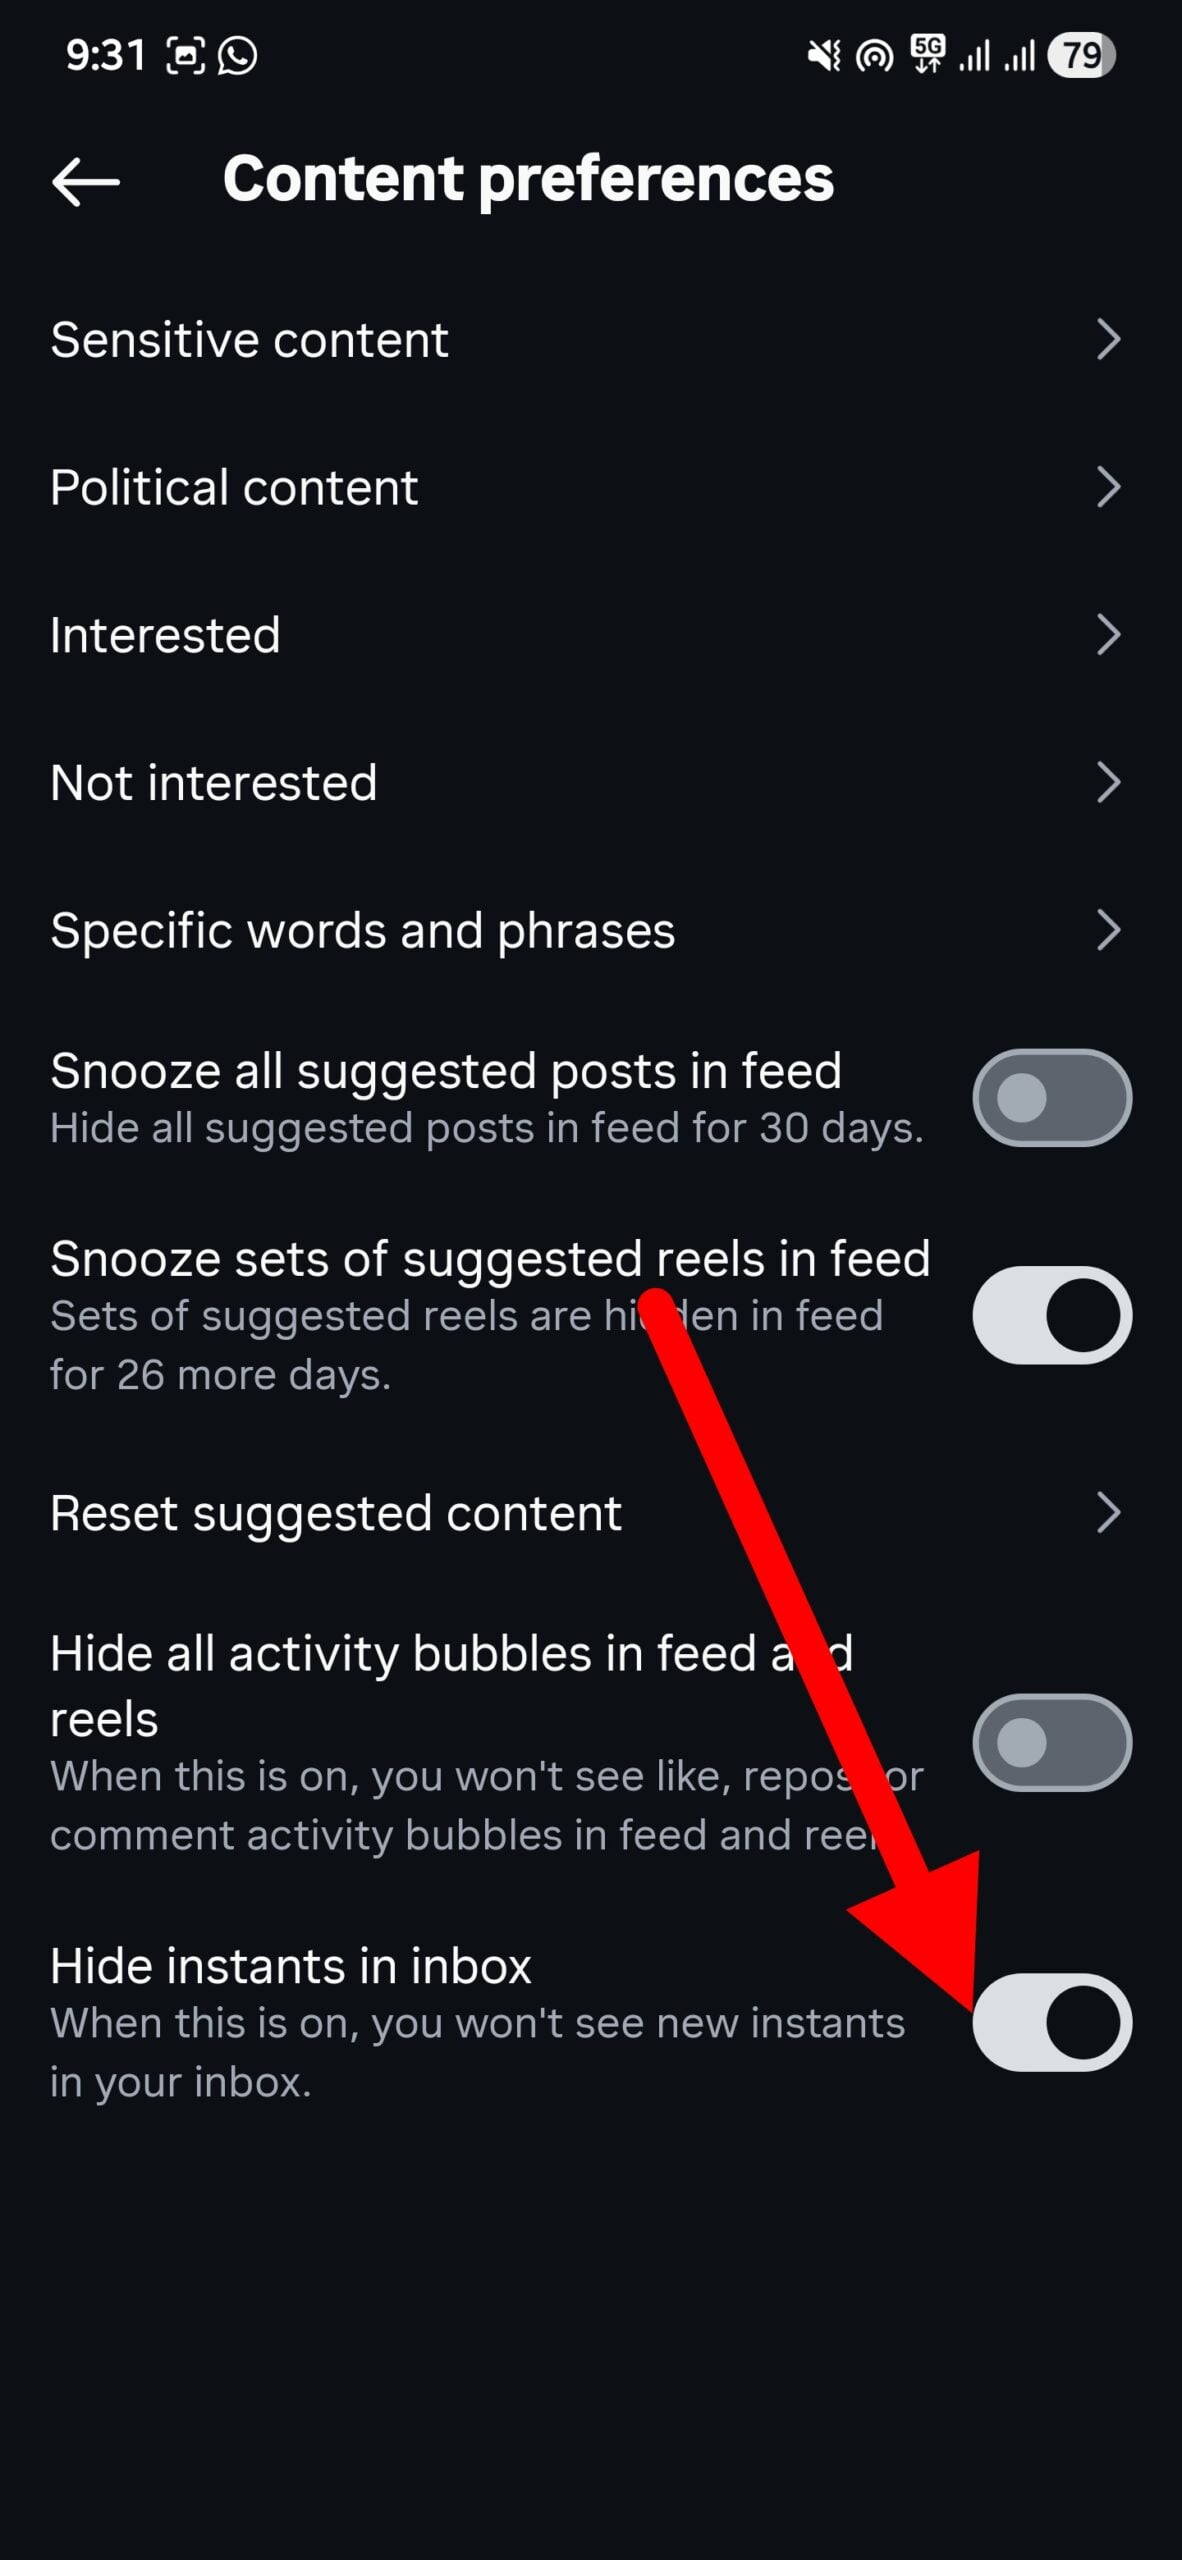
Once you turn this toggle on, the Instagram Instants feature disappears from your DM inbox, and you won’t receive any Instants either. A win-win for everyone.
How to undo a photo that you’ve already sent?
For those who have already tapped the shutter button by accident and that awkward photo is already on its way to your friends, then quickly follow the steps below and remove the photo that you’ve already shared:
Option 1: Use the Undo button
As already mentioned, as soon as you press the shutter button, Instagram shows you a small “Undo” button, which is located below the shutter button. It only stays there for a few seconds. So, you need to be on your toes and click it as soon as you have taken a photo that you don’t want to share.
Option 2: Delete it from your Archive
Most of you might have missed the Undo button and are in a panic state that your awkward images are out there. So, if you have missed the Undo window, there is a second chance. Here’s how to do it:
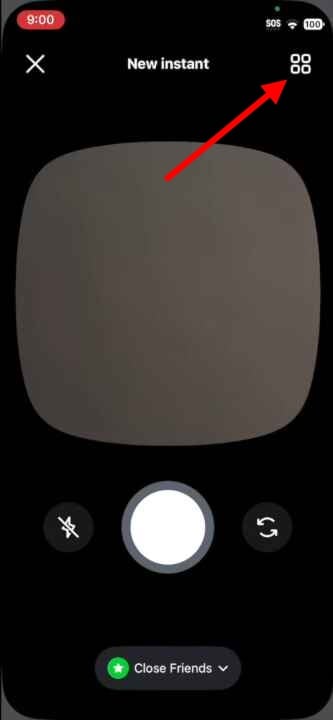
- Open the Instagram Instants camera from your inbox.
- Tap the four-box grid icon in the top-right corner of the camera screen. This will open Instagram Instants archive.
- Find the photo that you want to retract and delete it. This will unsend the image for any friend who hasn’t opened it yet.
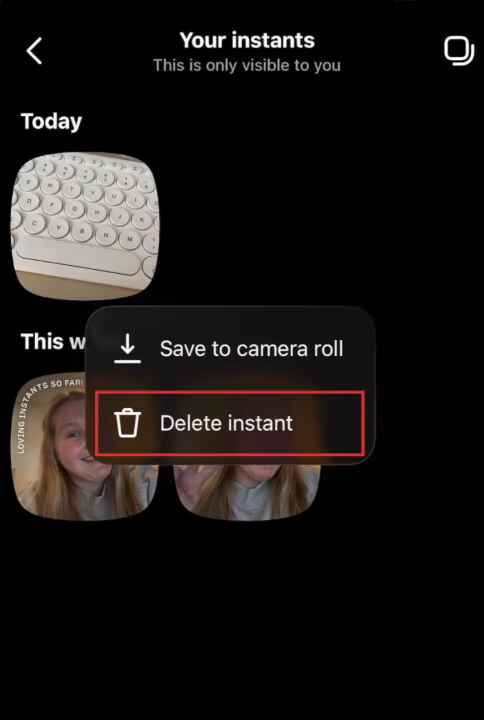
Do note that deleting the image from the archive only works if your friend hasn’t opened the Instants yet. Once someone has viewed it, it is gone on their end.
Act fast before Instants start bothering you
Honestly, I don’t like the Instants feature like the millions around the world who are also searching for a solution to make this feature go away. The auto-send design itself is questionable and takes away the power of what you want to share. Of course, there are people who have showered their love for this feature and even are sharing Instants, but not everyone is alike. If you completely dislike this feature, simply turn it off. This way, you are guarding yourself from sharing an awkward or private image that should never be out there for everyone to see. And if you are tired of your messy Instagram feed, then you clear it and start afresh.
