Quick Answer
To stop YouTube auto-dub and hear the original audio, manually switch the Audio track to the original language via the settings gear on each video or Shorts. On desktop, browser extensions like YouTube No Translation or Anti-Translate can force original audio, while setting preferred languages in YouTube settings reduces auto-dubbing frequency.
One of the most frustrating things on YouTube right now is the auto-dub feature. This feature is primarily intended to make it easy for users to understand language; however, it has become a frustrating experience for users. It automatically replaces the original creator’s voice with a dubbed version that users did not ask for. Even more frustrating is that there is no way to turn it off globally; you need to change the audio track for individual videos.
Fortunately, there are ways you can use to help reduce the auto-dub feature on YouTube, and they are easy to follow, even if you are a beginner. Primarily, there are three ways to do it, and an extra method if you want to completely get rid of it.
Table of Contents
How to Reduce or Disable YouTube Auto-Dub
Method | Works on | Best for | Limitations |
|---|---|---|---|
Change audio track manually | Mobile and Desktop | One-off videos | Must repeat for every video |
YouTube No Translation extension | Desktop | Desktop users | Needs extension enabled |
YouTube Anti-Translate extension | Desktop | Power users | Browser-only |
Set preferred languages | Mobile and Desktop | Casual users | Limited |
YouTube ReVanced app | Android only | Maximum control | Third-party app and might stop working in the future |
Change the Audio Track of Individual Videos
If the video is auto-dubbed, you can easily change the video to the original track. Most of the users are already aware of this method; however, if you are not sure, here is how:
Not just shorts, long can also auto-dub it to different languages, and sometimes creators publish videos in different languages, to get the original track
Mobile:
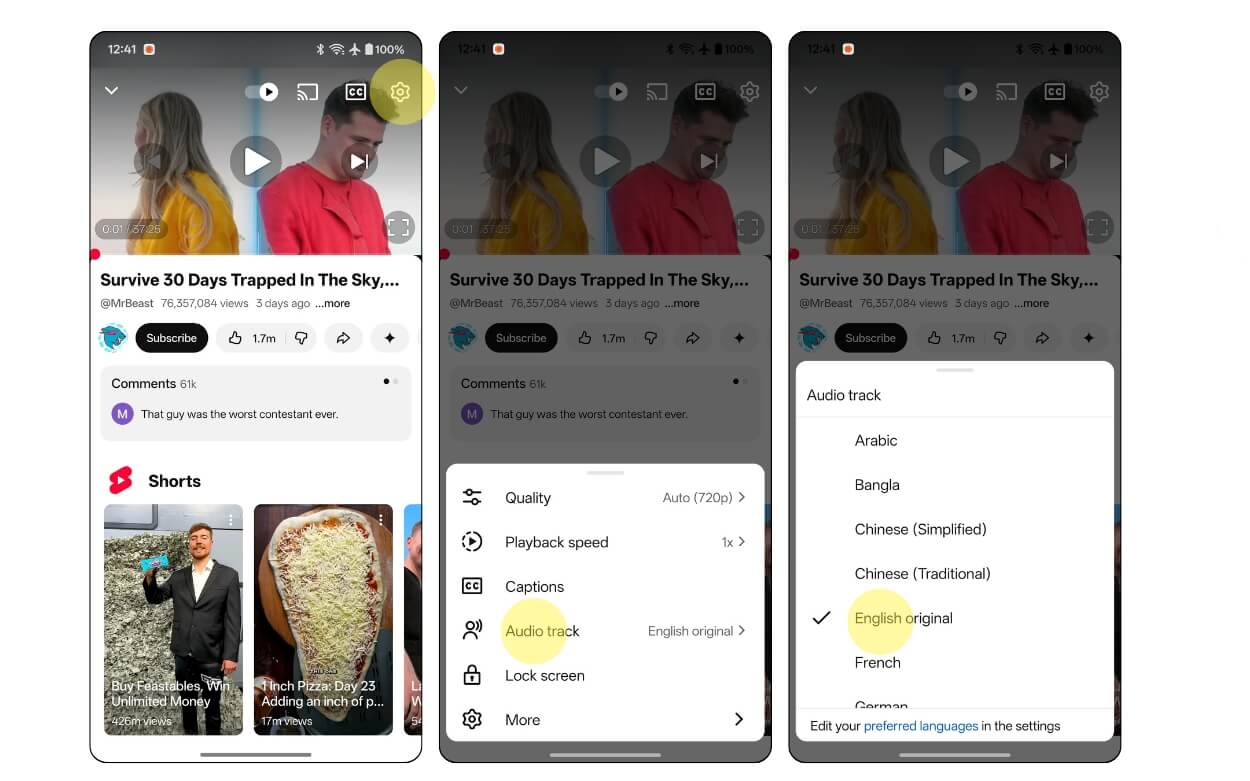
Step 1: Open the YouTube video.
Step 2: Click on the Settings gear icon, and then from the options select Audio track, and then select the language. Look for the original track and tap on it.
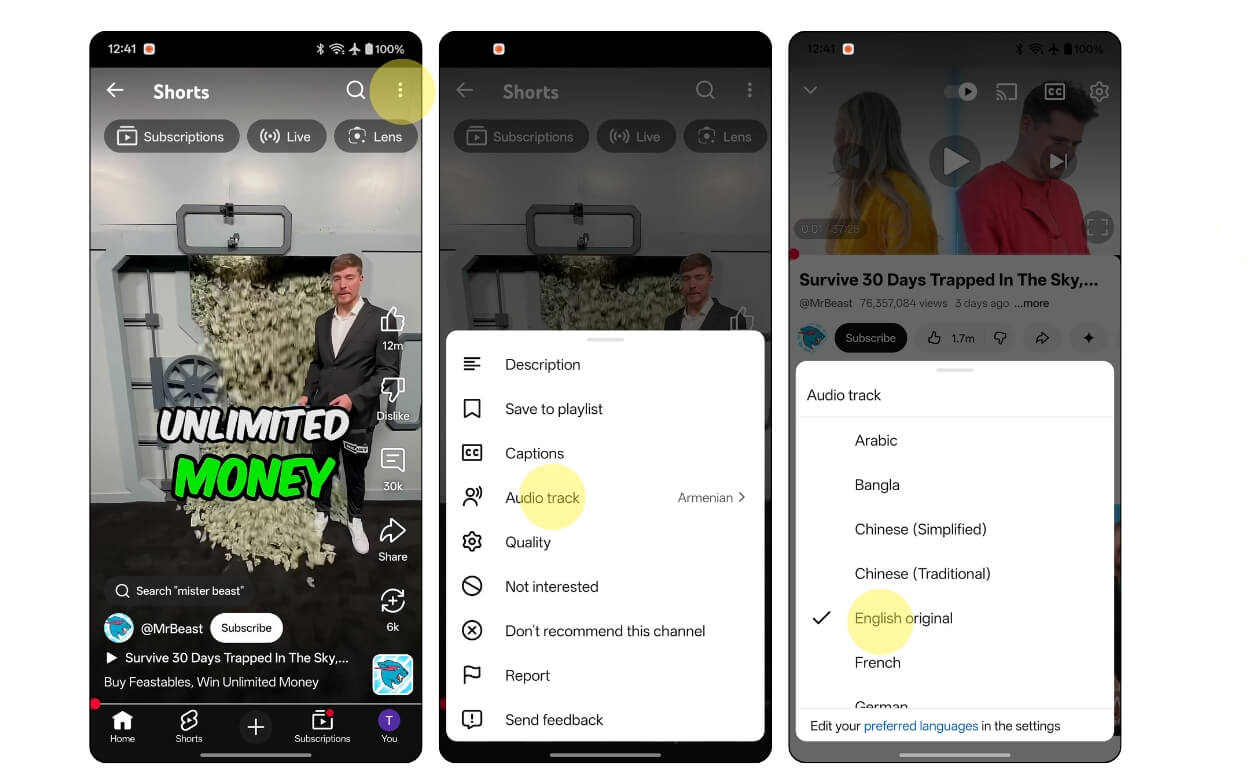
For Shorts, click on the three-dot menu in the top right corner of the screen and then tap on Audio track, and from there select original audio.
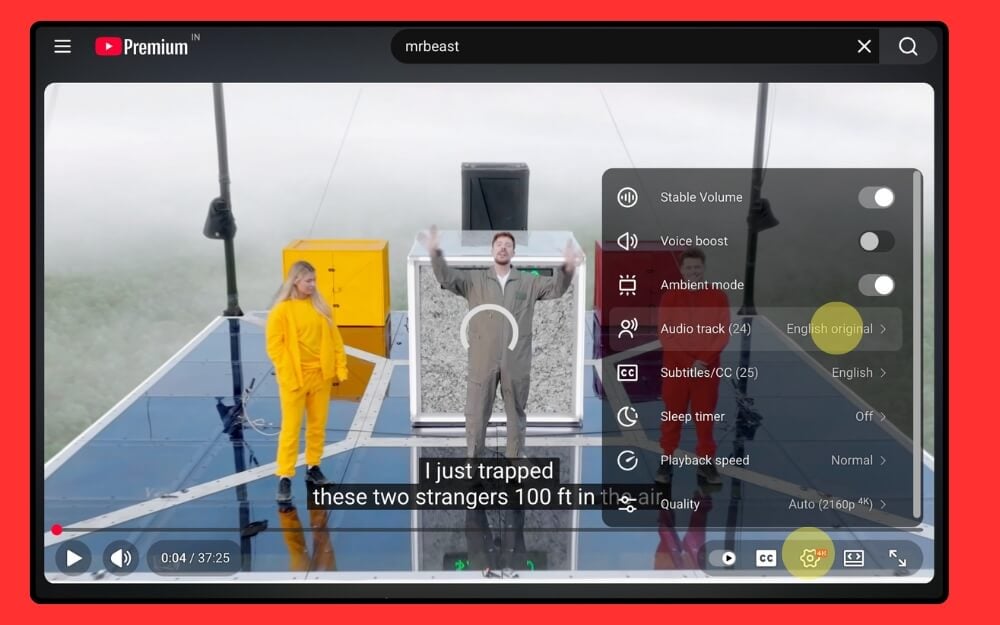
Desktop:
For the desktop version, you can find the Settings gear icon at the bottom of the video. Follow the same process.
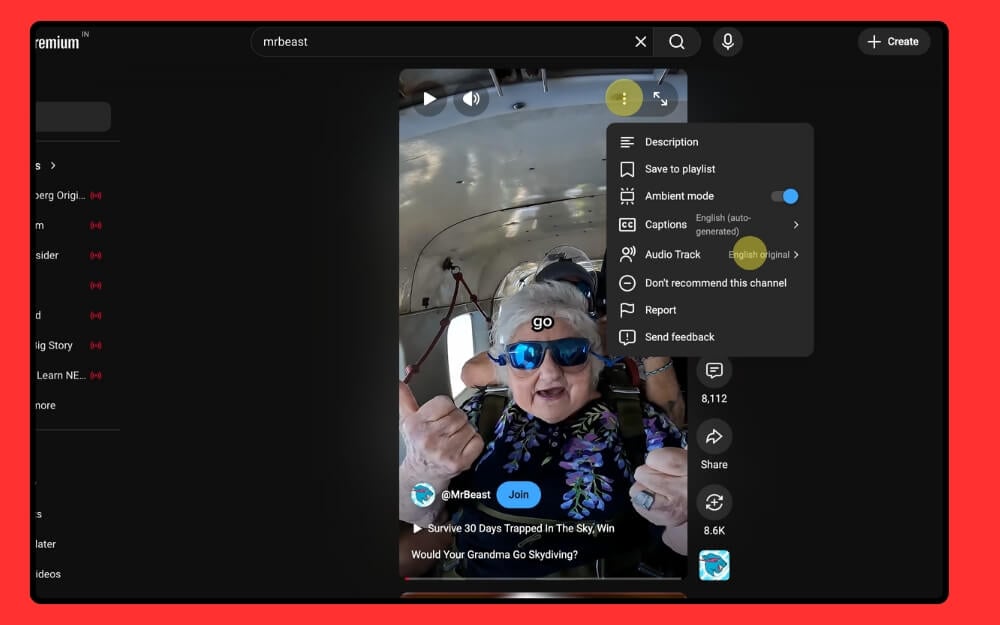
For Shorts on desktop, click on the three-dot menu located in the top right corner of the screen, and then tap on the Audio track and from there select the original track.
Use extensions and force YouTube to use the original audio track
Extensions are a lifesaver, and now you can also use them to force YouTube to use the original audio track. There are two best extensions you can use.
- First is the YouTube No translation extension: It forces YouTube to use the original audio track, and it works for both long and short videos. You can select the default audio track to use and reload the tabs
- Next YouTube Anti-Translate extension that works globally and automatically blocks translation platform-wide, including video titles, thumbnails, and much more.
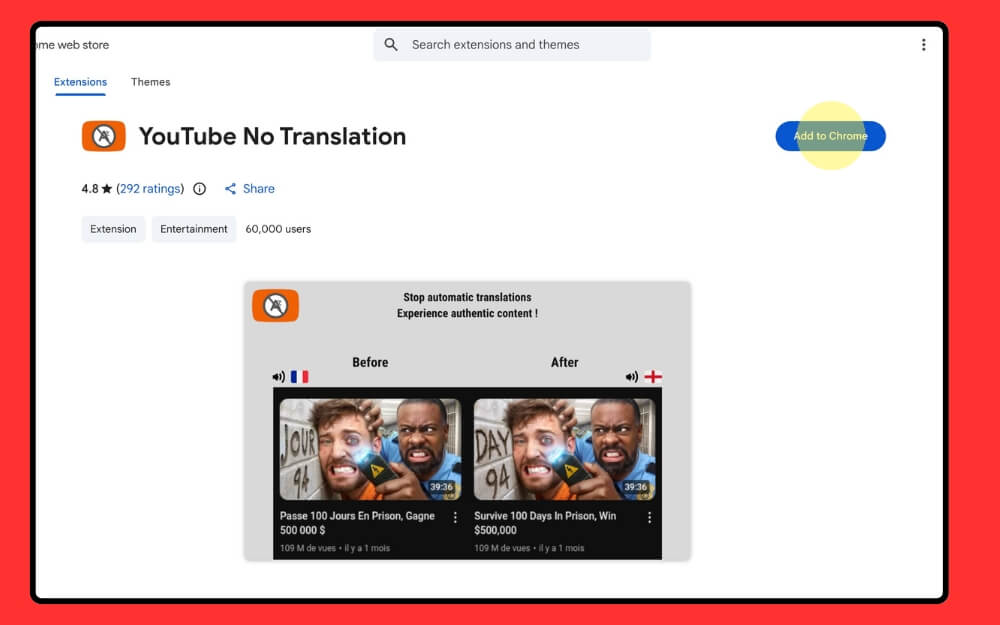
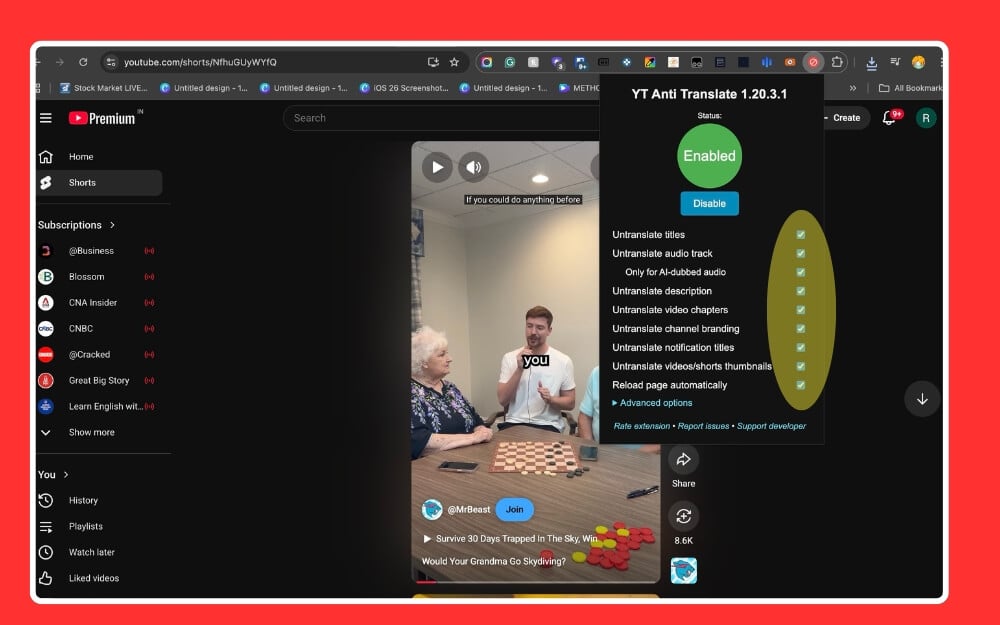
How to install the YouTube No Translation extension
Step 1: Install the Google Chrome extension using this link. When you are on the extension page, click on the Add to Chrome
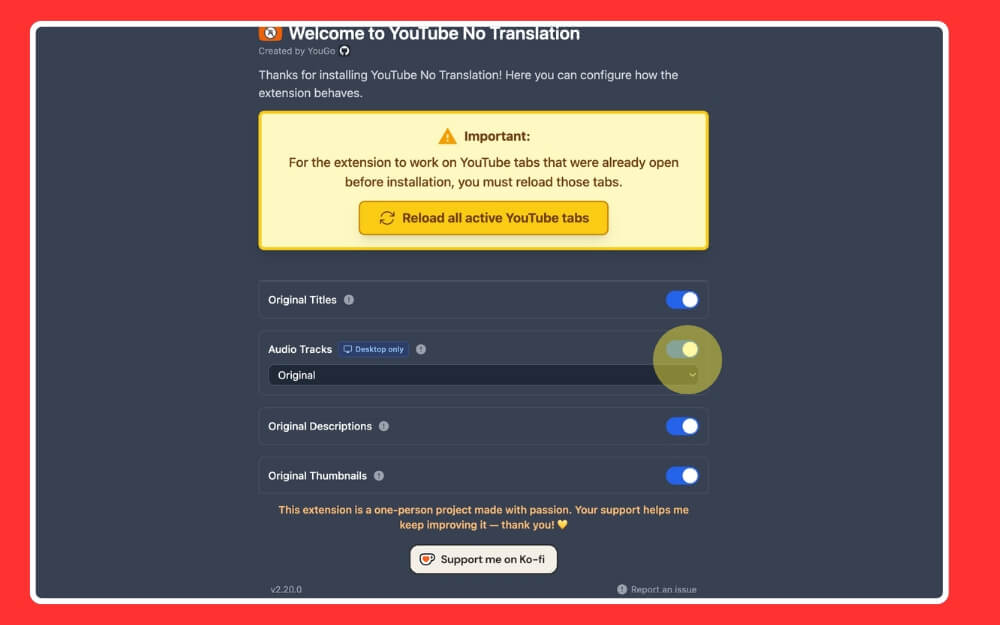
Step 2: Once the extension is installed, select your preference and click on the reload page. That’s it. Ensure this extension is active every time you open YouTube
How to install and use the Anti-Translate Extension
Step 1: Install the extension and add it to your Google Chrome using this link.
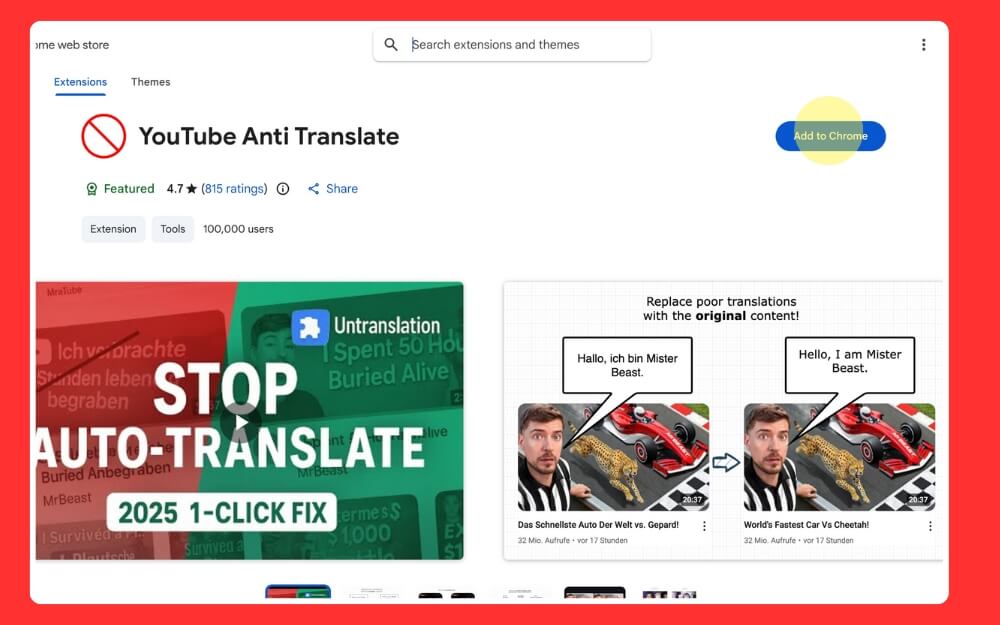
Step 2: Once installed, open the extension preferences and set your preferred language.
Set YouTube Preferences
This is a YouTube official option that lets you choose preferred languages. When you choose a preferred language, YouTube will prioritize this language and avoid auto-dubbing frequently. You can select preferred languages on both the YouTube app and desktop
How to set preferred languages on the YouTube app
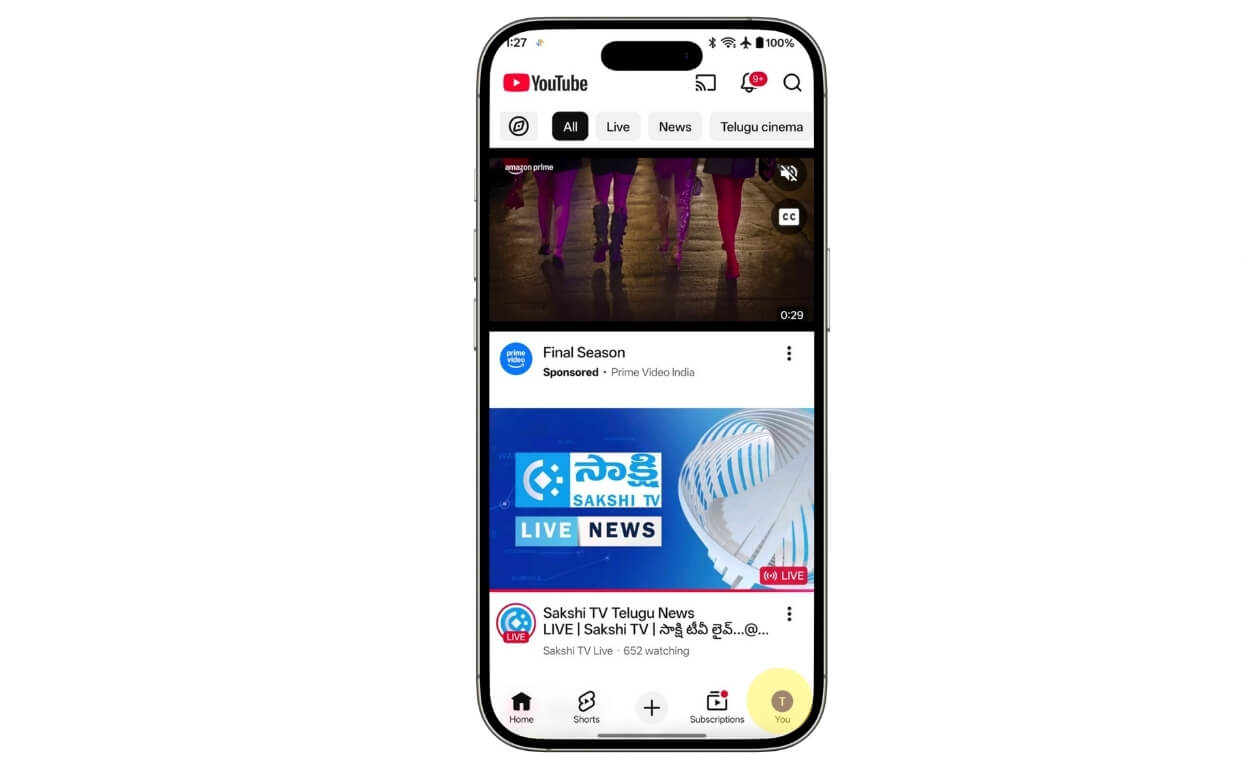
Step 1: Open the YouTube app on your Android or iPhone
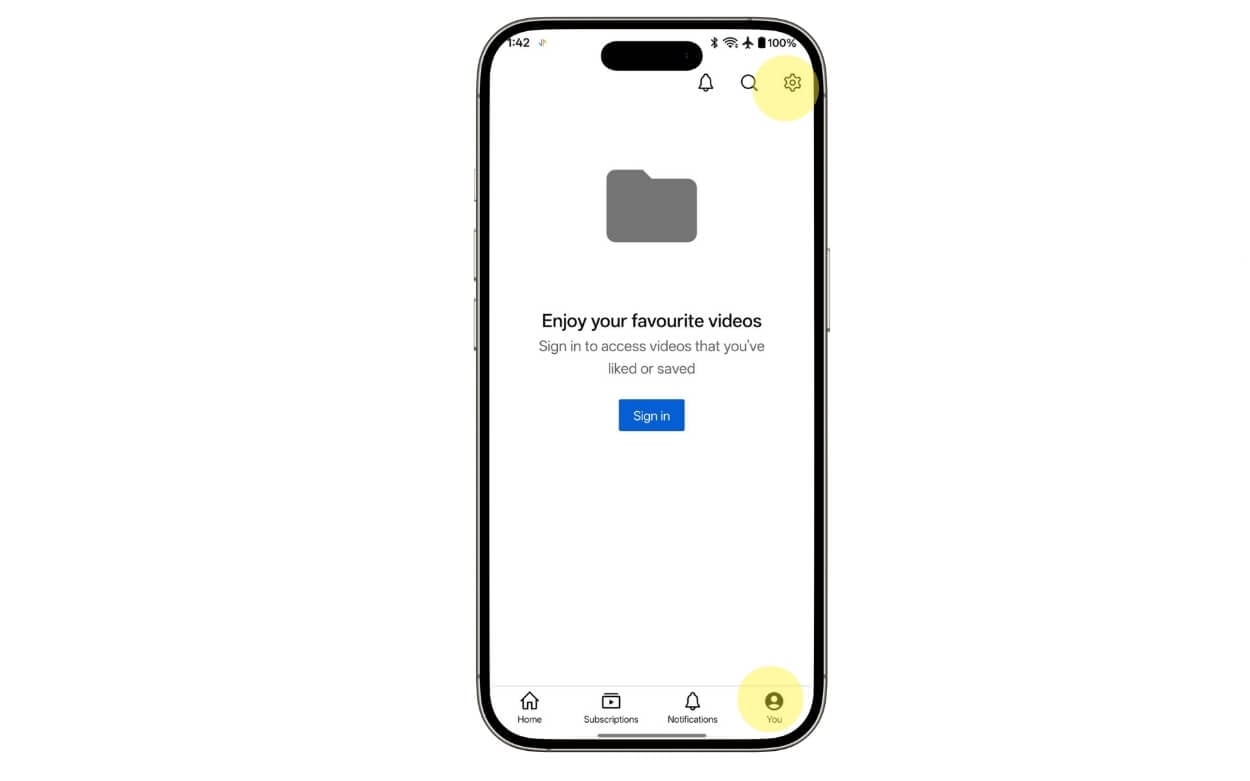
Step 2: Click on the profile picture in the bottom right corner of the screen.
Step 3: Click on the settings gear icon in the top right corner of the screen
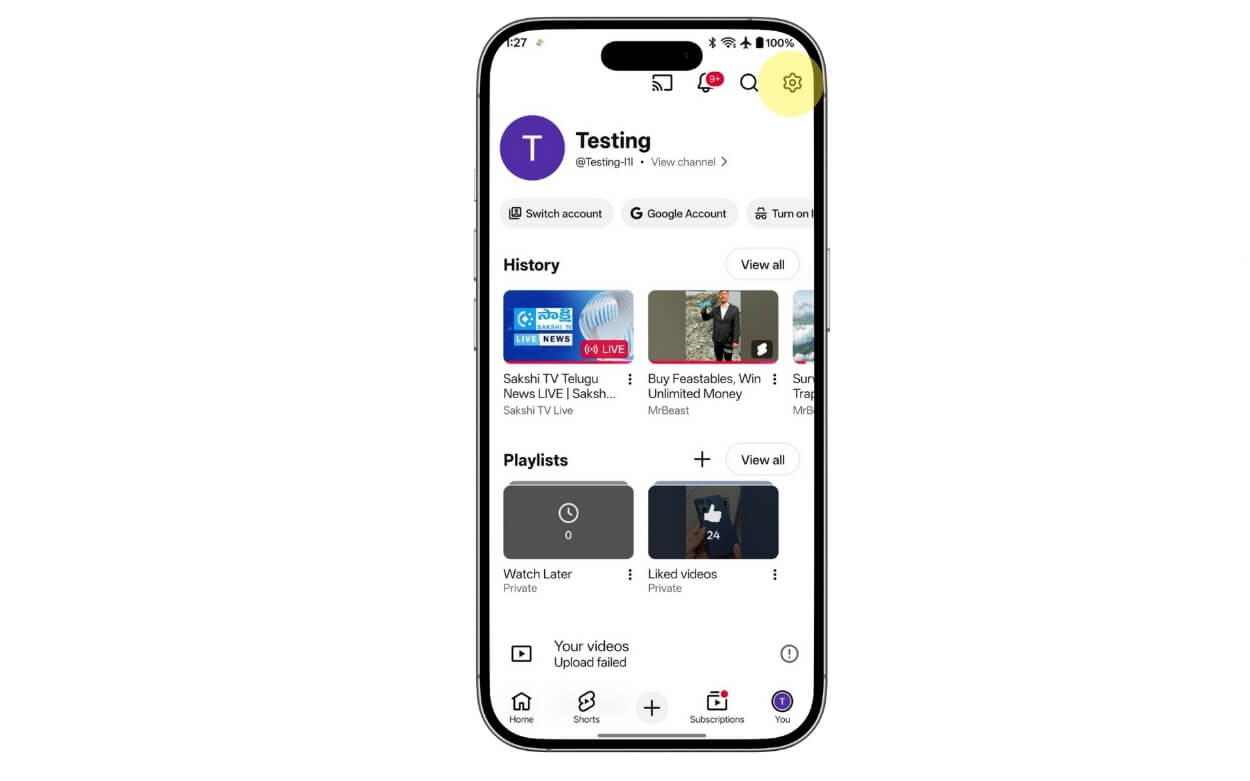
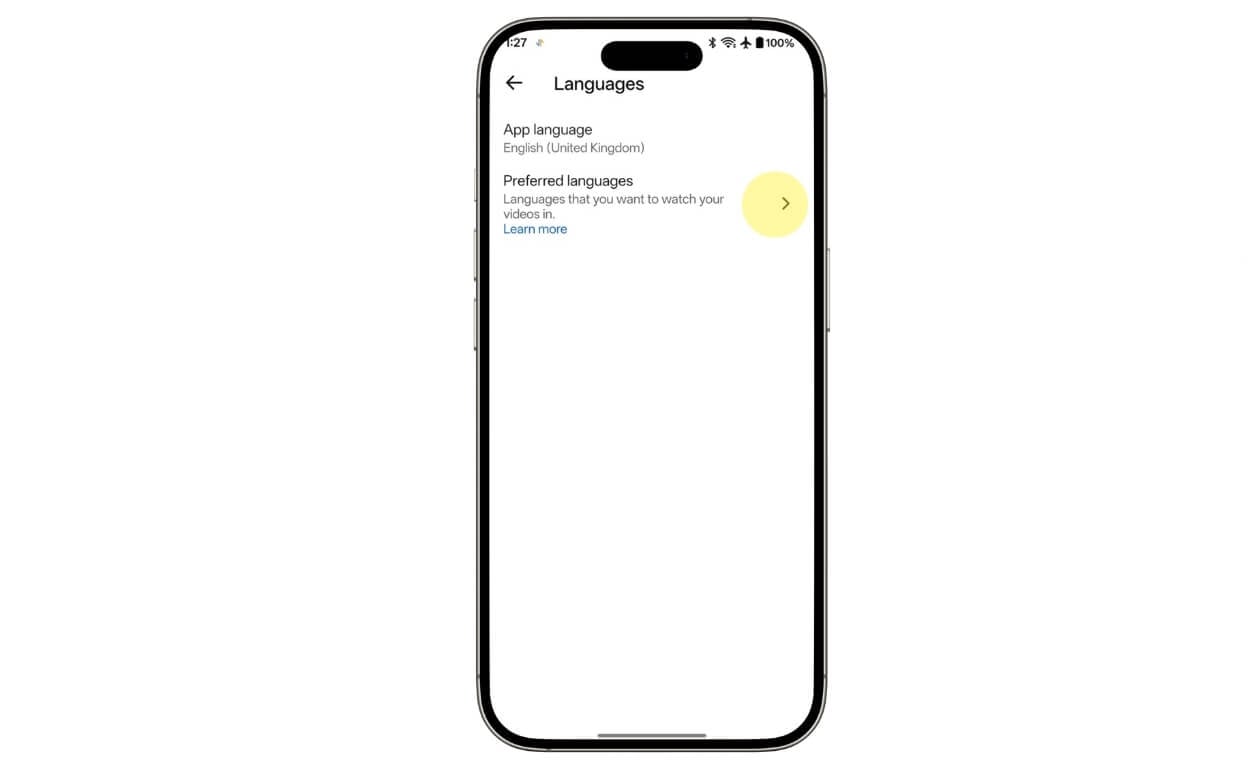
Step 4: From here, select languages.

Step 5: Tap on the preferred language.
Step 6: And here, choose your preferred language. You can select multiple.
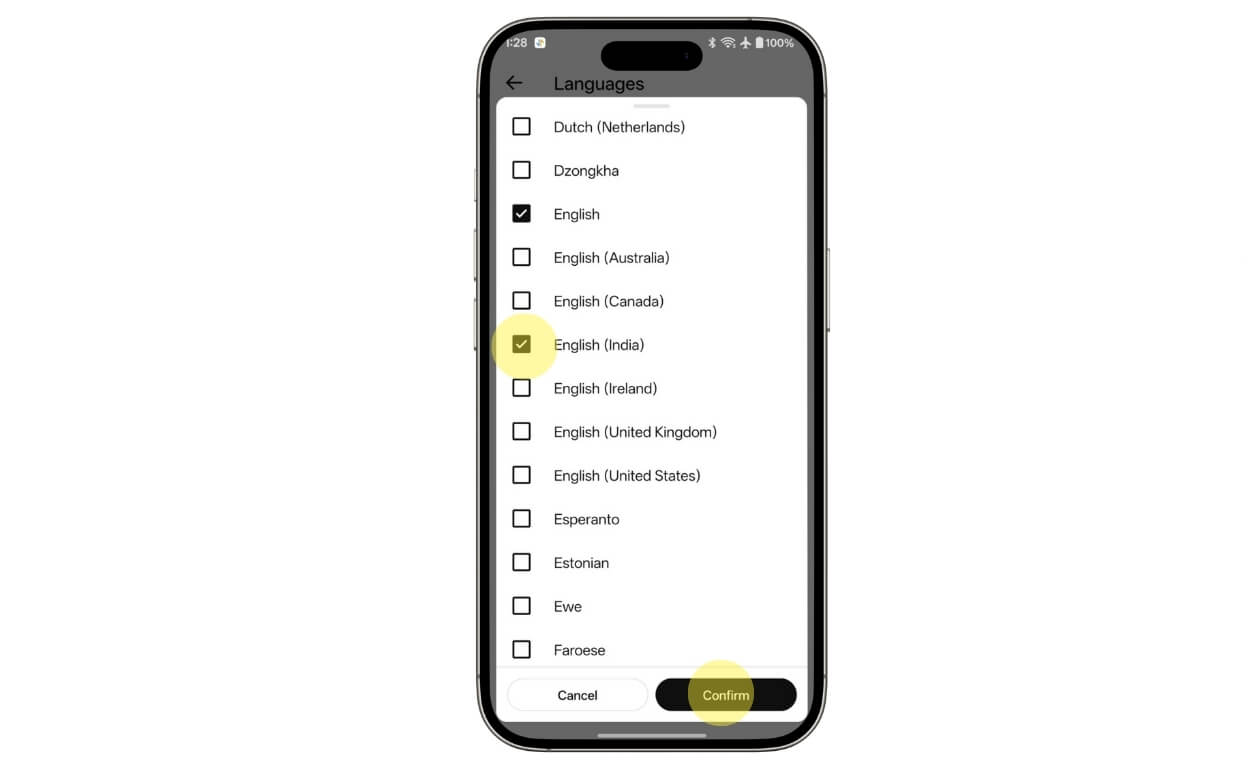
Step 7: Once done, click on the confirm option.
Desktop
Step 1: On your browser, go to YouTube.com and sign in with your Google account
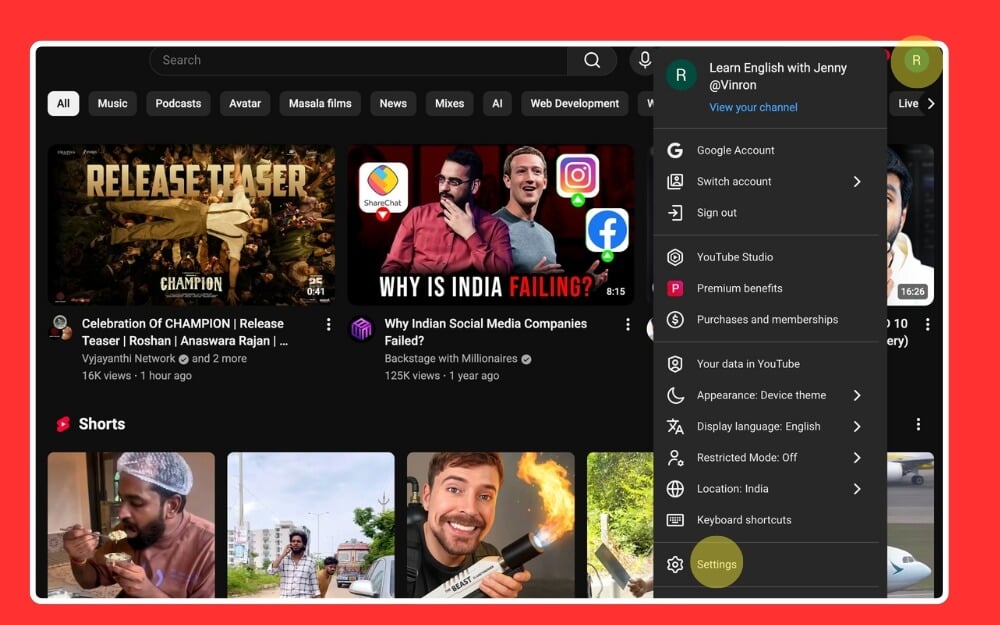
Step 2: Click on the profile picture in the top right of the screen and tap on Settings
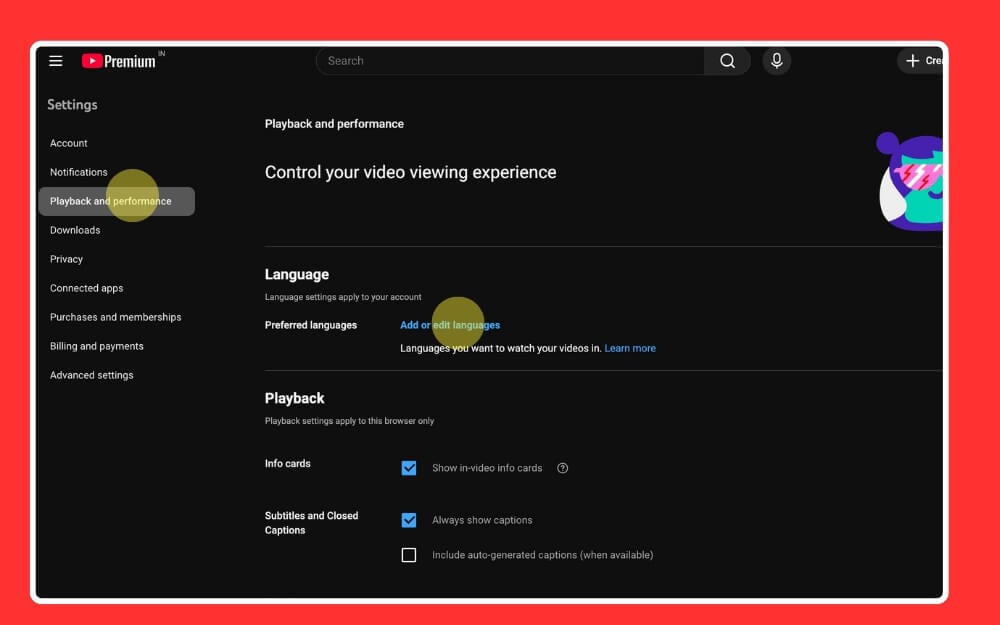
Step 3: Select playback and performance, and tap on add or edit languages under the Languages section.
Step 4: Here, select the languages and tap on confirm
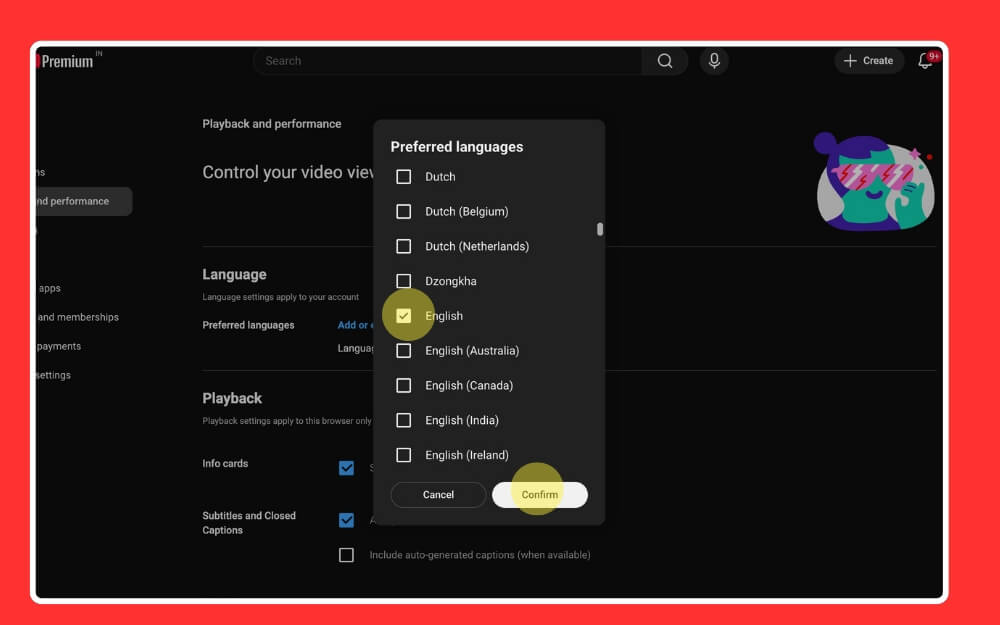
Step 5: And that’s it.
Use alternative YouTube apps (Android)
YouTube has started cracking down on mod versions of YouTube; however, there are still a few app versions. The modified versions solve all the biggest problems on YouTube, from removing shorts to the ability to control dubbing settings. However, since these are not from YouTube, security is a big concern. I only recommend it if you are truly frustrated with the YouTube auto-dub features and the above solutions aren’t enough for you.
How to install and use the YouTube Revanced app
Step 1: Download and install the YouTube Revanced app. You can download it from this link.
Step 2: Before installing, scan the file using any local antivirus or use any free online virus scanner tools to scan the file
Step 3: If the file is safe, install it on your drive. Open the file and choose install. Allow Chrome to install it from unknown sources
Step 4: Once you are done, open the app and sign in with your Google account, or you can also use Revanced without using your account.
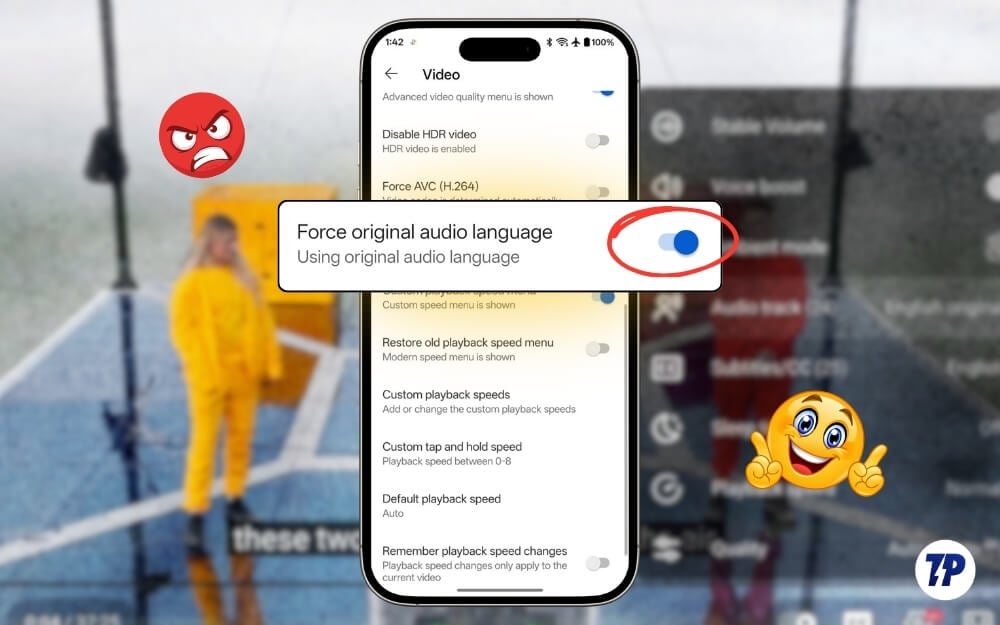
Step 5: To set the auto-dub feature, open the YouTube Revanced app and click on the profile picture in the bottom right corner of the screen and tap on Settings.
Step 6: Tap on the Revanced settings
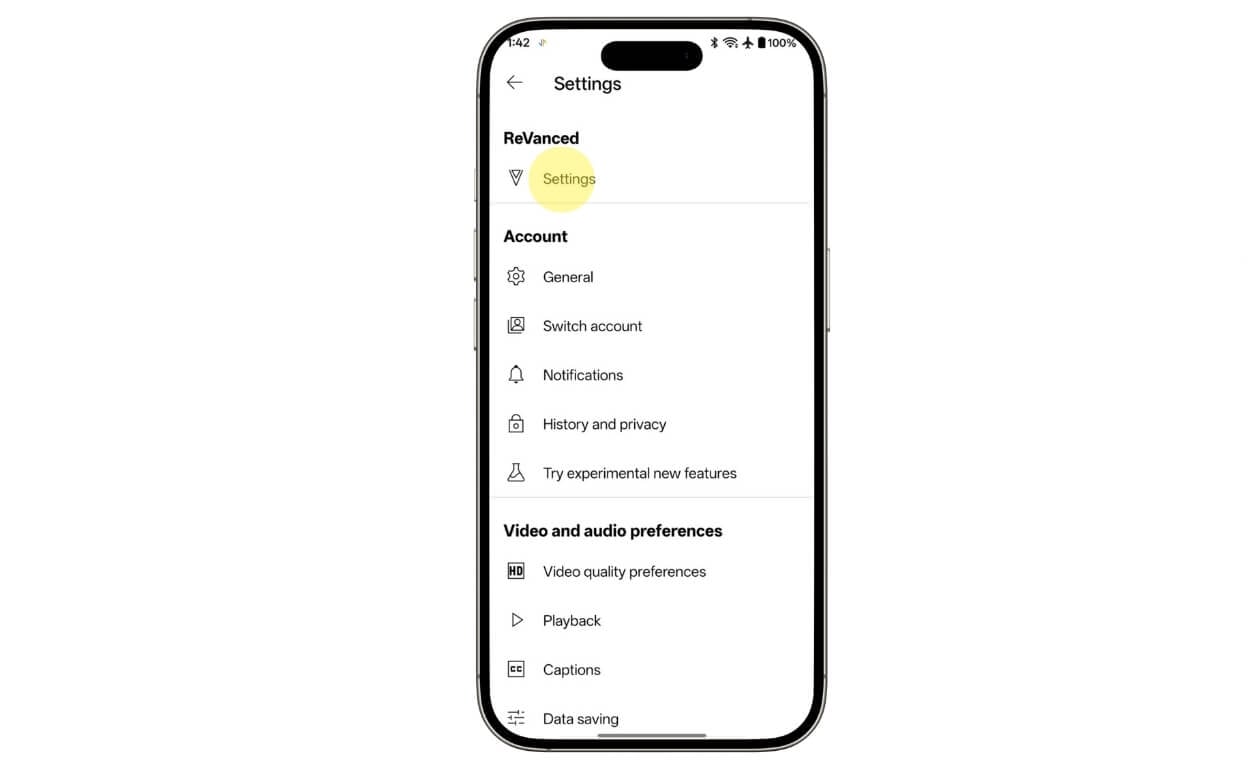
Step 7: Scroll down and tap on the Video option.

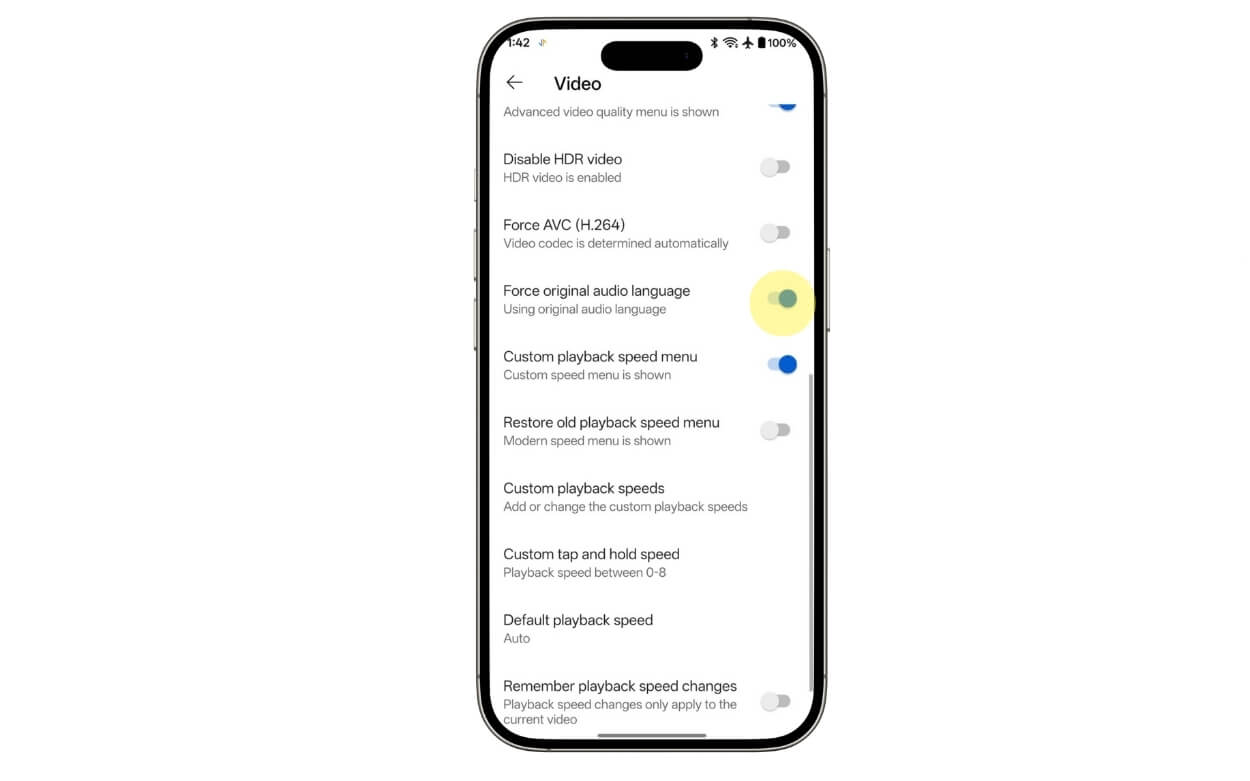
Step 8: From here, scroll down and enable the option that says force original audio language. That’s it
Remember that since it is a third-party YouTube app, scan and check the app before installing and updating it.
Stop YouTube From Replacing Original Audio With Auto-Dub
So those are the four methods you can use to reduce and even disable the YouTube auto-dub feature on your phone. To sum it up, method 1 is great if you want to change the Audio track for existing videos, method two is great if you on desktop and method three is the official YouTube way to set preferred languages, however it doesn’t guarantee the results and method four is the best method, however it only works on Android and not recommended if you care about security. I hope you find this guide helpful, and here are the frequently asked questions to answer your questions.
FAQs about YouTube Auto-Dub
1. Is there any way to completely turn off the YouTube auto-dub feature globally with one setting?
No, there is no way to completely turn off the YouTube auto-dub feature globally in one setting at the time of writing this article. We will update this article if we find any or if YouTube tools update in the future.
2. Will YouTube remember my original audio choice once I set it up?
It depends; there are times YouTube automatically dubs videos into English even after changing them to the original language. However, after using the methods, you will be less likely to find auto-dub features.
3. Does changing my Google account language permanently reduce auto-dub
Yes, since auto-dub works based on your location, changing your Google account language can help to reduce the auto-dub feature; however, you can get similar results using method three in this guide.
4. Is Auto-Dub controlled by YouTube or the creator?
YouTube auto-dub is a feature from YouTube that allows creators to change the language of their videos and dub into different languages so that a wider audience can understand. Creators can control whether to enable or disable this feature for their videos.
5. Can creators disable auto-dub on their videos so viewers don’t face this issue?
Yes, if you are the creator, follow these steps to automatically disable the auto-dub feature on your videos. Open the YouTube studio, go to settings, and then advanced settings, and uncheck the option that says Allow automatic dubbing.
