Did you forget to check or accidentally clear a notification on your Samsung Galaxy phone? Knowing how to check the notification history on a Samsung phone can be helpful in such situations.

However, it’ll only work if you had One UI’s notification history feature enabled on your phone beforehand. If you didn’t, you’re out of luck. The best you can do now is to turn on notification history on your Samsung phone to ensure you don’t end up in a similar situation again.
Let’s check out how to access the notification history on a Samsung phone—and turn it on if it isn’t already. In addition, we’ll also tell you an alternative (read better) way to access and manage your notification history on Samsung phones.
Method 1: Check the Notification History on a Samsung Phone Using Settings
Samsung has been offering the ability to check your notification history as a built-in feature on One UI since One UI 3.0. With this feature, you can check any notifications (missed, cleared, or attended) from the past 24 hours.
The notification history feature is disabled in One UI by default, but you can enable it with the help of these steps:
- Open Settings on your Samsung device.
- Go to Notifications and select Advanced Settings.

- Tap Notification History and toggle on the switch for Notification History.

Once you’ve done that, any time there’s a new notification from an app on your Samsung phone, you can see it on this page in the form of a list. Or, if you had the feature enabled before you cleared your notifications, you’ll see all those notifications here.

Tap on a notification entry on the list to open it in its respective app. Sadly, there’s no way to delete the notifications you don’t need.
A nice thing about One UI’s notification history feature is that if there are multiple notifications from a single app, it’ll consolidate them under the app’s name at the bottom of the page, making it easier to go through them. When you tap on an app notification here, it’ll take you its notification settings, where you can modify the settings based on your preference.
Method 2: Check Notification History on Samsung Phones Using NotiStar
One UI’s built-in notification history feature is one way to check your notification history on a Samsung phone. However, it won’t help if you want access to notifications older than 24 hours. To do that, you’ll need to use a Good Lock module, NotiStar.
Using NotiStar has a few other advantages as well. For example, with it, you can customize which apps on your phone can send push notifications. Then, you can set how long you want the module to keep your notification history before it gets deleted.
NotiStar is a part of the Good Lock module. So, if you don’t already have the Good Lock app on your phone, you’ll need to install it first.
- Go to Galaxy Store, search for Good Lock, and download it.
- Open the Good Lock app.
- Head to the Life Up tab, find the NotiStar module, and hit the download button to download it.
After this, follow these steps to turn on NotiStar and check your notification history:
- Go back to the Good Lock app and tap on NotiStar.
- Flip the switch for Activate NotiStar on.

Once you turn on NotiStar, you’ll be able to check any new notifications you receive on your Samsung Galaxy device. Sadly, you can’t access old notifications that you received previously.
A good thing about NotiStar is that it lets you search for a notification in your list by simply typing a keyword in the notification. Just tap the search bar at the top and enter the text you remember for that notification. If a notification exists, NotiStar will return it.
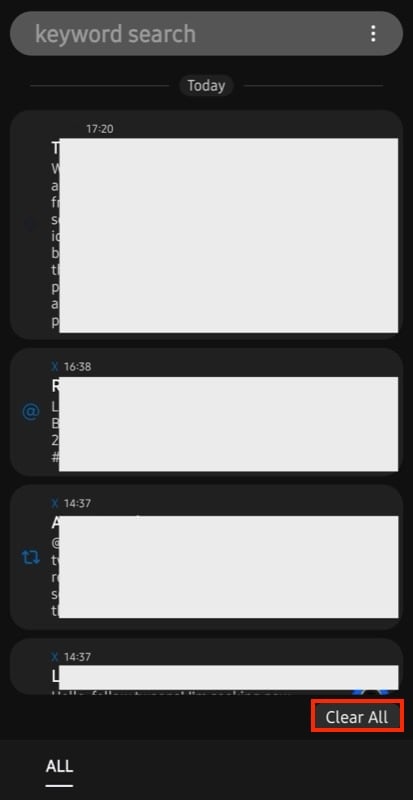
Over time, your notification history may get populated with too many notifications. This can make it harder to find the ones you may actually need. To avoid this, you can clear unimportant notifications from the list. Simply swipe left or right on a notification to delete it. Or hit the Clear All button at the bottom to delete multiple notifications at once.
NotiStar shows you a notification history of up to 30 days by default. But if you want to change this duration, you can do that. First, tap the three-dot icon in the search box and select Settings. Then, tap on Notification Storage Period and select your preferred range.

Similarly, NotiStar gives you easy access to your notification history right on the screen. It displays a button on the Lock Screen, which takes you directly to all your notifications. You can customize this button’s position or appearance. Or, if you don’t want the feature, turn it off completely.
To customize the icon, tap Start Icon Settings. This will take you to the customization screen. Here, you can adjust the icon’s position, change color, and add or reduce transparency as per your preference. Once you’ve customized the icon, hit Save.

Alternatively, if you want to turn off Lock Screen access, toggle off the switch for the Using on Lock Screen option on the NotiStar main screen.
Another nice feature in NotiStar is the ability to prevent accidental deletion of notifications. With this, you can exclude notifications from specific apps on your device from getting deleted when you hit the Clear button in the Quick Settings panel.
In the NotiStar settings, scroll down to the bottom of the page and toggle on the button for Set App Unable to Clear Notifications. Then, tap on it, and on the following screen, toggle on the switch next to the app whose notifications you want to prevent from getting deleted.
Knowing Your Notification History Can Be Helpful in Multiple Ways
Being able to access your phone’s notification history is quite helpful. Aside from the obvious advantage that you can view missed or cleared notifications, knowing previous notifications can also help identify the frequency of push notifications from different apps on your device.
This can, in turn, help you turn off such notifications or limit them to avoid getting bombarded with unwarranted notifications and missing out on the important ones coming in throughout the day.
