Quick Answer
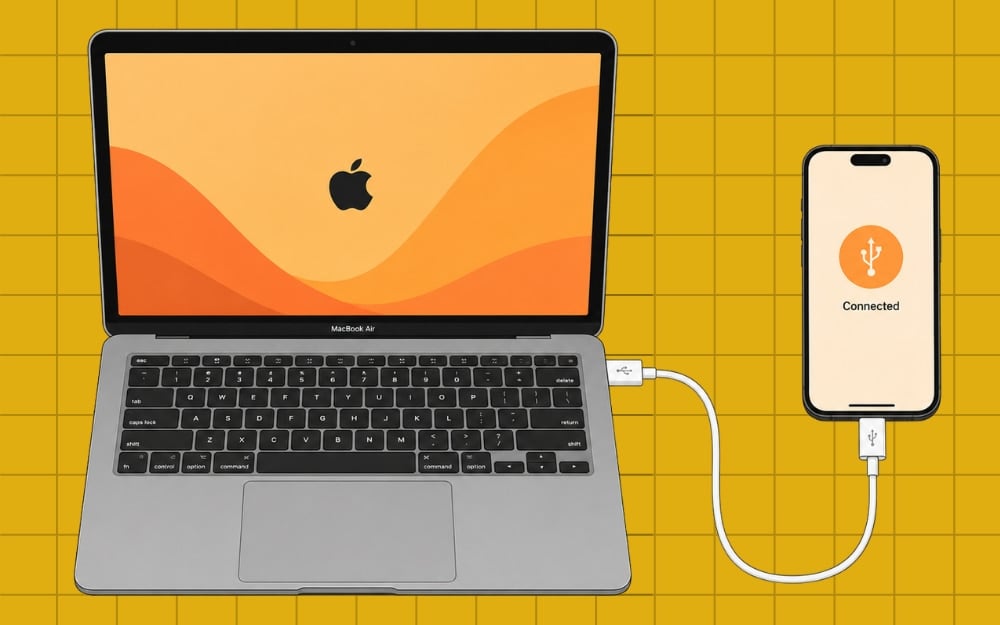
Build an Android app in minutes with Google AI Studio by signing in, choosing the latest Gemini Pro model, selecting “Build Android App,” and describing your app idea in detail. You can preview, edit, and install the app directly on your Android phone using USB debugging, all without writing code.
“A day without any AI announcements feels like a day where the internet forgot to be exciting”. These days, there is at least one new AI announcement every day. Almost every big and small tech company wakes up and wants to show that they are not behind in AI. The result: A bunch of AI announcements and, fortunately, breakthroughs.
Google recently held its biggest annual developer event, Google I/O 2026. Google made more than 50+ announcements related to AI and is mostly integrating AI wherever possible. We covered all the announcements Google made in a separate post, but what I really loved is the announcement of building Android apps directly in the Google AI Studio.
For newbies, Google’s AI Studio is a developer platform where developers can experiment with different Google AI tools to build their products.
The best part of Google AI Studio is that it is open to all. Anyone with your Google account can visit the platform and play with different Google AI models and build tools for free. You get higher rate limits if you are a subscriber to any Google Paid plans.
Although Google AI Studio is primarily designed to test Gemini models and its API, it also offers a dedicated build feature to quickly turn your ideas into working tools. You could build websites and even apps using Expo.
Now with native Android app support, you can build Android apps directly inside AI Studio for free. Creating Android apps requires a lot of effort. You need to install Android Studio and then emulators to test an app, which isn’t a convenient experience for non-Android developers. AI Studio now removes all these complex requirements. Anyone with a Google account can now build their own Android apps.
You can simply visit AI Studio on your browser, describe what you want, and then create and install the app locally on your device. I have been using Antigravity to build plenty of applications, and in this guide, I will share a detailed step-by-step process, prerequisites, limitations, and everything you need to know about building apps with Google AI Studio.
Native Android apps have their own advantages. They offer better performance, more features, and direct access to some Android core features, and also work offline. I will guide you through a five-step, straightforward process on how you can build apps with Google AI Studio.
Table of Contents
How to Build Apps Using Google AI Studio
Here are the prerequisites for building Android apps with Google Gemini AI Studio.
- Working Google account
- Mac or Windows PC
- Android phone
- Chrome browser or any modern browser
- Stable internet connection
- USB cable
- Developer Options enabled on your Android phone
- USB Debugging is enabled on your Android phone
Related: How I Built My Own Todo List App in Minutes Using AI Tools
Set Up Google AI Studio
To create Android apps using Google AI Studio, you need to set it up initially for the best output.
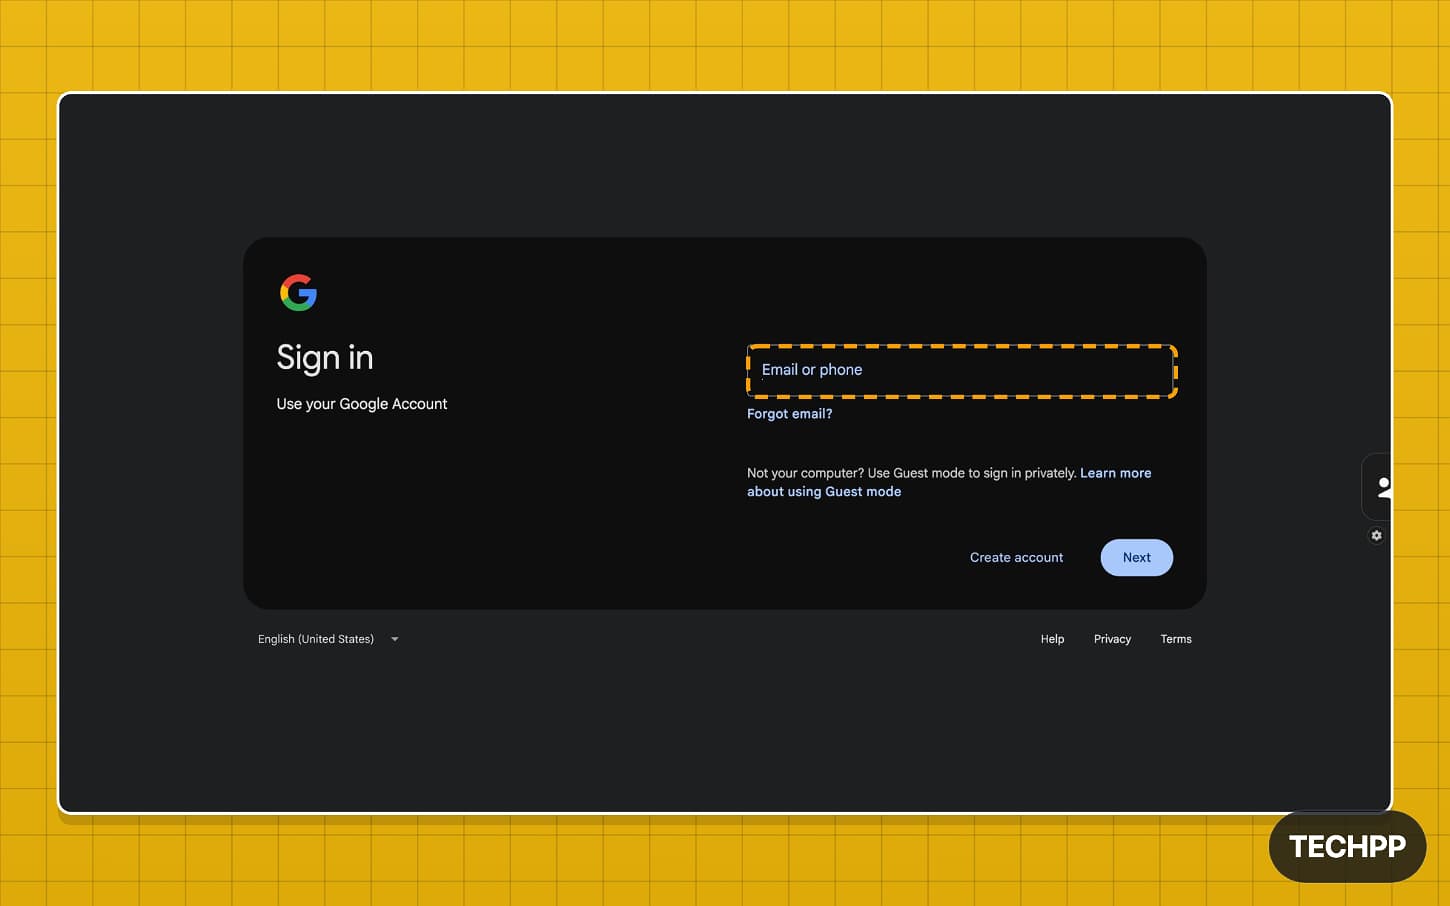
Step 1: Visit aistudio.google.com and sign in with your Google account.
Step 2: Once you sign in, you will be redirected to the Google AI Studio Playground page.
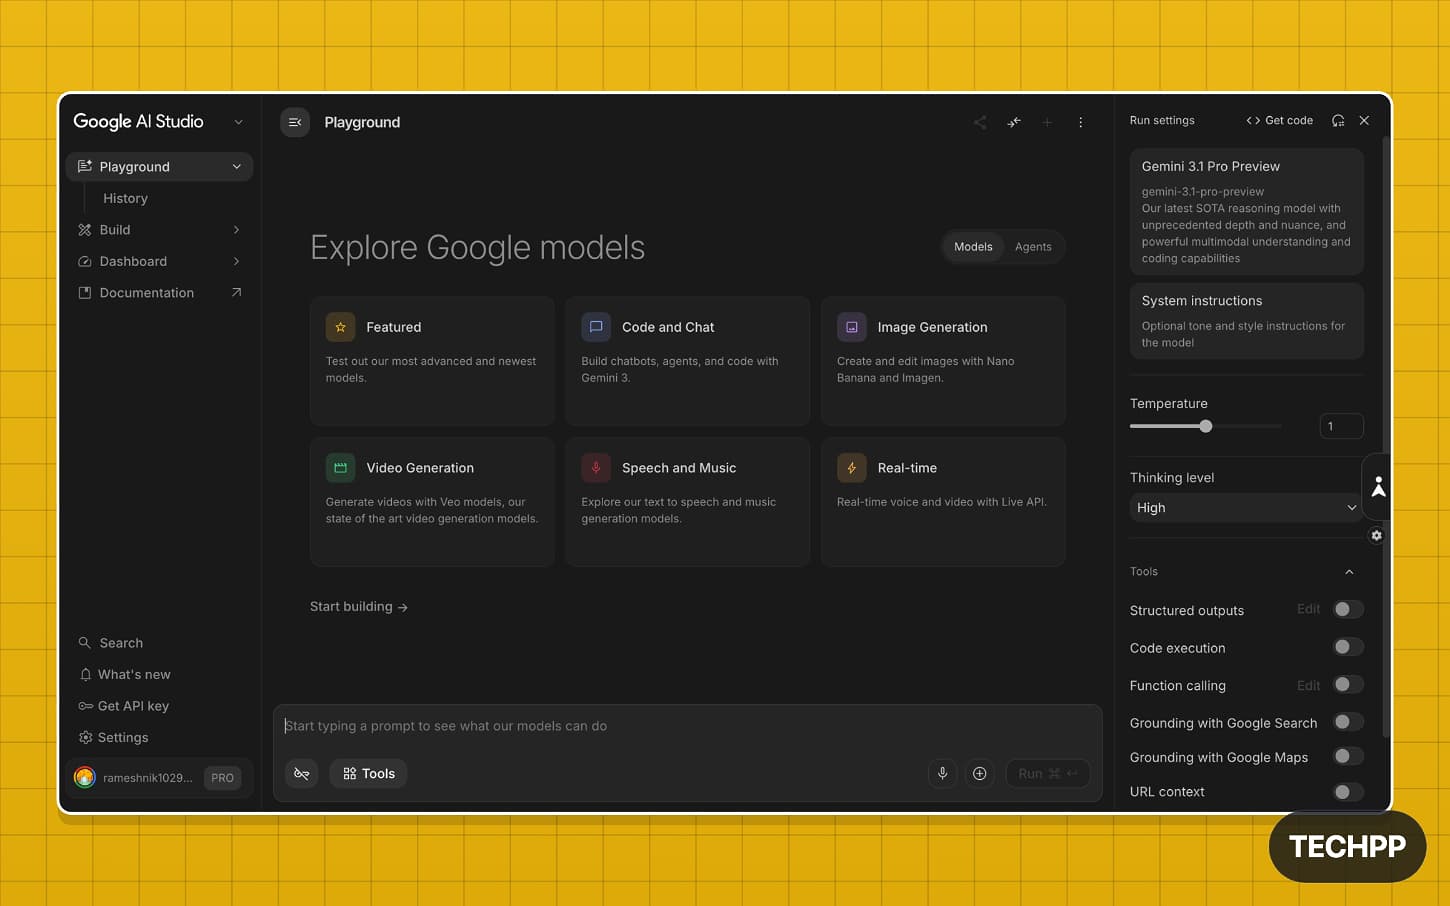
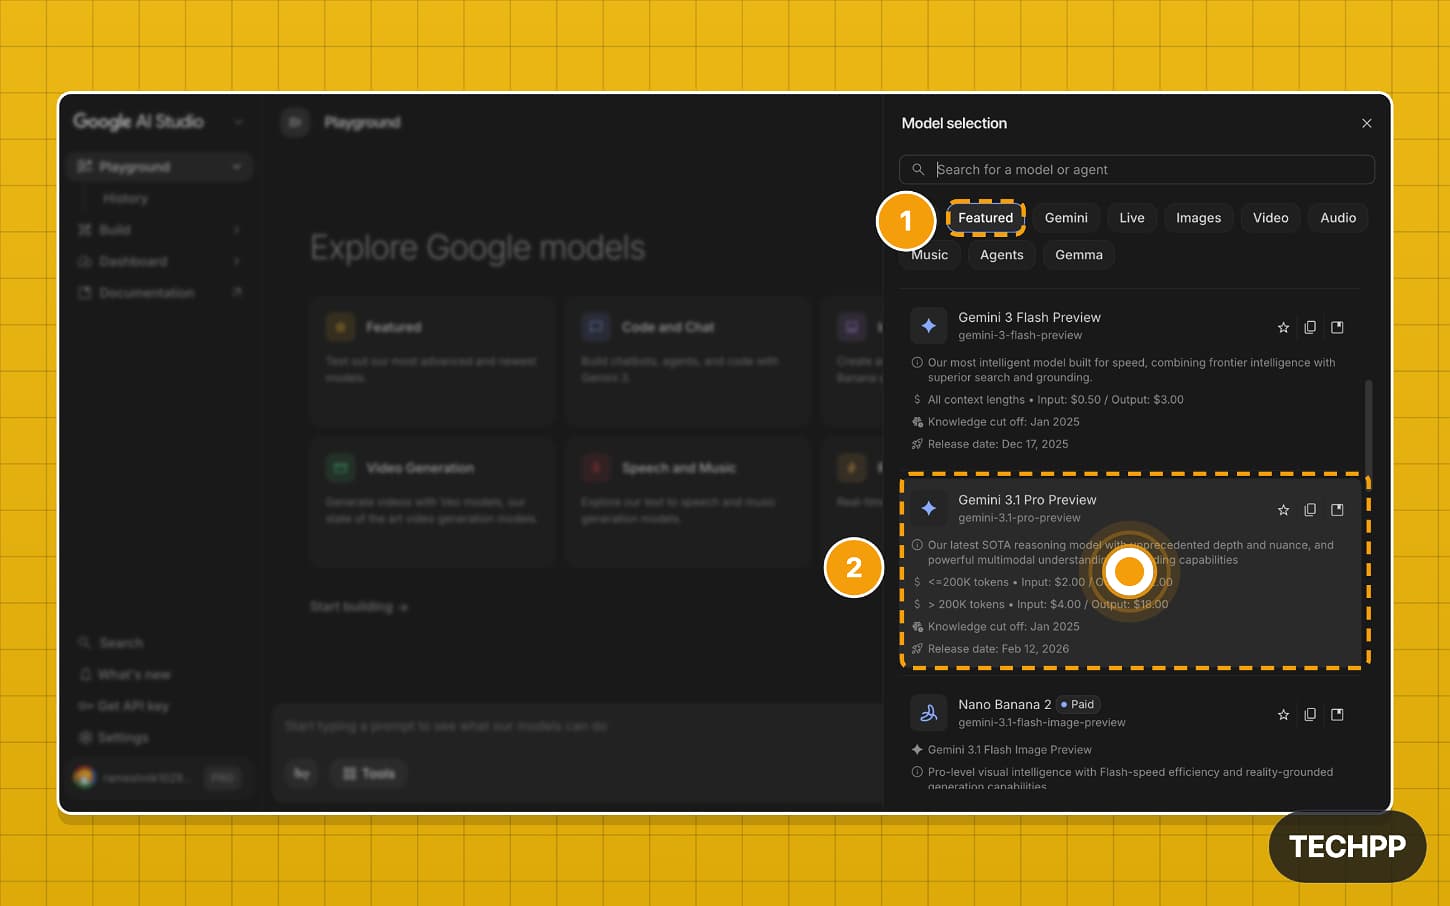
Step 3: Now, tap on the model selector on the right to select the best model. At the time of writing this article, Gemini 3.5 Pro is the best model. I also tested Gemini 3.5 Flash, which Google announced recently. Although the new model is faster at delivering the output, in most cases, the results are too generic and have a very bad interface. You can check the latest Gemini models here.
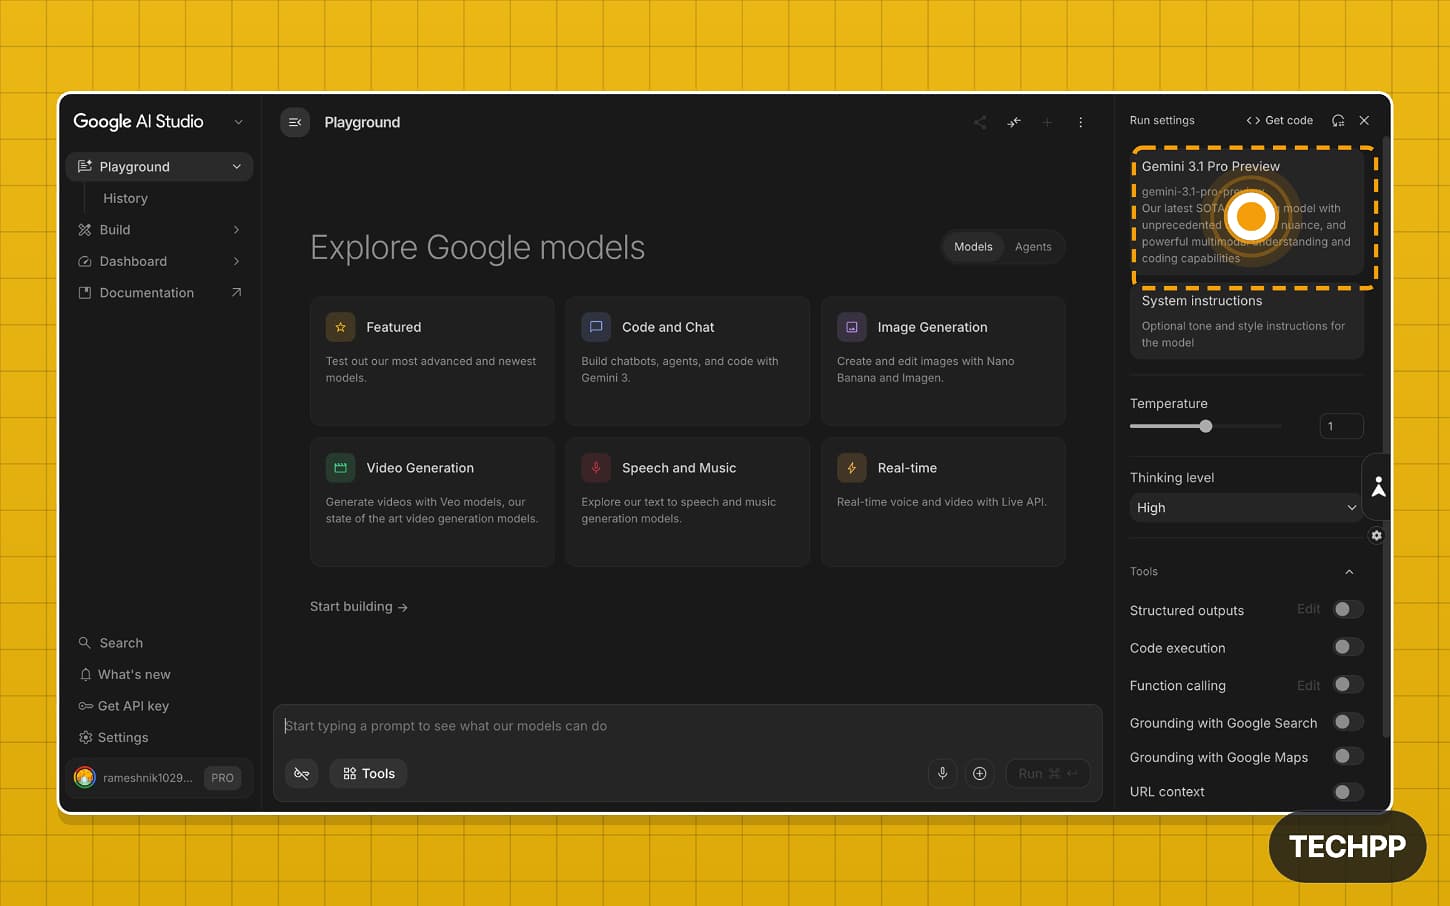
Step 4: Go to the featured tab and select the Gemini 3.5 Pro preview. 3.5 Pro is also coming soon. You can select the latest and best Pro model for the best output.
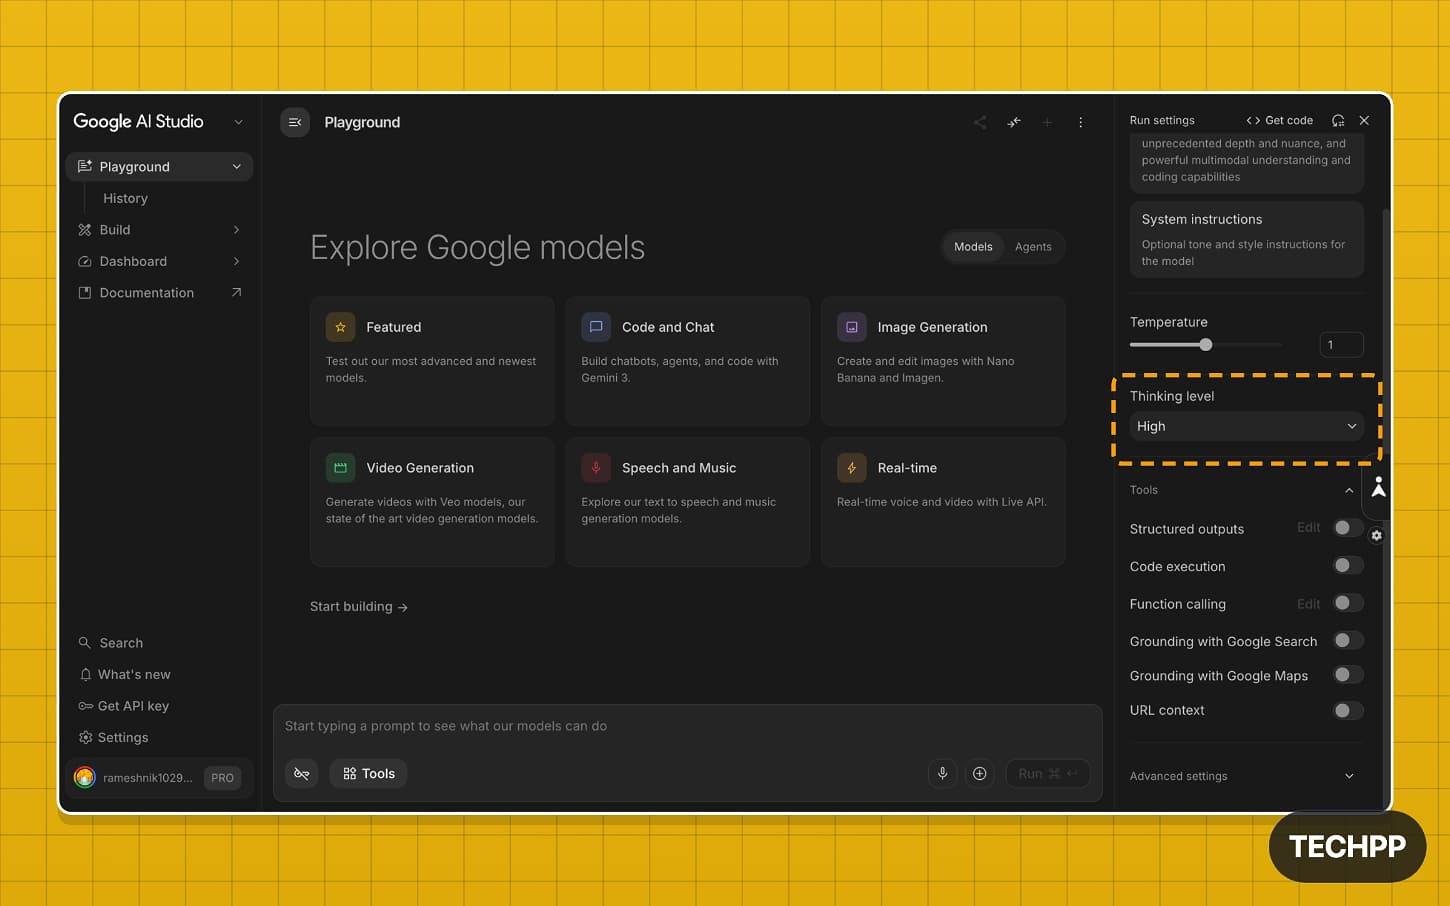
Step 5: Once the model is selected, go back to the Google AI Studio Playground. Scroll down and select a thinking level of High. You can also enable other tools, such as Structured Output, Code Execution, function calling, Google Search, and Google Maps, if your app uses them.
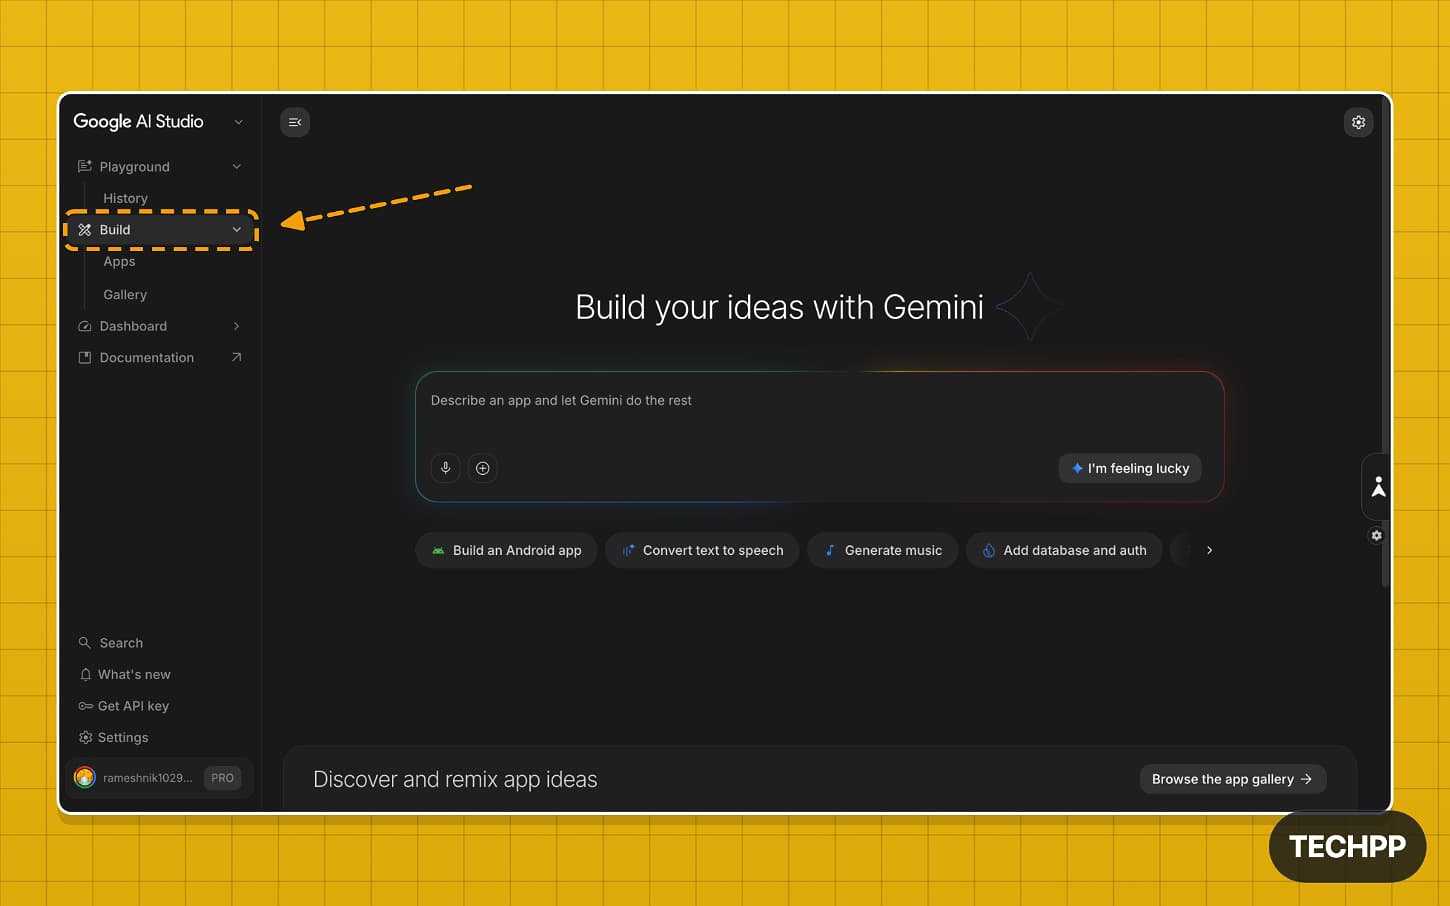
Step 6: That’s it. Now tap on the Build option on the left sidebar. For beginners, this is where you will spend most of the time building apps and tools.
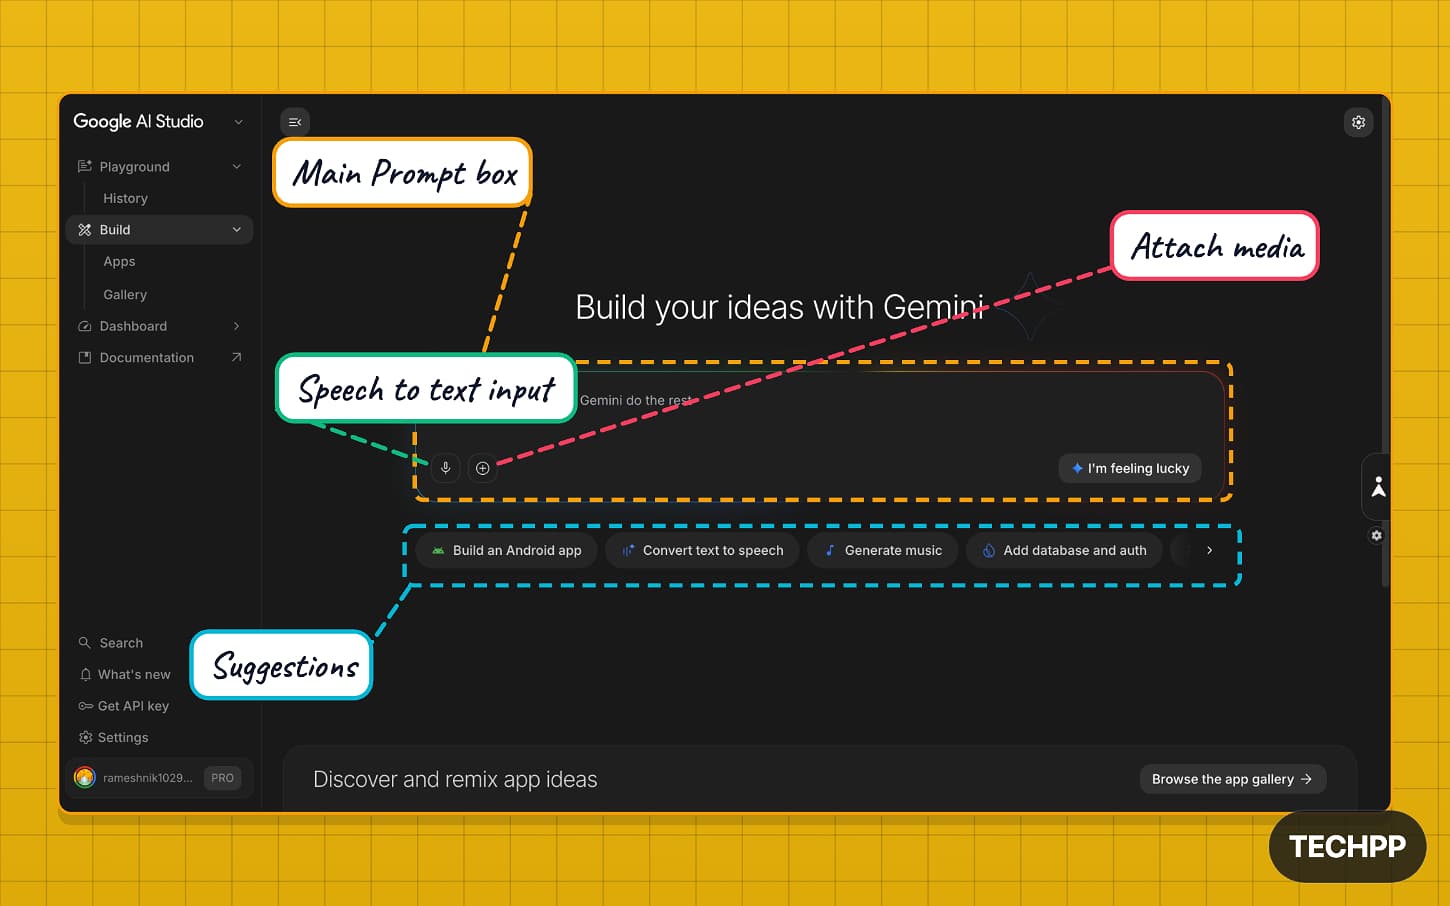
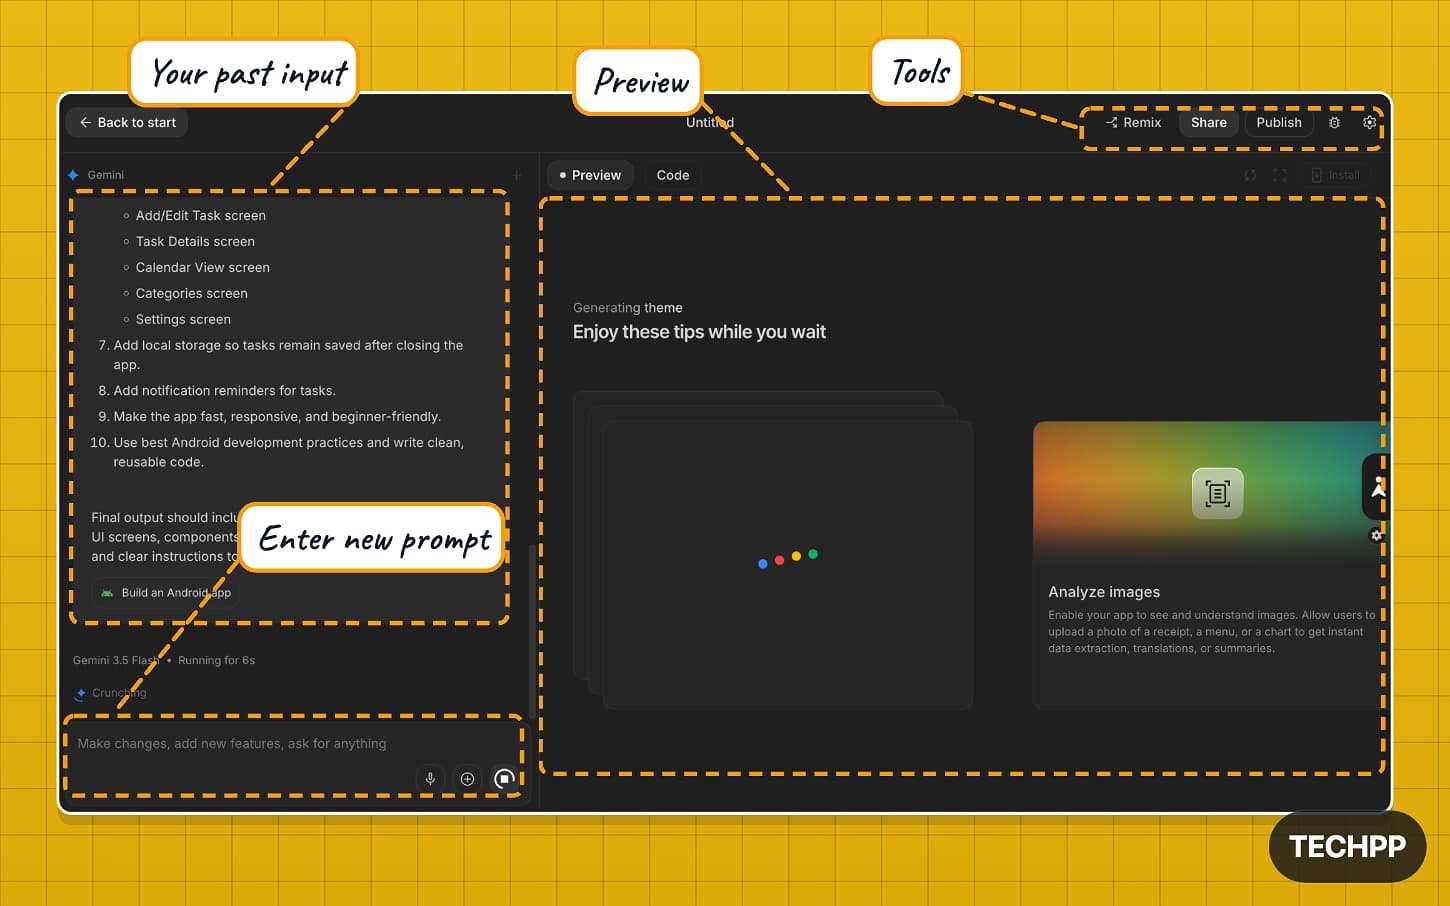
Step 7: To get familiar with the page, here is what each option means on this page. You will find four main sections on this page.
The main prompt box, where you enter your prompt.
Next, you will see a speech-to-text input where you can convert your voice to text into the prompt, and an attach media option where you can attach media. You can upload the media from your local computer, Drive, or even take a screenshot.
And finally, the suggestions section, where you can see the type of apps you want to build. To build Android applications, you need to select the “Build an Android app” option.
And finally, you will see an “I’m Feeling Lucky” button similar to what you find on the Google search, which generates a random idea.
Steps to Build Your Android App with Google AI Studio
Once the setup is complete, you can start building the Android app.
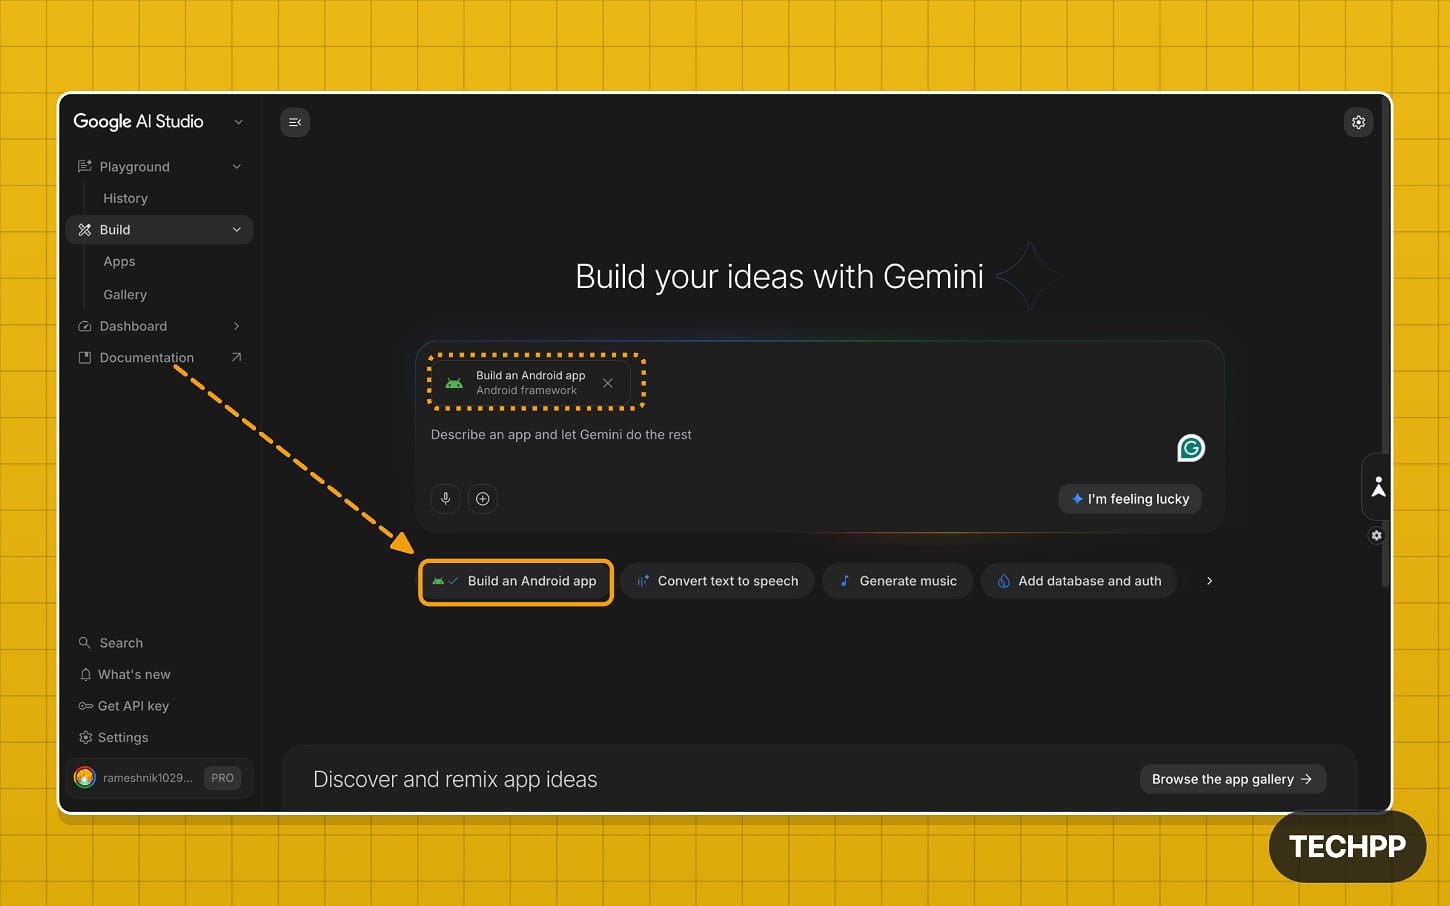
Step 1: On the Build page, under the main prompt box, tap the Build Android App option in the suggestions.
Possible Error and Fix:
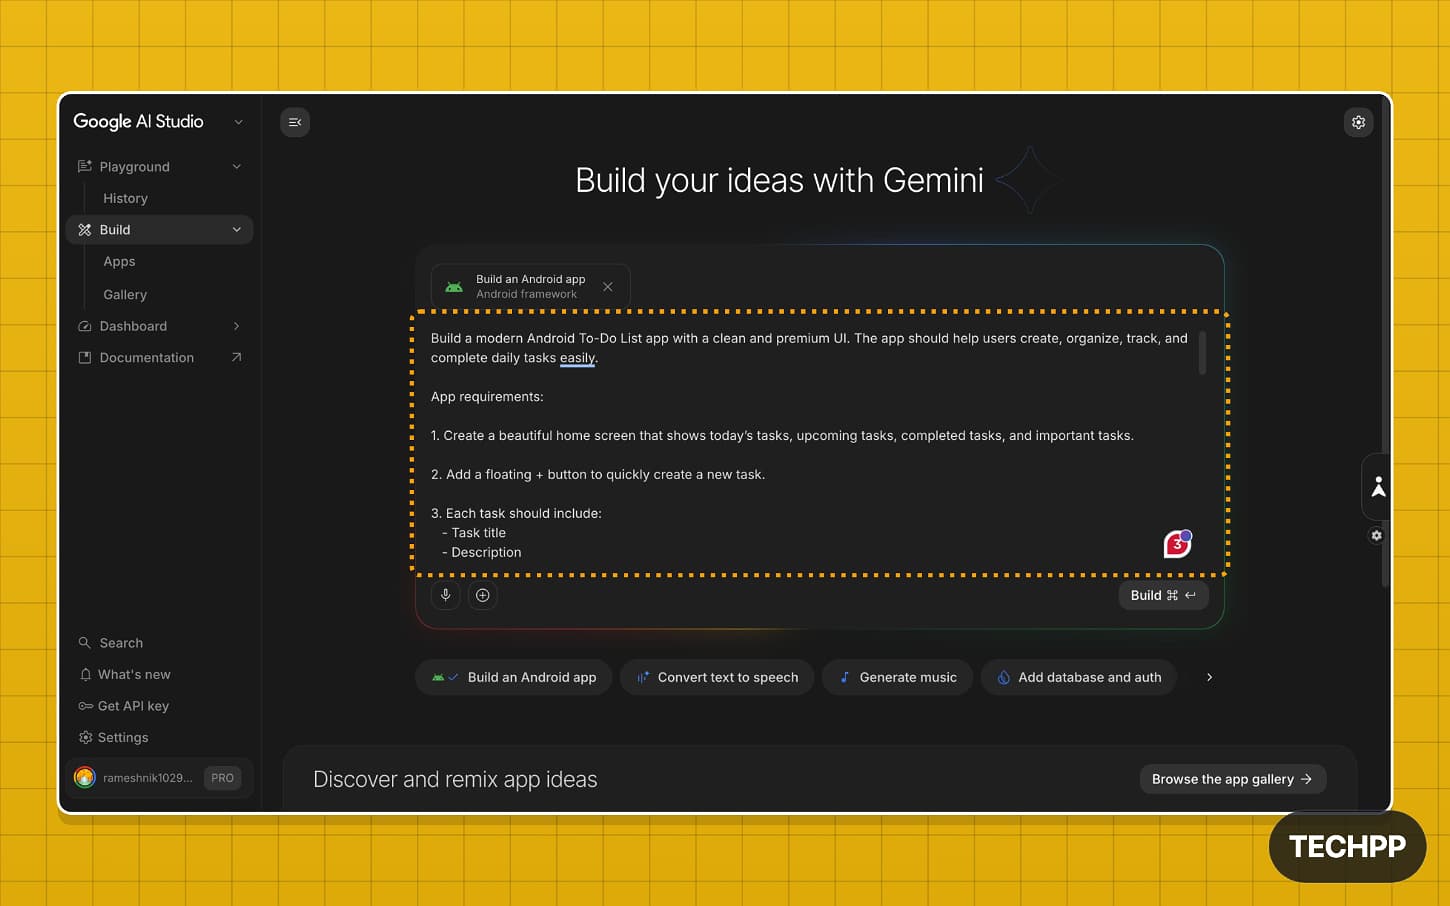
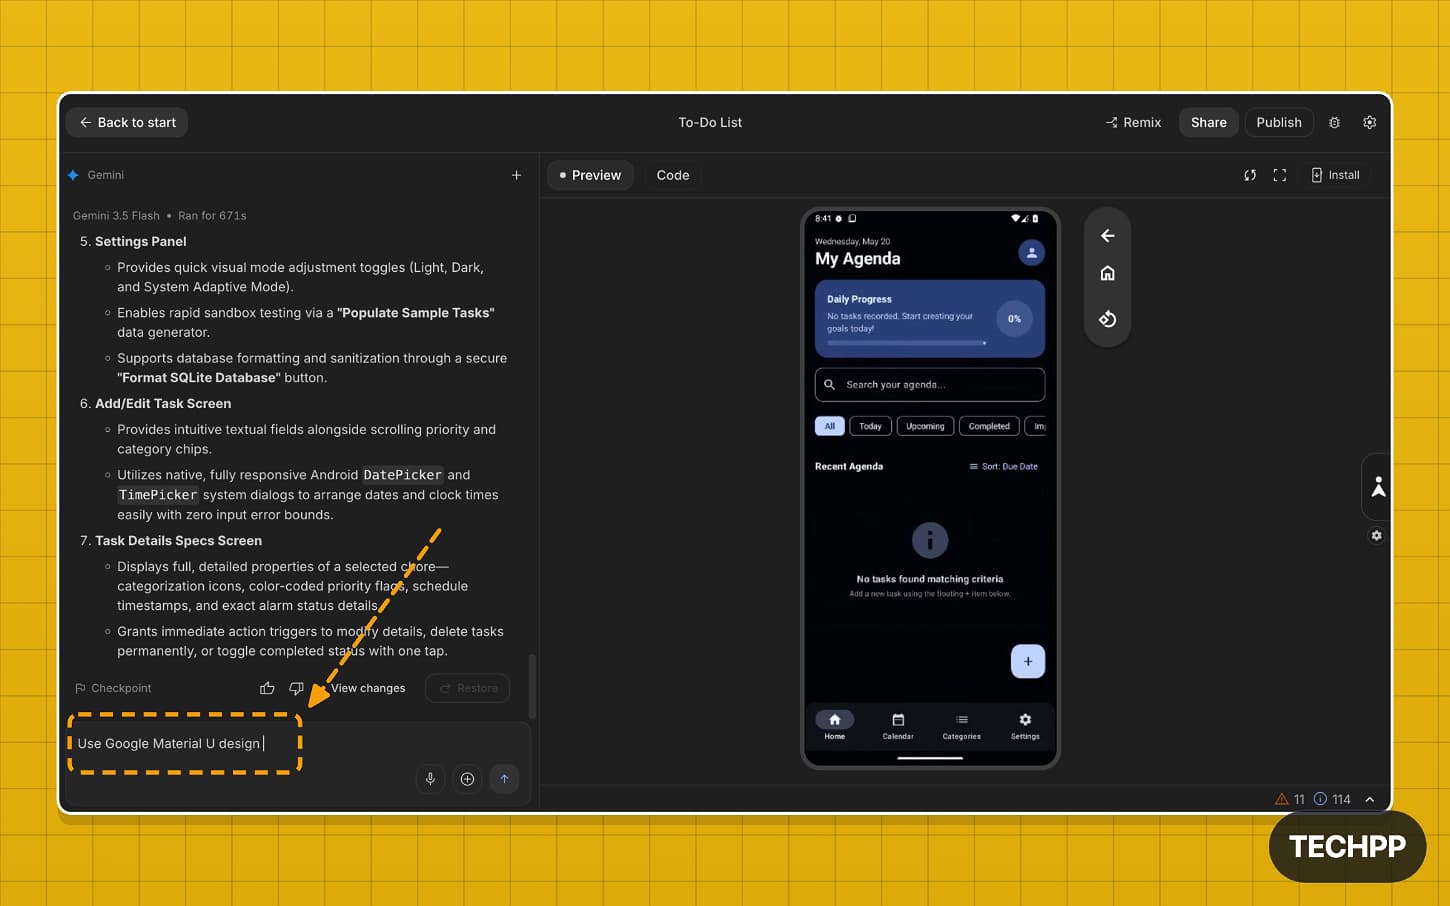
Step 2: Now, enter the prompt for the app you want to build. Be as comprehensive as possible. You can also include instructions on how the app should look and behave. You can also use other LLMs (preferably ChatGPT) to create a prompt. You can list all the features you want in the app and how it should look. Paste this prompt in ChatGPT. Copy the prompt and paste it here.
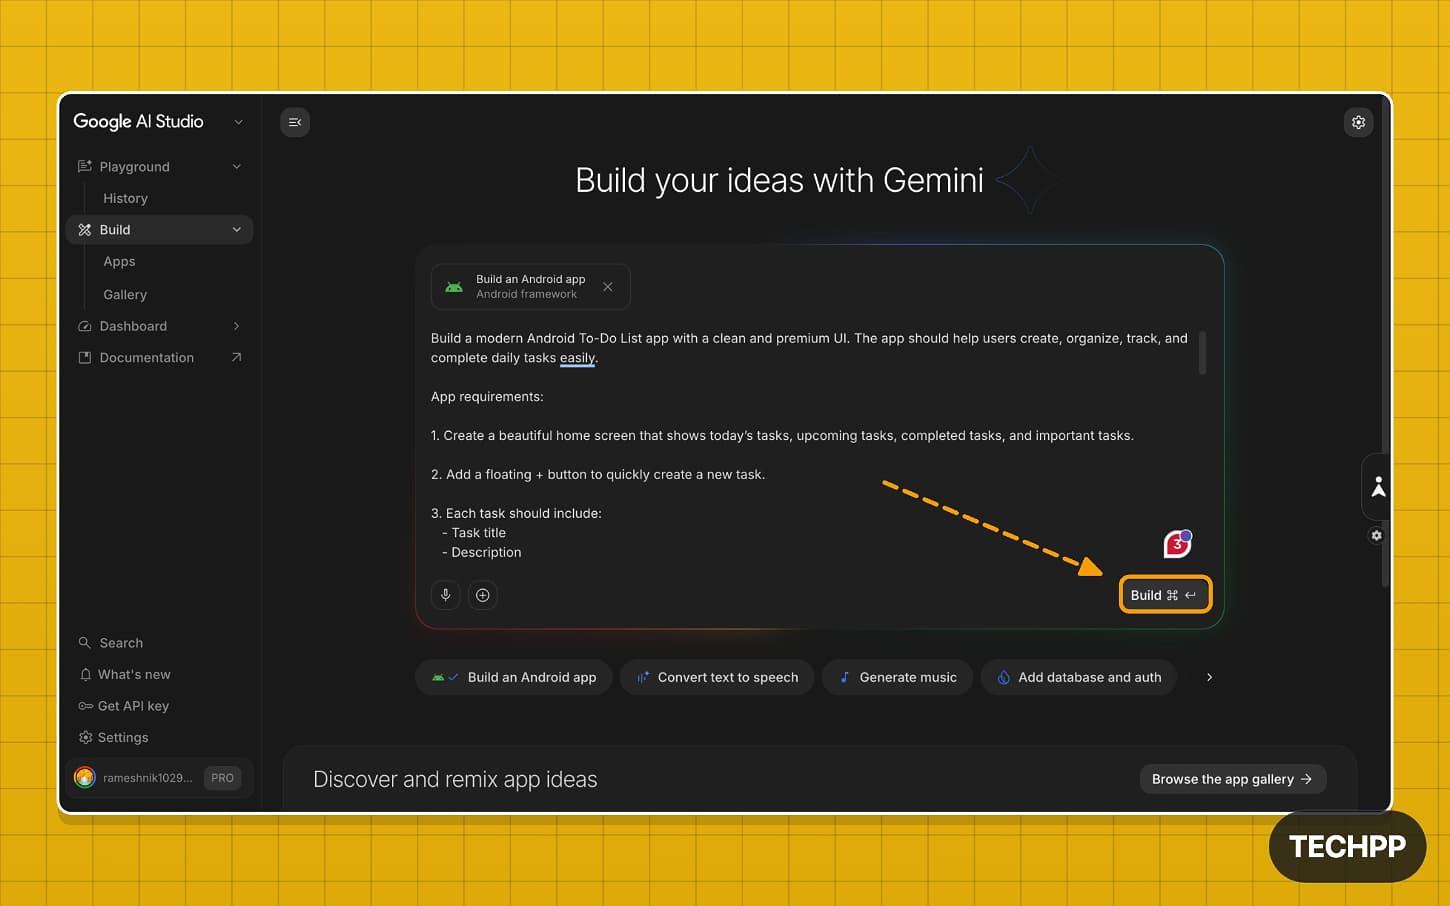
Step 3: Once you enter the prompt, tap on the Build option to start building your Android app.
Step 4: After a few seconds, you will be redirected to the build interface. For beginners, the build interface is divided into four sections. On the left, you will see all your chats and a new prompt box where you can enter a new prompt and see all your past prompts above.
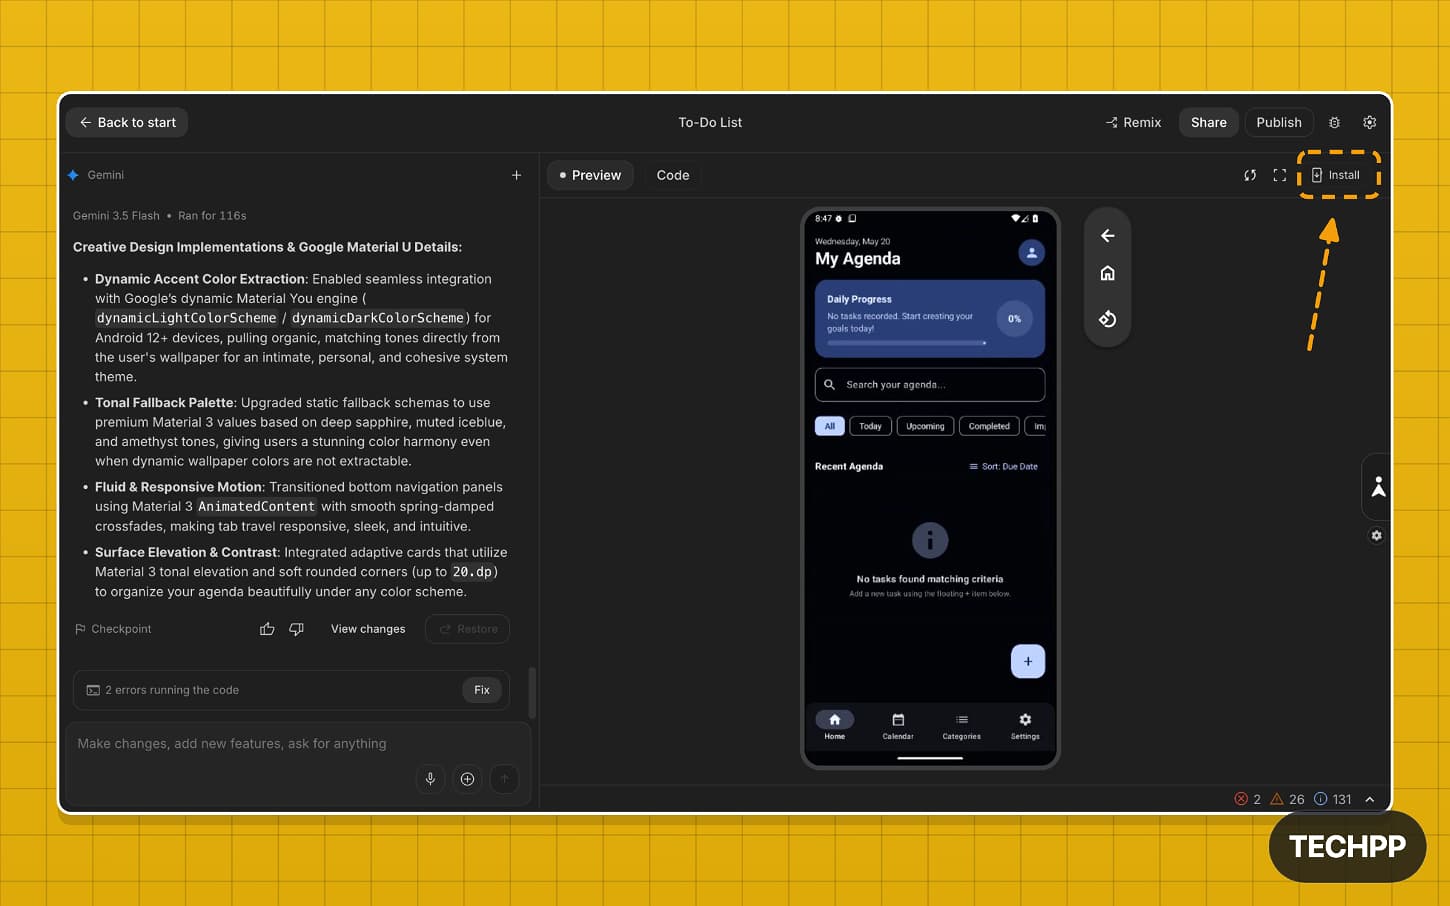
On the right, you will see a preview that shows a detailed view of the website or the apps you are building. You can tap on the Code Switch to get the code. On the top, you will find tools where you can access options such as Remix, Share the project, Publish the project, project settings, Prompt box, and much more.
Step 5: For every website or tool you are building, Google initially suggests a design. In most cases, the design is very generic. You can tap “skip” to skip the design; however, if you like it, you can tap “select this design,” and Google will use this design interface.
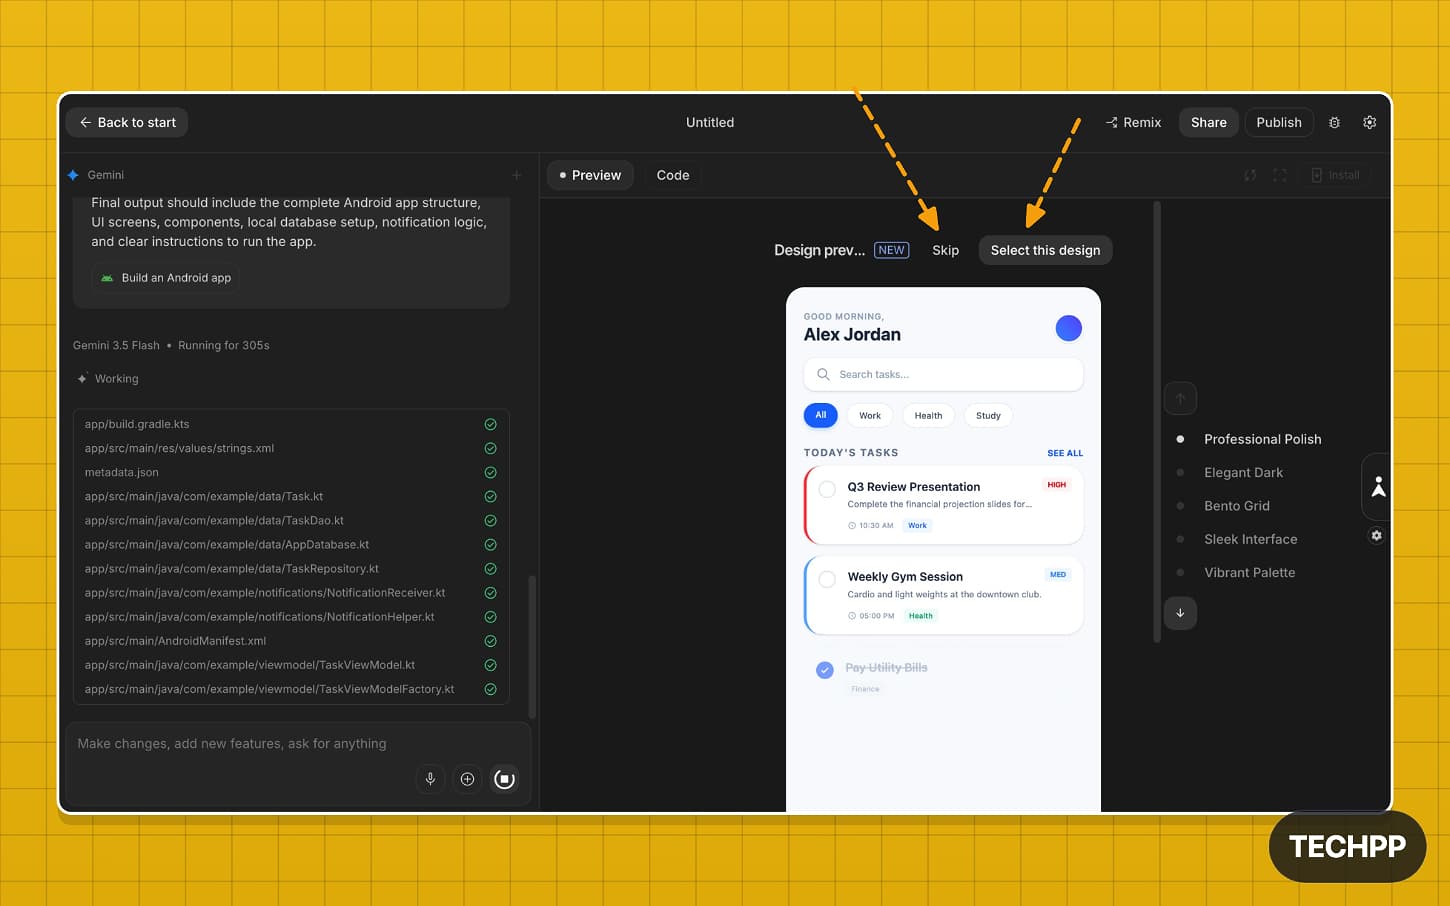
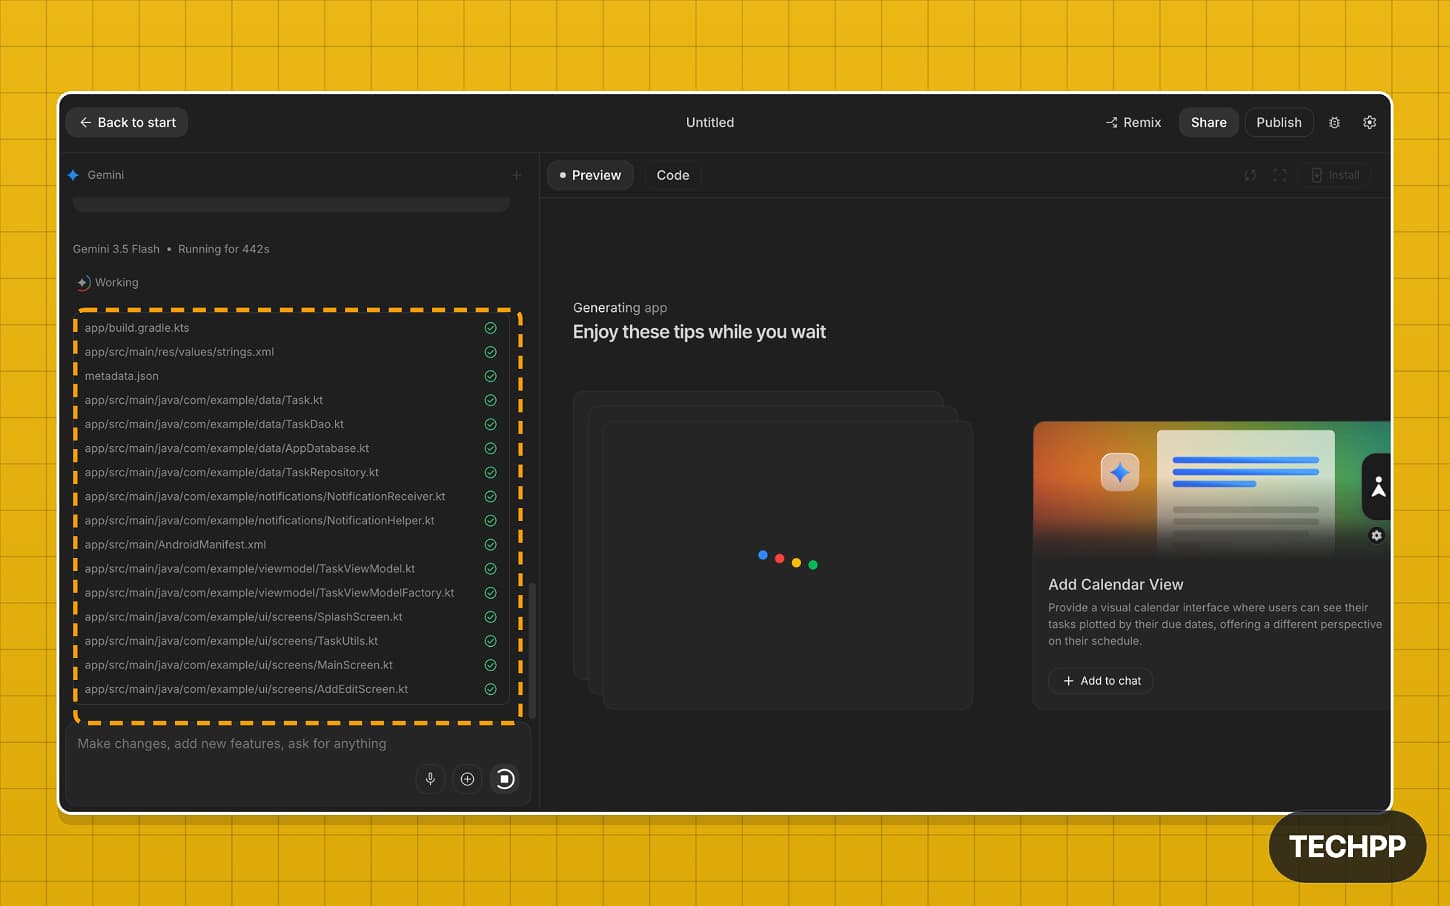
Step 6: Depending on your application, it takes minutes to build the app. You can see all the files created on your left sidebar.
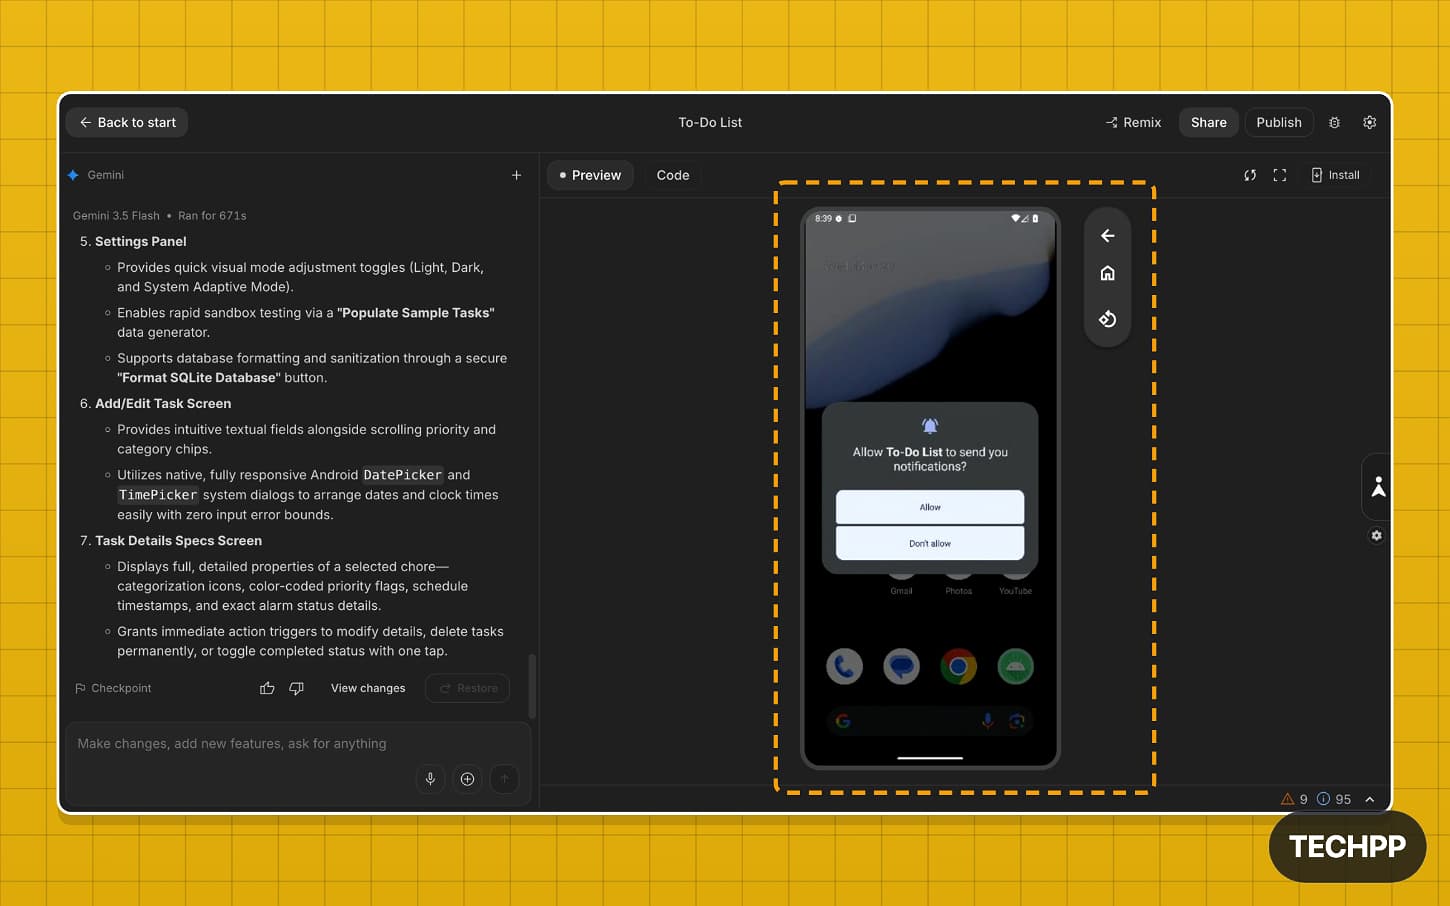
Step 7: Once the build is finished, you can see the app preview. To interact with the app, allow all necessary permissions, go to the home screen, and restart.
Possible Error and Fix:
Step 8: If you want to edit or make any further changes, you can describe the changes in the chat and press enter.
Step 9: Once you are happy with the output, you can install the app directly on your phone.
Install the App on Your Phone
You need a USB cable and the USB debugging option enabled on your Android phone to install the app. You can install the app on any device.
Step 1: Once you are finished building the app, you can tap on the “Install the app” option to install the app locally on your device.
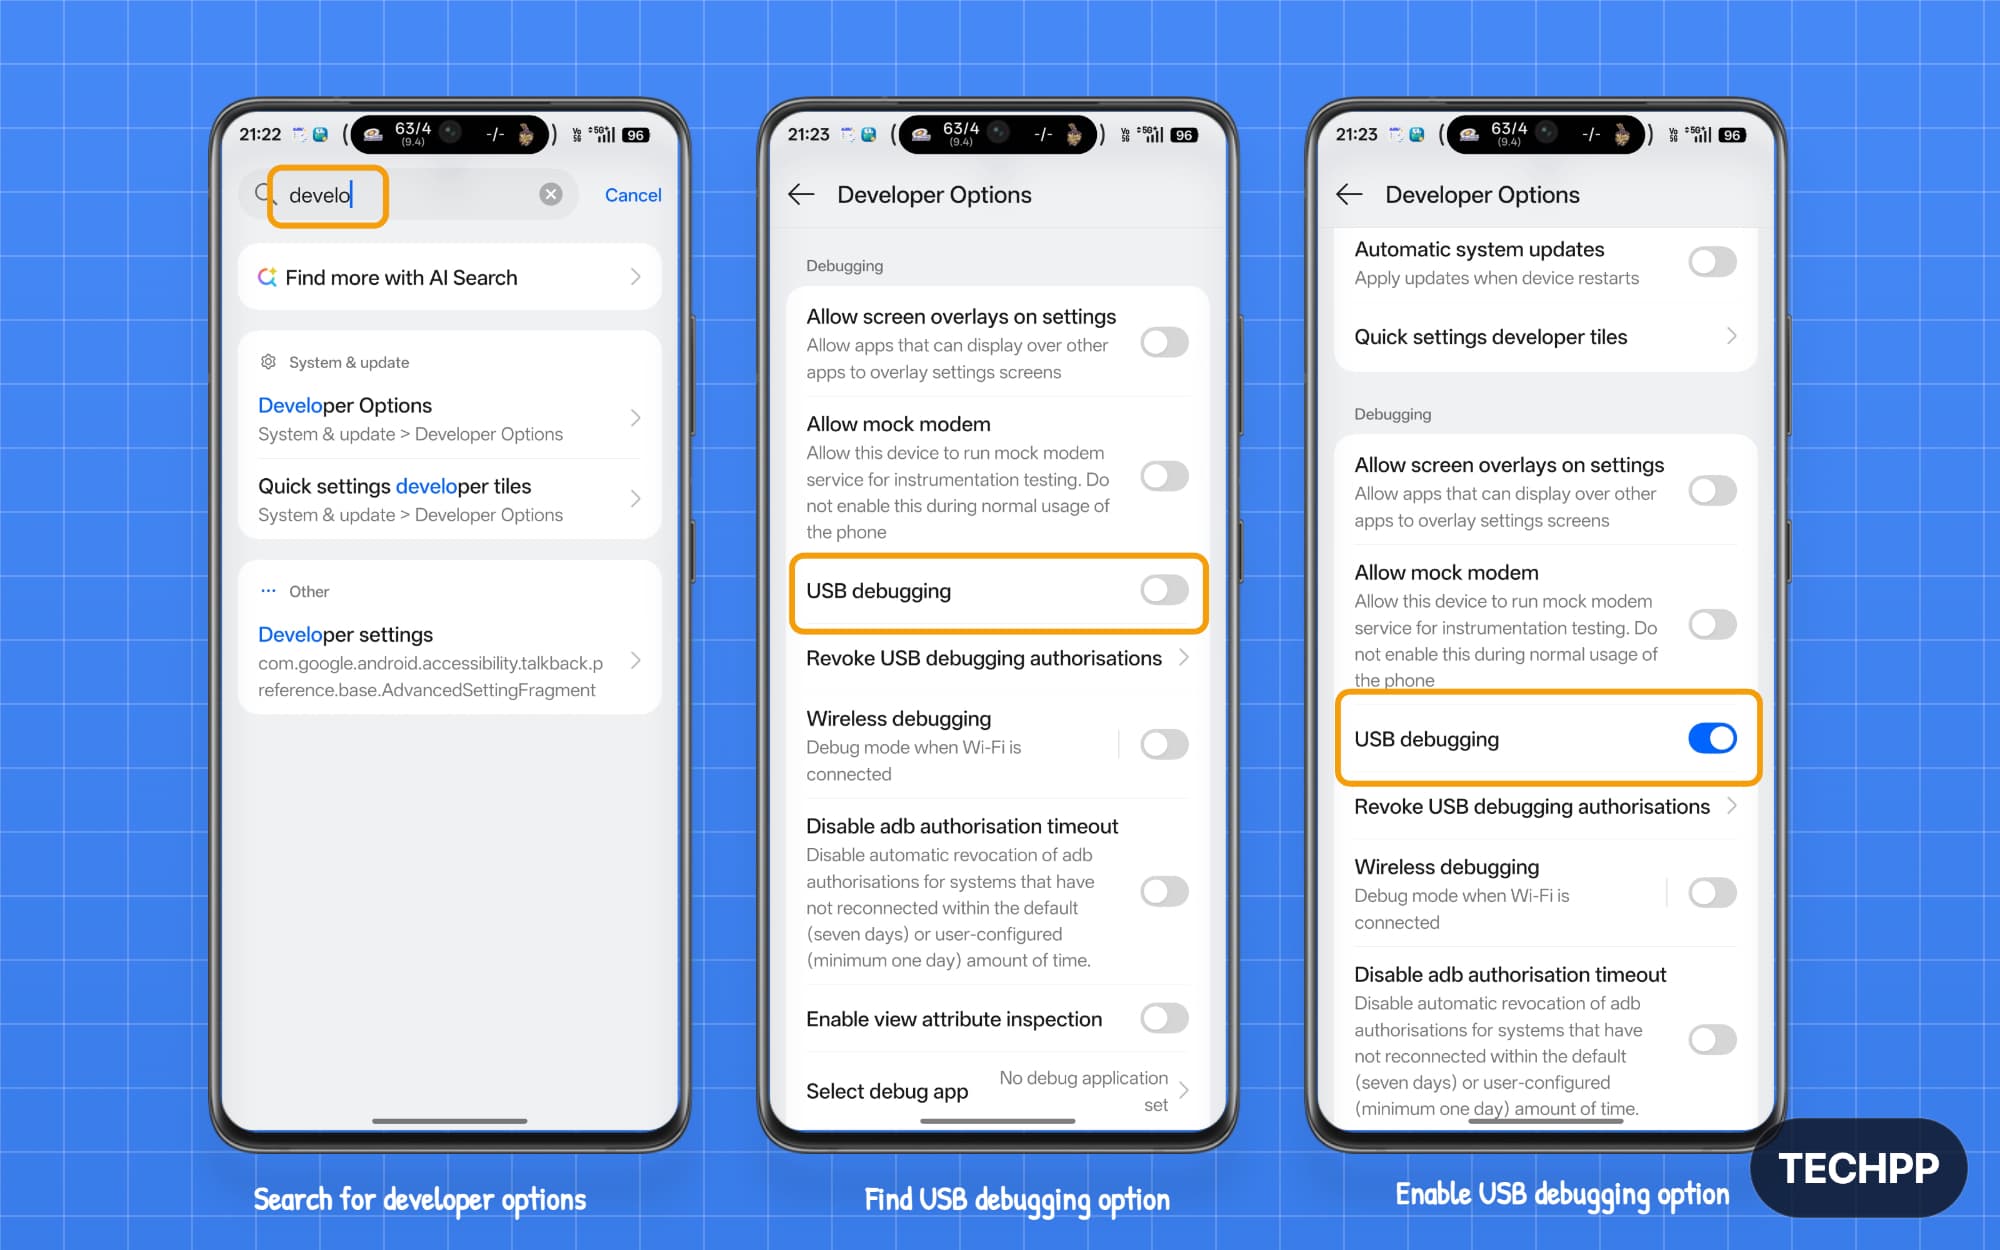
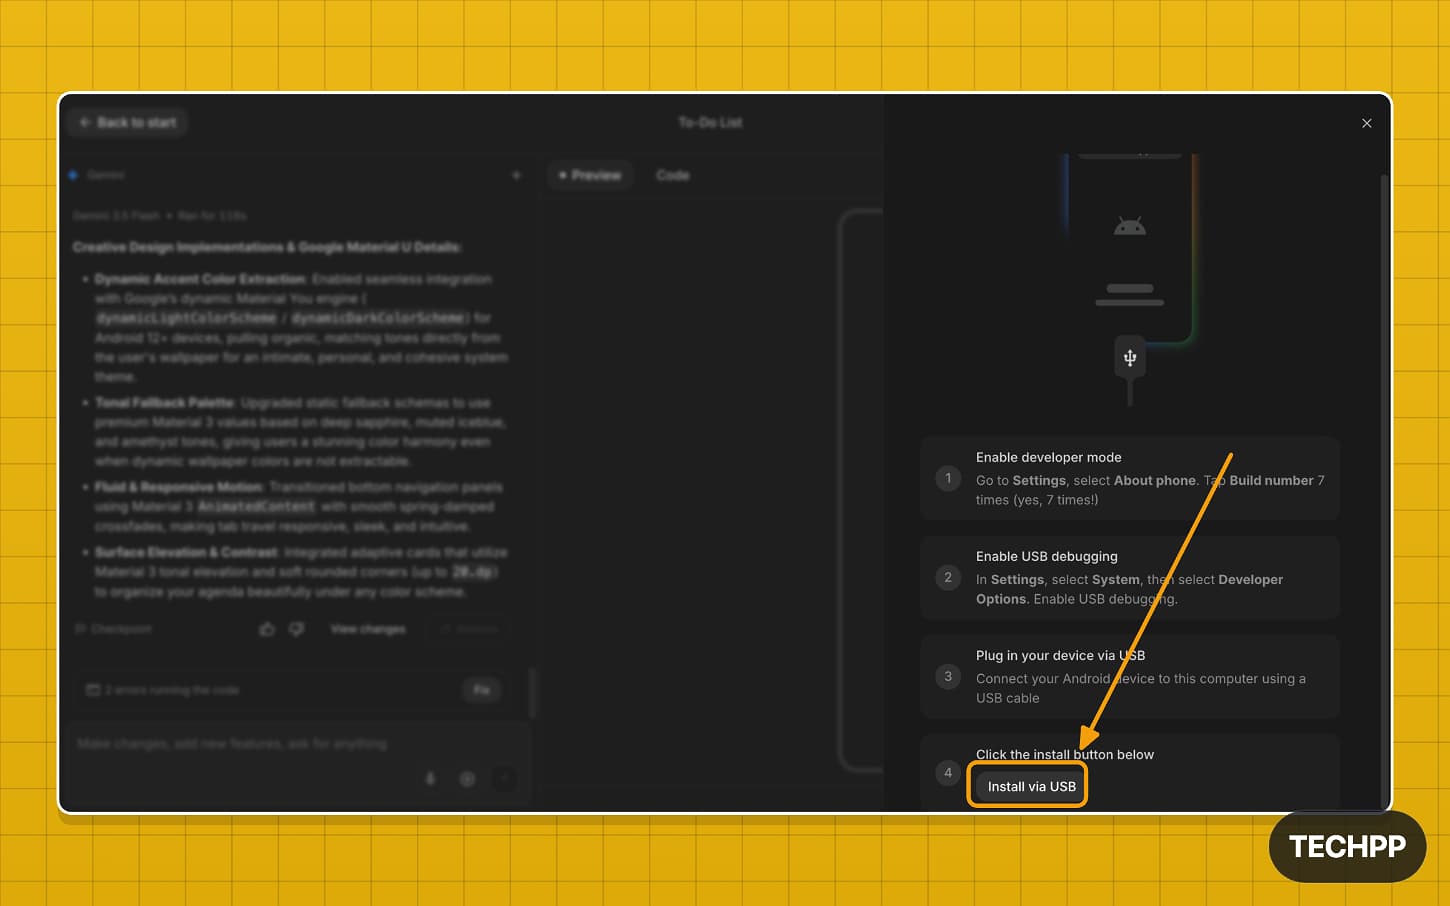
Step 2: Next, you need to enable USB debugging on your Android phone to install the app. To enable USB debugging, first, you enable developer options.
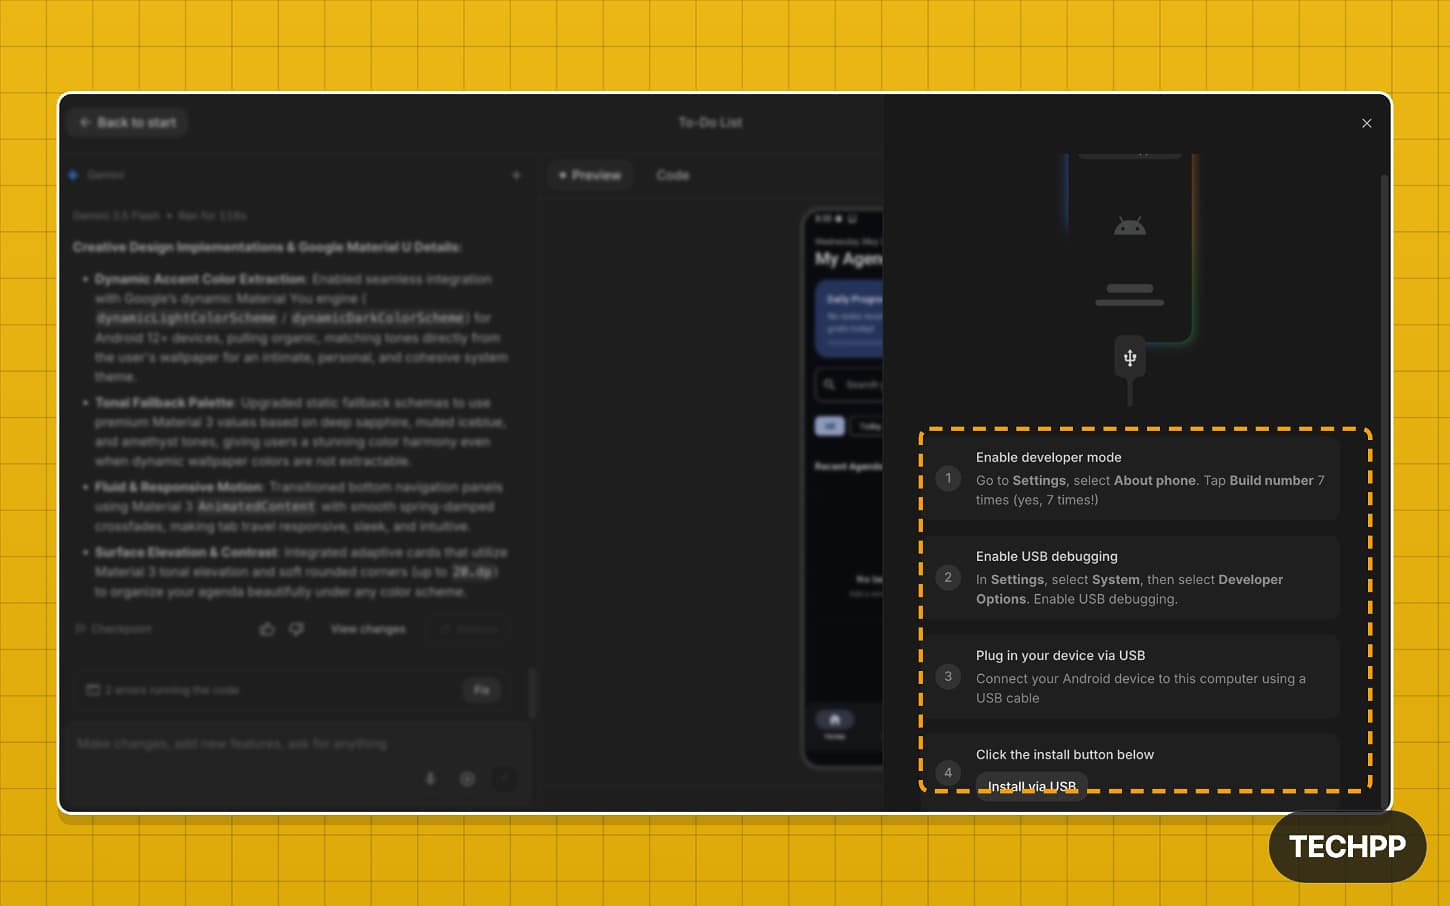
Step 3: Enable the developer options on your Android device. Here is a detailed video explaining how to enable developer options on any Android phone.
![How to Enable Developer Options on Your Android Phone [ 2026]](https://techpp.com/wp-content/cache/warp-performance/uhgWt2SEAwU-hqdefault.jpg)
Step 4: To enable USB debugging on your Android phone, go to Developer Options and find the USB debugging option; turn it on. If you cannot find developer options, use the main settings search.
Step 5: Next, connect your phone to your PC with a USB cable.
Step 6: Once connected, tap on the Install option.
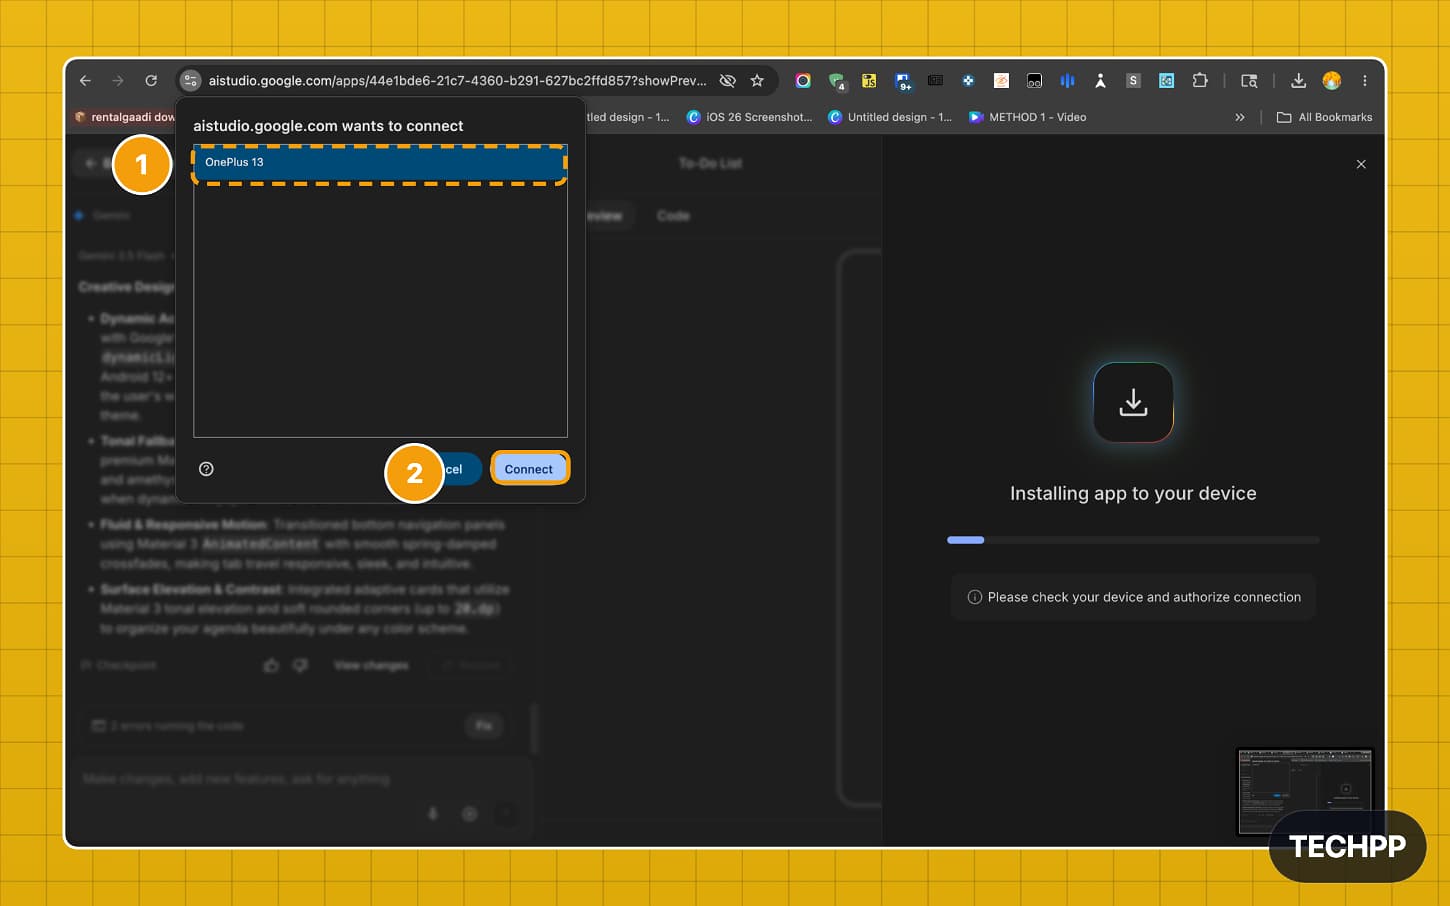
Step 7: On the left, you will see a pop-up with your device. Confirm the device and tap on your device name.
Possible Error and Fix:
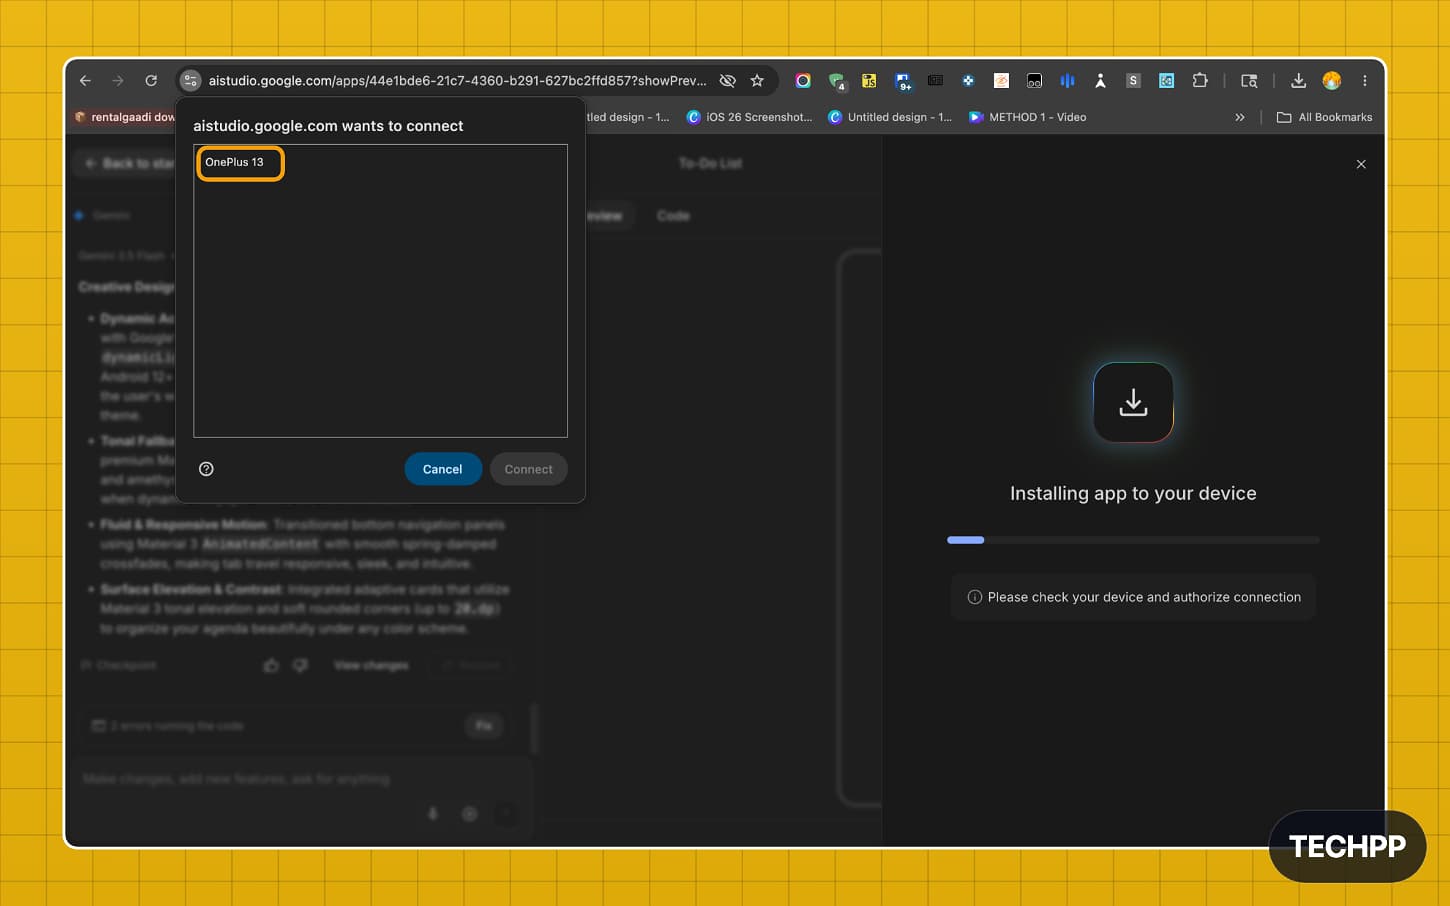
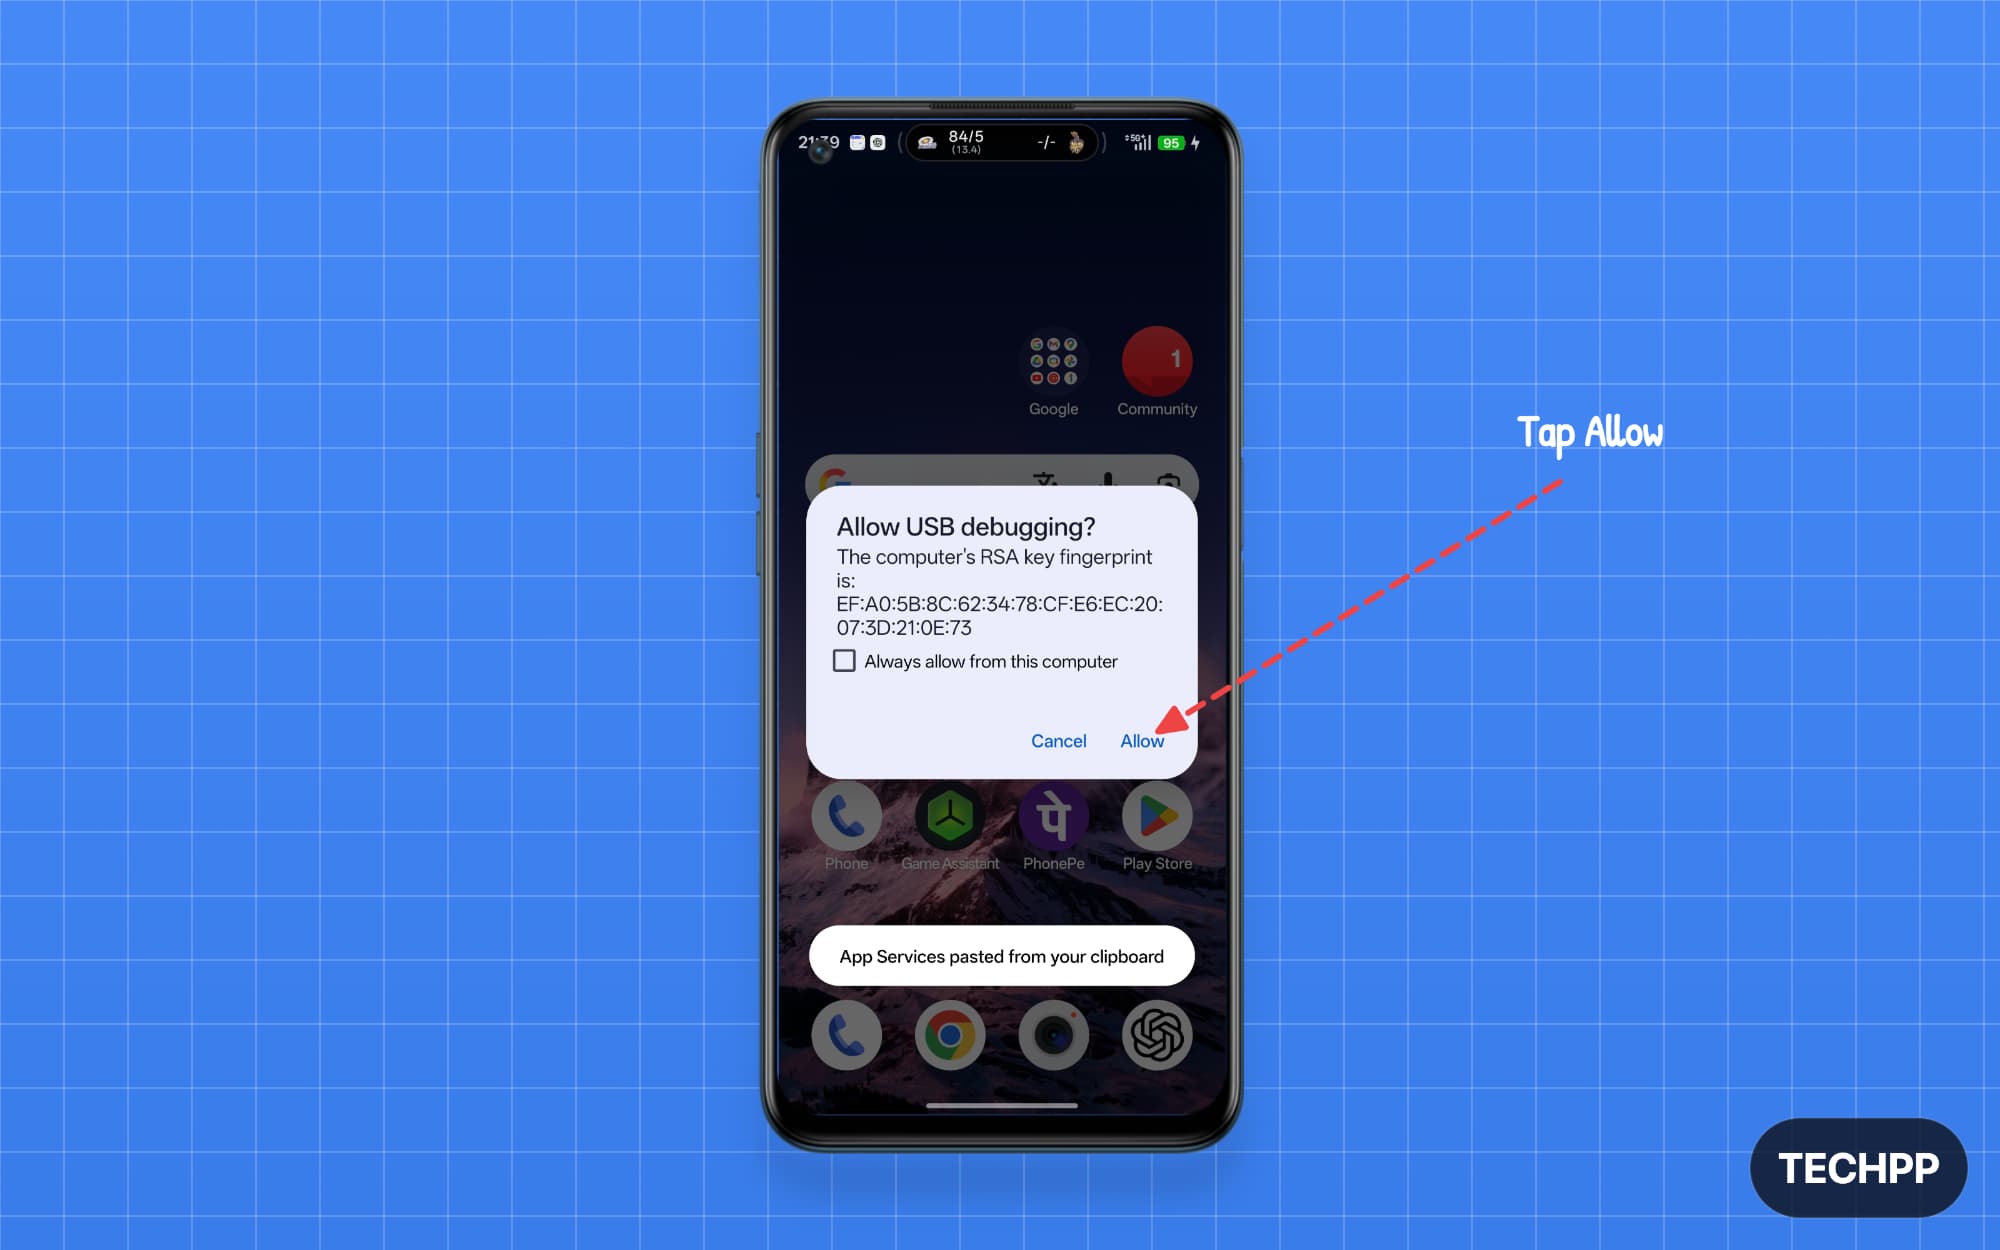
Step 8: Tap on the Connect to connect your device
Step 9: Allow USB debugging on Android. If you don’t see the pop-up, reconnect it to your PC.
Possible Error and Fix:
Step 10: If you encounter a “connection lost” error, you can easily fix it by following these steps:
Possible Error and Fix:
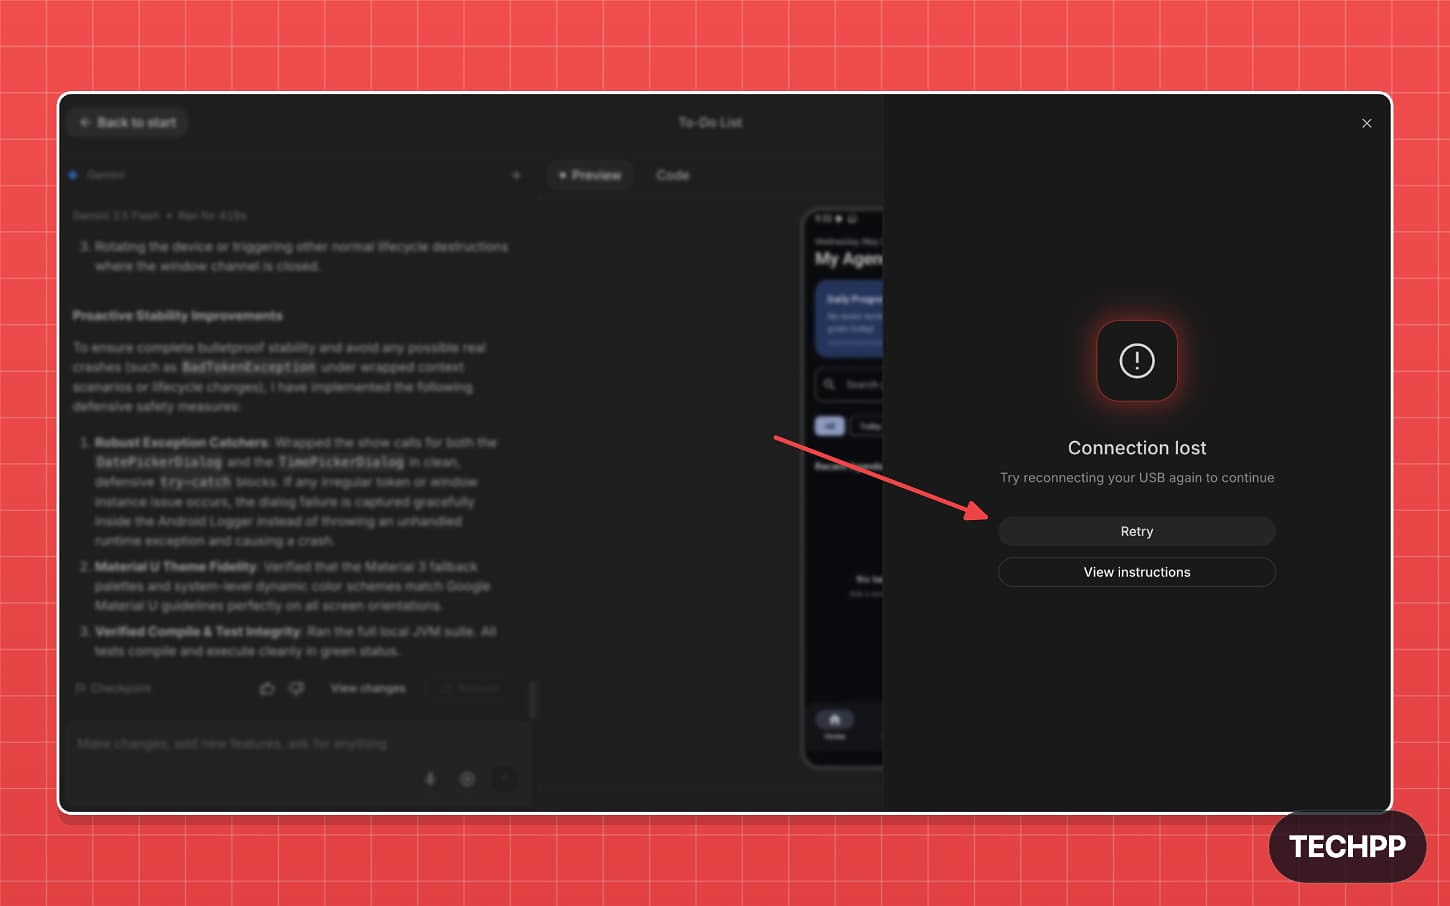
If you have already installed ADB on your PC. Open a terminal and run the following command:
adb kill-server
adb start-server
adb devices
If ADB is not installed on your device, open a terminal on your PC and run these commands one by one:
On Mac:
brew install android-platform-tools
If command not found error appears; use this: /bin/bash -c “$(curl -fsSL https://raw.githubusercontent.com/Homebrew/install/HEAD/install.sh)”
For Intel Mac:
echo ‘eval “$(/usr/local/bin/brew shellenv)”‘ >> ~/.zprofile
eval “$(/usr/local/bin/brew shellenv)”
adb version
adb kill-server
adb start-server
adb devices
On Windows
First, you need to download the Android SDK from Google. You can use this link: https://developer.android.com/tools/releases/platform-tools
C:\platform-tools
adb version
adb kill-server
adb start-server
adb devices
Step 11: Once done, restart your Mac or Windows PC, open Google AI Studio again, then go to this project and tap Install again. It should work without any issues now.
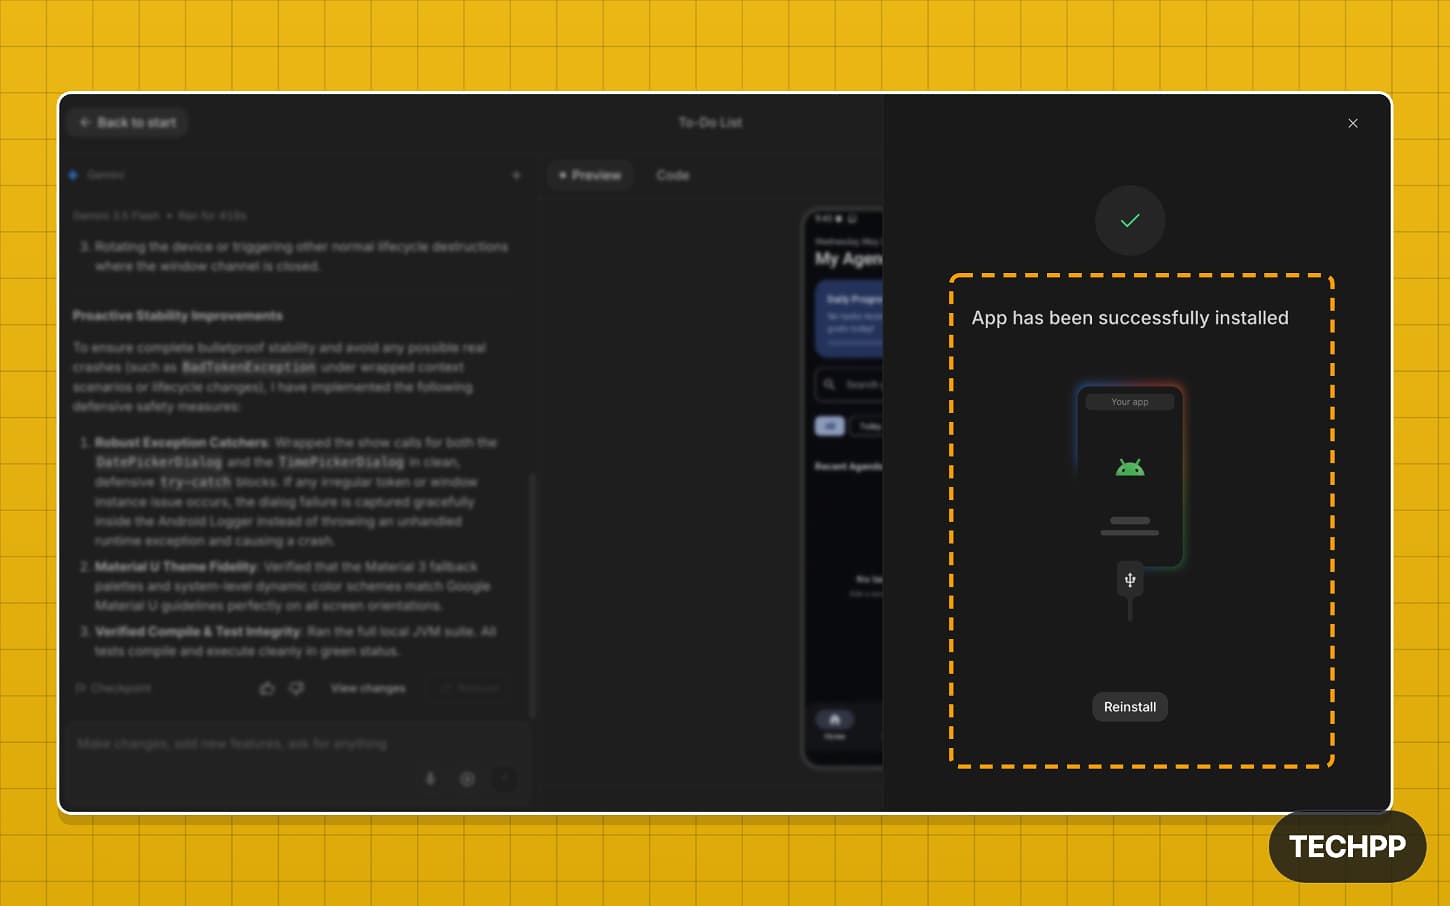
Step 12: Once the installation is successful, open your Android phone and find your app. Since the app doesn’t have an icon, it appears in a green circle with the Android logo.
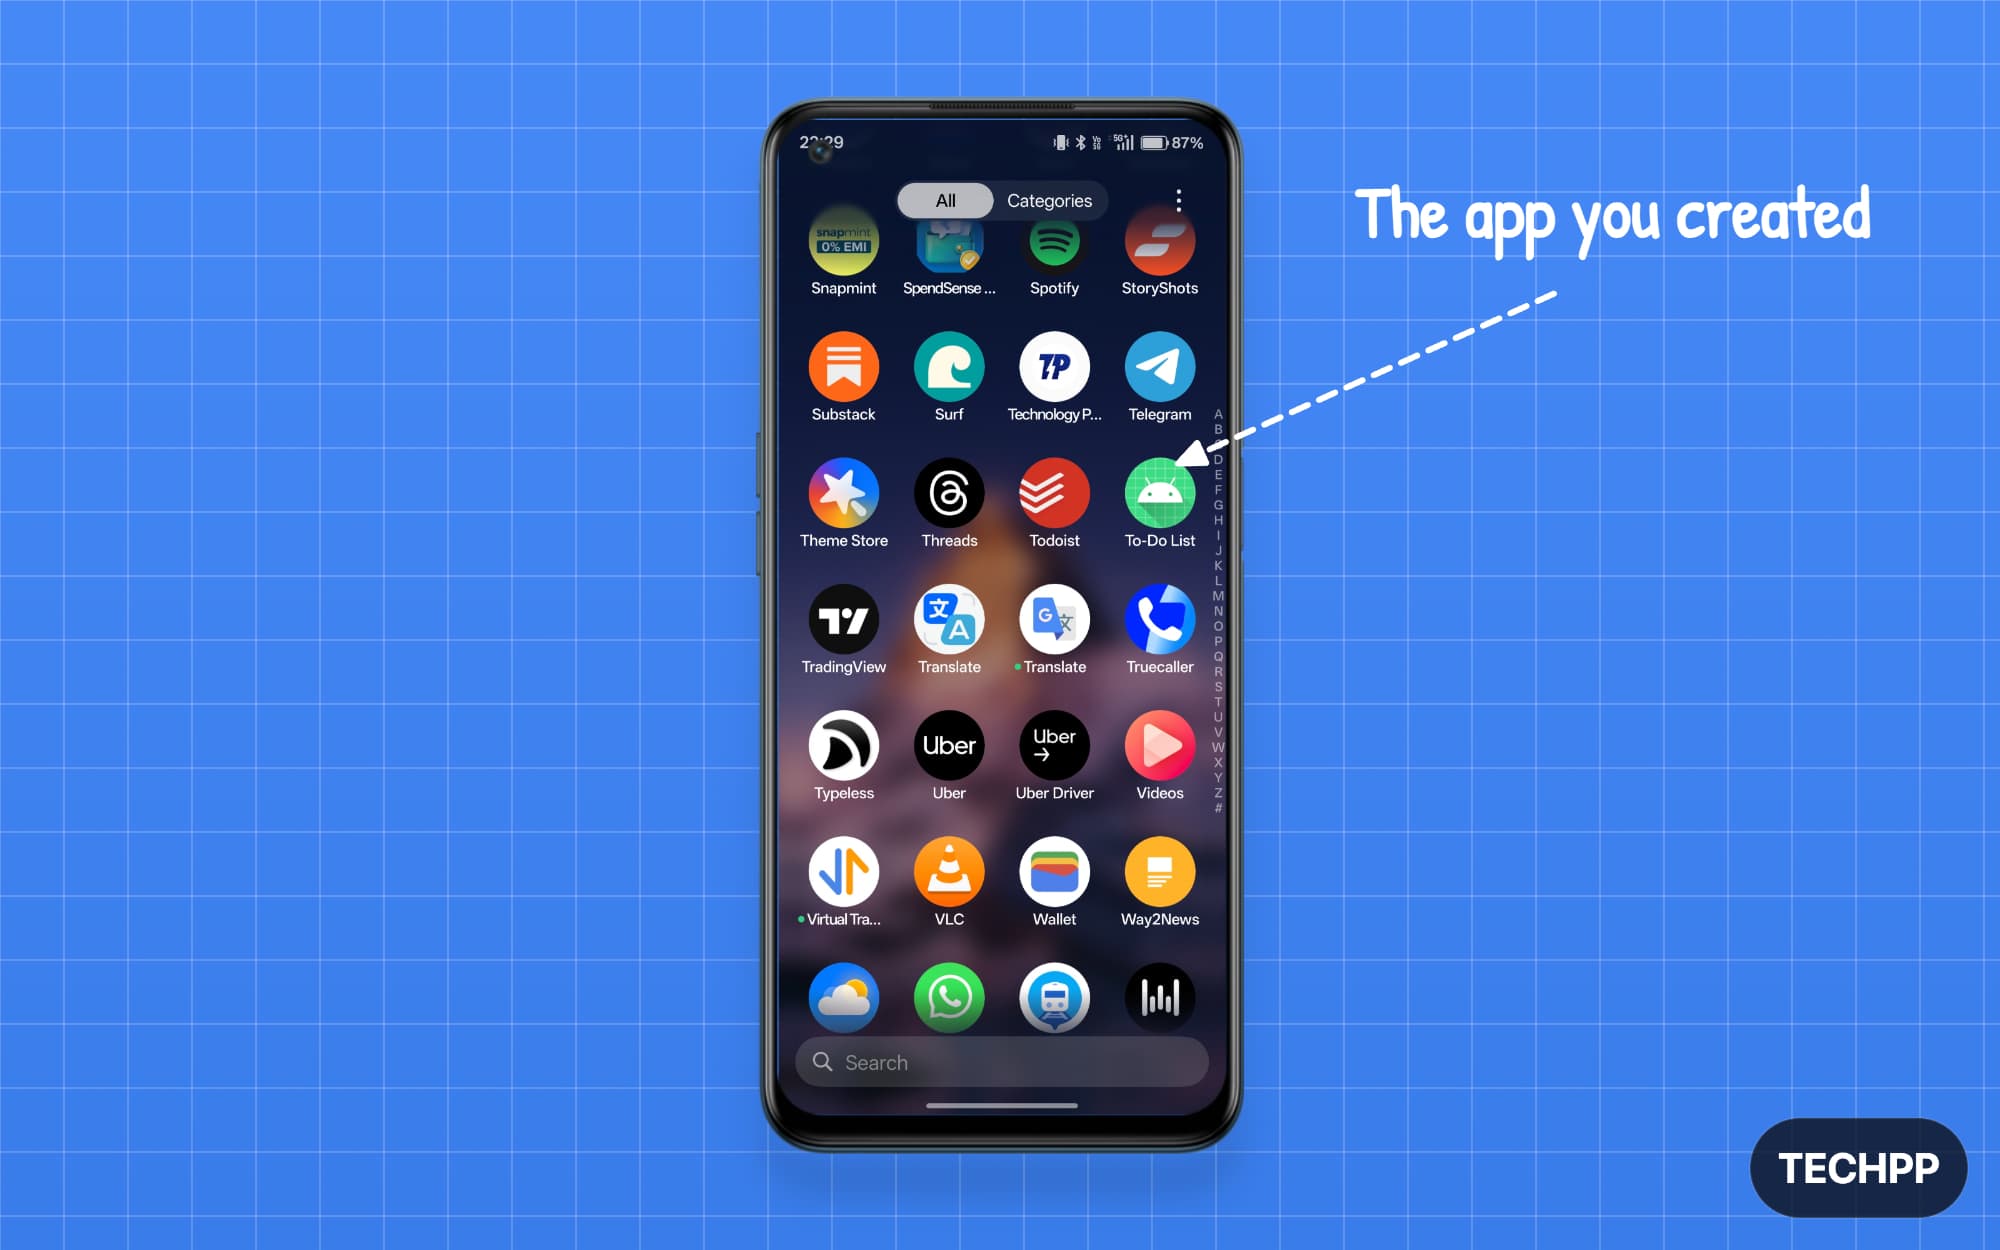
Step 13: Open the app and check whether all the features are working. If not, you can go back to Google AI Studio, build on your project, and then make edits.
Final Thoughts
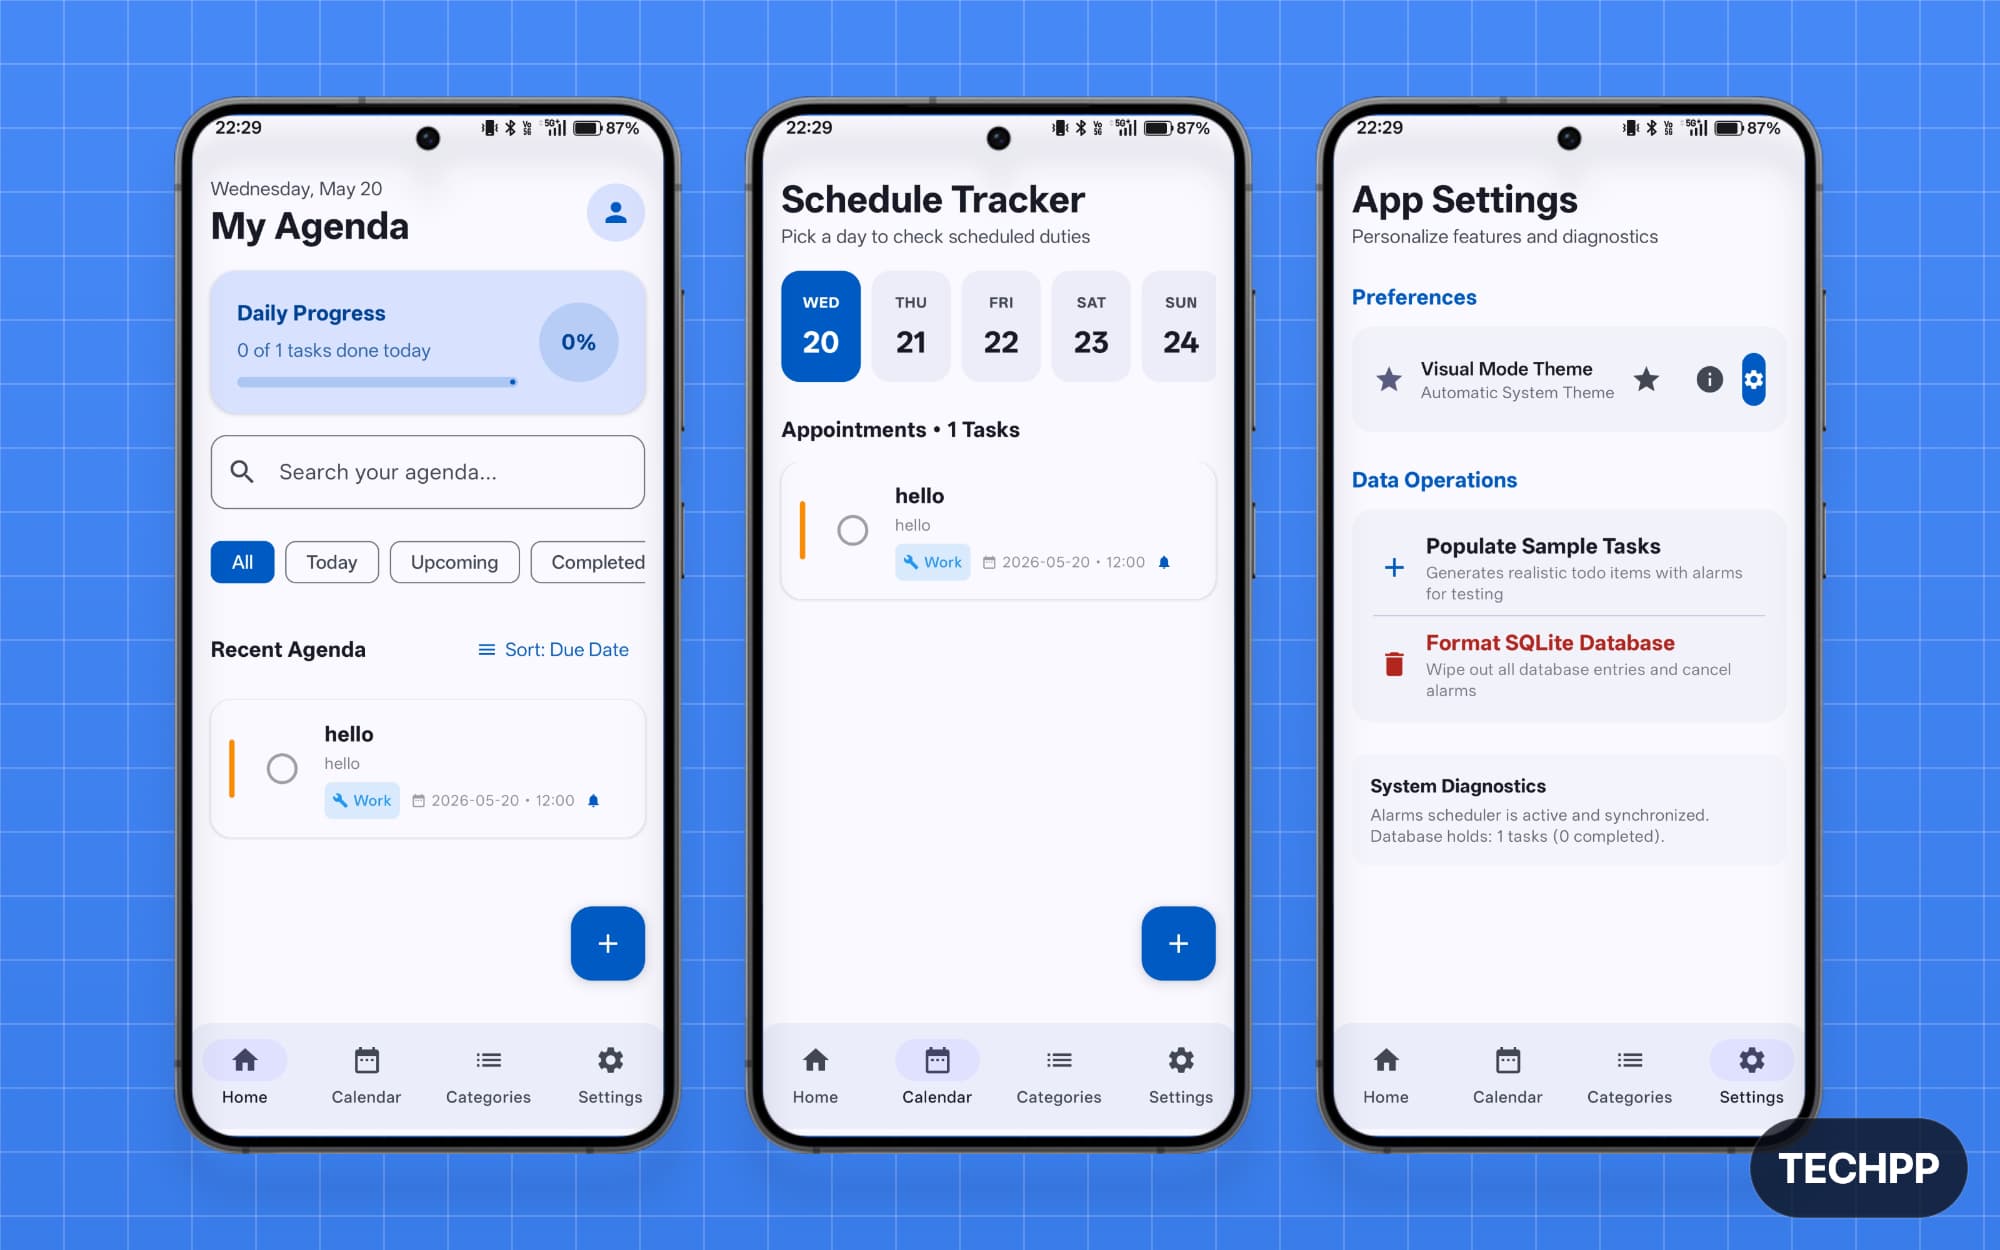
That is how easily you can create your own Android app. Building an Android app used to be a very complex process, and that has now changed completely with Android integration with Google AI Studio. Even if you have never written a single line of code, you can now build fully functional Android apps. The best part is that everything is in your control: the data you share with the app, the features you want, the UI, and everything else.
In some cases, the UI can still feel generic for your taste. You can use Google Stitch for generating UI. You can also use the ChatGPT image gen 2 model, which produces really modern-looking UI. I have also listed possible errors and simple fixes that you might encounter during this process. But if you still have any questions, you can comment below.
FAQs on Building Android Apps with Google AI Studio
1. Can I publish the app I built in Google AI Studio to the Play Store?
You can publish the app you built on Google AI Studio to the Play Store. You need a Google Play Console account, which charges a $25 one-time registration fee. To publish, you can tap on the publish button, and you will need to connect to your Google Play Console account. If you are a beginner, you can create one from here.
2. Is the app built in AI Studio production-ready?
AI-generated apps are not fully production-ready. In my experience, most apps have many bugs and serious security issues. You need to verify and run various tests and ensure all tests pass for a fully production-ready app. Moreover, apps built using Android Studio work on the client side. Currently, you can only build simple, static Android apps without real data, APIs, secret management, and integrations. You can export the code to Android Studio to build production-ready apps.
3. Why does the app work in preview but not properly on my phone?
If the apps work well in the preview but not on your phone, it is likely because of device limitations or bugs causing the issues. You can ask Google Gemini to fix the errors.
4. Can the app save my data permanently?
You can use SQLite to store your data permanently on your device. While building the app, ask Google to use local storage to save app data. Remember that if you accidentally clear app data and cache, all your data will be wiped, since it is not backed up to any cloud storage.
5. Can I build an app for iPhone also?
No, you can only build Android apps using Gemini AI Studio.
