Quick Answer
To back up your Chromebook, go to Google Chrome browser settings, then Google Account, and ensure sync is turned on. Also, go to ChromeOS privacy and security settings and ensure sync is on. If you have local files stored on your Chromebook, move them to the Google Drive folder or transfer them to external storage devices before factory resetting your Chromebook. If you have a Linux IDE setup, Open Settings> About Chrome> Linux development environment > Backup & restore and then create a backup.
Unlike Windows or macOS, ChromeOS doesn’t offer a full backup solution. ChromeOS runs on the cloud, and all the settings and files in Google Drive are automatically synced and backed up. However, files stored locally on your Chromebook and a few app settings require manual backup, and they can be lost if you powerwash your Chromebook without creating a backup of them.
If you want to reset a Chromebook or start a fresh installation, backing up important files is always recommended. In this guide, you will learn how to easily back up your Chromebook, sync data to your account, and move local files to the cloud to back up your Chromebook.
Table of Contents
How to Backup Your Chromebook
Sync Your Chrome Data With Your Account
If the sync is turned on, the Google Chrome browser automatically syncs your browser activity to your Google account. This includes Google Chrome browser settings on your Chromebook, all your bookmarks, browsing history, saved passwords, tabs, autofill, payment information, settings, extensions and more.
Google Chrome sync is automatically enabled on Chromebook; however, you can customize it if you don’t want to sync complete data with Google your Google account.
If the Google Chrome browser sync is turned off, all your data, including the mentioned items, will not be backed up if you factory reset your Chromebook. So, to back up your Chromebook, ensure you sync your Chrome browser data and ChromeOS settings with your Google account.
How to sync Chrome data with your Google account on Chromebook:
- Step 1: Open Google Chrome, click on the three dots menu in the top right corner of the screen and click on Settings.
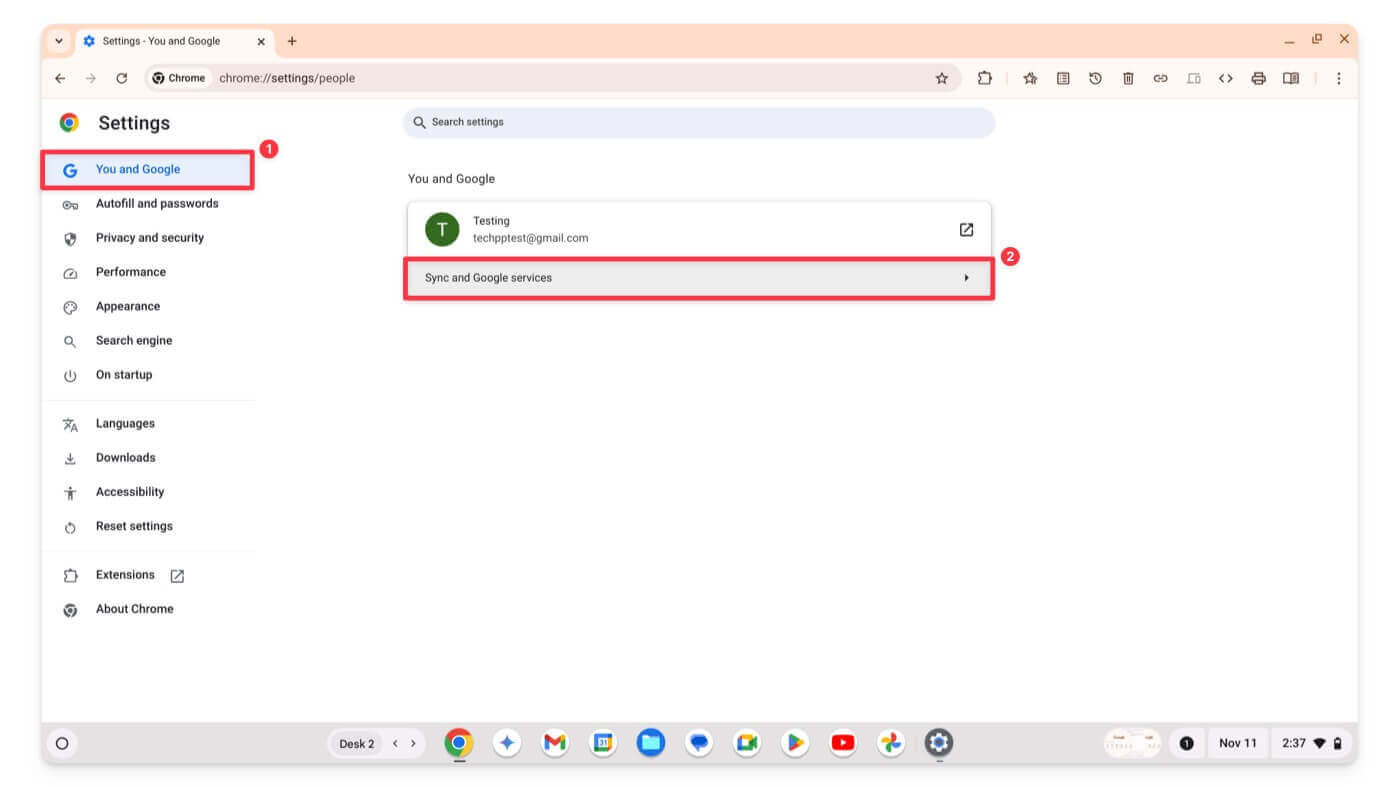
- Step 2: Click the You and Google option in the sidebar and tap Sync and Google services.

- Step 3: Click the Manage what you sync option on the next screen.

- Step 4: Select Sync Everything or Customize Sync to manually select what you want to sync.

This includes bookmarks, extensions, history, settings, themes, reading lists, open tabs, and saved groups. You can scroll down and enable individual options based on your preference.
Once you have successfully synced your Chrome activity with your Google account, if you log in to Google Chrome with the same Google account on another device, your data will be automatically synced.
Likewise, Google Chrome OS allows you to sync apps, networks, themes, and settings, along with Chrome OS data, with your Google account. To enable this,
- Step 1: Go to Settings on your Chromebook.
- Step 2: Click on Privacy and Security, and select Sync and Google Services.

- Step 3: Click Manage what you sync.

- Step 4: Ensure the Sync Everything option is enabled.
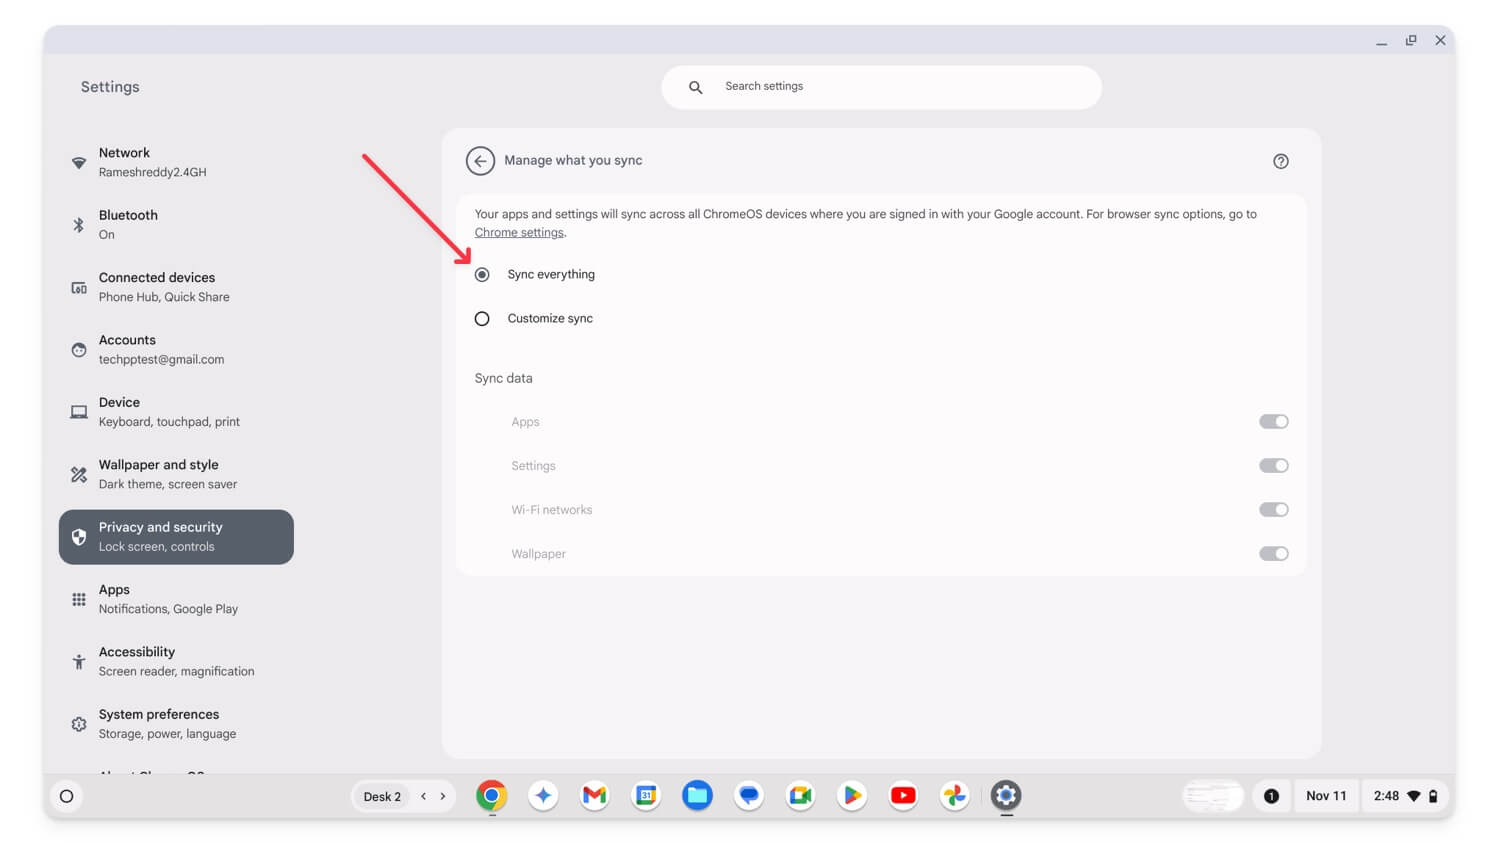
- This will be enabled by default, but if you set Customize sync, you can leave that option and select your preferred data to sync or change it to Sync everything to back up every setting on your Chromebook.
Next time, if you log into the same Google account on another Chromebook or this Chromebook after a power wash, your Chrome settings, app settings, Wi-Fi network, and Wallpaper will be synced and reloaded with your current Chromebook.
Move Local Important Files to Google Drive
If important data is stored locally on your Chromebook, you can move it to Google Drive cloud storage for backup. However, if the files are large, you can use external devices to transfer your existing data before resetting your Chromebook and copying it back to your Chromebook. To do this, open the file manager and follow the steps below.
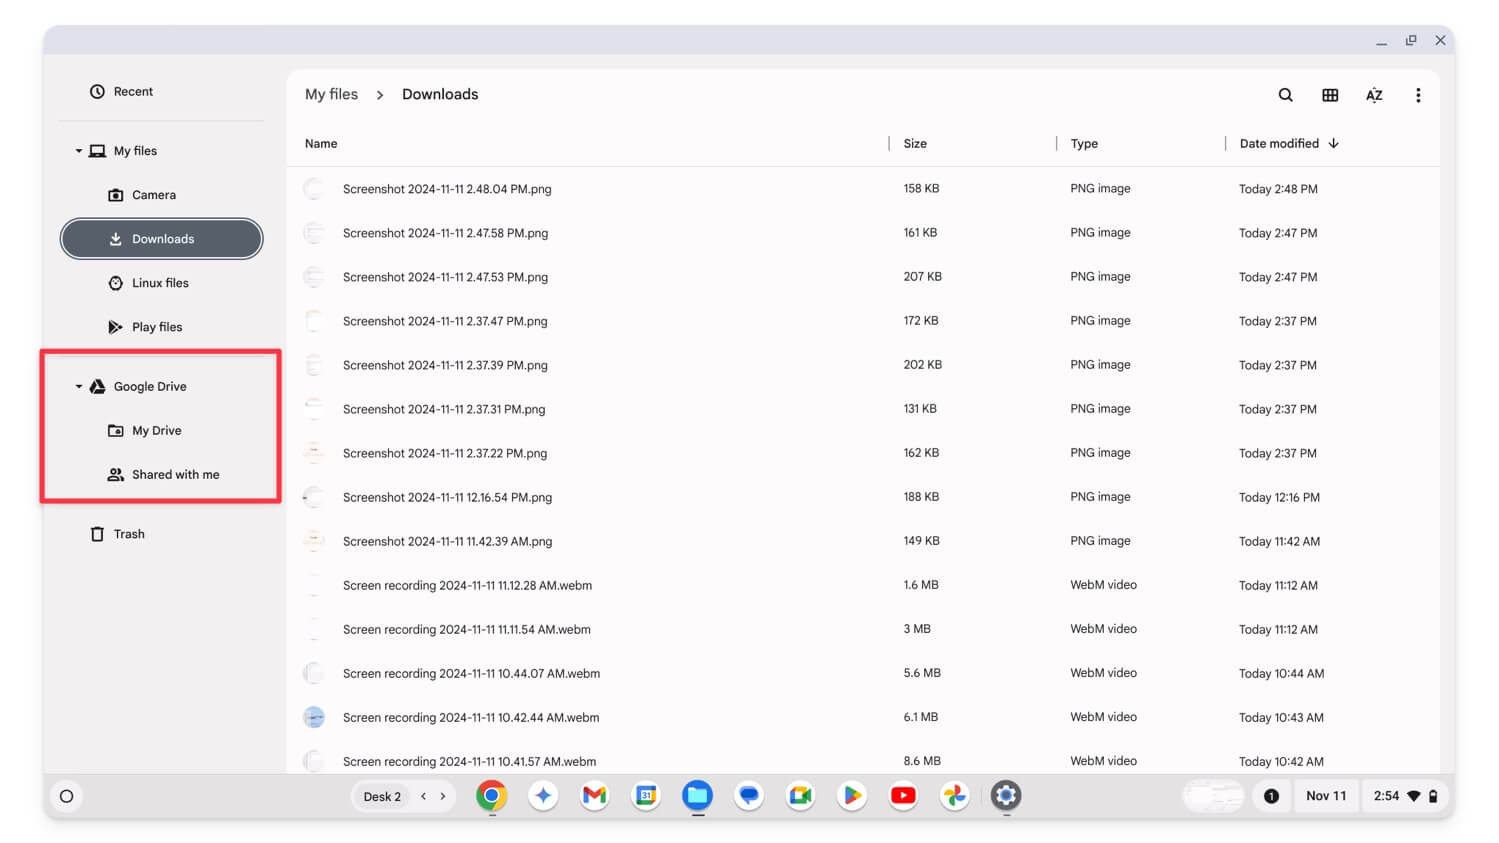
- Step 1: Open the Files app on your Chromebook.
- Step 2: Go to Downloads or Camera, then select the file or multiple files.
- Step 3: Right-click and drag them to Google Drive’s My Drive folder. It might take a few minutes to back up your files, depending on your file size.
Ensure that your Chromebook is connected to the network. Only proceed with Powerwash once the files are visible in the Google Drive folder without a loading icon on the left side of the size column.
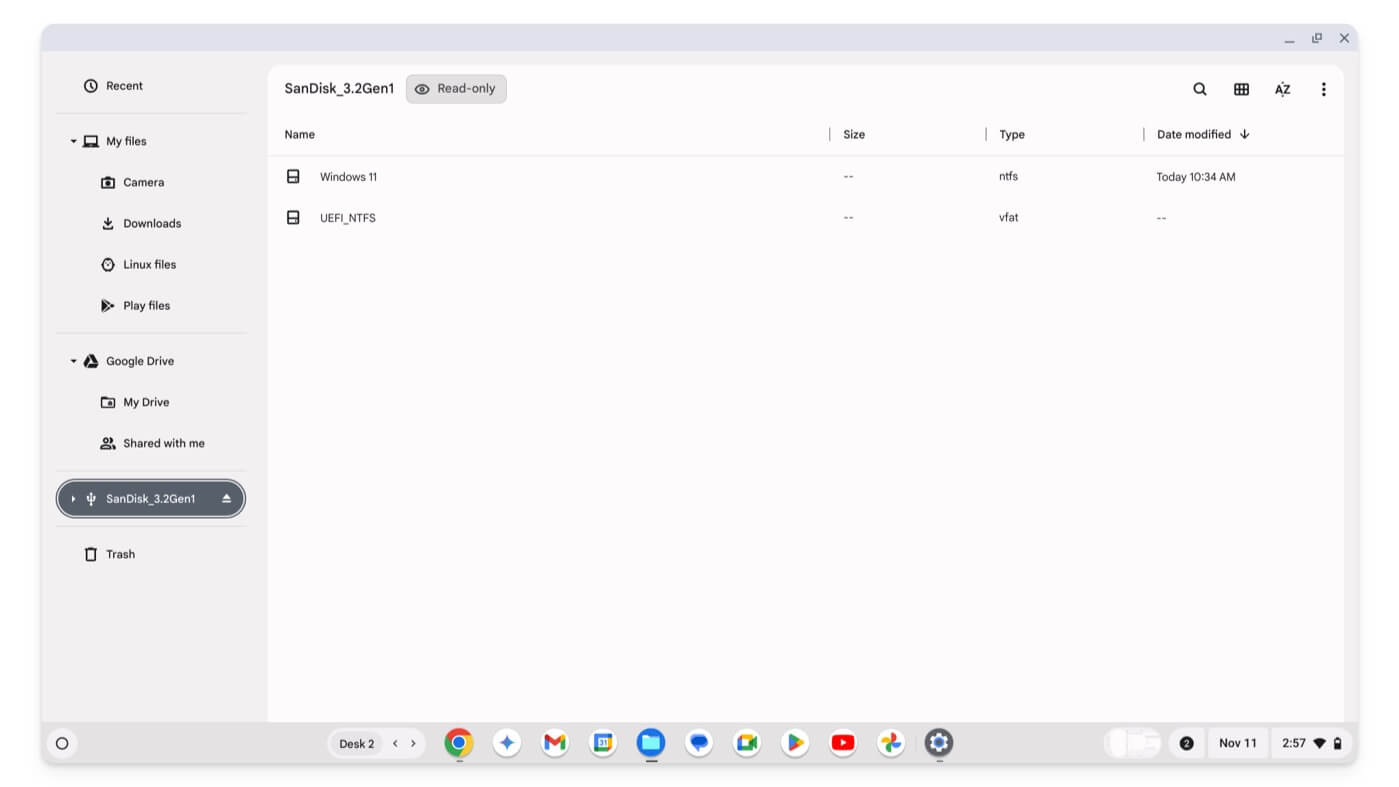
If you use the free version of a Google account, you only get 15 GB of free space. If your local files are larger, you can move them to external storage to prevent data loss. To do this, select the files and then drag and drop them to your external storage drive. After that, you can successfully power wash your Chromebook, return the drive, and transfer your data to your Chromebook.
Backup Your Linux Environment
If you have set up the Linux development environment, Chrome OS allows you to manually back up and restore your Linux environment. There are different ways to back up your Linux files. You can copy important files from your Linux folder to your Google Drive or the Linux backup tool to back up selected files from the settings using the manual backup.
Advanced users can also use Linux commands to copy files directly to shared folders or external files for automatic backup. Here is how to back up your Linux environment on your Chromebook.
To manually back up Linux files:

- Step 1: Open File Manager on your Chromebook.
- Step 2: Go to Linux files, select the files you want to back up and move them to the My Drive under the Google Drive section or to external storage devices.
To back up files using the Linux backup tool:
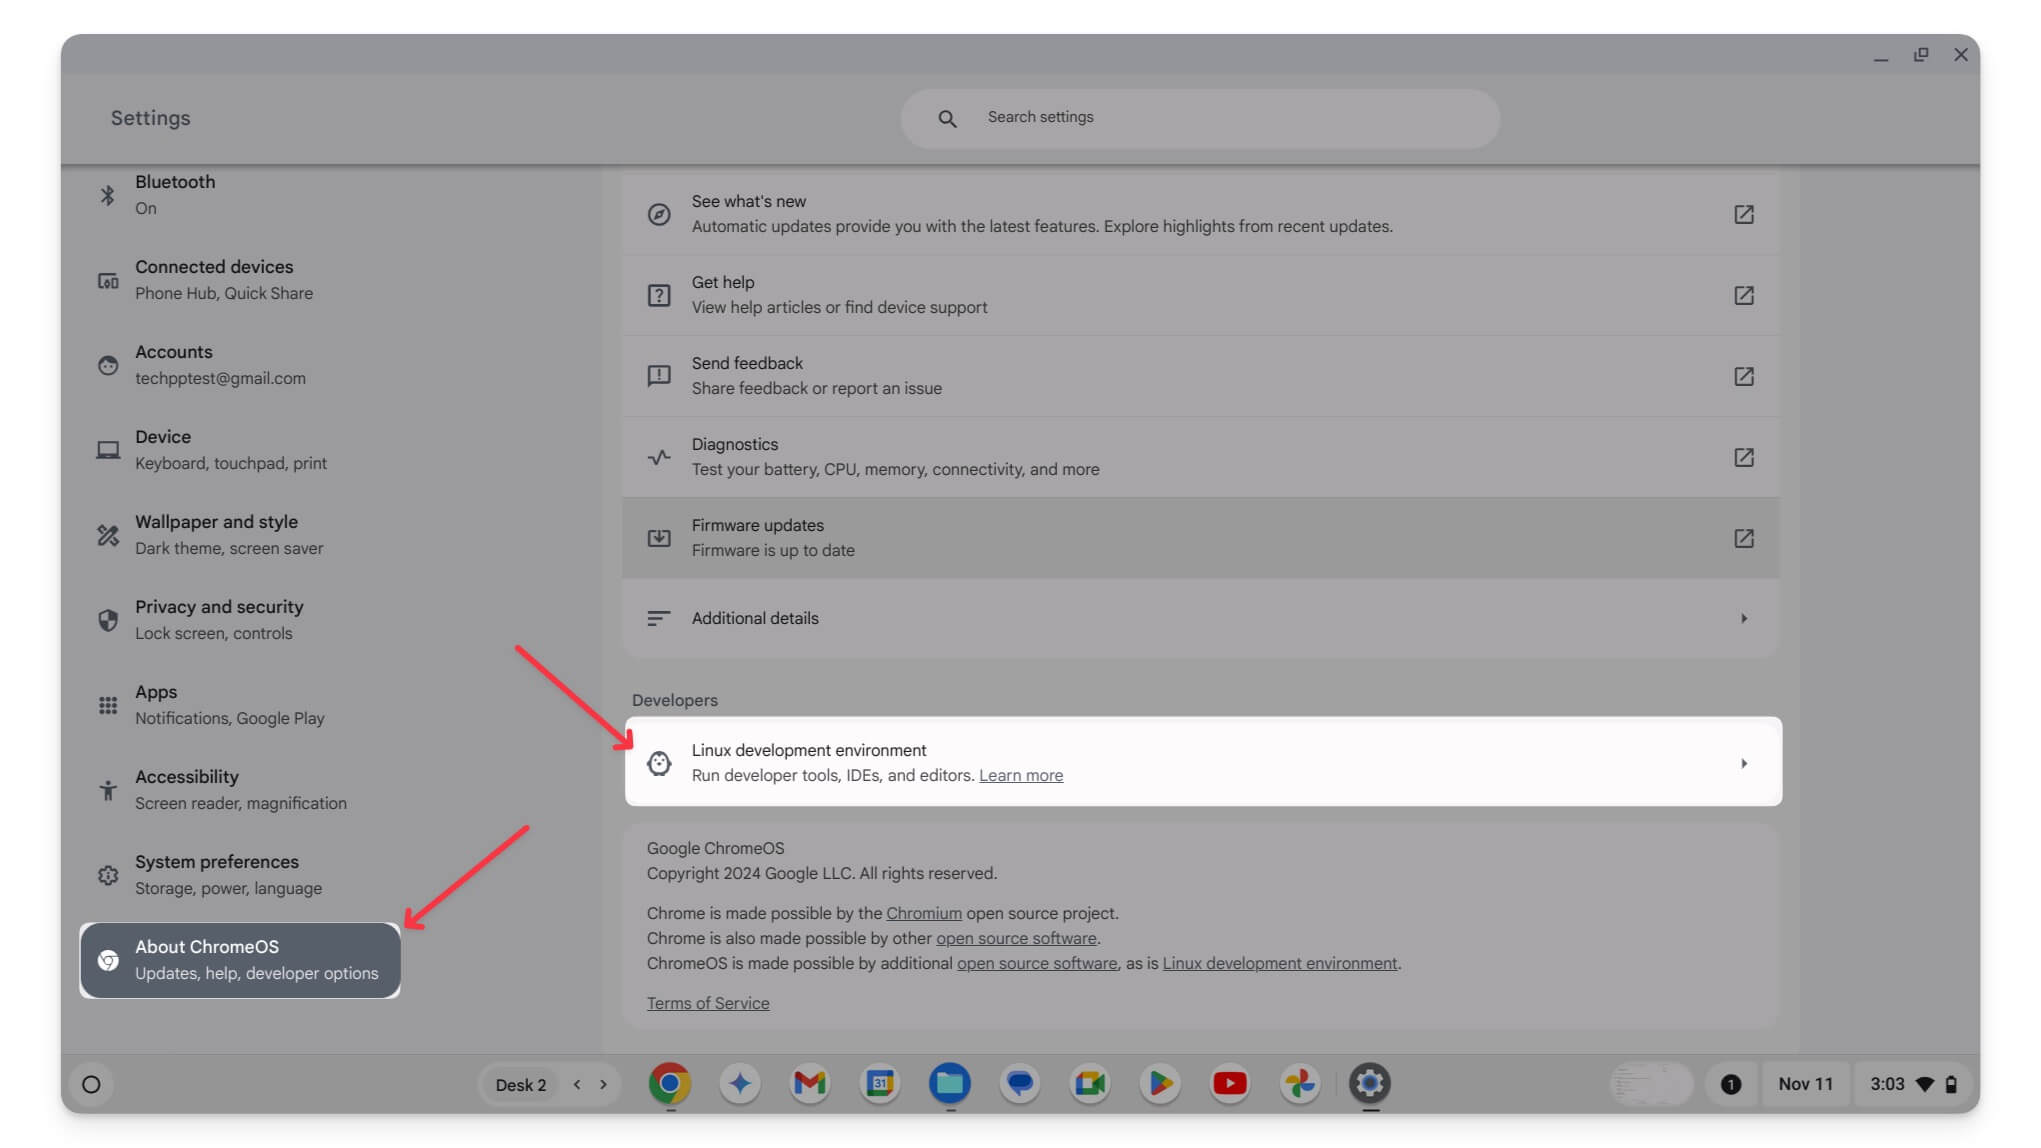
- Step 1: Open Settings, scroll to the bottom and click About ChromeOS. Click on the Linux development environment under the Developers section.
- Step 2: Tap on Backup and restore.

- Step 3: Click Backup next to Back up Linux apps and files. This will open a file manager.
- Step 4: Store the backup in Google Drive or an external drive.
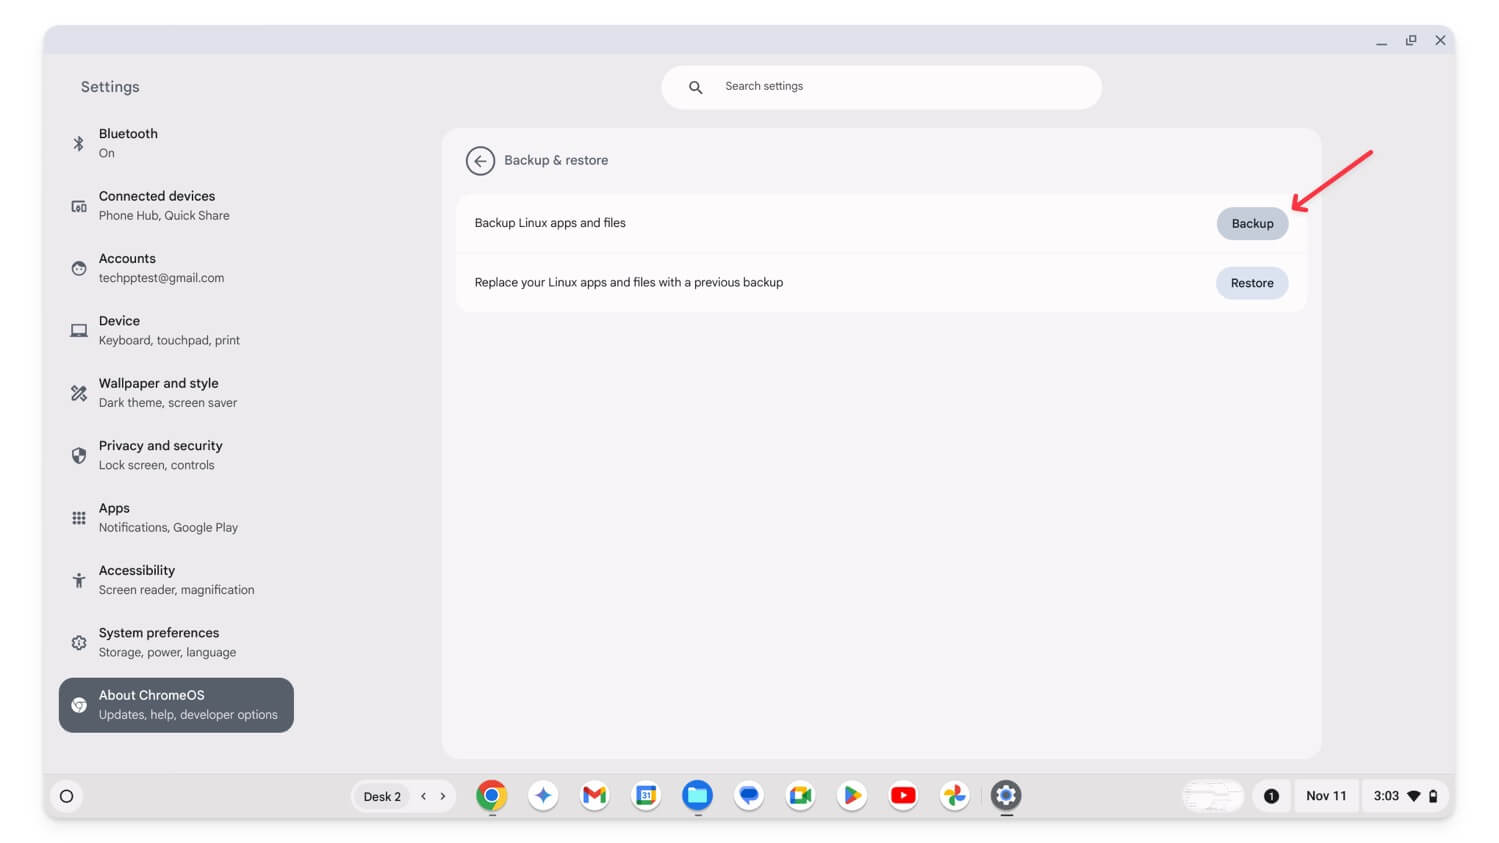
- Step 5: Click on Save. This creates a backup of your file that you can move to Google Drive or external storage.

How to Restore Backup After Performing a Factory Reset
To back up your Chromebook settings and other data, while setting up, use the same Google account you used previously to back up your Chrome OS settings. Finally, you can download the files uploaded to Google Drive and transfer the files you moved back to external storage to restore local files.
Similarly, to back up your Google Chrome browser settings, Open Google Chrome on your Chromebook and sign in with the account you use for the backup. While signing in, if prompted, allow Google Chrome to Sync. In most cases, Chrome automatically restores your browser data and settings.
Back-Up All Important Data on Your Chromebook
Unlike Windows and Mac, factory resetting a Chromebook is easy, and you can do it in simple steps using shortcuts. I often recommended users factory reset their Chromebooks to fix bugs associated with the OS. You should back up your Chromebook before the factory resets it. I hope you find this guide helpful.
FAQs on Backing up Chromebook
How do I know if Chrome Sync is turned on for my Chromebook?
To check if Chrome sync is enabled on your Chromebook, open Google Chrome, click on the three-dot menu, and go to Settings. Then click on You and Google and select Sync and Google services. Here, ensure that Sync everything is selected. To sync your Chrome OS data with your account, go to Settings, click on Privacy and Security, select Sync and Google services, then click on Manage what you sync and enable Sync Everything to sync all data.
Can I choose specific items to sync rather than syncing everything, and what happens if I only sync some items?
You can sync specific data rather than syncing everything on your Chrome browser and Chromebook. Follow the same steps discussed above to access the Sync Everything settings, and then from there, select Customize Sync on the Chrome browser and in the settings. Select the data you want to sync and ensure the remaining options are turned off.
How do I back up locally stored files on my Chromebook if I don’t have enough Google Drive space?
In my experience, the best method for limited Chromebook storage is using an external device or creating a new Google account for free, which gives you 15 GB of free storage. This can be used to upload the remaining data on your Chromebook.
Can I recover the lost data if I accidentally reset my Chromebook without backing up?
Unfortunately, once you have reset your Chromebook, you cannot recover your data, and all your data, including local files, will be removed. However, if sync was turned on previously, you might be able to recover synced data from your Google account, including Chrome data or Chrome OS data linked to your Google account.
