Quick Answer
ShareX is a free and open-source screenshot and screen recording tool for Windows. It packs a bunch of screenshot and screen recording modes alongside comprehensive annotation and editing tools, which are missing in the Snipping Tool. You also get support for batch operations and automation, and additional utilities like Image Beautifier, Ruler, Color Picker, and OCR.
Your Windows PC comes pre-installed with Snipping Tool—Microsoft’s native tool for capturing the contents on your screen. It’s easy to use and includes all the basic functions to serve the needs of most users.
While Microsoft updates Snipping Tool quite regularly to enhance its functionality, it still lacks many useful features, which makes it less ideal for those who frequently capture screenshots or recordings on their Windows PCs. This is where third-party screenshot tools, like ShareX, come into play.
Here’s what ShareX does better and why you should use it over Snipping Tool on your Windows PC.
Table of Contents
Advanced Screen Capture Modes
A major shortcoming of the Windows Snipping Tool is that it offers limited screen capture modes—your options are limited to Rectangle, Windows, Full Screen, and Freeform. As a result, you can’t capture scrolling screenshots or automatically capture screenshots at set intervals, for instance.
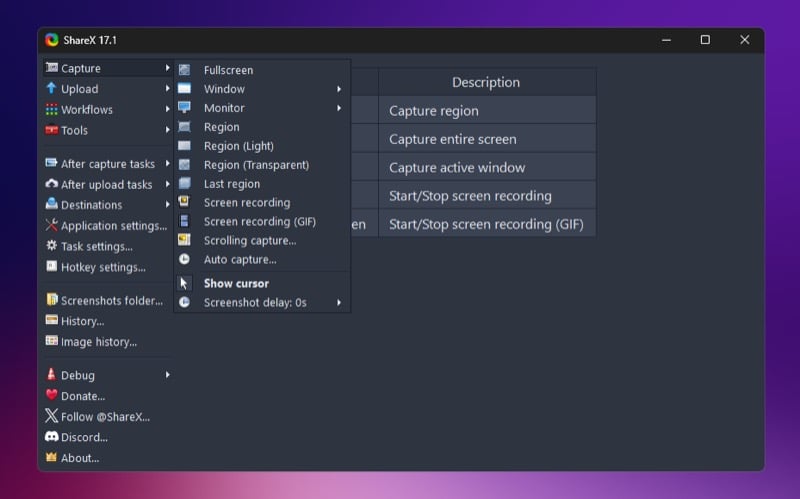
ShareX, on the other hand, offers many advanced capture modes in addition to the basic ones available with Snipping Tool, such as full screen, window, delay, and more. Some of the notable ones include:
- Last Region: Allows you to re-capture the last region on the screen you captured. That way, you don’t have to select the same area repeatedly.
- Scrolling Capture: Lets you capture content that extends beyond what’s visible on the screen. You can use it when you want to take a screenshot of a long list of items, such as the settings menu, spreadsheets, webpages, or chat logs.
- Auto Capture: Offers the ability to automatically take screenshots of the specified area on the screen at a set interval. You’ll find it most useful when you want to document a process or monitor the progress of a task.
- Monitor: Enables you to capture the screen content on a specific monitor in a multi-monitor setup. The tool automatically identifies the monitor to capture based on your mouse cursor.
Advanced Screen Recording Options
Just like advanced screen capture modes, Snipping Tool also lacks advanced screen recording options. For example, it doesn’t allow you to record content in a specific region on your screen. As such, you’ll need to edit the clip later to crop out unnecessary elements or hide sensitive information (if it has them), which can be quite time-consuming.
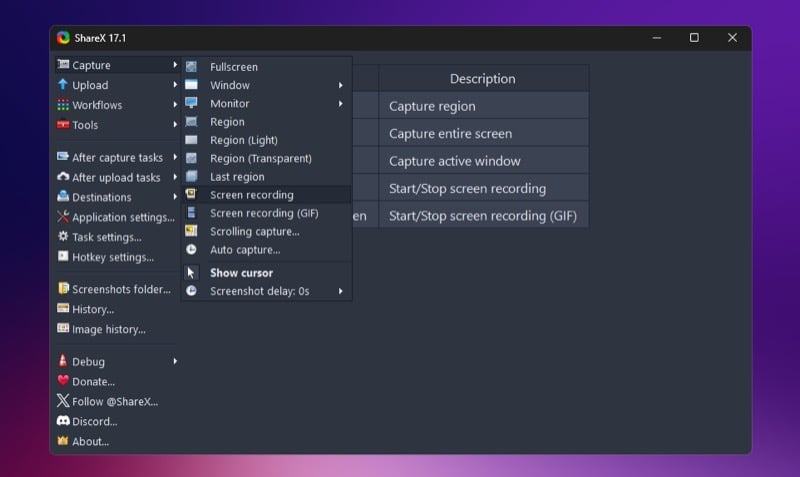
Meanwhile, with ShareX, you aren’t forced to record the entire screen; you can choose a specific area of the screen you want to record. This way, you can draw focus solely on items on the screen that matter. What’s also nice about this mode is that it makes picking the region you want to record super easy. For this, it outlines the area as you hover over it, which you can then tap on to begin recording. You can also record the screen as a GIF.
Aside from focused screen recording, ShareX also offers several customization options to give you control over various aspects of your screen recordings. For example, it allows you to choose your preferred audio and video encoders based on where you plan to use the recording. Similarly, you can adjust the frame rate—setting it to a lower FPS for static demonstrations and a higher FPS for games.
Other aspects you can configure include bitrate, preset, start and end times, and more. You may also choose to hide or show the cursor in your recordings depending on your requirements.
Related: Best Screen Recording Apps for Windows 11: Record Your PC Screen with Ease
Comprehensive Annotation and Editing Tools
The Windows Snipping Tool comes with very few annotation tools, like Pen, Highlighter, Eraser, Shapes, and Crop, which are the bare minimum for basic annotation, and lacks some essential and advanced tools. Hence, you’ve to rely on additional (read more capable) apps to edit your screenshots.
This isn’t the case with ShareX. The tool has a capable built-in editor with a comprehensive set of editing and annotation tools. This includes Blur and Pixel to blur and hide sensitive information in screenshots, respectively, Speech Balloon and Number for tutorial-style annotations, and Magnify to highlight important elements in screenshots.
There’s also a Smart Erase feature, which erases elements from the screenshot while matching and replacing the erased pixels nearby to give you a cleaner look. You can use it when the traditional Erase tool doesn’t work well and leaves botched spots on the screenshot.
Similarly, ShareX offers advanced text and shape customizations, with customizable colors, sizes, effects, and opacity. Additionally, it allows you to automate some of the basic annotation tasks (more on this below). Thus, simplifying your workflow.
Batch Operations and Automation Capabilities
ShareX supports various kinds of editing and annotation operations, allowing you to make changes to screenshots natively. While you can use these tools on your captured screenshots individually, there’s also the ability to apply operations to multiple items at once, which can save you time and effort.
Some of the operations that you can perform on your screenshots in bulk include applying image effects, adding watermarks, converting formats, saving with custom names, and generating thumbnails. You can also automatically upload processed images to your preferred cloud storage or sharing service. Note that you’ll need to configure the service first by going into Destinations under Application Settings.
Besides bulk operations, ShareX also supports automations. An automation is a personalized workflow you can set up to execute a series of tasks on your screenshots automatically. You can create automations that run after taking a screenshot or performing other operations.
For example, you can create an after-capture task that automatically resizes the screenshots to 1200px as soon as they’re captured. Similarly, you can set up an automation that renames the screenshot per your preferred naming scheme and saves it to a folder of your choice. This way, you can save yourself the hassle of performing those actions manually after taking the screenshots.
Additional Utilities for Extra Functionality

Aside from offering multiple capture modes, a better editor, and automation capabilities, ShareX includes a bunch of additional tools. These tools let you do more than just capture the screen and edit the screenshot or recording—all in one place.
For example, you can use ShareX’s Image Combiner tool to combine multiple images into a single image. Then, there’s Image Thumbnailer, which automatically generates thumbnails of images, and Image Beautifier, which enhances images by applying filters, effects, and custom backgrounds.
Similarly, ShareX also offers Ruler to help measure dimensions, distance, and angles on the screen, Color Picker for getting color values from various elements on the screen, OCR for extracting text from screenshots, Metadata to learn and remove location data from files, and QR Code for scanning QR codes in screenshots.
Related: How to Turn on Hidden OCR Feature in the Windows 11 Photos App
Extensive Customization Options

You can use many of the ShareX features as-is. However, the tool offers extensive customization options, allowing you to customize pretty much every aspect, from capturing screenshots to editing and sharing them.
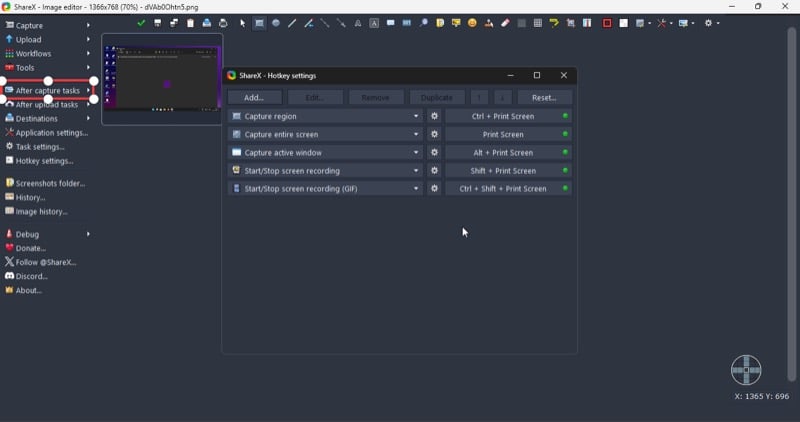
To give you an idea of the possibilities here, you can create custom keyboard shortcuts for various capture modes and workflow actions to run them quickly. Similarly, you can configure where screenshots are saved, customize the filename pattern, and configure image and video settings.
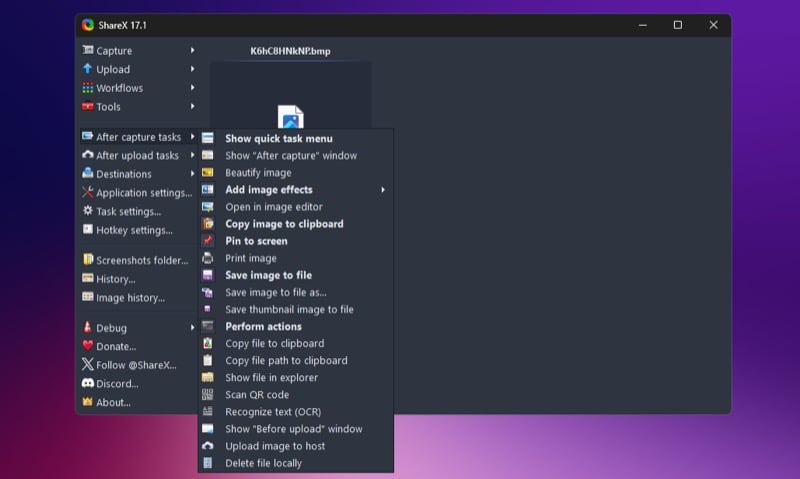
Then, there’s the ability to customize the right-click menu to show or hide specific capture methods and tools based on your needs and configure the quick task menu, which appears post capture, to view your preferred actions.
Besides, ShareX also lets you customize the startup behavior, disable UI elements not required (for a cleaner experience), and back up configurations into a JSON file to transfer your setup between machines or after installation.
Improve Your Screenshot Workflow on Windows With ShareX
Those were some of the key reasons to consider replacing Snipping Tool with ShareX on your Windows PC. Aside from these, ShareX also offers a few other perks, which you’ll discover as you use it.
The best part? ShareX is open-source and completely free. So, go ahead and download ShareX on your PC today to improve your screenshot workflow.
If you’re not sold on the ShareX features, there are several other screenshot apps for Windows that you can explore.
