Quick Answer
You can bypass website age restrictions using two reliable methods: connect to a VPN and set your location to a country without mandatory verification, or use NextDNS, which offers a built-in bypass feature that masks your DNS requests to avoid checks. Both methods help if you’re falsely flagged as underage.
There have been several reports of children being exposed to harmful and inappropriate content through digital platforms. To safeguard children, many governments around the world have started imposing strict age verification methods to prevent minors from accessing content that can negatively impact them.

Recently, YouTube has announced its AI-based age verification method to find users’ age based on their search history, content they watch, and their Google activity. Many Redditors have also reported that Google is imposing age verification methods on other platforms, including Google Search.
Also, as per the UK Online Safety Act 2023, all platforms in the UK now require age verification methods before accessing their platforms.
While age verification can help prevent minors from being exposed to harmful content, many current methods require all users to submit sensitive data like government IDs, selfies, or biometric scans to some third-party apps, which can be misused by some providers.
Also, AI-based verification methods can falsely flag you as a minor and impose restrictions on your account, plus many websites also have a slow verification process. Fortunately, there are still methods you can use to bypass age restrictions.
And we at TechPP have created this guide for educational purposes only to help people who are falsely flagged as minors on their accounts and prevented access, or someone who doesn’t want to submit their sensitive data, and who wants a guide for educational purposes.
Table of Contents
How to bypass age verification
Method | Steps (How to Use) | Limits |
|---|---|---|
Use VPN | 1. Install VPN app (e.g., ProtonVPN, NordVPN) 2. Connect to a country without age verification 3. Clear cookies/cache & disable GPS 4. Access the site again | Slower speed, some sites detect/block VPNs |
Use NextDNS Bypass Age Verification Feature | 1. Create NextDNS account & profile 2. Enable Bypass Age Verification in settings 3. Copy your Config ID 4. Add Config ID in device DNS settings (Android, iOS, Windows, Mac, etc.) | Needs setup, May not work on strict ID-based sites (currently its not working for X (Twitter) |
Use VPN (Bypass geo restriction)
Governments around the world have implemented several methods and laws for online child safety, and have recently been rolling out age verification methods.
However, it’s not implemented in all countries yet. For instance, if you live in the UK, age verification has already been made mandatory for users in the UK, and all users are required to verify their age to access certain platforms.
However, if you want to bypass, you can use a VPN and set it to any location that doesn’t have an age verification method, and easily bypass age verification on your device.
Here is the list of countries that have not yet implemented age verification.
| Country | Country | Country |
| United States (limited) | Canada | Australia |
| India | Japan | South Korea |
| China | Indonesia | Saudi Arabia |
| United Arab Emirates | Turkey | Brazil |
| Mexico | Argentina | South Africa |
| Nigeria | Spain | Netherlands |
| Sweden | Poland | Czech Republic |
| Denmark | Ireland |
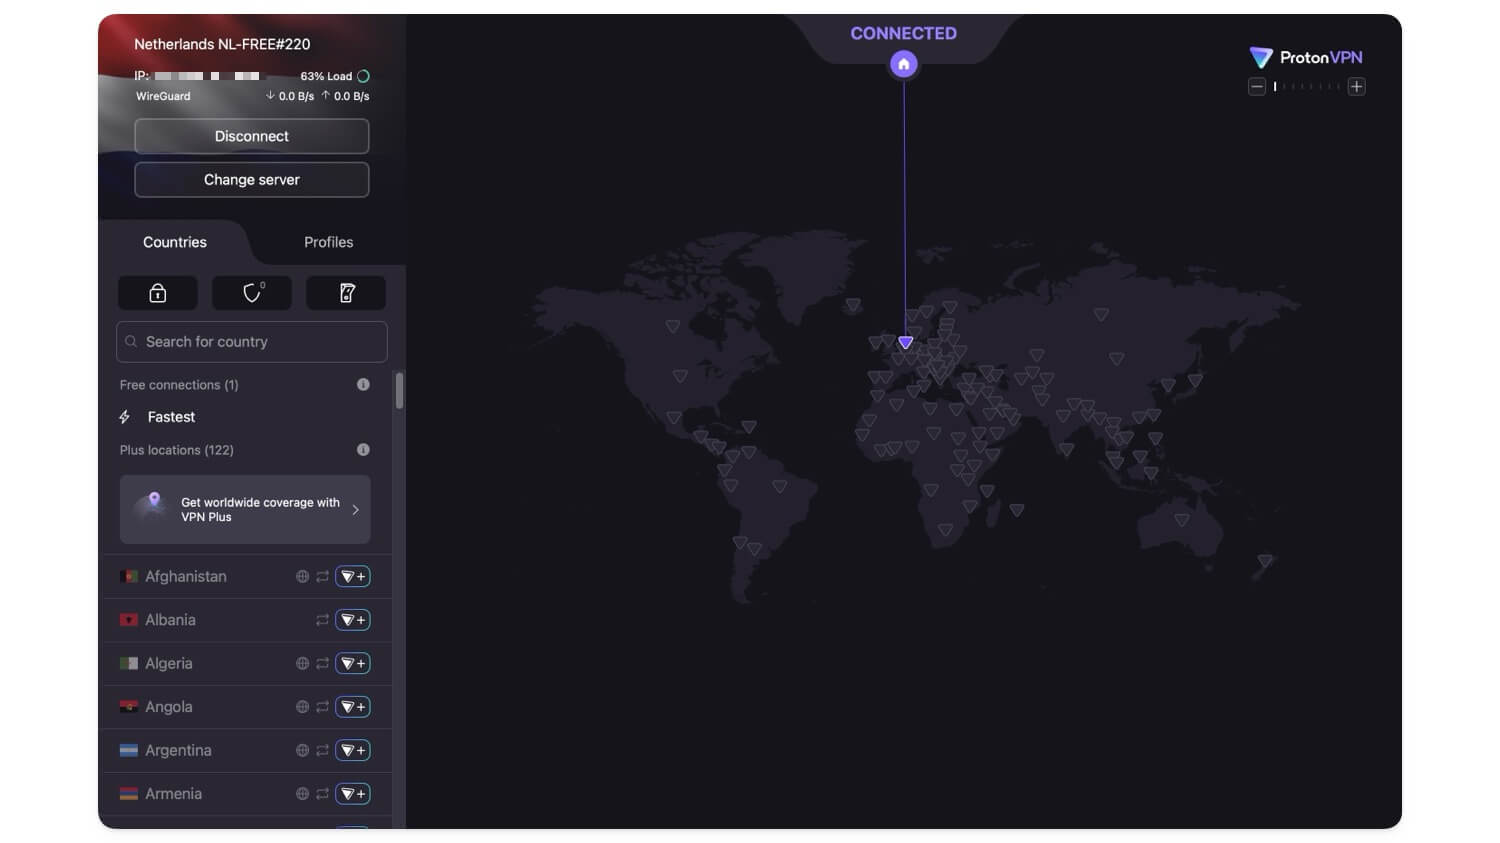
How to use a VPN
Install any free VPN app, Proton VPN or Nord VPN are the two best options available on all platforms.
- Open the VPN and connect to the server in any country listed on this table above, and access the service.
- Some services require you to reverify with your account; you can reverify and start using the platform without any age verification requirements.
And also, it is recommended to clear cookies and cache before visiting the site, and also turn off GPS, since sites can also trigger age verification based on your GPS location. If you are still getting blocked, try using any incognito or third-party browser.
Use NextDNS to bypass the age verification feature
Many services have already started offering a bypass age verification feature to help you bypass age verifications imposed by these websites. NextDNS is one of them, which announced a dedicated age-bypass feature.
It works very similarly to a VPN, but instead of rerouting your traffic completely, NextDNS uses just the DNS request to make you look like you are accessing the site from another country and restricts age verification. Since this is not rerouting your traffic completely, it is significantly faster than using VPNs.
How to use NextDNS to bypass age verification
NextDNS also comes with a free version, which allows you to make up to 3,00,000 requests per month, more than enough for a regular user browsing the internet. It comes with different setups for all the platforms. Here is how you can set up on Android, iOS, macOS, Windows, Linux, and ChromeOS.
If you already use NextDNS, you can directly go to your dashboard settings and turn on this new bypass age verification feature. It will automatically apply to all your devices using NextDNS with the same configuration ID. \
However, if you are new, first you need to create an account, then create a profile, and generate a configuration file for the profile. For each profile, you can configure different settings such as ad blocking, tracker blocking, controlling website access, bypassing age verification, and more.
Step 1: Create your configuration file
Open any browser and visit NextDNS and sign up for your account. Once you create it, you will be redirected to the NextDNS dashboard.
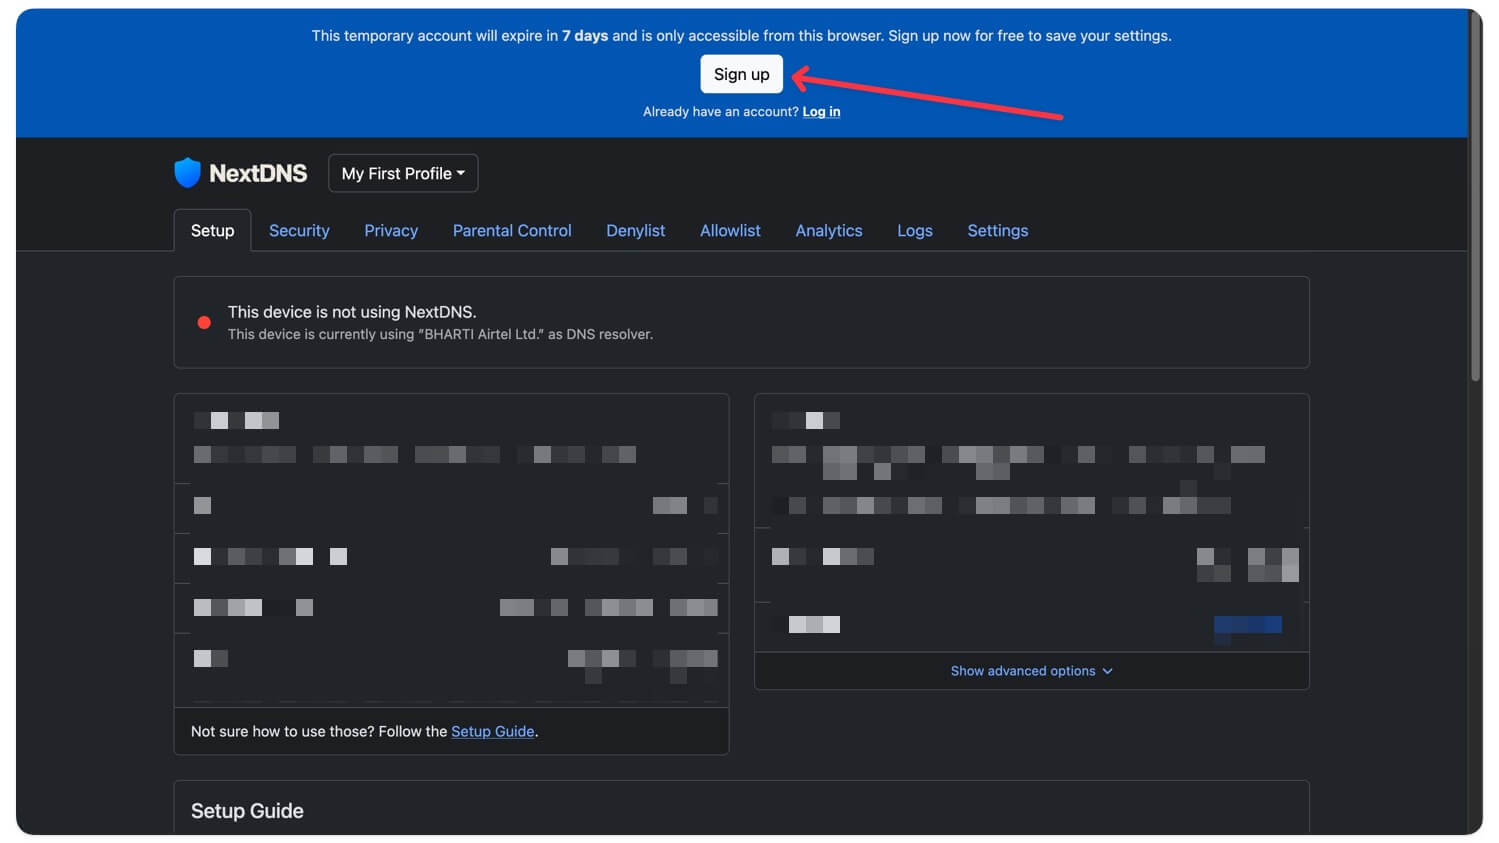
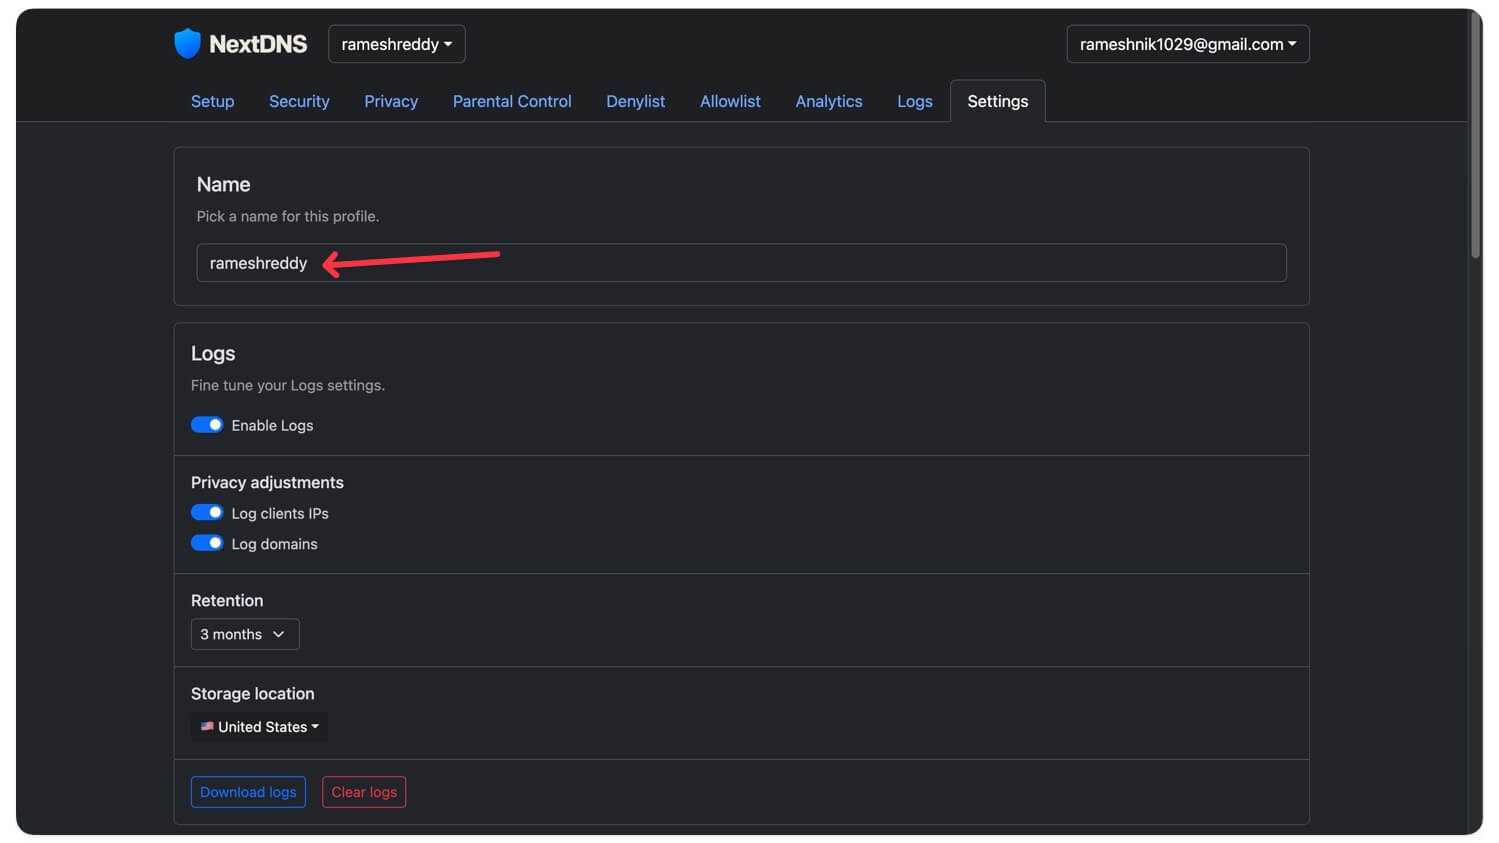
Go to the Settings tab, enter your name in your profile. You can create multiple profiles with different settings. To create a new profile, click on your profile name in the top next to NextDNS log and tap on add new.
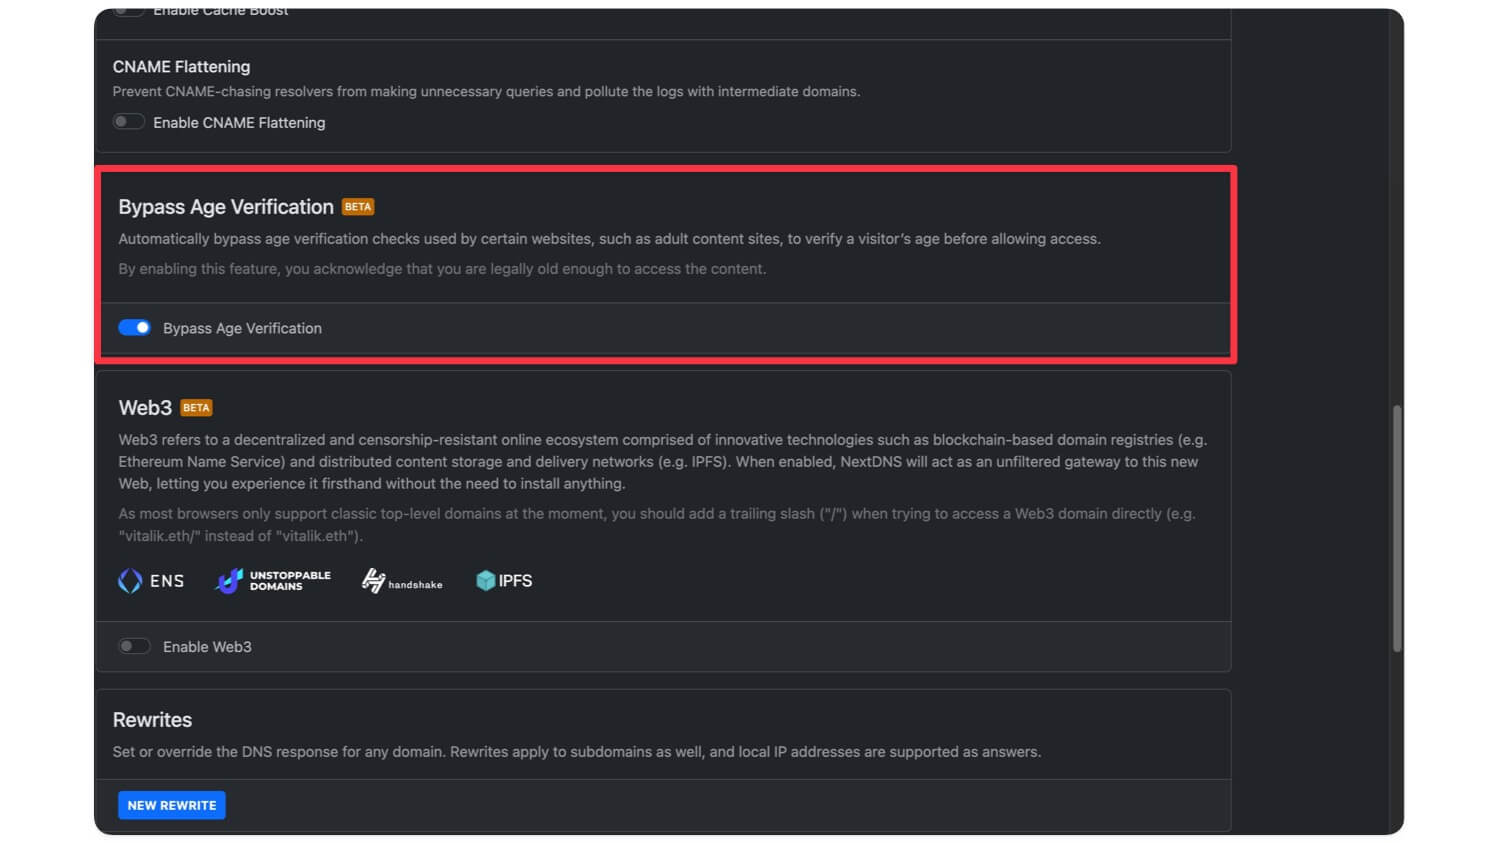
Step 2: Enable Bypass Age Verification feature
Scroll down and turn on the Bypass Age Verification feature, which is currently in beta.
Now go to the setup tab and select your device, and follow the steps to use NextDNS on your device. Here is how you can set it up for Android, iOS, macOS, and Windows. You can get access to your unique configuration ID for your profile, which you can use on different devices. If you want, you can also create multiple profiles and configure different settings for each profile.
Step 3: Set up NextDNS on different devices
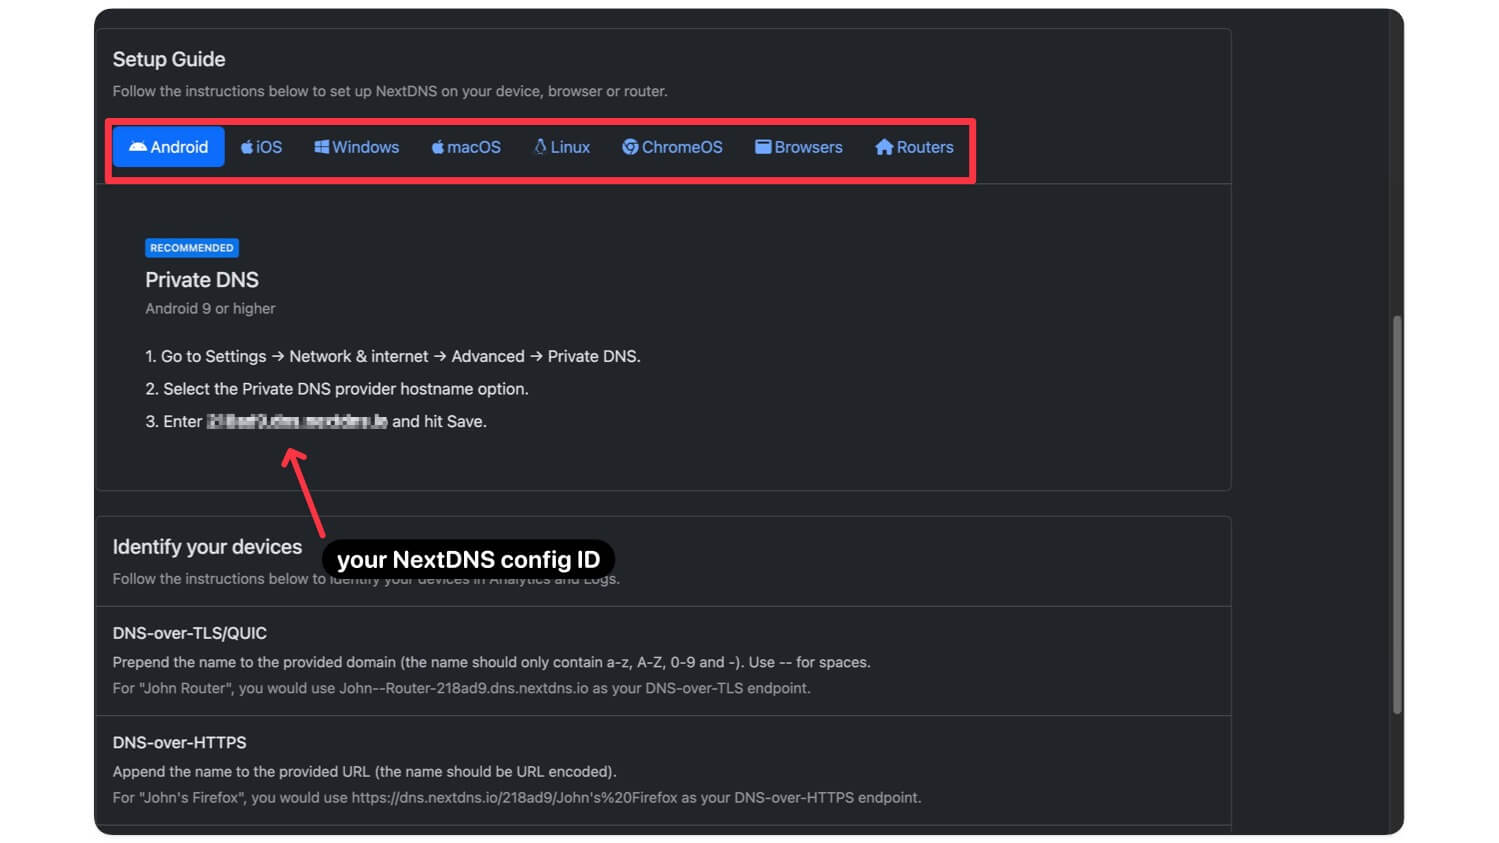
Android
- Go to the settings, the network, and internet.
- Go to advanced settings, and go to private DNS. These steps can vary depending on your Android version and model.
- You can use the search bar to find the private DNS option on your device.
- Now select the specified DNS and enter your configuration file here. example: 23ufhfirhfvjfg
- You can find your configuration file in the setup guide tab on your my.nextdns.io dashboard.
- Add the configuration file and click on the save button.
iOS
- Unlike Android, you cannot set a private DNS on your iPhone. Download the free NextDNS app from the App Store.
- Open the app, and allow the necessary permissions.
- Open the app, go to settings, toggle on use custom configuration, and here enter your configuration ID. example: 23ufhfirhfvjfg
- You can find your configuration ID on the setup page in your NextDNS dashboard on your web. Now, finally, turn on NextDNS.
Windows
- Download NextDNS Windows Installer from here.
- Install and download NextDNS software on your Windows now, and after installing, right-click on the NextDNS icon, go to settings.
- In the custom configuration ID, set your custom configuration ID as your configuration ID. example: 23ufhfirhfvjfg
- Now, right-click on the NextDNS icon in the tray and click on Enable to turn on this feature.
MacOS
- First, download the NextDNS app from the Mac App Store.
- Install the app and allow the necessary permissions. Next, click on Preferences in the app status bar menu and go to the Configuration tab.
- Tap on the ‘Use Custom Configuration’ option and then enter your NextDNS config ID as your configuration ID.
- Now go to the settings tab and scroll down, and enable the option that says Bypass Age Verification, which is currently in beta.
- Finally, enable NextDNS settings.
Chrome OS
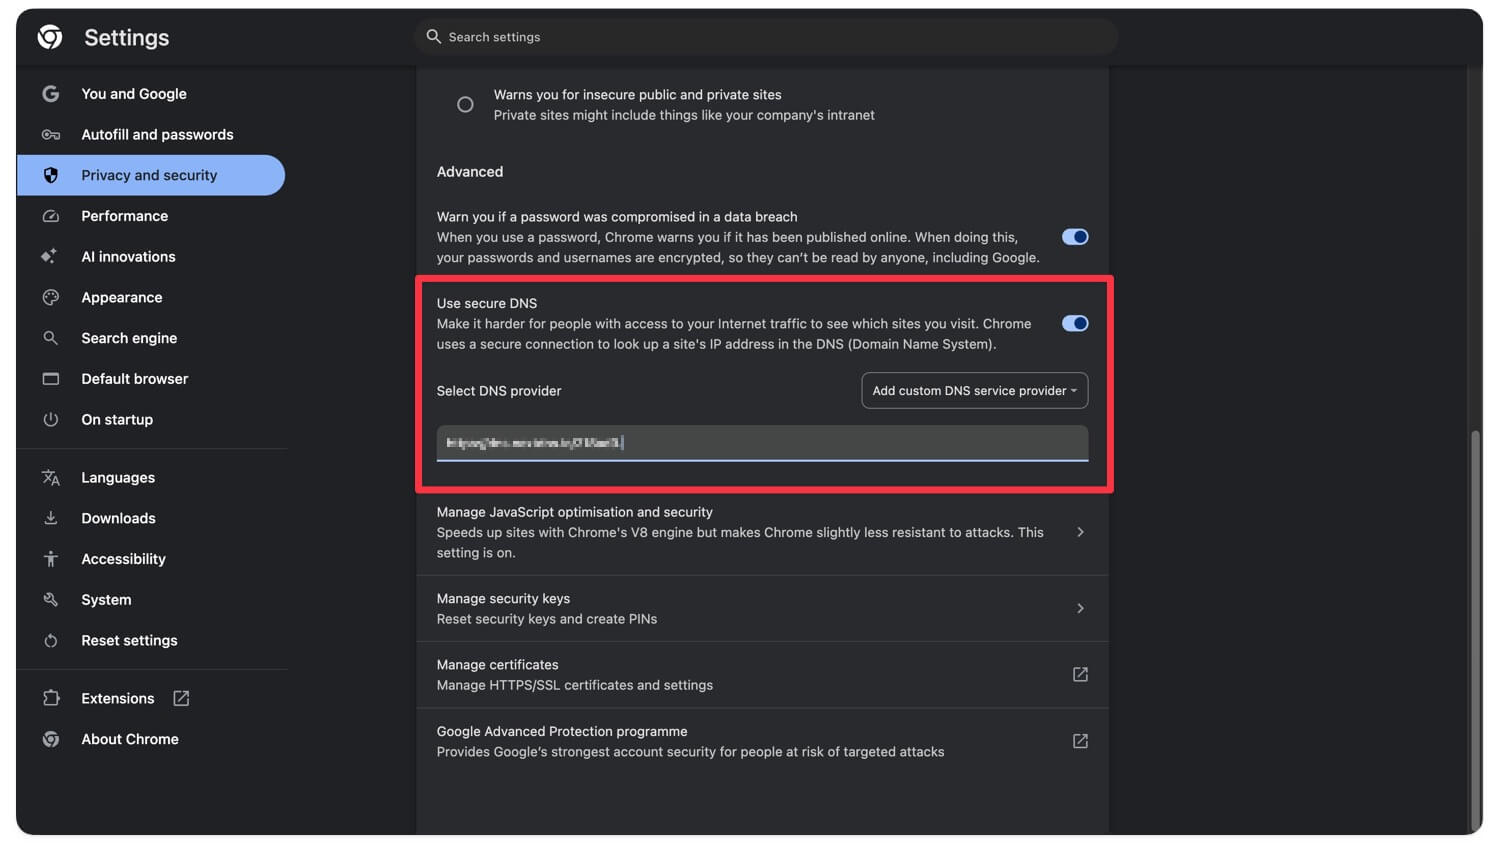
- On Chrome OS, you can use secure DNS settings to enable and use NextDNS on your Chrome OS.
- First, open the settings on your Chrome OS, go to security and privacy, and here select the option that says Use secure DNS, and then select custom, and then enter the following URL https://dns.nextdns.io/[Your configuration id here], followed by your custom ID in the end.
Browsers
If you don’t want to apply this bypass age verification throughout the system, you can only apply it on your browser. NextDNS also supports a browser-only setup.
To do this for Chrome, go to settings in the privacy and security section, click on the security, here in the advanced section, enable and use secure DNS, here select the option that says custom, and then enter the following URL, followed by your NextDNS configuration ID. example: https://dns.nextdns.io/[Your configuration id here]
If you are using Firefox, open preferences, click on privacy and security, scroll down, and turn on Enable DNS over HTTPS. Now, choose the increasing protection settings or Max protection, depending on your preference. Here, select custom in the menu, and here enter the following URL, followed by your NextDNS configuration ID. example: https://dns.nextdns.io/[Your configuration id here]
You can also follow the similar settings for Microsoft Edge and Brave. Go to settings, go to privacy, and go to the security section. Under security, enable and use secure DNS, select a service provider, and then enter the following URL, followed by your NextDNS configuration ID. https://dns.nextdns.io/[Your configuration id here]
For Brave, go to settings in the privacy and security section, go to security in the advanced section, enable and use secure DNS. Here, select the custom option and enter the following URL, followed by your NextDNS configuration ID. https://dns.nextdns.io/[Your configuration id here]
Working Ways to Bypass Age Restrictions Online
So those are the two reliable methods you can use to bypass most of the age verification methods; however, still, because of this limited availability, these two methods might not work for everything. For instance, many people are still facing age verification methods despite using these methods.
FAQs on Bypassing Age Verification
1. Will using NextDNS or a VPN to bypass age verification slow down my internet speed?
VPN reroutes your traffic to another server, so it is generally slower. However, NextDNS only changes your DNS request, so it is faster than a VPN in this case.
2. Can websites or governments detect if I’m bypassing age verification with these methods?
Some websites can detect VPN use and flag you as a robot; however, DNS-based methods like NextDNS are harder to detect, but it is still possible for governments to block them at the ISP level, which can also block DNS methods in the future.
3. Is it legal to bypass age verification in my country, or could I face penalties?
In most countries, bypassing is not directly illegal, but it can violate the platform’s rules, as it requires your age verification to use its service in your location. If you are found to be bypassing your age, your account might be restricted permanently.
4. Do all services use the same age verification systems, or are some stricter?
No, websites use the same age verification methods. Google and YouTube use AI-based age verification methods that flag you as a minor based on your search history; however, some websites only require you to submit your government ID to continue using the site.
5. Does NextDNS keep logs of websites I visit when I use it to bypass?
Yes, NextDNS stores your logs of the websites you have visited using the DNS, but you can delete those logs or disable logs completely if you want an even more secure connection.
6. If I’m falsely flagged as a minor, can I appeal instead of bypassing?
If you have accidentally been flagged as a minor and if you don’t want to bypass your age verification, you can appeal by submitting your ID or proof of age. Depending on the site, they may verify your account and lift the ban on your account.
