Quick Answer
macOS 26 Tahoe brings a fresh Liquid Glass design, customizable folders with colors and emojis, new icon styles, smarter Spotlight with filters and quick actions, clipboard history, Live Activities sync from iPhone, Apple Intelligence features, a Phone app, Magnifier, and even a new Games app to manage all your titles.
Apple has finally rolled out macOS 26 Tahoe after months of testing it in the beta. I haven’t enrolled in the beta because my Mac is my primary working device, since beta software often consists of bugs that can hinder my experience. So I waited and recently updated to the macOS 26 official stable version.
Similar to iOS 26 and iPadOS 26, Apple has added several new features to macOS 26. If you have upgraded to macOS 26 and are looking to explore, here are the fourteen settings that you should look for in your new OS.
Table of Contents
macOS 26 Tahoe: 14 Features You Should Try First
Feature / Setting | What It Does |
|---|---|
Reduce Transparency | Redice the translucent design |
Customize Folder Colors & Emojis | Color code you folders and organize and identify folders quickly |
Change Icon Styles | Switch between light, dark, clear, or tinted icons |
Context Menus | Right-click menus to perform quick actions |
Control Centre Customization | Now you rearrange or resize tiles in the control centre, drag to menu bar. |
Live Activities from iPhone | View iPhone live activities (rides, flights, scores) on Mac directly. |
Spotlight Search Filters | You can search from specific sources for faster search results. |
Clipboard History | View past copied items including text, images, files. |
Quick Actions in Spotlight | Run tasks like timers, send messages, 3rd-party app actions |
Phone App | Make or receive calls, view history direclty on your Mac |
Magnifier App | Now you can Zoom/read objects or text using Mac or iPhone camera |
Apple Intelligence Features | More useful Apple intelligence features in Mac including live translation |
Shortcuts with Apple Intelligence | Now you can add Apple intelligence models in shortcuts. You can rewrite text, proof read, generate image and much more. |
New Games App | You can manage all games in one place. |
Reduce the Transparency
One of the biggest changes in this year’s update is the new user interface; Apple has introduced a new Liquid Glass Design on all its platforms that adds a translucent look across its systems. While some people find it modern, others hate it because the transparent design makes it hard to read text in some apps.
Fortunately, Apple allows you to reduce the transparency to make it more readable. If you are finding it hard to read, here is how you can reduce the transparency.
How to reduce transparency on macOS

- Open Settings in your MacOS
- Scroll down and go to Accessibility, and then Display
- Now, turn on the option that says Reduce transparency.
Customize Folder Colors and Add Emojis
Tagging folders is one of the most useful features in macOS that lets you easily find the file you are looking for. Now, with macOS 26, you can customize folders with colors and even add icons and emojis to them.
Adding color and emojis makes it easy to find what you are looking for. It also makes it easy to organize your folders and find them easily. You can also set a default universal color to all folders to match your style.
How to change folder colors in macOS 26
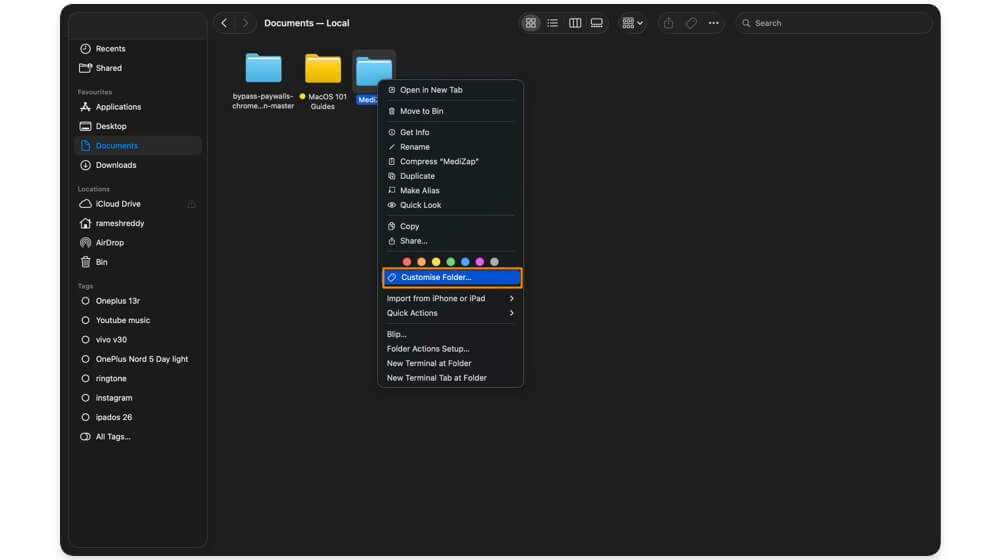
- Go to the folder you want to customize.
- Right-click on the folder and from the menu, select the color you want to use.
- To add an icon or emoji to the folder, tap on the Customize Folder option, and from there, you can select the emoji or icon for the folder.
Change icons to match your preference
Similar to the icon style on iPhone, now you can set custom icon styles on your Mac. Currently, macOS offers four different styles, including light icons, dark icons for dark mode, and transparent icons if you prefer clear mode.
You can also use the tinted color option to change the color of the icons to match your wallpaper’s style, and also set automatic color tinting to change icons’ tint based on the time, such as automatically switching to light and dark modes based on the time.
How to change icon style on macOS 26:
![]()
- Go to Settings on your MacBook
- Scroll down and tap on Appearance.
- Under the icon and widget style, select your preferred icon style. Currently, you can choose from default, dark, clear, and tinted. If you select tinted, you can also choose the color. It will be automatically applied to your folder.
Use Context Menus for Quick Actions
Another useful addition to macOS 26 is the new context menu. As the name suggests, the context menu helps you to perform quick actions of an app or in a particular scenario. It gives quick actions in the menu.
For instance, if you are writing notes, you can right-click and get suggestions for making text bold, rewriting the text, looking up translations, changing font, and maybe more.
Similarly, when you are on the home screen, you can right-click anywhere to quickly sort things, clean, use stacks, and much more. Apple also lets developers add their own sub-option to the menu to help users perform quick tasks without navigating through the interface.
How to access context menus on macOS:
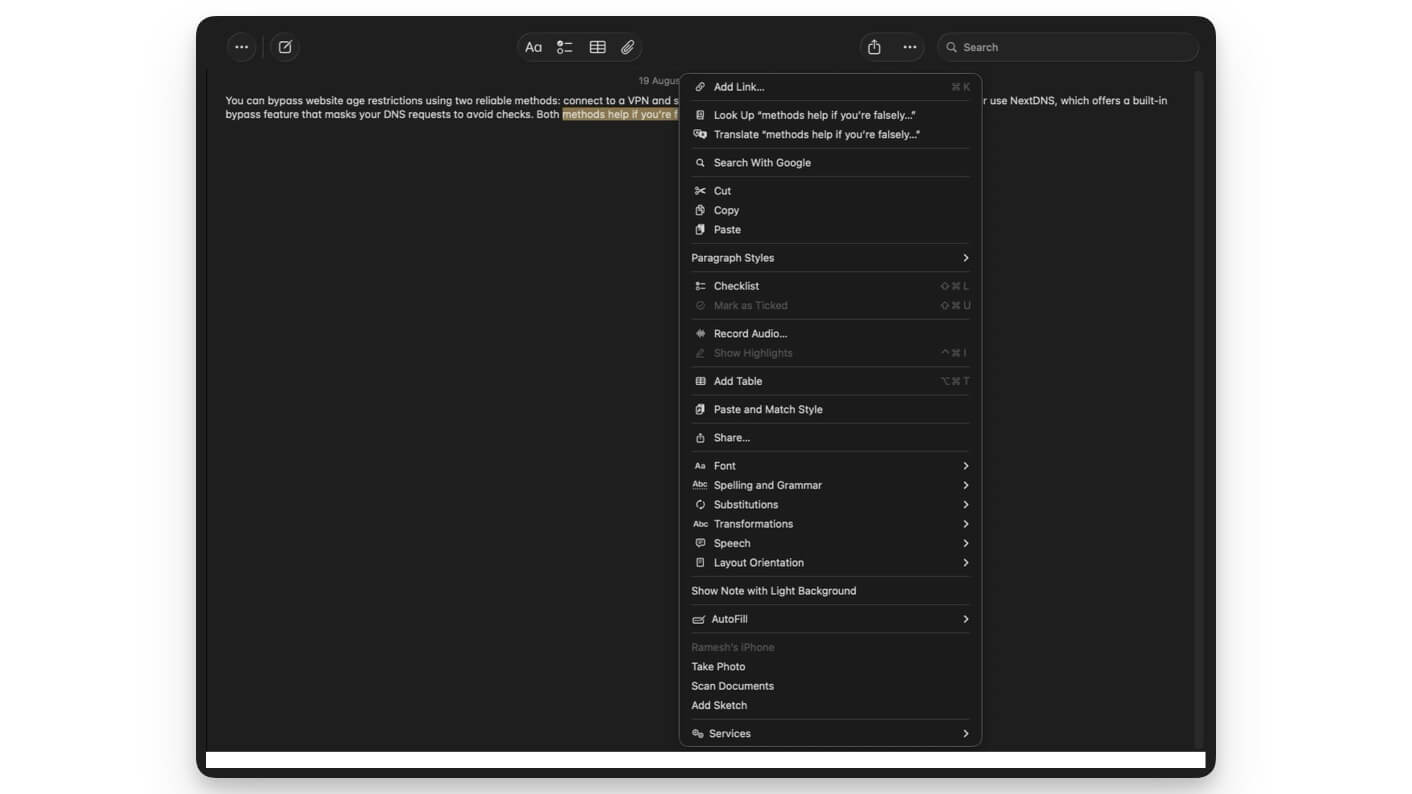
- Open a folder or any app, in this case, I’m using Notes.
- Open the Notes app on your Mac and go to any notes.
- In the Notes, select any text and right-click on it. Here you can see all the tools.
- Likewise, select any app and right-click on it; here you can see the app’s quick actions in the context menu. You can tap on it and apply quick actions.
Customize Your Control Centre Experience
After adding resize and rearrange tiles in Control Centre on iPhone, Apple has now added the same functionality to macOS. Now you can resize or rearrange the tiles in the Control Centre based on your preference. For even quicker actions, you can simply drag and drop any time into the menu bar at the top to quickly access it without even opening the Control Centre.
How to Edit the Control Centre

- On your Mac, click on the Control Centre icon from the menu, or you can swipe left from the home screen
- Click on the edit Control Centre option.
- Now you can rearrange the tiles in the control centre.
- To add tiles to the menu, drag and drop the tile into the menu bar, and that’s it.
View Live Activities from Your iPhone
If you use Live activities on your iPhone, you can now directly view them on your Mac. This includes all live activities from your iPhone, including Uber rides, flight, sports scores, and timers, and they also update in real time to give you the latest updates.
However, it uses Apple Continuity features, which require both your Mac and iPhone to be connected with Bluetooth and wifi, and within proximity. You can also hide live activities if you don’t want to see them on your Mac.
How to Enable Live Activities on macOS
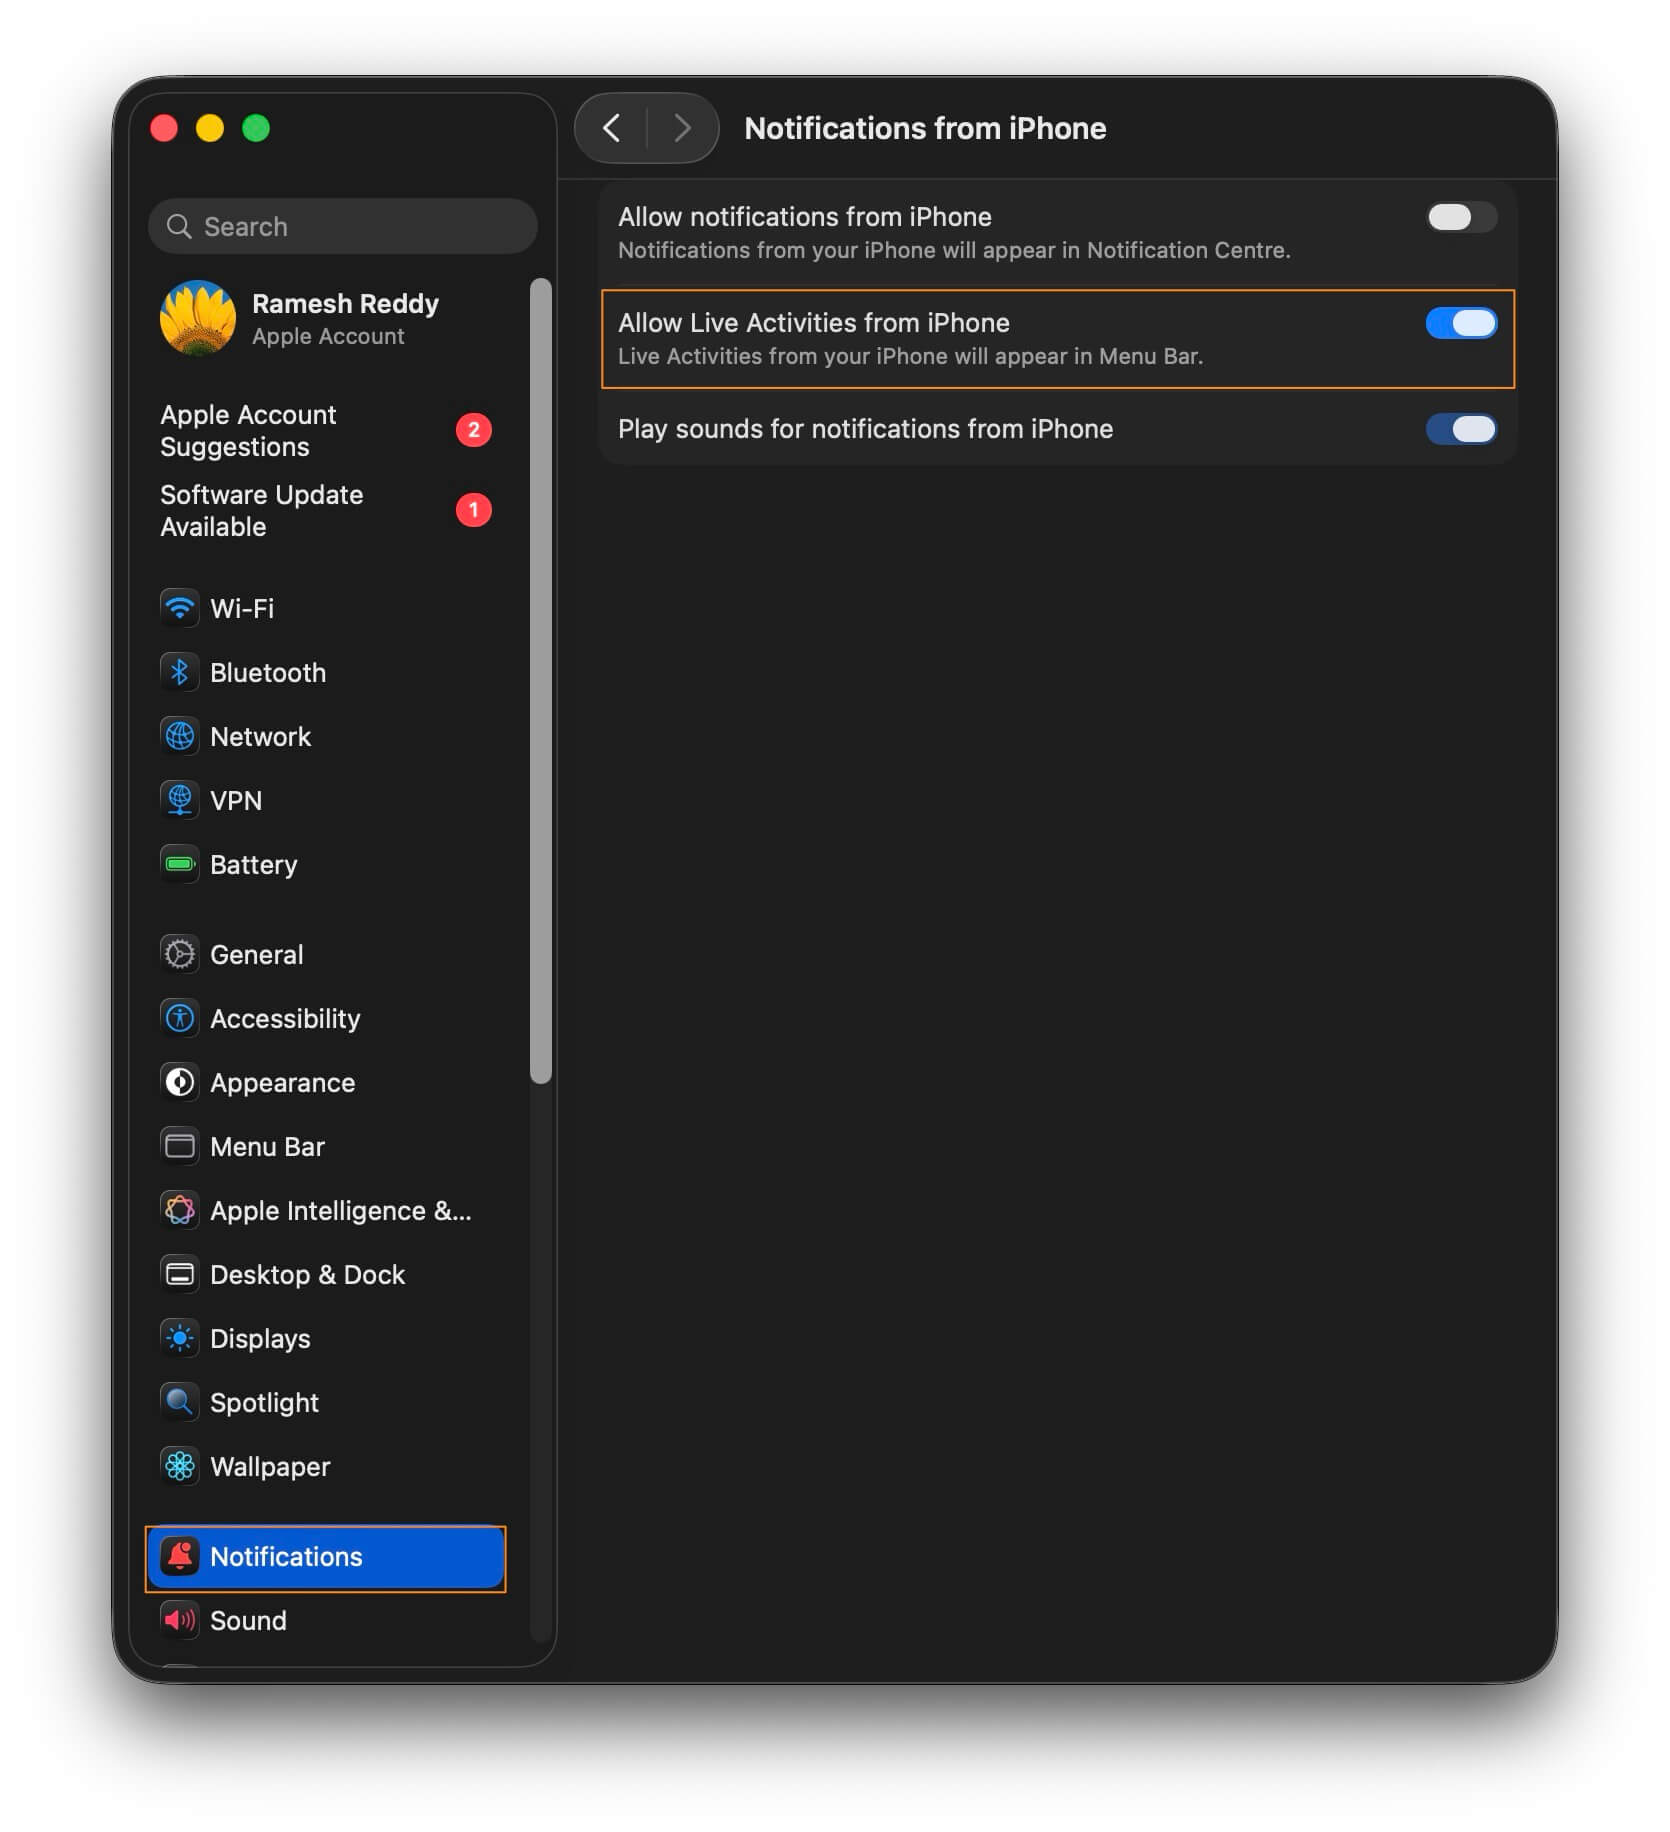
- Go to Settings on your Mac.
- Scroll down and tap on the Notifications.
- Here, tap on the option that says Allow Notification from iPhone.
- Here, enable the option that says, Allow Live Activities from iPhone.
Use Spotlight Search Filters
Spotlight gets very useful upgrades with macOS 26, and now you can choose which sources Spotlight can search with useful search filters. Based on your query, you can restrict the search to specific sources, including files, system settings, your text, messages, notes, and more.
How to Use Spotlight Search Filters on Your Mac:

- Open Spotlight search on your Mac. You can use the Command+Space shortcut to activate.
- Enter the file or the app name you want to search, and new filters appear under the search bar
- Enable the filter, and it searches the file from the specific source. As of now, you can only select a single source.
Find Your Clipboard History
Viewing the clipboard history is one of the major limitations on Mac, and now with macOS 26, Apple finally supports clipboard history. You can finally view all your clipboard history in one place. All your copied text will now be remembered and saved on your Mac.
To view, you can use the Spotlight light search and go to the clipboard history (after launching the Spotlight, you can also use the shortcut command+4 to directly go to the clipboard tab to view all your history. However, it is still limited; there is no option to pin, and it is limited to an 8-hour timeline. Also, your clipboard content doesn’t sync with other devices.
How to View Your Clipboard History on Your Mac:
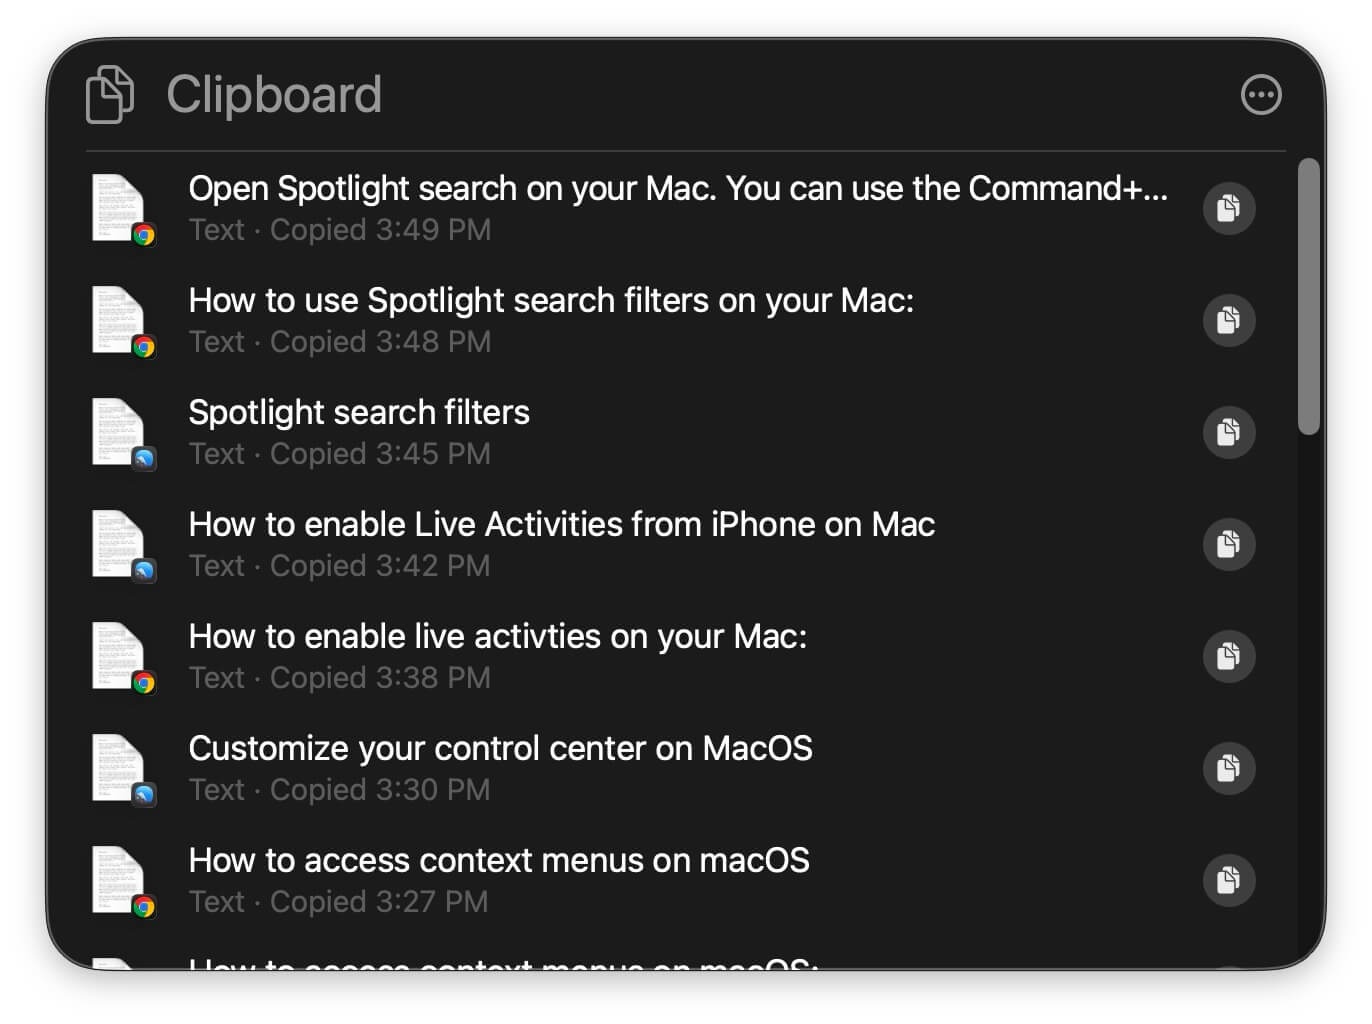
- Open Spotlight search on your Mac. You can use the Command+Space shortcut to activate.
- Now, on your keyboard, enter command+4, or you can select the clipboard history option from the Spotlight options
- Here you can see your clipboard history, including text, images, and files you have copied.
Perform Quick Actions from Spotlight
Another useful addition to Spotlight in macOS 26 is the ability to run quick actions directly from the Spotlight. For instance, you can directly start the timer, send a message, and, along with other quick actions, the best part is that it also supports third-party app actions to help you perform tasks quickly directly from the spotlight. You can also assign a shortcut for each spotlight to quickly access them whenever you need them.
How to Perform Quick Actions on macOS

- Open Spotlight search on your Mac. You can use the Command+Space shortcut to activate.
- Now, on your keyboard, enter command+3
- You can see all the actions you can use from here.
- You can also assign a shortcut to frequently used actions. Tap on the Add quick keys to add a shortcut.
Phone App is Now on Mac

macOS 26 now comes with a built-in Phone app, so you can directly take or make calls directly on your Mac. It also comes with useful hold assistant and call screen features directly on your Mac without any limitations. You can also view your call history, voice memos, and more.
Magnify Things Directly on Your Mac
Along with the phone, Apple also adds a useful Magnifier app to the Mac that lets you zoom and read content using the built-in camera app or using your iPhone camera as an external device. It also comes with a reader mode that automatically detects text from objects and shows it in a reader, making it easy if you have blurry vision or find it hard to read something.
How to Access the Magnifier App on macOS:
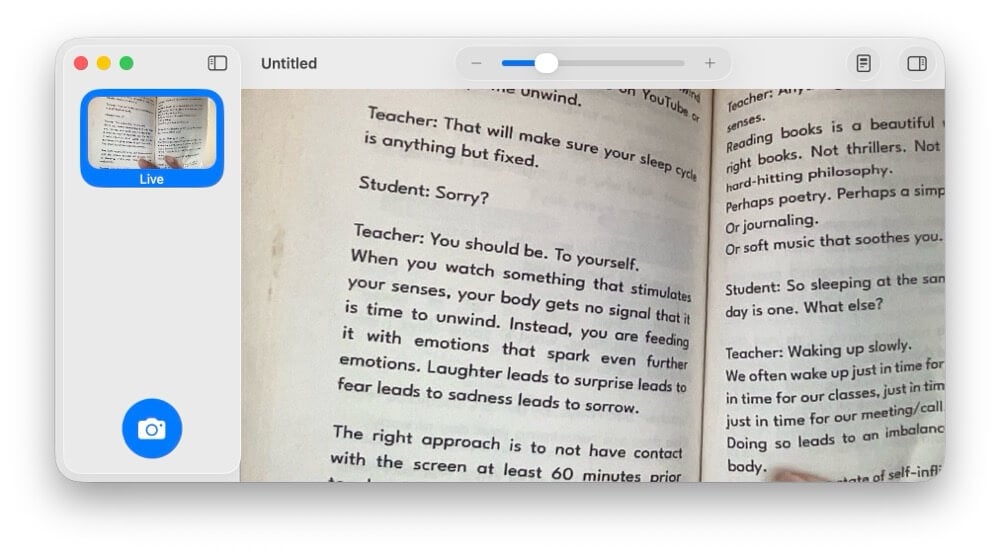
- Open the Magnifier app and use the camera to scan text or any object you want to read.
- You can use the magnify slider at the top to zoom. If it has text, you can switch to the reader mode to read the text. To enter into the reading mode, click on the round document icon in the top right corner of the screen (left to the sidebar icon).
Explore Apple Intelligence Features
While Apple Intelligence might be the star of the show this year, Apple has added some useful Apple Intelligence features for Mac. First support for Live Translation during calls and chats. Now you can live translate text in messages and during real-time calls directly on your device without depending on third-party options.
Use Shortcuts With Apple Intelligence

Apple adds Apple Intelligence to the Shortcuts app on Mac. You can use AI tools alongside your automations to perform smart tasks. For instance, you can ask it to summarize the text, rewrite and proofread before sending a text message, and get daily briefs for specific news sites.
Similar to shortcuts, the possibilities are endless with Apple intelligence support. Since AI is natively available on your Mac, you also don’t need to worry about rate limits. You can create unlimited shortcuts with Apple intelligence support and execute them multiple times.
How to Use Apple Intelligence Models in Shortcuts:
- Open the Shortcuts app on your Mac.
- While creating a new shortcut, search for any Apple intelligence feature such as summarizing the text, rewriting, creating an image and more.
- You can insert multiple Apple intelligence models into one shortcut.
New Games App for Mac
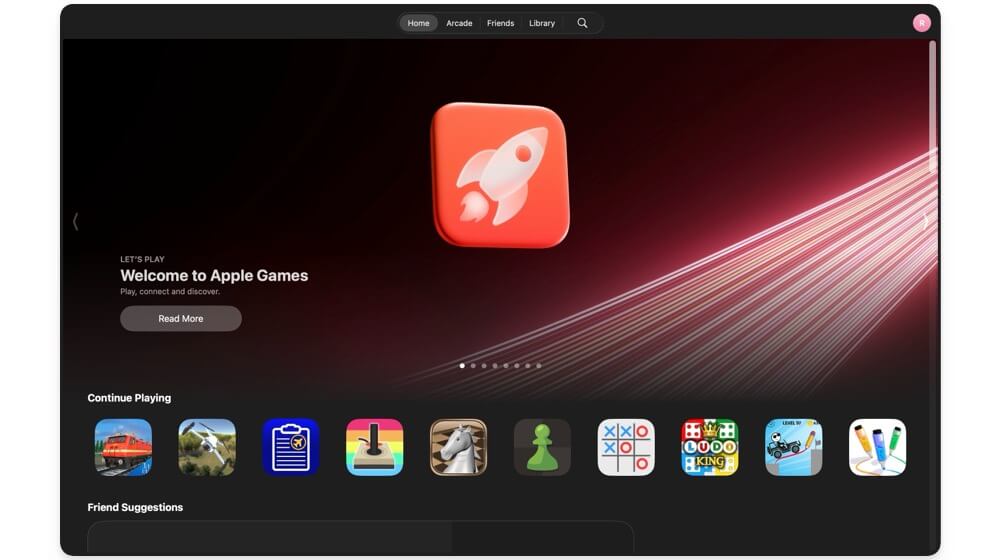
Another new addition to Apple Mac is the new Games app. Now you can install, manage, and delete all games in one place. You can also play games together with your friends and see the leaderboard and more.
Conclusion: Getting the Best Out of macOS 26
Those are the major changes coming to your Mac with macOS 26, along with all these changes. All the changes coming to iPad and iOS 26 are also rolling out to Mac, which includes iMessage backgrounds, poll support, useful accessibility features, and more. Apart from a few bugs and some design inconsistencies, macOS 26 is so far stable on my MacBook Air M1. If you are looking to upgrade, you can go to Settings> General> System Update and update your Mac to the latest version.
