Quick Answer
Setting up a new MacBook like a pro means completing the initial Setup Assistant, signing in with your Apple ID, transferring data if needed, and then optimizing key settings like trackpad gestures, Dock, Finder, keyboard shortcuts, security options, and installing essential apps for productivity and workflow.
Whether you’ve just unboxed the latest MacBook Air, MacBook Pro, or any other model from Apple’s iconic lineup, you’re about to embark on a journey of innovation, productivity, and creativity. Before you can explore all the incredible features and capabilities of your MacBook, it’s important that you set it up properly. Properly configuring your new MacBook will ensure that you have a smooth and efficient computing experience right from the start. This article is your comprehensive guide to getting your MacBook up and running like a seasoned pro right from the moment you turn it on.

In the following sections, we’ll walk you through the key steps to transform your new MacBook into a productivity powerhouse. From initial setup and system settings to installing apps and transferring data, we cover it all.
By the time you finish reading, you’ll be equipped with the knowledge and experience you need to turn your MacBook into an extension of your digital self so you can tackle any task with flying colors. So, let’s roll up our sleeves together and embark on this exciting journey as we show you how to set up your new MacBook like a pro.
Let’s get started.
Table of Contents
The Initial macOS Setup
When you turn on a new MacBook for the first time, you get a setup screen that walks you through the basics.
- The first step is to select the language and country.

- After that, you can go to the accessibility settings, where you can choose the font size, screen zoom level, and so on.

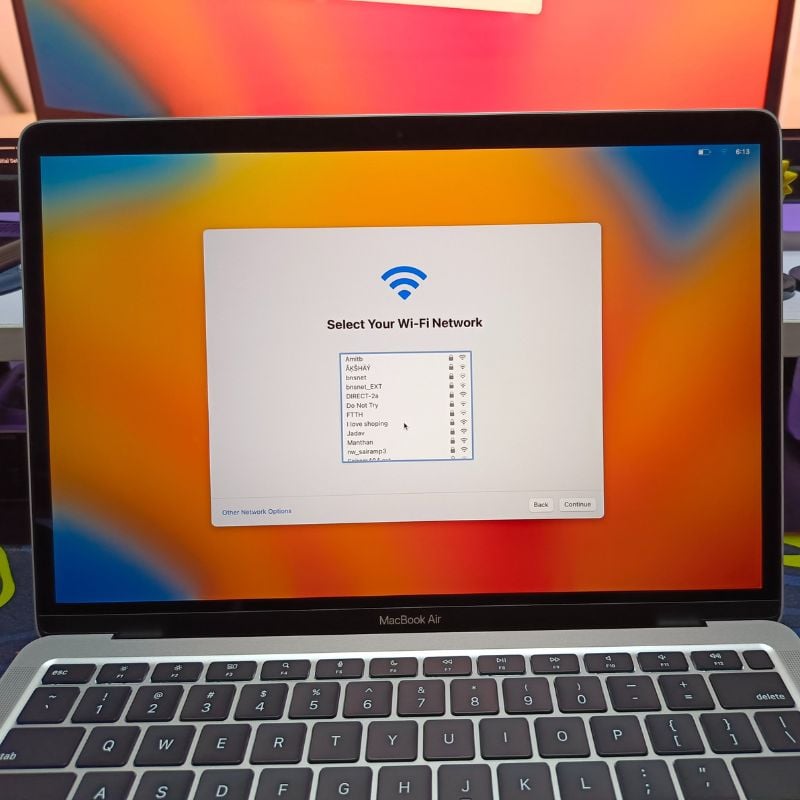
- In the next step, you need to connect the MacBook to the Wi-Fi to continue.
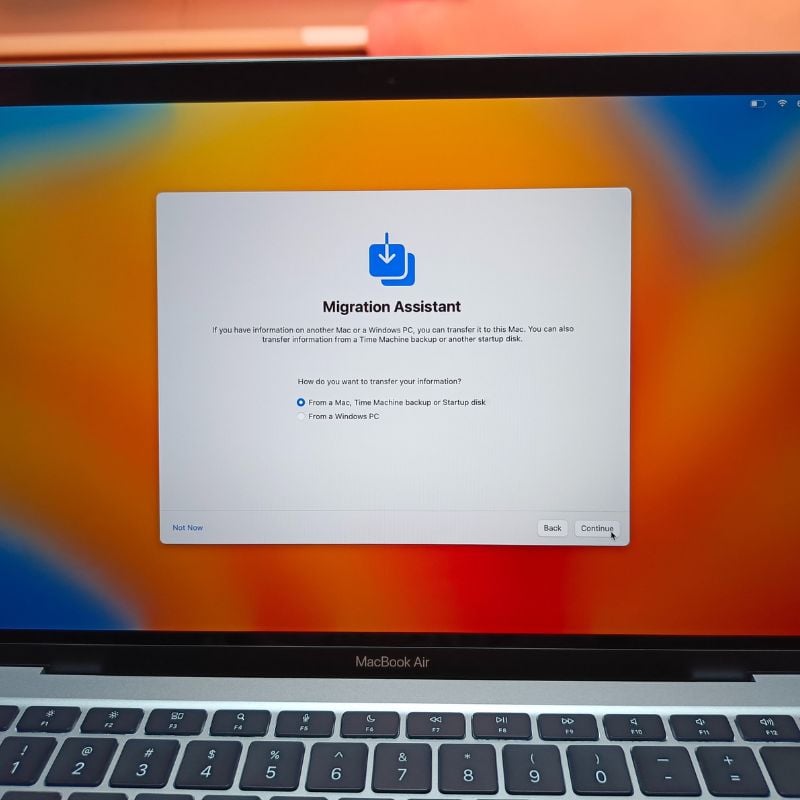
- After this initial setup, you can choose to migrate your data from another Mac or from a PC or just start with a new layout. Personally, we prefer to start with a new layout for our MacBook, so we click the Not Now button.
- The next step is to log in with your Apple ID; this is a very important step. You can either sign in with your existing Apple ID or create a new one.

- Next, you need to create a password for your MacBook. Make sure you choose a password that you can remember because this password will be used throughout the operating system for various tasks.
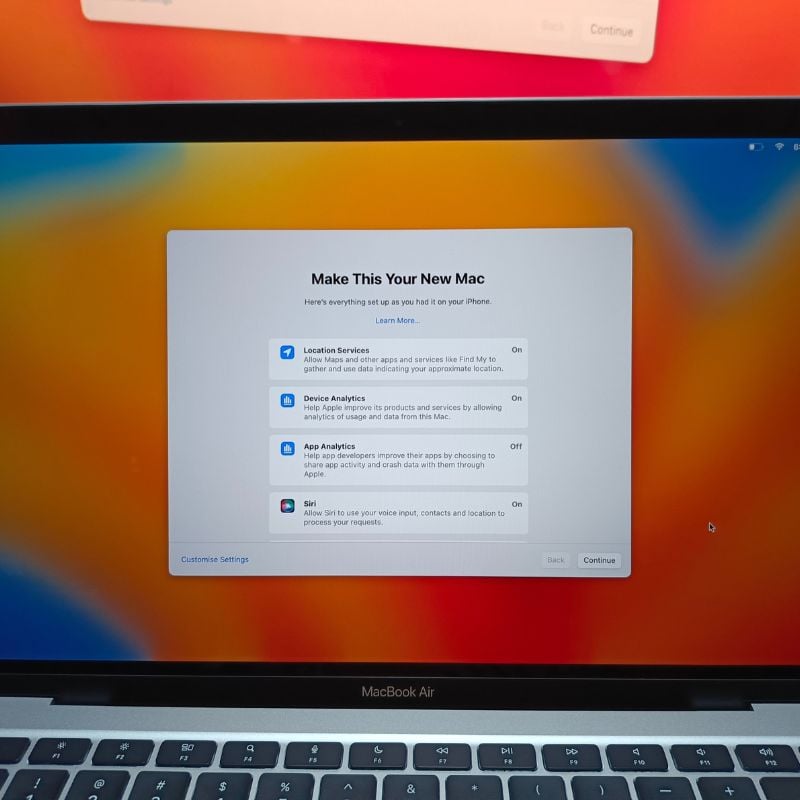
- On the next screen, you will be asked to provide some information about your MacBook. Normally, only location services and Siri are “On” here. You can share the information you want if you want.
- The next step is to set up Siri on your MacBook. Just follow the steps onthe screen and you should be done with it.

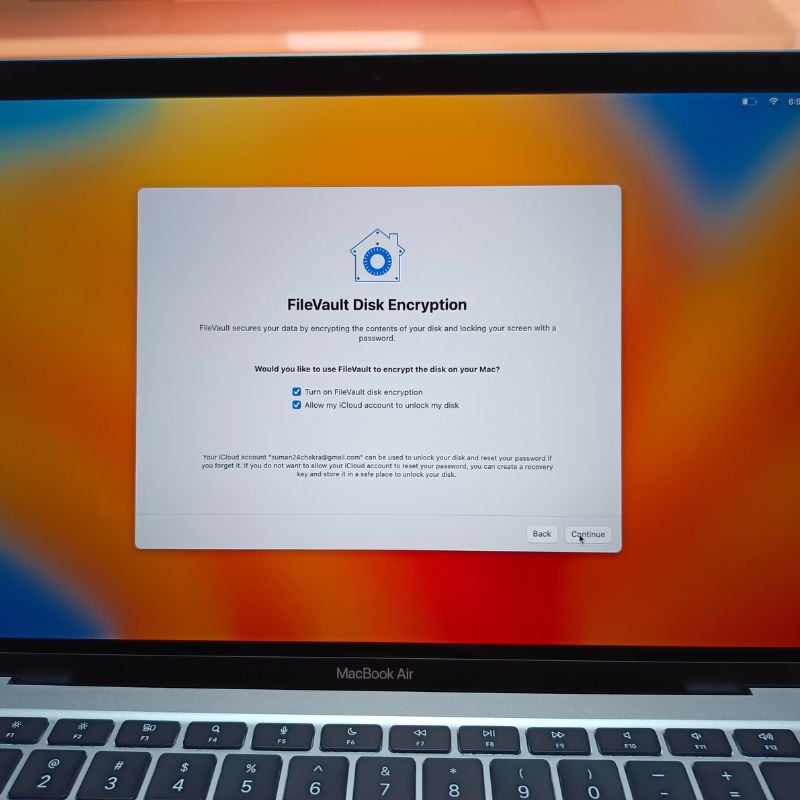
- On the “FileVault Disk Encryption” page, enable both options to keep your backups encrypted and give you the ability to reset your MacBook’s password from another device using your Apple ID in case you forget the password.
- Alright, now you should see your macOS desktop. That means you’re done with the initial setup of your new MacBook. Pat yourself on the back, and let’s move on to the next section, which will cover all the settings you need to change in macOS.

Change These Settings in macOS to Make it More User-Friendly

After you set up your new MacBook, you’ll need to change a few settings to make it more user-friendly for new and regular macOS users.
Trackpad

Open System Settings on your MacBook, then scroll all the way down until you find Trackpad Settings. In the trackpad settings, you can adjust the scrolling and tracking speed according to your needs and check all the gestures you can use with the trackpad. Then enable the “Tap to click” option because, by default, you have to press the trackpad to click, which eventually gets annoying.
Dock Icons
![]()
The next step is to remove the apps you don’t need from the Dock. You can do this by right-clicking on the icons, then going to Options, then Remove from Dock, or else you can just drag the icon out of the dock.
Display

MacBooks are equipped with ambient light sensors that adjust the brightness of your screen according to the light around you, but this can be annoying sometimes if you are trying to work on something important. The same goes for True Tone, which adjusts the color temperature of the screen to the environment. You can turn this feature on or off depending on your needs. Personally, we prefer to turn it off once we’ve set up the MacBook. You can find these options in the display preferences of macOS. Here, you can also change the color profile of your screen by selecting one of the many available options.
Desktop and Dock
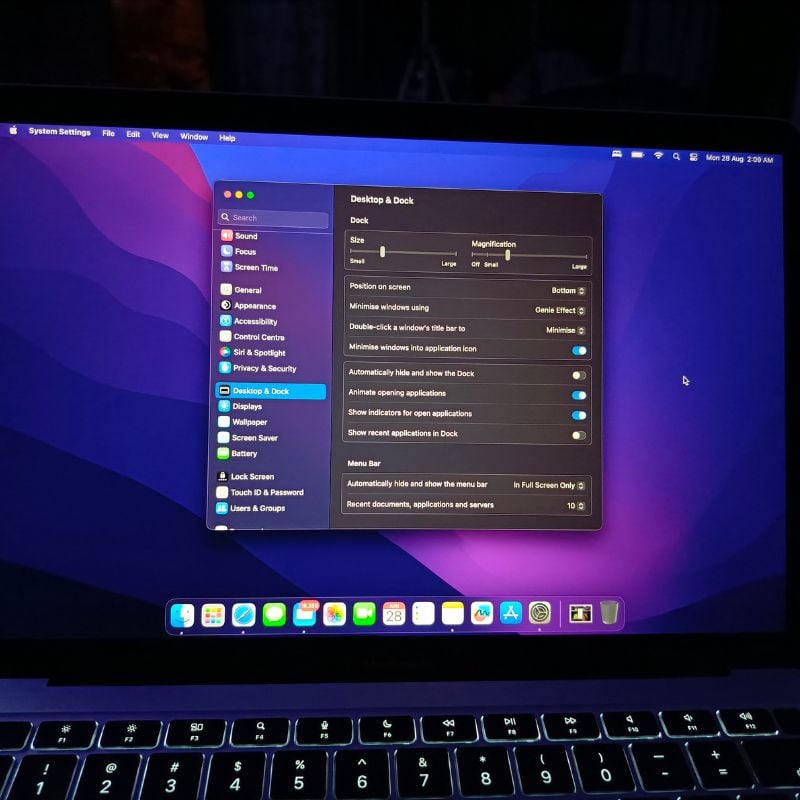
In the next step, you can change the settings of the Dock, which by default takes up the entire bottom part of your screen. We like to shrink the dock and also enable the magnification animation, as it adds a bit of interest to the otherwise boring dock. Here, you can also change the position of the dock. We also like to enable the “Minimize Windows into Application icon” option. We’d also like to enable two more options: Show indicators for open applications and Animate opening applications. The rest we leave in the default settings.
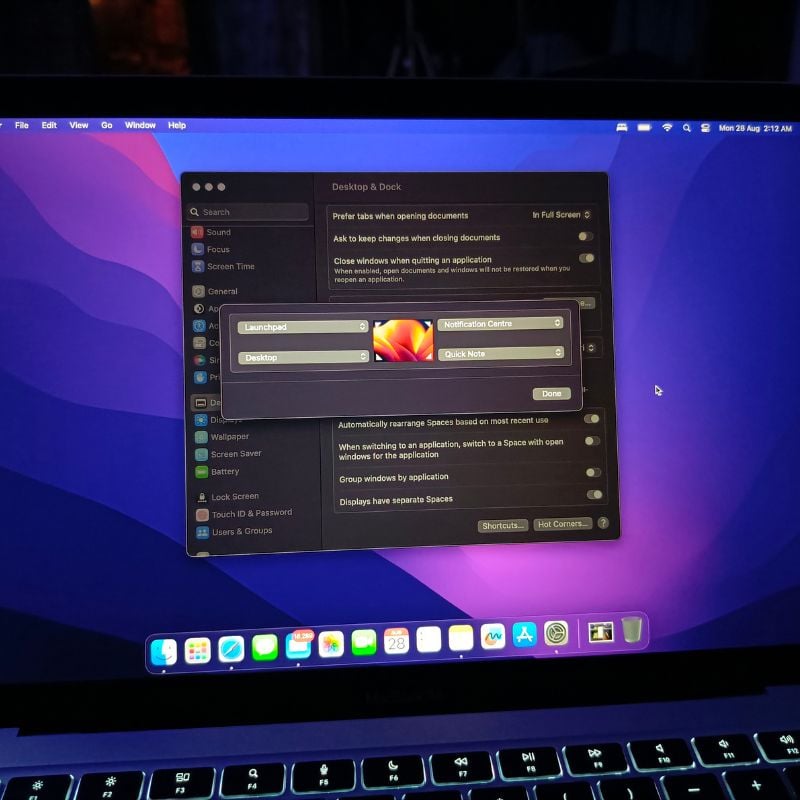
The desktop and dock settings also include the option to change the default browser and turn on Stage Manager. In addition, the Hot Corners setting lets you set shortcuts for all four corners of your screen and even change the keyboard and mouse shortcuts to trigger Mission Control (Desktop Manager) in macOS.
Finder Settings
The Finder is your file manager on macOS, where you can manage all your files and drives, as well as your iCloud storage. It’s a bit confusing by default, but we’re going to change a few settings and customize it to our needs. Open the Finder and go to the settings by clicking on the Finder name at the top left of the screen.

In the Finder settings, select the Sidebar option and select all the folders and drives you want to access from the Finder. You can also sort different file types by assigning them different labels. In the general settings, you can choose which things to display on the desktop when you’re connected. Finally, you can change a few things in the advanced settings.
Control Center

The control center contains all the quick settings of macOS. You can customize the Control Center to your needs by going to the Control Center preferences. We usually like to see the exact battery level in the menu bar, so we turn it on because it is off by default. You can customize the menu bar and control center according to your needs.
Keyboard
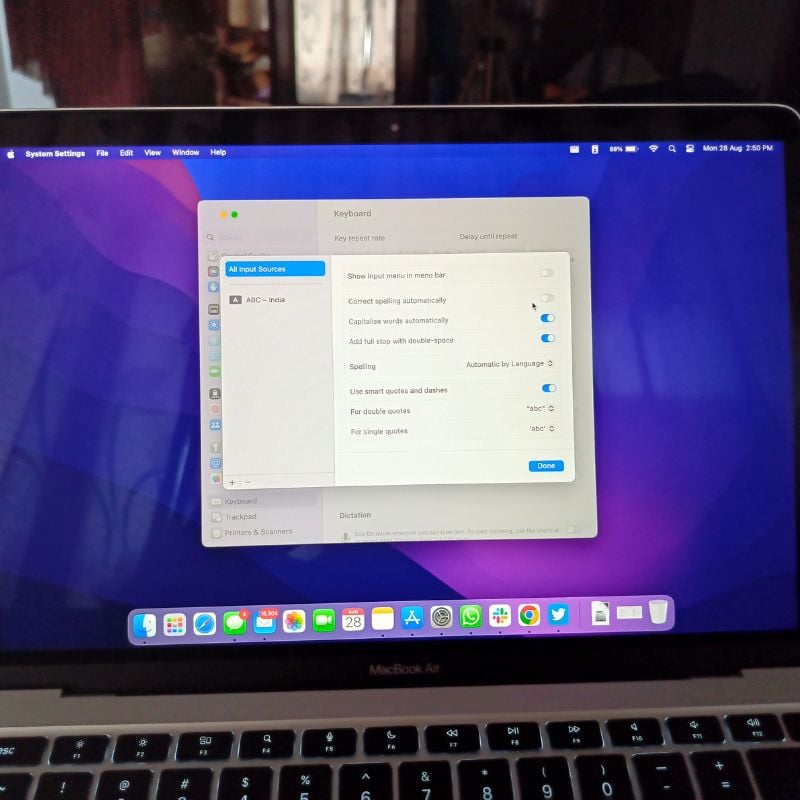
Before we get started, we like to make a few changes to the macOS keyboard. In the Autocorrect settings, we like to turn off Auto-replace because it’s sometimes annoying. But we’ll leave the Auto-Capitalise and Double tap to add full-stop options enabled. You can make the changes accordingly.
Those were all the changes we wanted to make in macOS Settings to make it more user-friendly. You can look through all the settings and change them accordingly. Next, we usually download some applications that we use on a daily basis.
Download Your Favorite Apps on MacOS
We would like to download some apps to our new MacBook that we use daily.
Favorite Browser

You can either use the default Safari browser or another browser of your choice. Personally, we prefer to install Google Chrome because it is part of our daily workflow, and unlike Safari, it is cross-platform.
Shortcut Apps
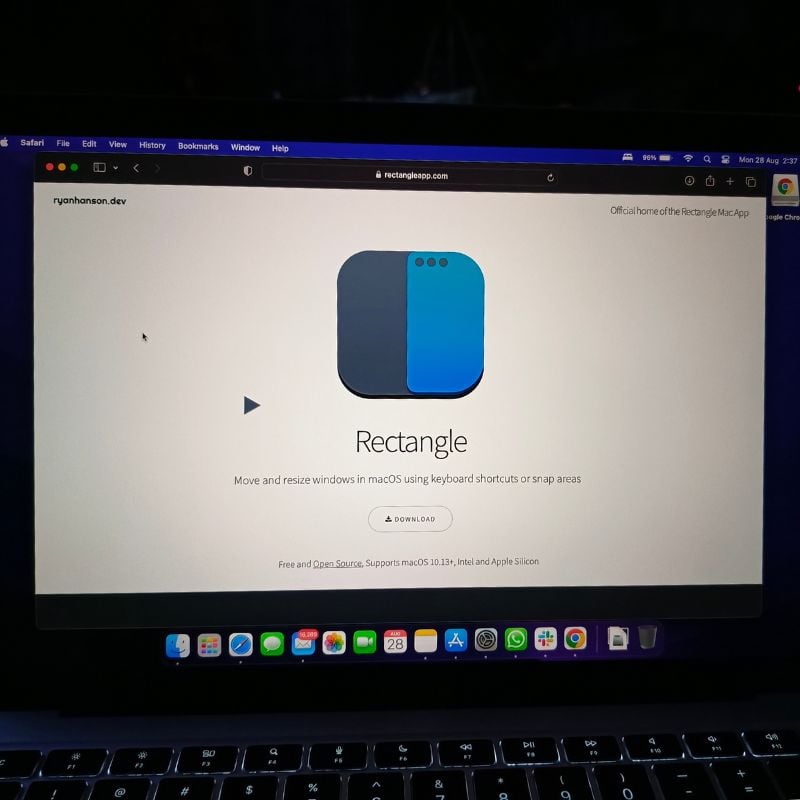
To learn all the keyboard shortcuts on macOS and also learn new ones, we like to install an app called Rectangle. This app enables a lot of useful keyboard shortcuts that will help us work faster on macOS. You can install any other app you want. We have curated the list of the best Window Manager apps for macOS. So check them out.
Settings to Keep Your Mac Safe
One of the most important things people must do (but often forget) when setting up a new MacBook is to secure the Mac. Ensure you set a strong password that can’t be easily guessed. In addition to that, we have provided some additional tips in our guide on keeping the Mac safe. Do check it out as well.
Other than that, you can install any app you want. Most of these apps can be installed from the macOS App Store, but you can also easily install third-party apps. We have curated some of the best apps to install for Mac, such as the best media player apps, the best photo editing apps, the best free Mac games, the best note-taking apps, the best clipboard managers, and many more.
Set Up New MacBook Like a Pro
Setting up your new MacBook like a pro isn’t just about aesthetics or convenience; it’s about streamlining your workflow and improving your overall computing experience. By following the steps and tips outlined in this article, you can ensure that your new MacBook is tailored to your exact needs, whether you’re a creative professional, a student, or a business professional. By putting a little time and effort into the initial setup, you can work smoothly and productively with your new MacBook for years to come.
What MacBook are you currently using? Let us know in the comments below if you have any questions or suggestions.
FAQs about How to Set Up Your New MacBook Like a Pro
1. Where do I start when setting up my new MacBook like a pro?
Start by unboxing your MacBook, powering it on, and follow the initial setup instructions. This includes choosing your language, connecting to Wi-Fi, and logging in with your Apple ID.
2. What are some essential system preferences I should configure?
Configure important settings such as trackpad and keyboard settings, display settings, power saving options, and security and privacy settings. You can access these settings in the “System Preferences” app.
3. How do I customize the desktop and organize my files efficiently?
You can organize your desktop by creating folders and using the “Stacks” feature. To organize files, use the Finder app, create folders, and employ tags or labels for easy searching.
4. Which apps should I install for a productive setup?
It depends on your needs but think about essential apps like a web browser, a productivity suite (such as Microsoft Office or Apple’s iWork), apps for note-taking, and media software. You can download apps from the App Store.
5. What are some macOS features that can boost productivity?
macOS offers features such as Spotlight search, Mission Control, Spaces, and Split View for multitasking. Mastering keyboard shortcuts can also greatly increase productivity.
6. How can I set up iCloud and use it effectively?
Go to “Apple Menu” > “System Preferences” > “Apple ID” and enable iCloud features such as iCloud Drive, Photos, and iCloud Keychain. This will allow seamless data synchronization between devices.
7. What accessories should I consider to enhance my MacBook setup?
Accessories like an external monitor, ergonomic keyboard, mouse or trackpad, and laptop stand can help you get more out of your MacBook. In addition, backup storage and a surge protector are practical choices. Check our guide on the best accessories for MacBook.
8. How do I ensure the security of my MacBook during setup?
Set a secure login password, enable FileVault for hard drive encryption, and activate the firewall. Keep your software and apps up to date, and be wary of phishing scams and suspicious downloads.
9. How can I troubleshoot common setup issues?
If you have problems during setup, check the official Apple support website or contact Apple Support for help. The most common issues include Wi-Fi connection and account login problems.
10. Is it necessary to create a backup of my MacBook during setup?
Yes, it is highly recommended to set up a Time Machine for automatic backups. This will ensure that your data is safe in case of hardware failure or data loss.
