Quick Answer
GitHub hosts powerful open source apps you can use daily, from Immich for photo backups and Upscayl for image upscaling to VERT for file conversion, BC Uninstaller for cleanup, Mole for Mac storage, WinApps for Windows apps on Linux, and more.
Ever since I started using open-source apps and projects, I discovered a new world of apps that I never knew existed. Most of these digital paid tools work way better than popular apps.
Most of us perceive open source tools as developer-centric, which requires deep technical knowledge to use them. I have used hundreds of open source projects over the years; most of these projects are easy to use and set up.
GitHub is the number one repository for home to apps, so for the last month, I have been trying different open source projects from GitHub, including AI projects that are currently popular. Since last month, I have tested over 50 open source projects from GitHub and found a few best tools that can be useful for everyday users. In this guide, you will learn about nine best open source projects from GitHub, their uses and a step-by-step guide on how to install them on your device.
Table of Contents
Best Open Source Projects from GitHub
App Name | What it does | Download |
|---|---|---|
Immich | Best Google Photos Alternative | |
Upscayl | You can upscale images locally on your device without any limits | |
VERT | Local file cobnverstion tools that supports 100s of file formats | |
Epicentre | Simple voice to text convertor which you can use for voice typing | |
BC Uninstaller | Remove unwanted bloatware on windows easily | |
WinApps | Run windows app on Linux without dual boot | |
Mole | Manage storage on your Mac | |
KoalaKeys | Find shortcuts of any app | |
Open Notebook | Best free alternative to NoteBookLM |
Set Up a Free Alternative to Google Photos
Most of us rely on Google Photos for storing our photos. And it is the default photo app on most Android phones. While it offers plenty of features, if you need to share your photos or want to access them from other devices, you need to upload them to the cloud.
If you are using the free version, it offers 15GB of free storage, which can quickly fill up with your Photos and impact other Google services, such as your email.
To ensure smooth functionality, you need to free up some space on your Google Drive. However, there are free tools like Immich, which you can use as a free alternative to Google Photos and get unlimited storage without compromise.
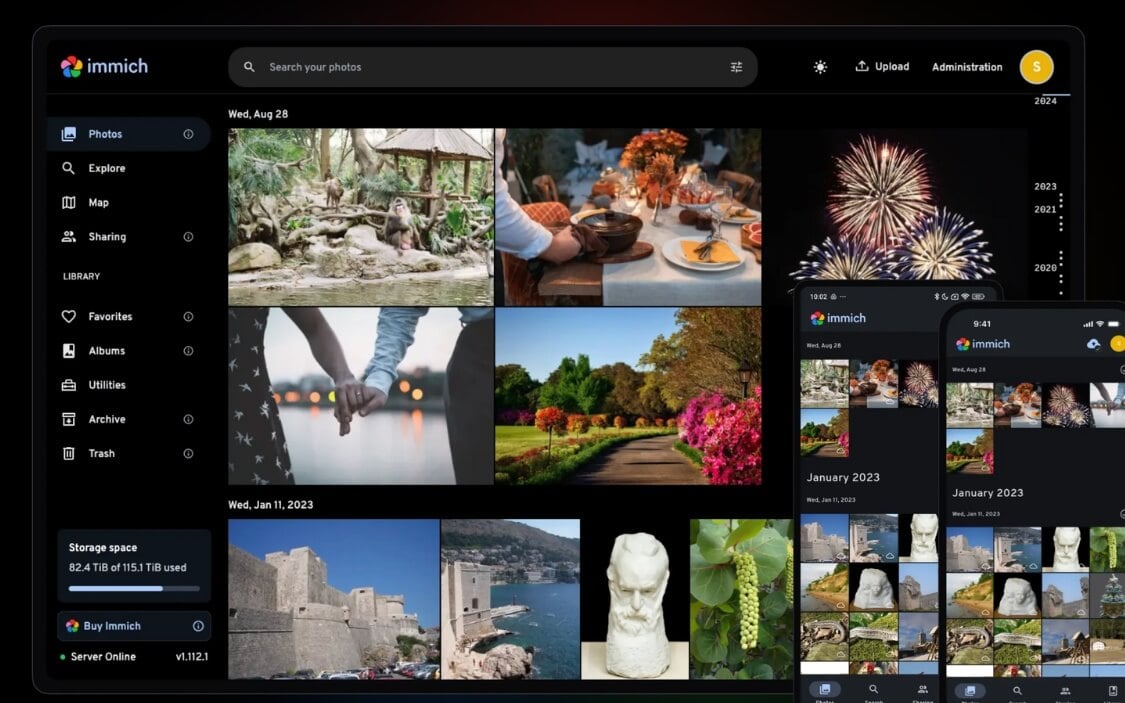
immich is a free, open-source alternative to Google Photos, which you can host on your device locally. Similar to Google Photos, it lets you back up, organize, search, and share your entire photo/video library, just like Google Photos and more.
Once hosted locally, you can access your photos across all devices using native apps available for both Android and iOS. The best features in immich are the ability to import your entire Google Photos library and store it securely on your device.
And similar to Google photos, immich also comes with AI features like facial recognition which can automatically group photos based on face, comes with natural language search similar to Google photos which you can search photos using natural language such as last trip to Shimla along with object detection, map view and also comes with memories features that brings your old memories and shows you similar to Google Photos.
It also comes with user management and lets you share photos with others. The best part is that there is an app and an option to access your photos remotely using a few external methods. Here is how to set it up on your device.
How to set up Immich locally on your device:
Step 1: First, install Docker on your Mac or Windows device
Step 2: Next, you need to get Immich to run locally on your device.
Use this command: curl -L https://github.com/immich-app/immich/releases/latest/download/docker-compose.yml -o docker-compose.yml
Step 3: Next, you need to start the immich: Use this command: docker compose up -d
Step 4: That’s it, immich will start running on your local server to access: http://localhost:2283
Next, install the mobile apps, connect to the server, and access the files. If you find these steps complex, we have a detailed guide on how to set up immich.
Upscale Your Images for Free
Ever since Google introduced Gemini Nano Banana Pro, I have been using it to revive old images; however, the biggest limitation is that it is only for a single image at once, and sometimes hallucinates and changes the objects in the image.
When I started looking for alternative ways, most of them had a limited free version and required a premium to upscale bulk images. And if you are like me, I found a free app that works offline and lets you upscale images locally on your device without limits.
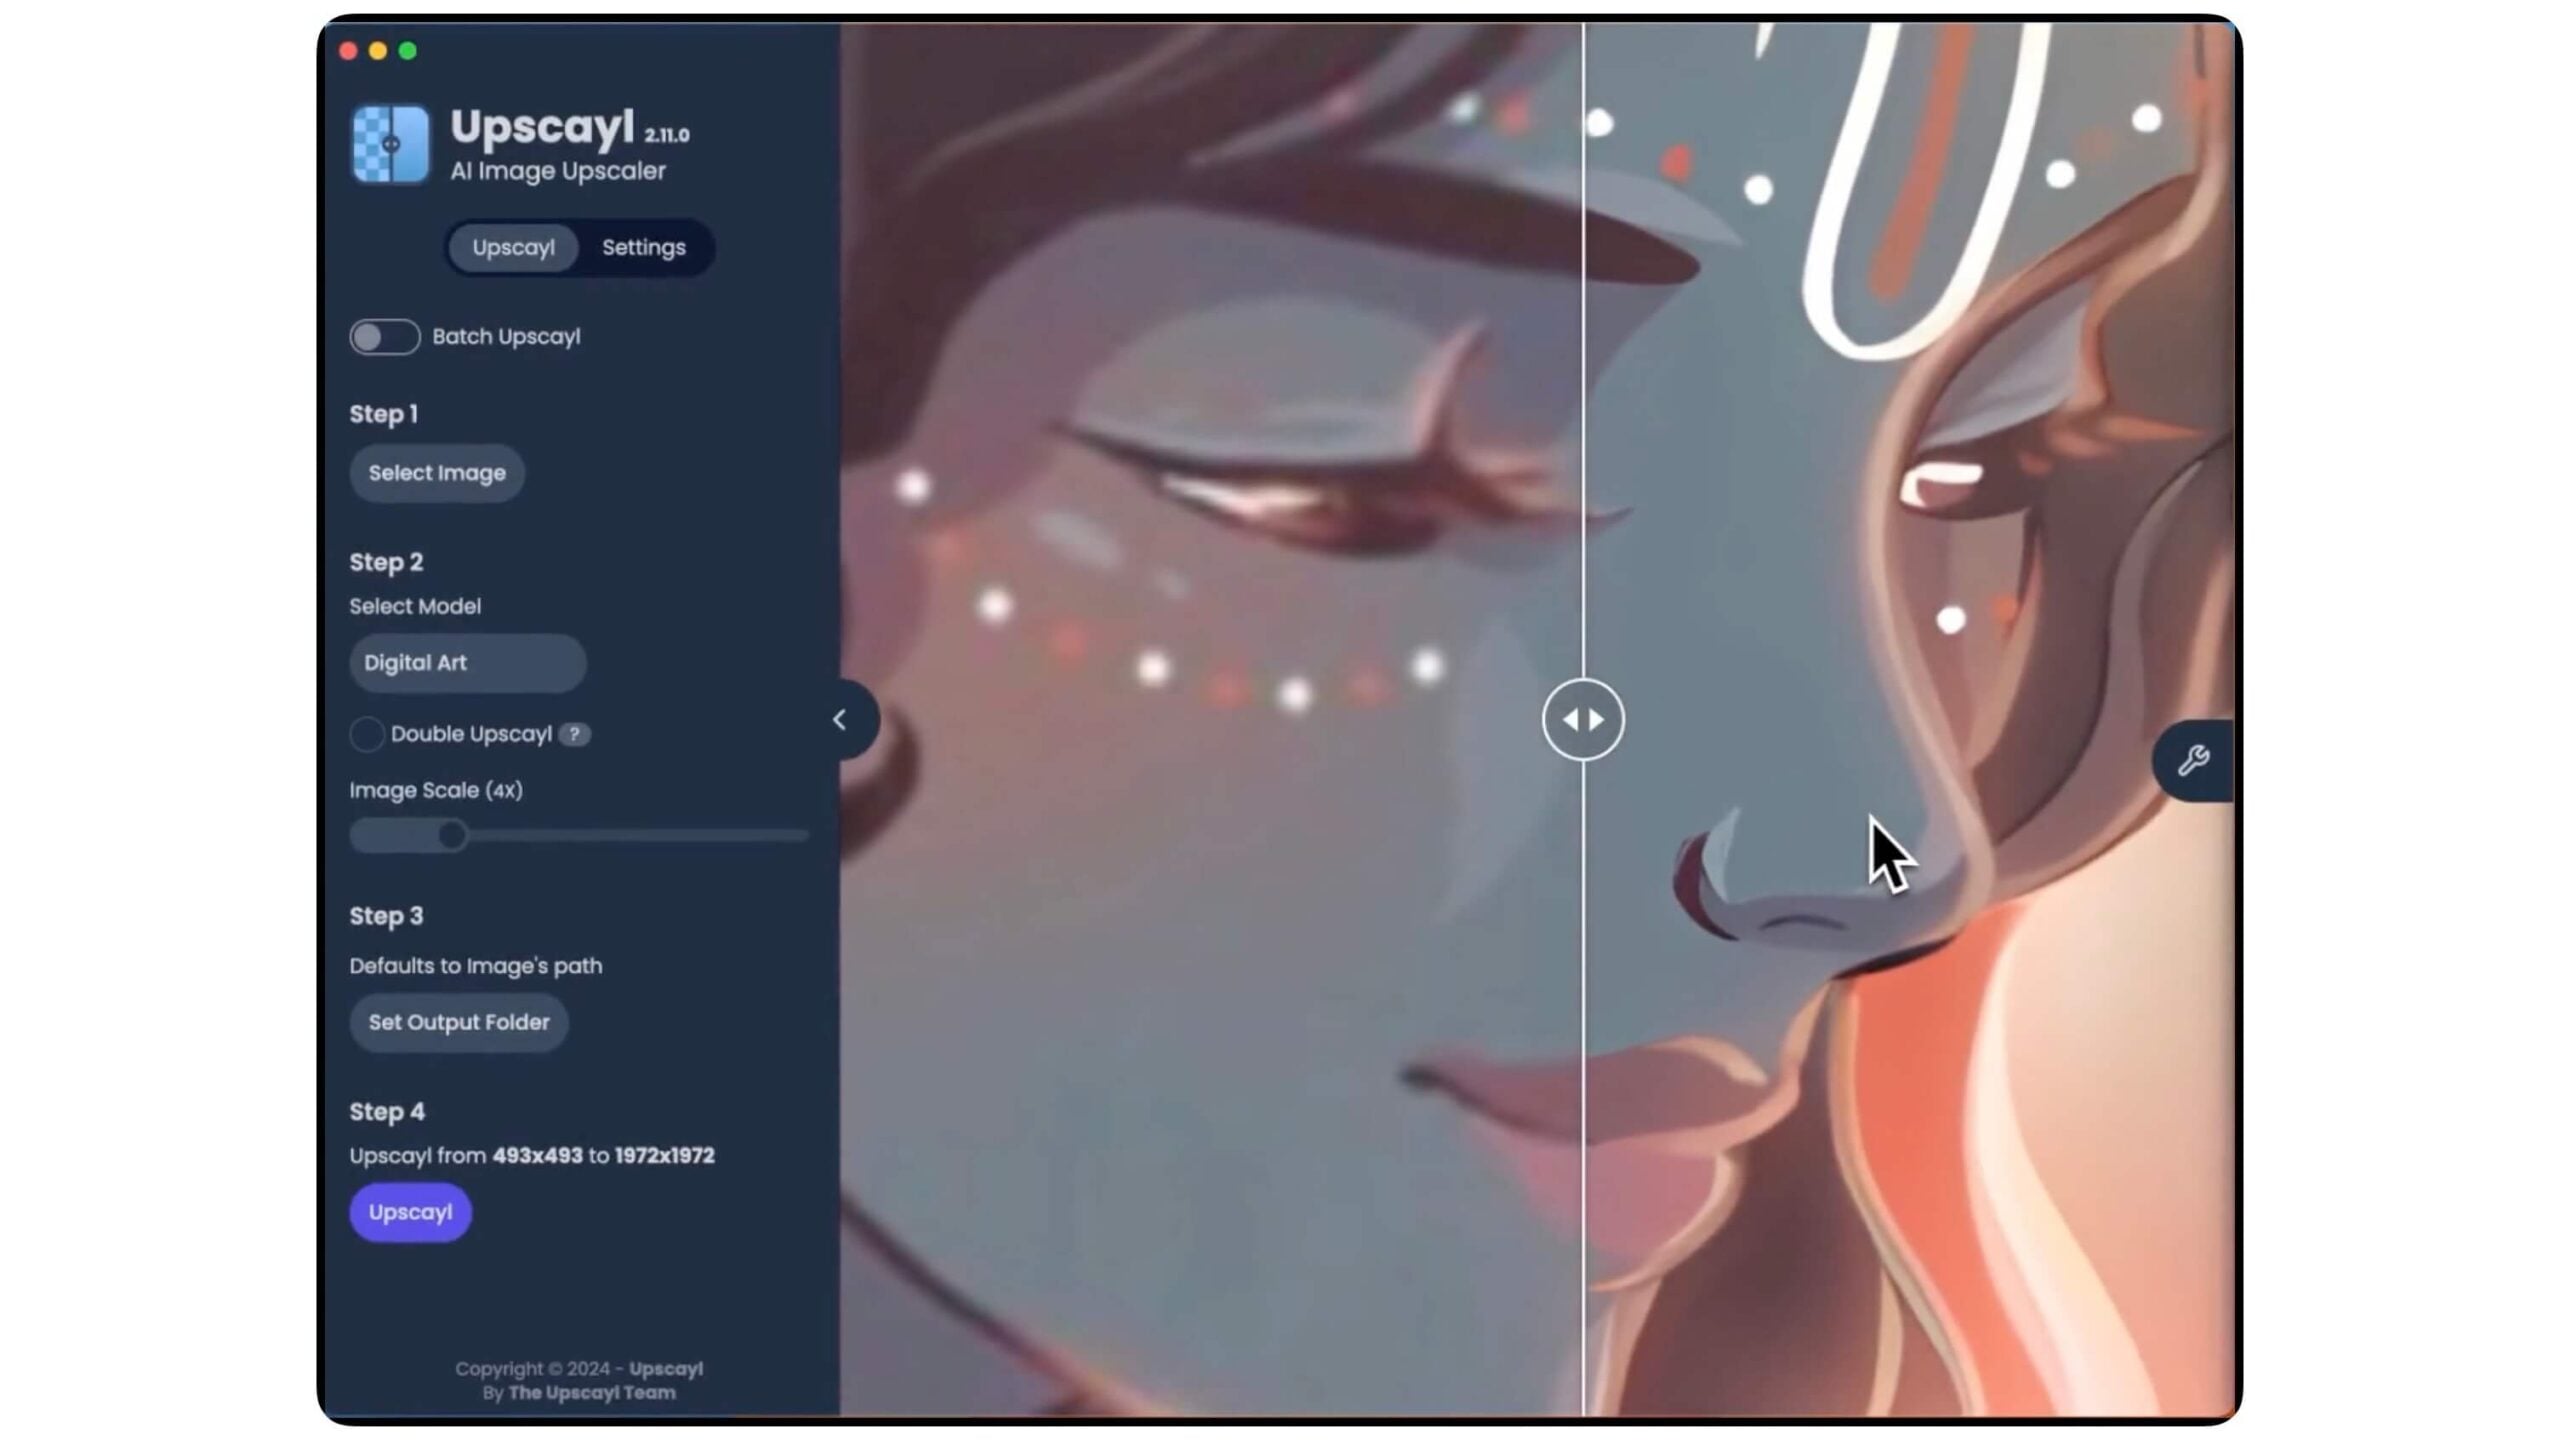
The tool is called Upscayl, an open-source image generator, which is available for all platforms, and lets you upscale free deep learning models that run offline.
The best part is not just using a single model; Upscayl uses multiple models, scaling models for different enhancements, which include several built-in models for different needs, such as ‘Real-ESRGAN,’ ‘Remacri’ (by Foolhardy), ‘Ultramix Balanced’ by Kim, and ‘High Fidelity’ to upscale images.
It also supports batch processing, which lets you upscale bulk images for free. Installing Upscayl locally is also easy. You can simply download and install it just like any other regular app.
VERT Convert Files Offline Locally
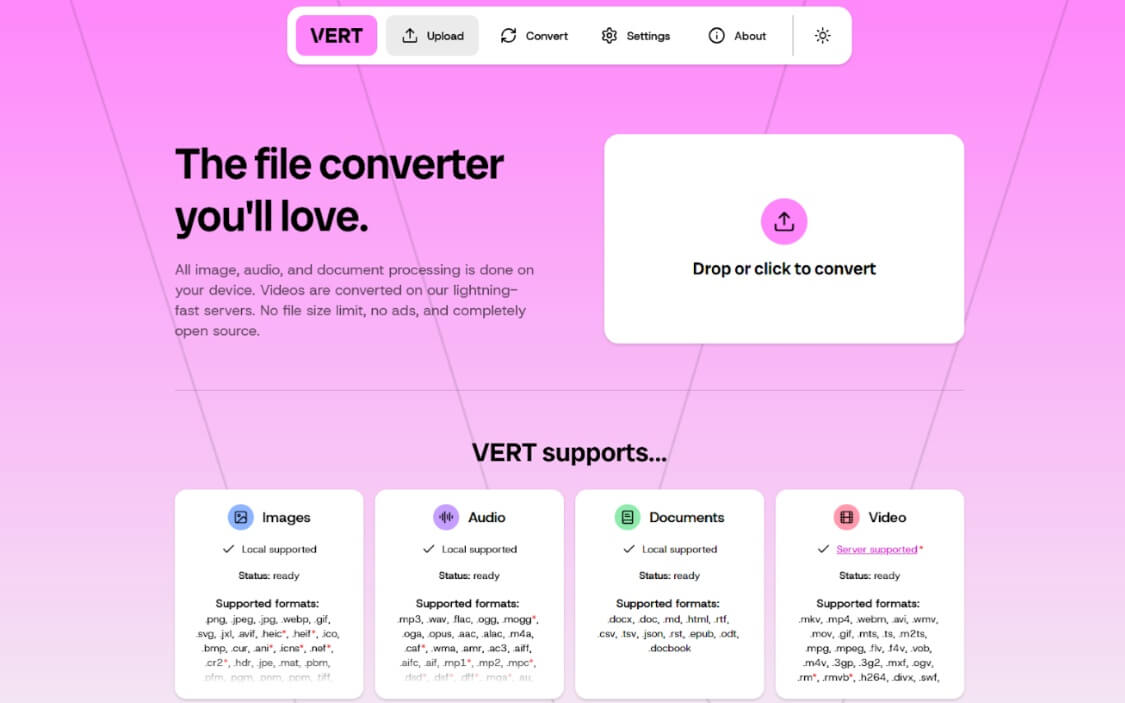
VERT is a free open source local file converter that supports over 250+ file formats, including image formats like PNG, JPEG, WebP, GIF, AVIF, TIFF, ICO, and Audio formats like MP3, WAV, OGG, M4A, FLAC, AAC, and Documents like PDF, DOCX, TXT, EPUB, etc., so it already has a unique advantage of accessing all file formats and conversions in a single place, rather than using multiple online rooms.
The best part is that it works offline, so you also don’t need to worry about privacy or uploading large files to the cloud. Since everything works locally, if you have a decent PC with resources, you can run it offline and convert multiple files at once.
VERT also supports video conversion; however, currently, it is on the web version, which requires you to upload the video to the cloud, process it, and download it. You can run it locally by setting it up using Docker on your device. It also offers a clean and easy-to-use interface, making it easy even for beginners.
Download VERT File Converter from GitHub
Better Voice Inputs Compared to Others
Voice inputs have fundamentally changed how I type on most platforms. Instead of typing a long message using a keyboard, which can be time-consuming, especially on a laptop, you can simply use the Microphone to record and convert your voice into text and send it.
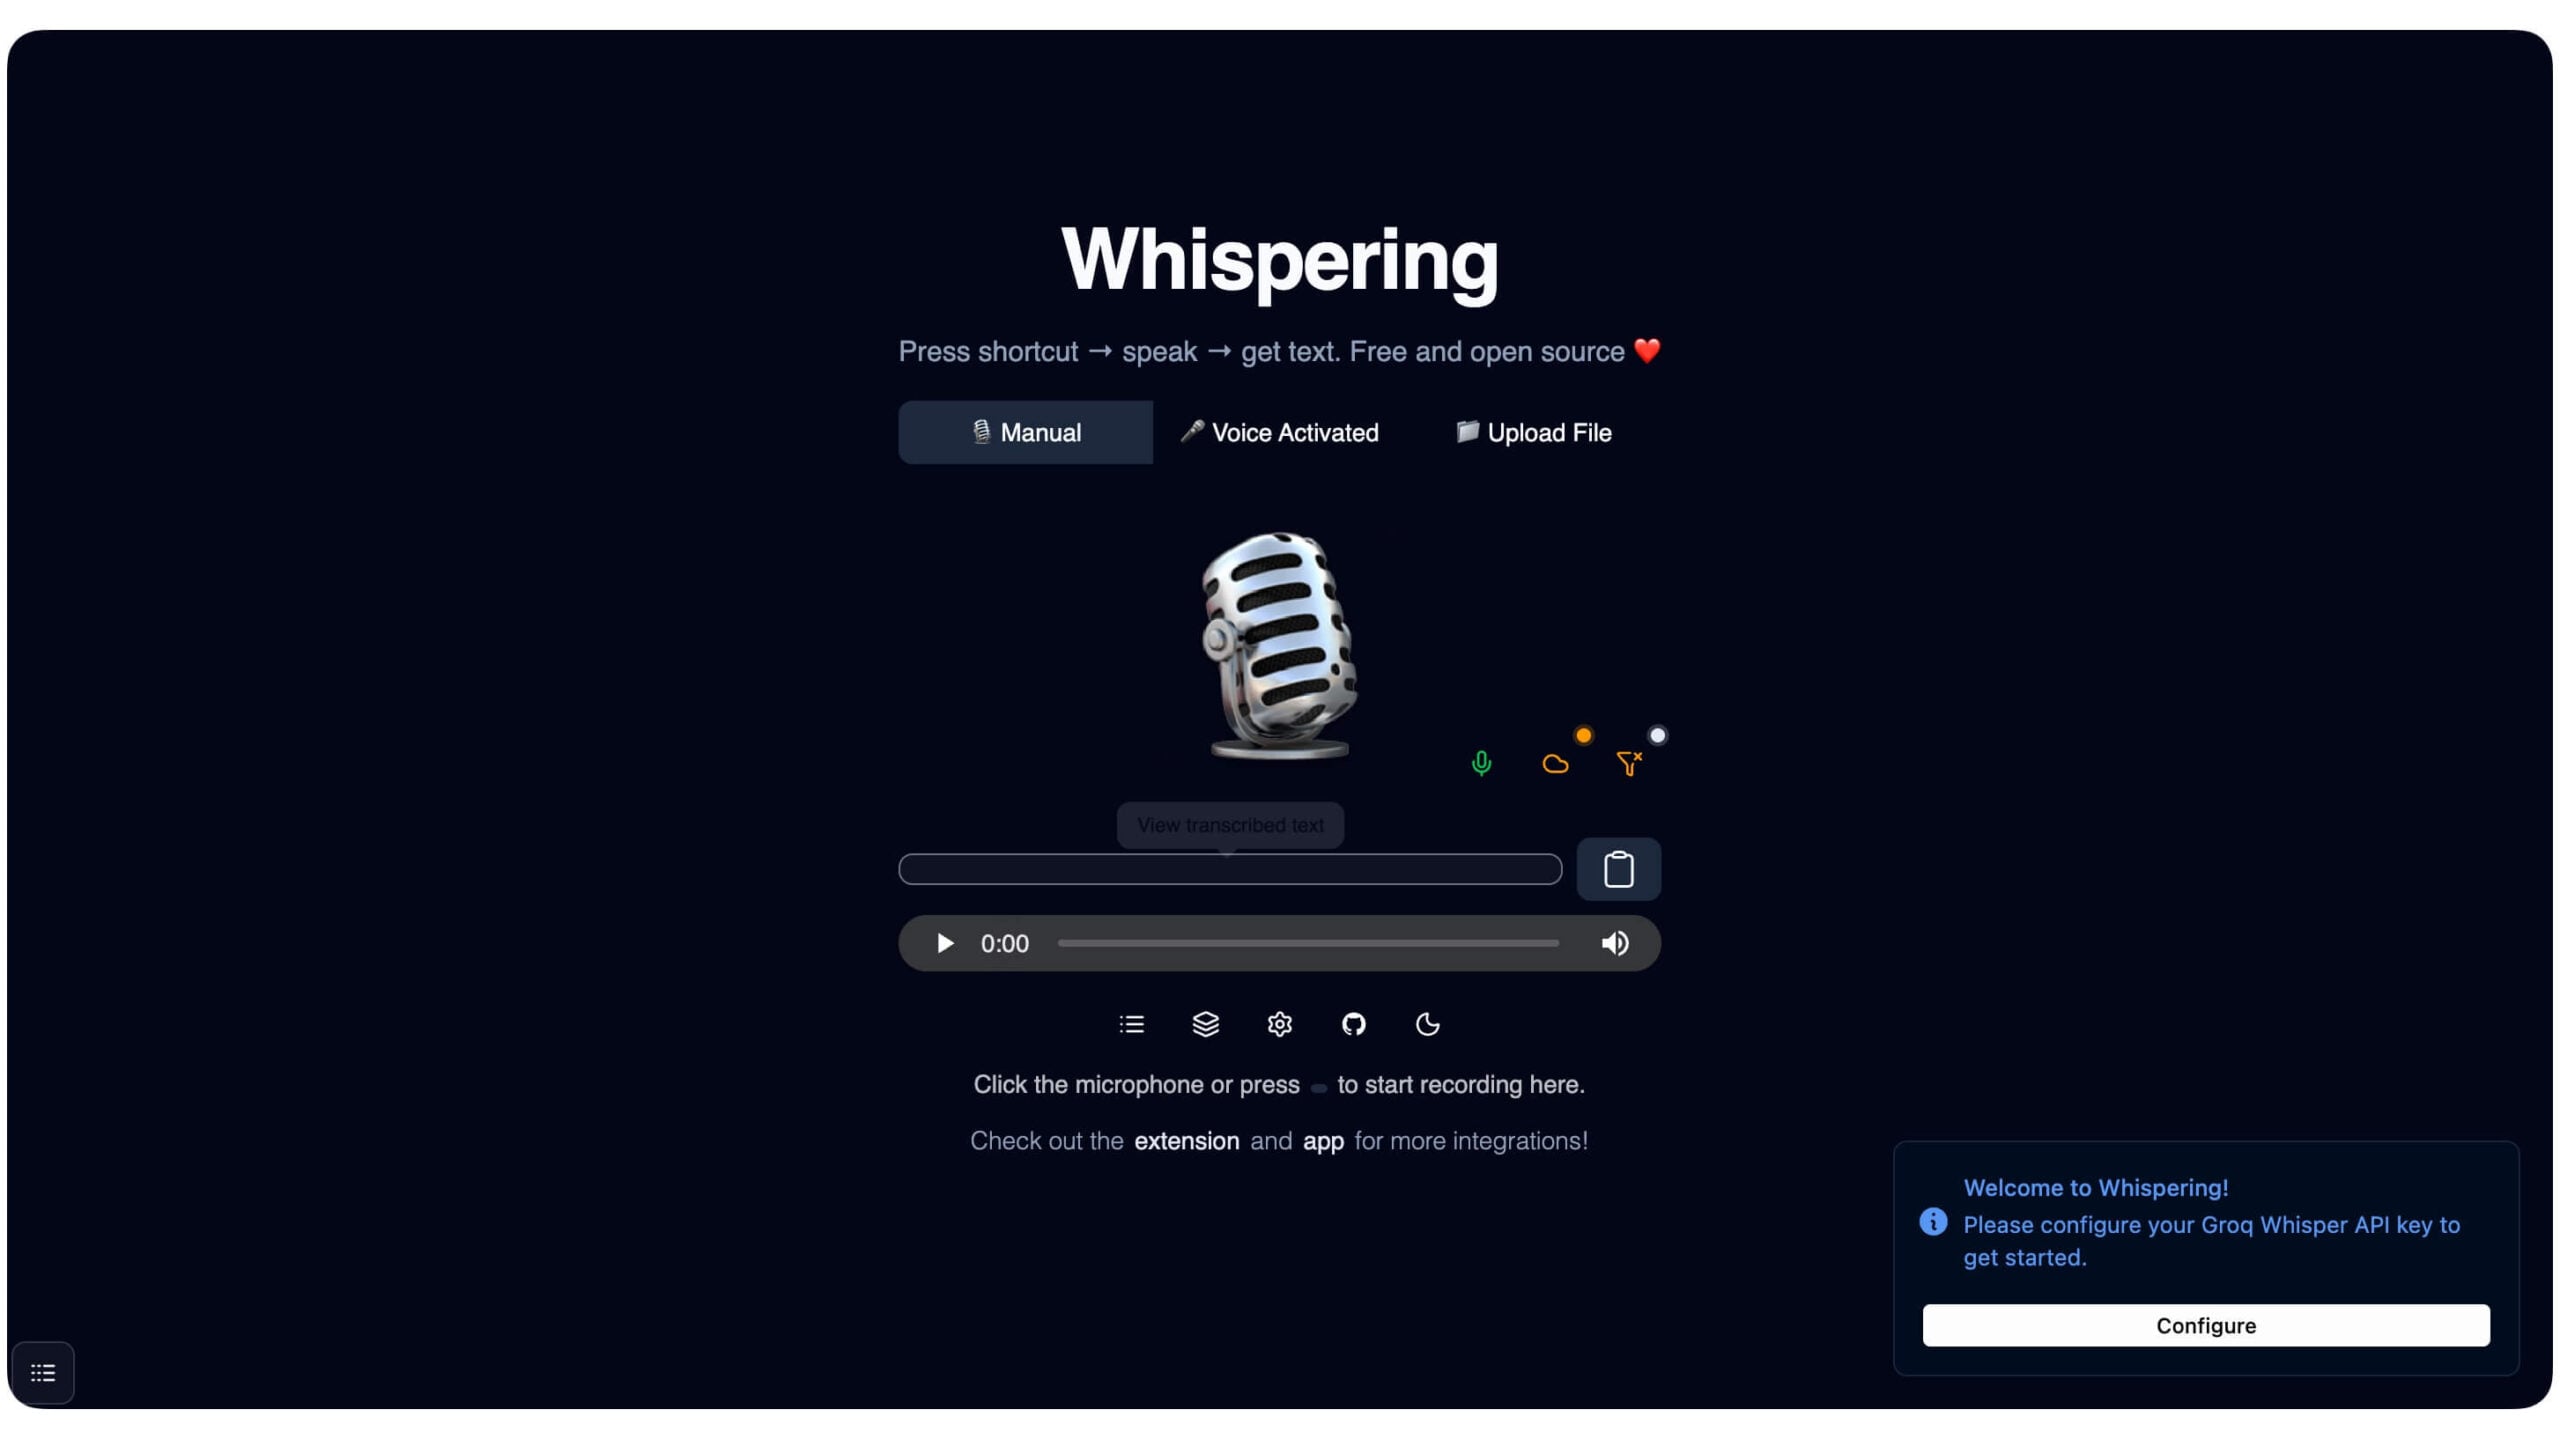
While both Mac and Windows offer native record and voice type options, Epicenter differentiates itself by offering a unique workflow. So instead of continuous typing mode, which is the current workflow for native voice-to-text features, you need to assign a shortcut and access it by pressing it and speaking, and don’t switch to different modes.
It also offers better accuracy, especially if you are using it for technical language, works locally, similar to OS level transformation, so you don’t have to worry about privacy, and finally, it works anywhere and on any app.
How to install the Epicenter voice-to-text tool on your device
You can install Epicenter just like any other app on macOS or Windows. Here are the official download links for
However, for macOS, you can directly install it on your device using Homebrew.
Step 1: Use this command in your terminal and ensure
Homebrew is already set up on your device
Step 2: Command: brew install –cask whispering
Step 3: Click on the download link from above and install it on your device.
Step 4: Once installed, open the app and grant the necessary permissions and assign the shortcut key.
To use it, long-press the shortcut key and speak.
Download Epicenter from GitHub
Clean Bloatware on Windows

No matter how clean you want to keep your laptop, over time, it can easily get filled up with junk apps, bloatware, temporary folders and files, and more. This can happen for both Windows and Mac users; however, Mac users are more conscious about storage compared to Windows because of the limited storage availability.
So this tool is specially built for Windows users to clean up and manage junk files on Windows without complex user flows. BC uninstaller is an easy-to-use tool that helps you manage files and programs on your Windows. It scans the entire Windows and finds files and software that are even hidden by the system by default.
Once you have the list, you can remove unused apps that you no longer use. The best part is that it not only lets you view all programs and files in the hidden folders but also helps you remove those apps that refused to uninstall normally, and also apps that were installed from Microsoft app stores, leftover folders, installer files, and registry entries.
It is the single best app you need to have on your device if your device often gets filled with junk files and folders over time. You can use this BC Uninstaller on new laptops to remove bloatware and fix a slow laptop.
Installing BC uninstaller is easy. You can install it using the three download links below.
Once you download and install it on your device, you can manage files and programs on your Windows device easily.
Once installed, open the app and wait for the software to scan and list all files. Once listed, you can select the programs you no longer use, select the file, and click on the Uninstall button in the header. The software removes all the program files and their traces completely from your device, which could help to speed up your PC and save storage.
Use Windows App in Linux Without Dual-Boot
If you are like my friend who likes Linux but is forced to use Windows, this tool is for you. Most users use a dual-boot system to use cross-platform apps, but it is resource-heavy since your device needs to run two OSes simultaneously, which can take up a significant amount of resources and degrade your performance, especially if you are running on low-end hardware.
If your use case just involves using Microsoft apps and a few other popular Windows apps, you can use Windows apps without needing to dual-boot your system.
You can simply use Winapps to run Windows apps on Linux. It offers fully functional features to seamlessly run Windows apps on Linux.
A few of those features that this tool offers are native Linux shortcuts for Windows app that lets you create desktop menu shortcuts on Linux for a native feel, full file integration, which you can right-click on Linux and open a file in any Windows apps, such as documents in Windows Word and Photoshop files in Windows Photoshop app and much more.
While the app makes it easy to use Windows apps on Linux, it can be a bit complicated to set up for beginners; however, it’s easy to use for already existing Linux users.
Step 1: Install the required Linux packages to run WinApp on your Linux. You can use this command:
Open Terminal and enter this command, and click on enter:
sudo apt update
sudo apt install -y curl dialog freerdp3-x11 git iproute2 libnotify-bin netcat-openbsd
Step 2: To run WinApp, we are going to use Docker. You can install it for free on your device. Use this command:
sudo apt install -y docker.io docker-compose-plugin
sudo systemctl enable –now docker
sudo usermod -aG docker “$USER”
Step 3: Next, you need to clone the WinApps repo
Use this command:
git clone https://github.com/winapps-org/winapps.git
cd winapps
Step 4: Next, you need to create a folder for the Windows VM
Use this command to make a folder: mkdir -p ~/winapps-windows
Next, download Windows ISO. We already offer high-quality Windows file ISO downloads
Once downloaded, you need to move it to the Windows VM folder.
Use this command to copy that to that folder
mkdir -p ~/winapps-windows
Step 5: Next, you need to create and start the Windows VM on your Linux
Now, we go to your WinApp’s folder and use this command
cd ~/winapps
Now you need to open the docker setup file. Use this command to do that:
nano compose.yaml
Step 6: Next, inside the file, check for the option that says ISO_PATH=
And point the path to the windows iso files you just copied to a separate folder before
ISO_PATH=/home/YOURNAME/winapps-windows/Windows.iso
Here is the example: ISO_PATH=/home/ramesh/winapps-windows/Win11_23H2_English.iso
Step 7: Next, save the file. You can use Control + O to enter and Control + X to exit.
Step 8: Now you need to start the Windows VM using Docker.
You can use this command: docker compose up
Step 9: Next, it opens up the Windows setup. Now you need to run through the entire setup and complete it. Once the setup is finished, follow the other steps below. Also, create a username and password, and remember that we will use them in the upcoming steps
Step 10: Now you need to connect your Linux to Windows. Open Linux Terminal and enter this command:
mkdir -p ~/.config/winapps
nano ~/.config/winapps/winapps.conf
Step 11: Now paste this code and replace it with real values
RDP_USER=”YourWindowsUsername”
RDP_PASS=”YourWindowsPassword”
WAFLAVOR=”docker”
RDP_IP=”127.0.0.1″
RDP user name is the Windows username that you created when setting up Windows in the previous step, and RDP pass is the password that you created.
Step 12: To save, press Control + O and Control + X to exit. To test the connection, you can use this command:
xfreerdp3 /u:”YourWindowsUsername” /p:”YourWindowsPassword” /v:127.0.0.1 /cert:tofu
Step 13: Next, use this command to install the Windows app, and these steps also automatically add the Windows app shortcut to your Linux. You can simply double-tap. The app to open them
bash <(curl https://raw.githubusercontent.com/winapps-org/winapps/main/setup.sh)
You can follow this simple video guide to install WinApp if these steps sound complex to you.
Here is the video link:
Clean and Manage Mac Storage
Mac users are always space-conscious compared to Windows; however, despite all the preventive methods, Macs with low storage can quickly fill up and often experience lags and sometimes even overheating. The only option most of the time is to visit the storage and clean up unwanted files manually.
Similar to Windows, Now can clean system junk files and uninstall unused apps to save a significant amount of storage on your Mac.
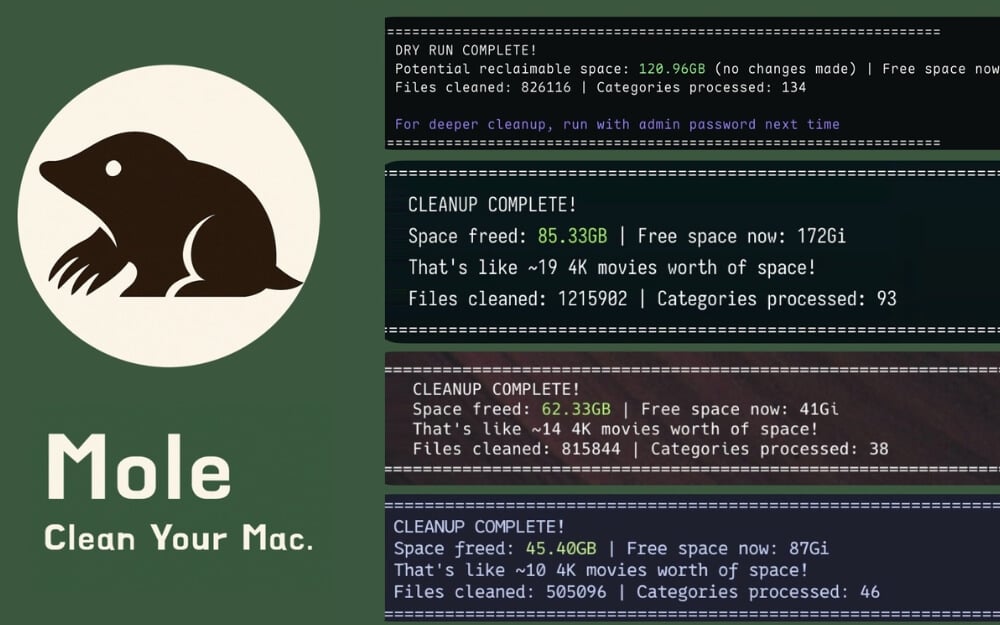
You can use the free open-source Mole on your Mac to optimize storage. After scanning your Mac, it also shows all files, including caches, browser data, logs, temp files, developer leftovers (Node/npm/Xcode), trash, and app junk files, and much more. Once it is detected, you can tap on the Clean button to remove all these junk files and also uninstall the used programs on your computer.
It also comes with a disk analyzer that lets us easily analyze storage usage and also easily find files and folders that take up a huge amount.
Not just that, it also comes with a live system dashboard that shows real-time CPU, memory, disk usage, temperatures, fans, battery cycles, network speeds, and process load in real-time. While you can ignore the majority of the dashboards, the disk usage can help you quickly get an overview of your current macOS disk usage.
However, the only downside is that Mole doesn’t have a user interface, so you need to deal with the commands to clear and manage storage on your Mac.
How to install Mole on your Mac
Step 1: You can install it using this simple homebrew command: brew install tw93/tap/mole
Step 2:Once installed, here are commands you can run to clear storage, uninstall programs on your Mac and much more
You can use this command to get an interactive menu and browse different actions: momo # Interactive menu
mo clean # Deep cleanup
mo clean –dry-run # Preview cleanup plan
mo clean –whitelist # Adjust protected caches
mo uninstall # Remove apps + leftovers
mo optimize # Refresh caches & services
mo optimize –whitelist # Adjust protected optimization items
mo analyze # Visual Disk Explorer
mo status # Live system health dashboard
mo touchid # Configure Touch ID for sudo
mo update # Update Mole
mo remove # Remove Mole from system
mo –help # Show help
mo –version # Show installed version
Find Quick Shortcuts for Any App
Keyboard shortcuts have always been a lifesaver, especially saving time and finishing the task with less effort; however, the biggest pain points of using keyboard shortcuts are remembering those shortcuts.
To make it even worse, each app has its own Shortcuts, making things worse. This open source makes it easy for you to remember and use Shortcuts for any app.
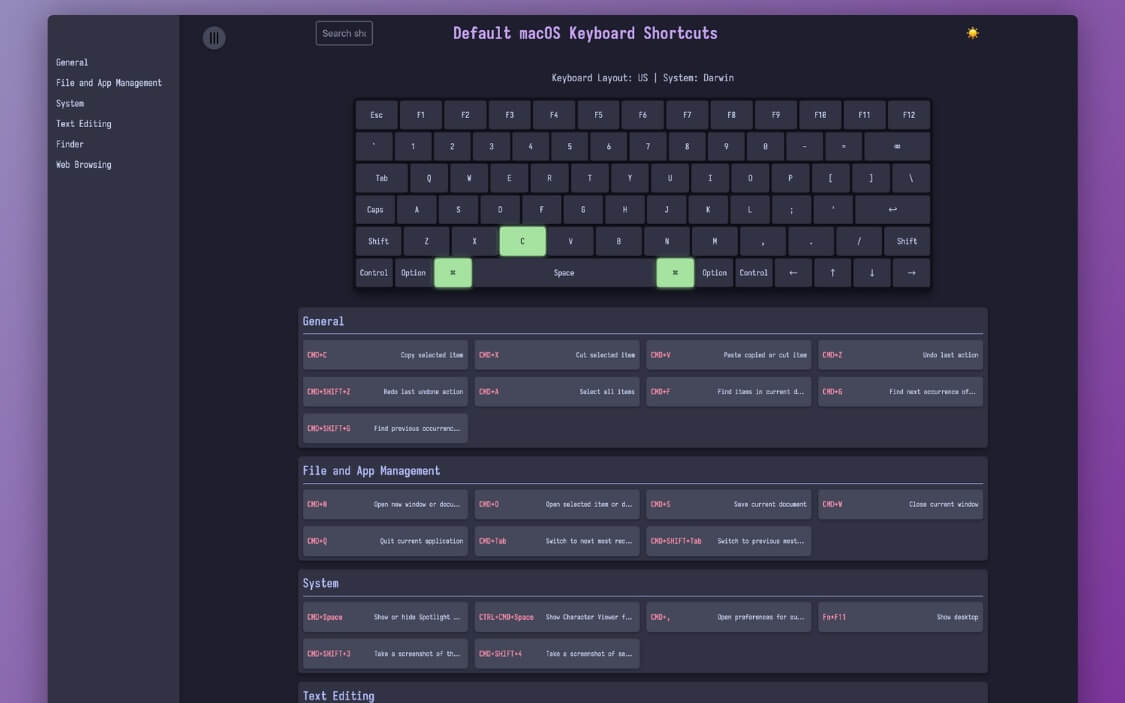
KoalaKeys displays Shortcuts for every app in a simple list. The shortcut screen shows all supported Shortcuts for the current app, and these Shortcuts are categorized into different sections, making it easy to find the exact shortcuts you are looking for.
Not just you can also tap on the shortcut and highlight the keys on the keyboard using a virtual keyboard on tap, making it easy to discover new Shortcuts and where they are located on your keyboard.
KoalaKeys supports all major apps and automatically fetches working keyboard shortcuts for these apps. While you can access keyboard shortcuts from the web, KoalaKeys makes it easy to access, remember, and use them on your device.
Steps to install KoalaKeys on your device
Step 1: Use the prompt to install it on your device
git clone https://github.com/rtuszik/KoalaKeys
cd KoalaKeys
uv sync –locked
Step 2: Next, you need to set up the output folder
CHEATSHEET_OUTPUT_DIR=path/to/output
Step 1: Next, you need to create a YAML Cheat sheet
name: VS Code Shortcuts
system: macOS
shortcuts:
– keys: [“cmd”, “p”]
description: Open file quick search
Now you need to generate a cheat sheet
UV run src/generate_cheatsheet.py
To view your chat sheet, follow this command
index.html
Download KoalaKeys from GitHub
Best Alternative to Google’s NotebookLM
NotebookLM is a great tool for anyone who works with documentation often. For students and researchers, it is a gem that organizes all your information in one place and provides detailed insights.
However, since it’s by Google, it only uses Gemini AI models for all AI-related tasks. However, if you want a similar experience but want to use other API models or want more privacy, then you can use this Open Notebook, a replica of Google Notebook LLM that lets you upload documents and PDFs, organize them into a notebook, ask questions, summarize, analyze information, and much more with any AI model.
The user interface is also very similar to Notebook LLM. So if you are already an existing user, you don’t have to worry about the learning curve. However, you need to use external AI models with an API to get AI features. While most of the AI models are paid to use, there are several free models that you can host on your device locally and use them.
For example, the Ollama model from Facebook is very fast and also great for answering questions, summarizing chats, and more. It is free to use and can run locally on your device
Here is how you can set up Open Notebook using any free model to run locally
Step 1: First, you need to install a free model on your device. In this case, I am using Ollama free models that are free to use and also faster compared to other models, and great at text output. Open a terminal and use this command
curl -fsSL https://ollama.com/install.sh | sh
On Windows, you can use the installer: https://ollama.com/download/windows
Step 2: Next, you need to install the Free model
Use this command on your Mac or Windows:
ollama pull llama3.2
To test ollama run llama3.2
Step 3: Now you need to download and set up Open Notebook tools on your device
Open a terminal, and first you need to clone the project to install it on your device. Open a terminal and use this command: .
git clone https://github.com/lfnovo/open-notebook
cd open-notebook
Step 4: Now you need to install the backup. Requirements
pip install -r requirements.txt
Step 5: Next, you need to start the backend server
uvicorn api.main:app –reload
Step 6: Next, you need to install Node.js on your device. You can visit Nodejs.org and install it on your device, and once installed, open the Open Notebook project files using the terminal and then use the following command to install
npm install
npm run dev
Step 7: Now open the Open Notebook app on your device and go to settings, and in the model provider choose local model and type this model name there:
llama3.2
Step 8: That’s it, now you can access the tools running locally on your device. You can upload the PDF and get summaries and much more.
Download Open Notebook from GitHub
Wrapping Up: The Best GitHub Projects to Try
Those are the nine best open source projects from GitHub. Every project in this guide is easy to set up and can be very useful. Starting with immich, which can be a great free alternative to Google Photos if you are worried about your storage, Upscayl can be a great option to enhance the quality of the images locally on your device.
VERT is a powerful local file converter that supports hundreds of file formats, like bloatware cleaning software like BC uninstaller, and Mole is a great way to manage storage on your device.
I hope you find this guide helpful. You can download the files from the links given below, or follow the step-by-step guide to easily set up and run them on your device. If you are facing issues while setting up these tools, you can comment below, and I’m happy to help.
