Quick Answer
To install Google TV on a USB drive, flash the Google TV ISO to a 16GB or larger USB using Rufus, set maximum persistence, then convert the persistence partition to exFAT. Move system.sfs and data.img to it, disable Secure Boot, boot from USB, complete setup, and sign in.
Gone are the days when you had to rely on your cable network provider for channels and then depend on channels to show movies and TV shows at a particular time. The streaming services like Netflix, Amazon Prime Video, Hulu, HBO Max, etc., let viewers watch their favorite shows and movies anytime, anywhere. Moreover, things have also gotten easy on a TV, thanks to TV OS platforms such as Google TV. You can install any Android app on your Google TV OS-supported smart TV and start binge-watching your favorite show.
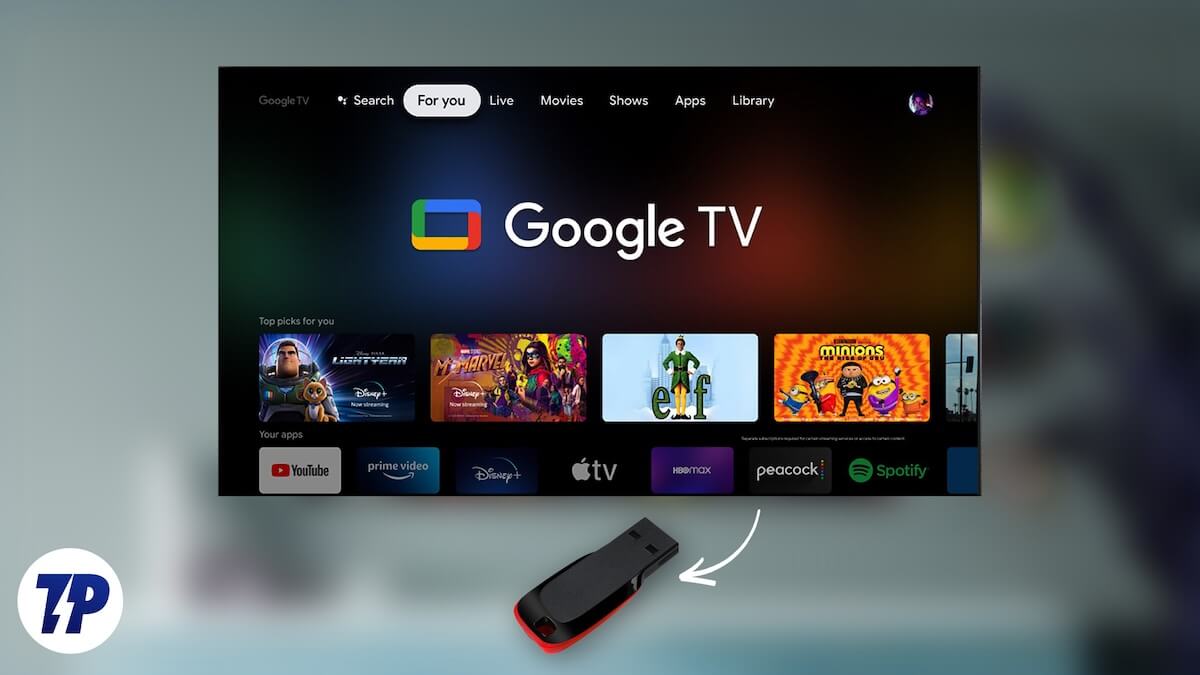
But it is not possible to carry your TV everywhere, which has all of your preferred apps, login info, and watch history. Wouldn’t it be wonderful to have a device that carries Google TV OS wherever you go? It may sound complicated, but it is actually very easy, and in this guide, we will show you exactly how you can install Google TV on a USB drive.
Table of Contents
Pre-requisites
Before we go ahead and get down to the steps to install Google TV on a USB drive, you need to have a few things at your disposal. Here are the things you need:
- USB drive: The more capacity it has, the better. But we would advise not to go below 16 GB.
- Google TV files: To run Google TV OS, you need the OS itself, and that too in RAR format.
- Rufus: The tool that we will be using to flash the USB drive and install Google TV OS on it.
- Windows PC: Because what’s more versatile than a Windows PC? You can do that with a macOS PC as well.
Install Google TV on a USB drive
We have divided the process of installing Google TV on a USB drive into multiple steps for easier understanding. You need to follow each step carefully, because skipping any of the steps below will not result in the desired outcome.
Step 1: Prepare the USB with Rufus
In this step, we will be preparing the USB for installing Google TV on it.
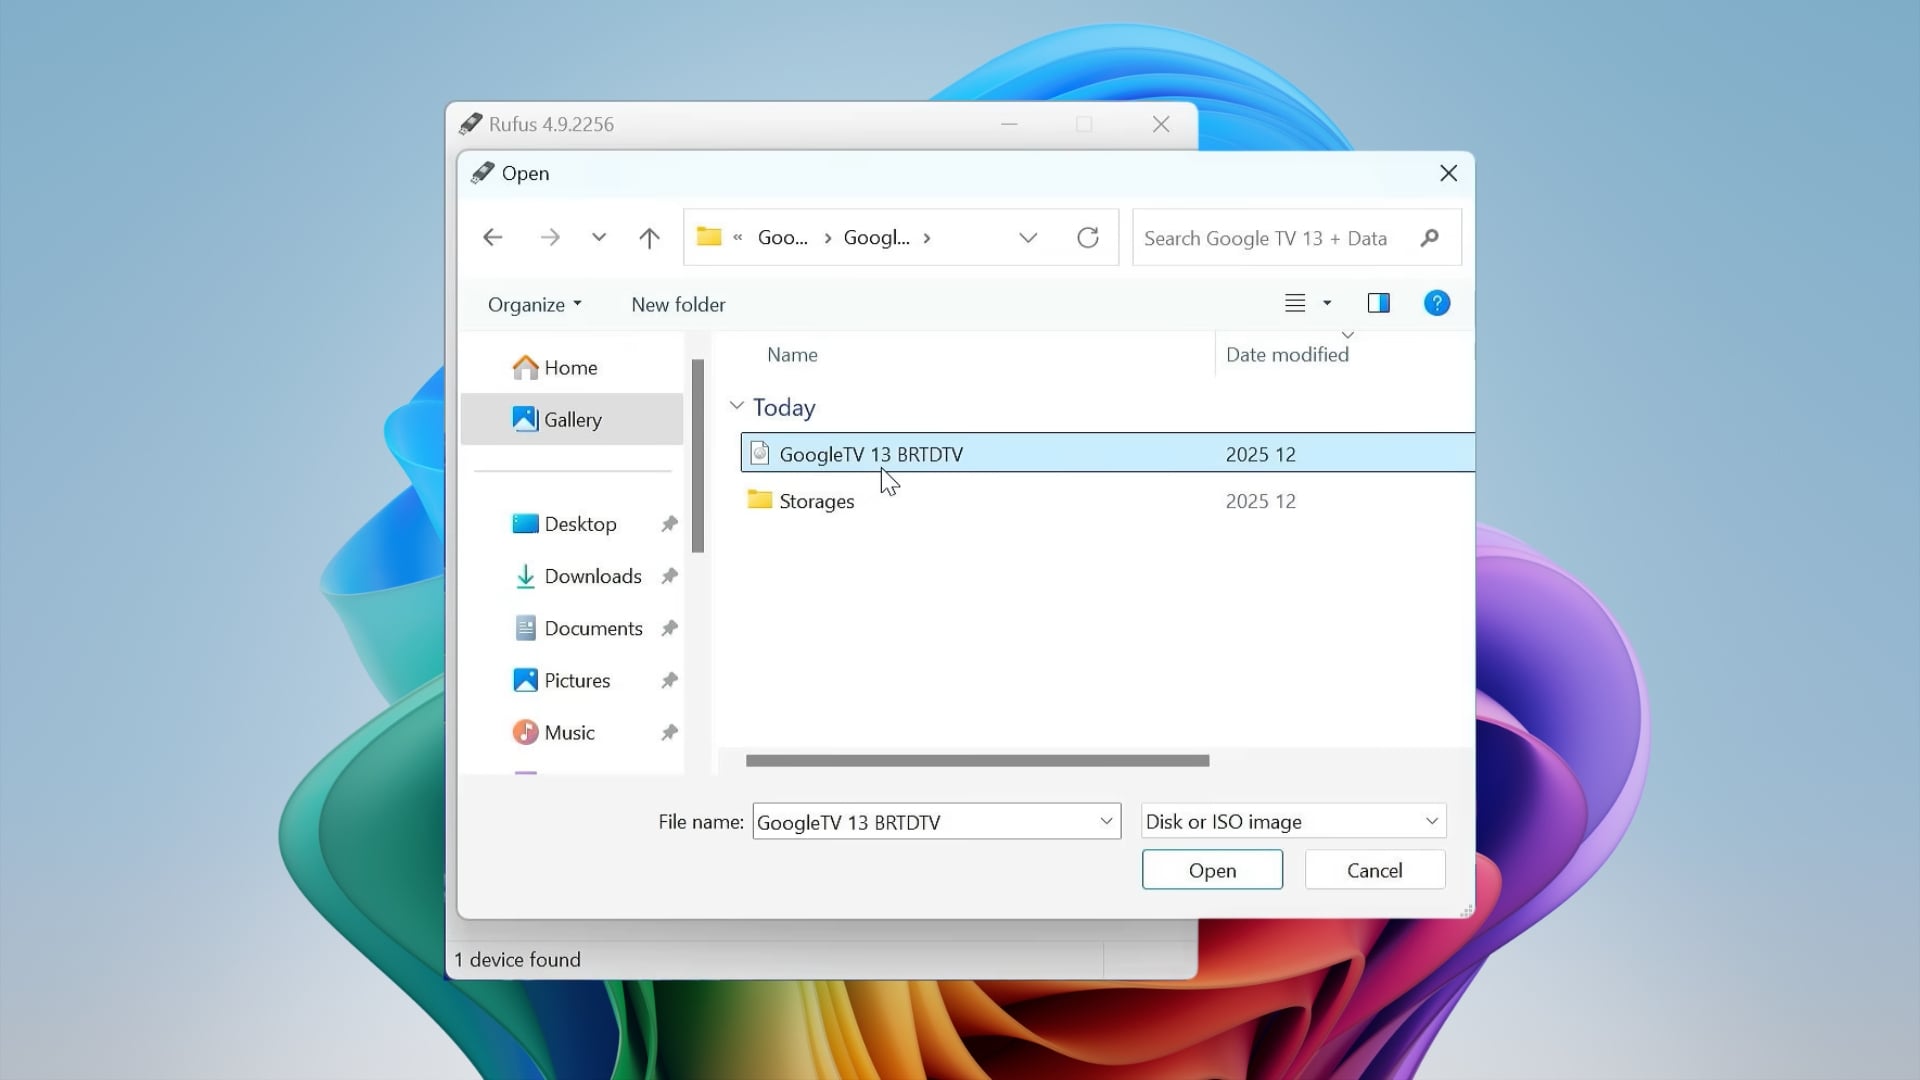
- Download the Google TV OS file from this link. If the previous link doesn’t work, then use this link instead. Extract the file and keep the ISO file found inside the Storages folder handy.
- Download and install Rufus on your Windows PC.
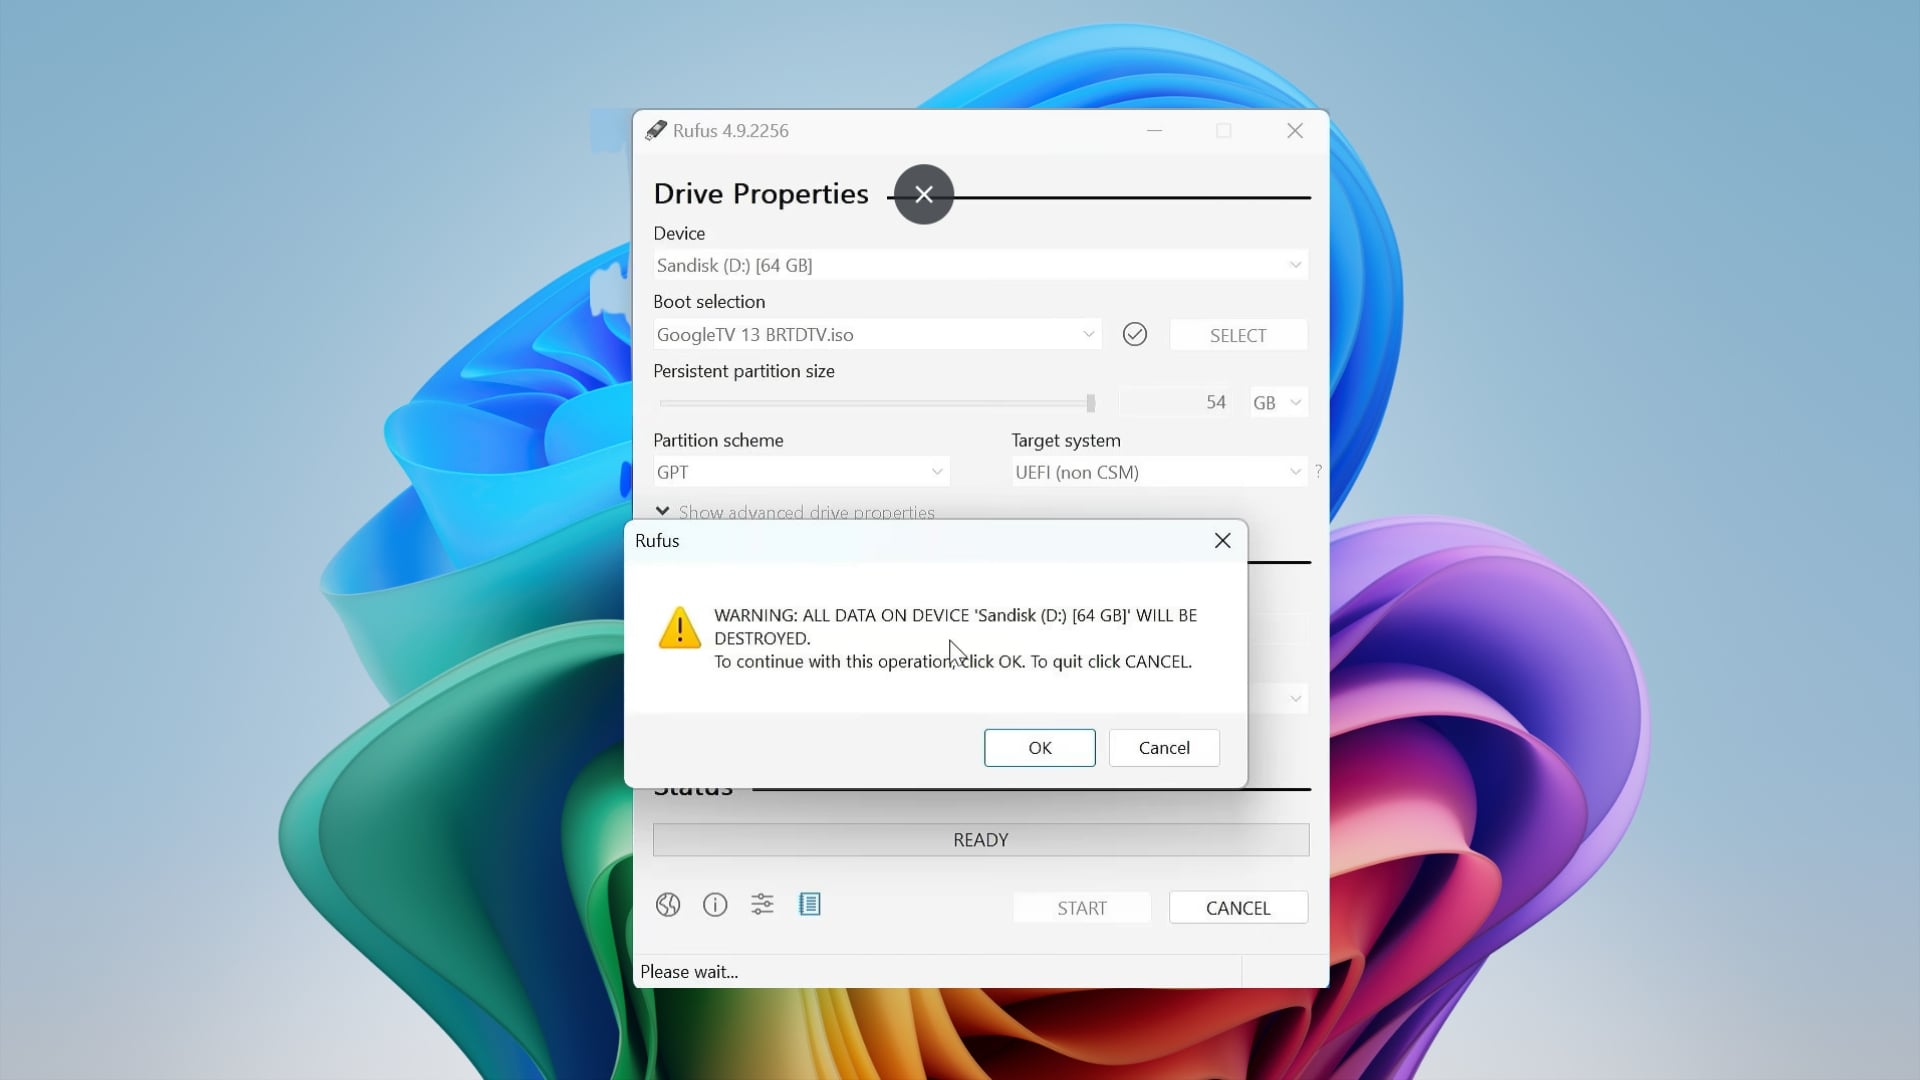
- Launch Rufus and plug in the USB drive that you wish to create a bootable Google TV OS on.
- Click the Select button and choose the Google TV ISO file that you extracted in step 1.
- You need to move the Persistent partition size slider all the way to the right. This is done to have the maximum capacity of the USB drive for modification later.
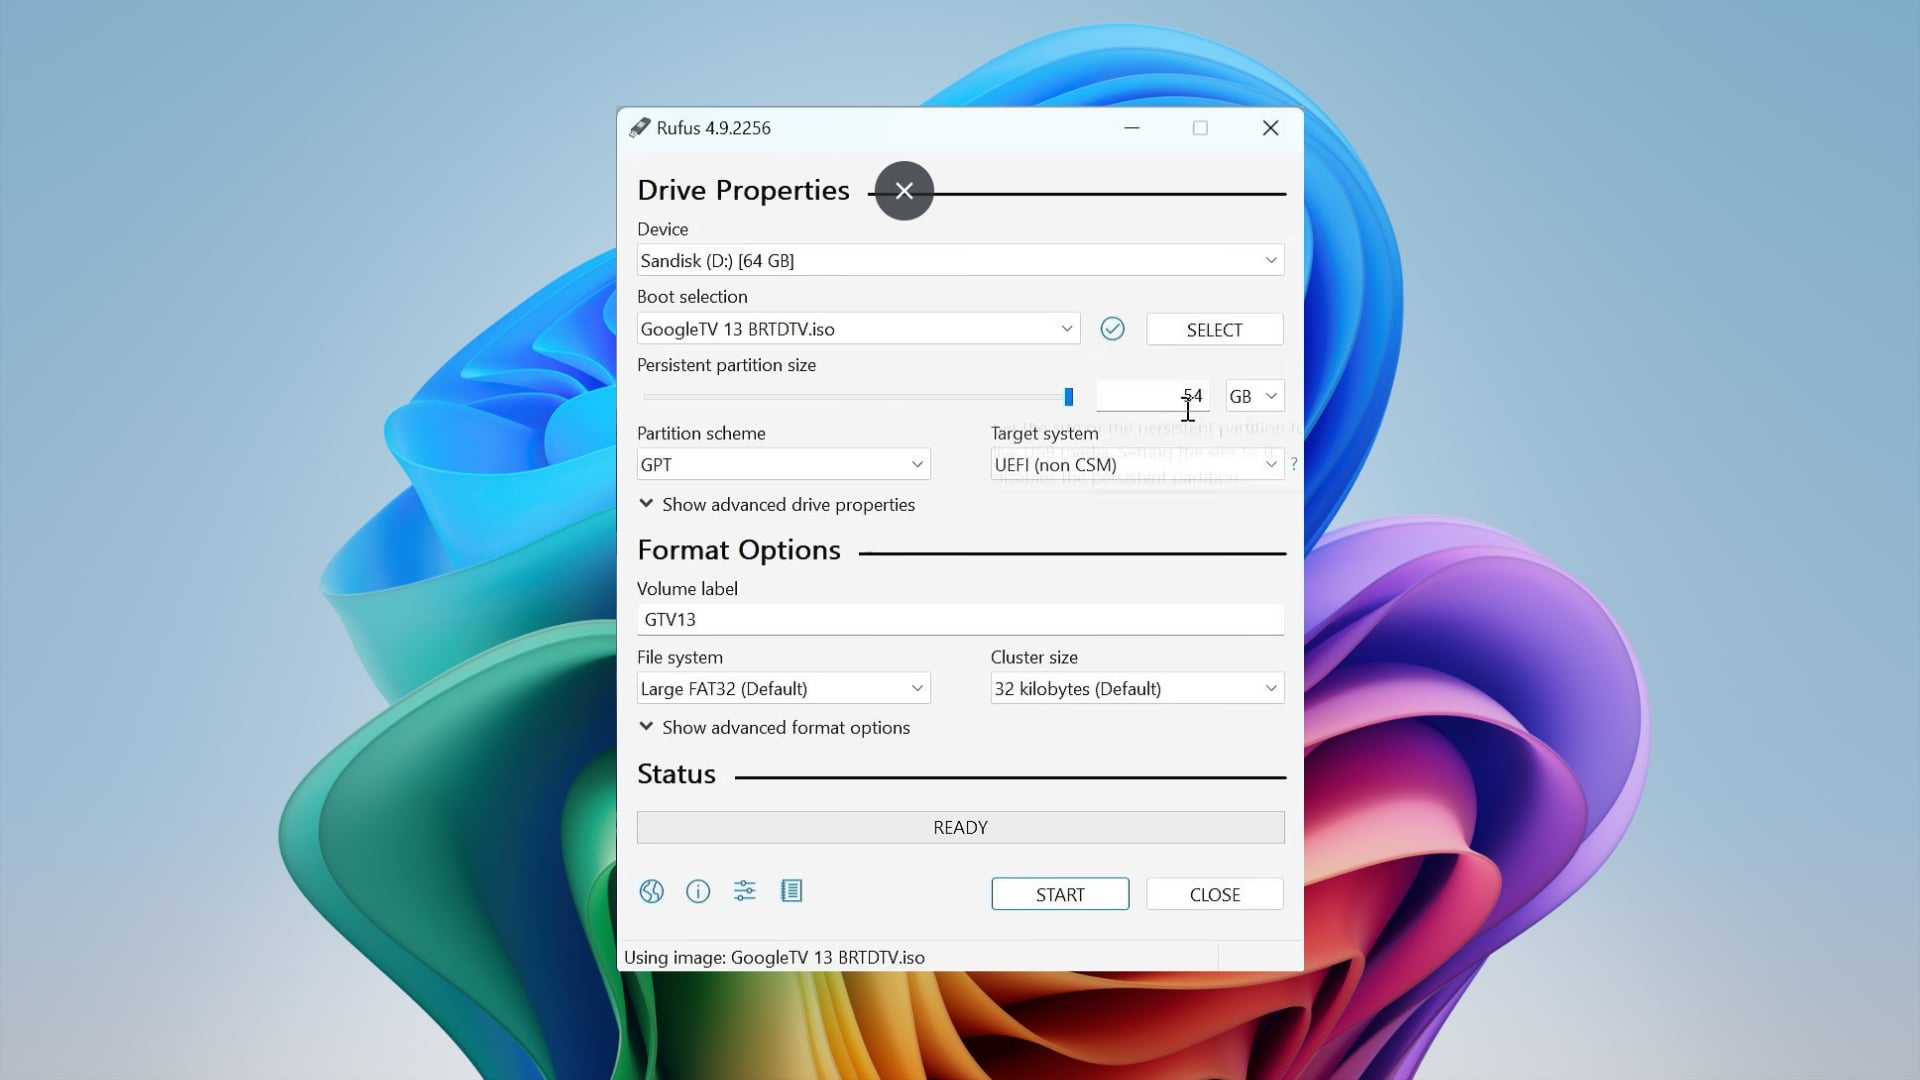
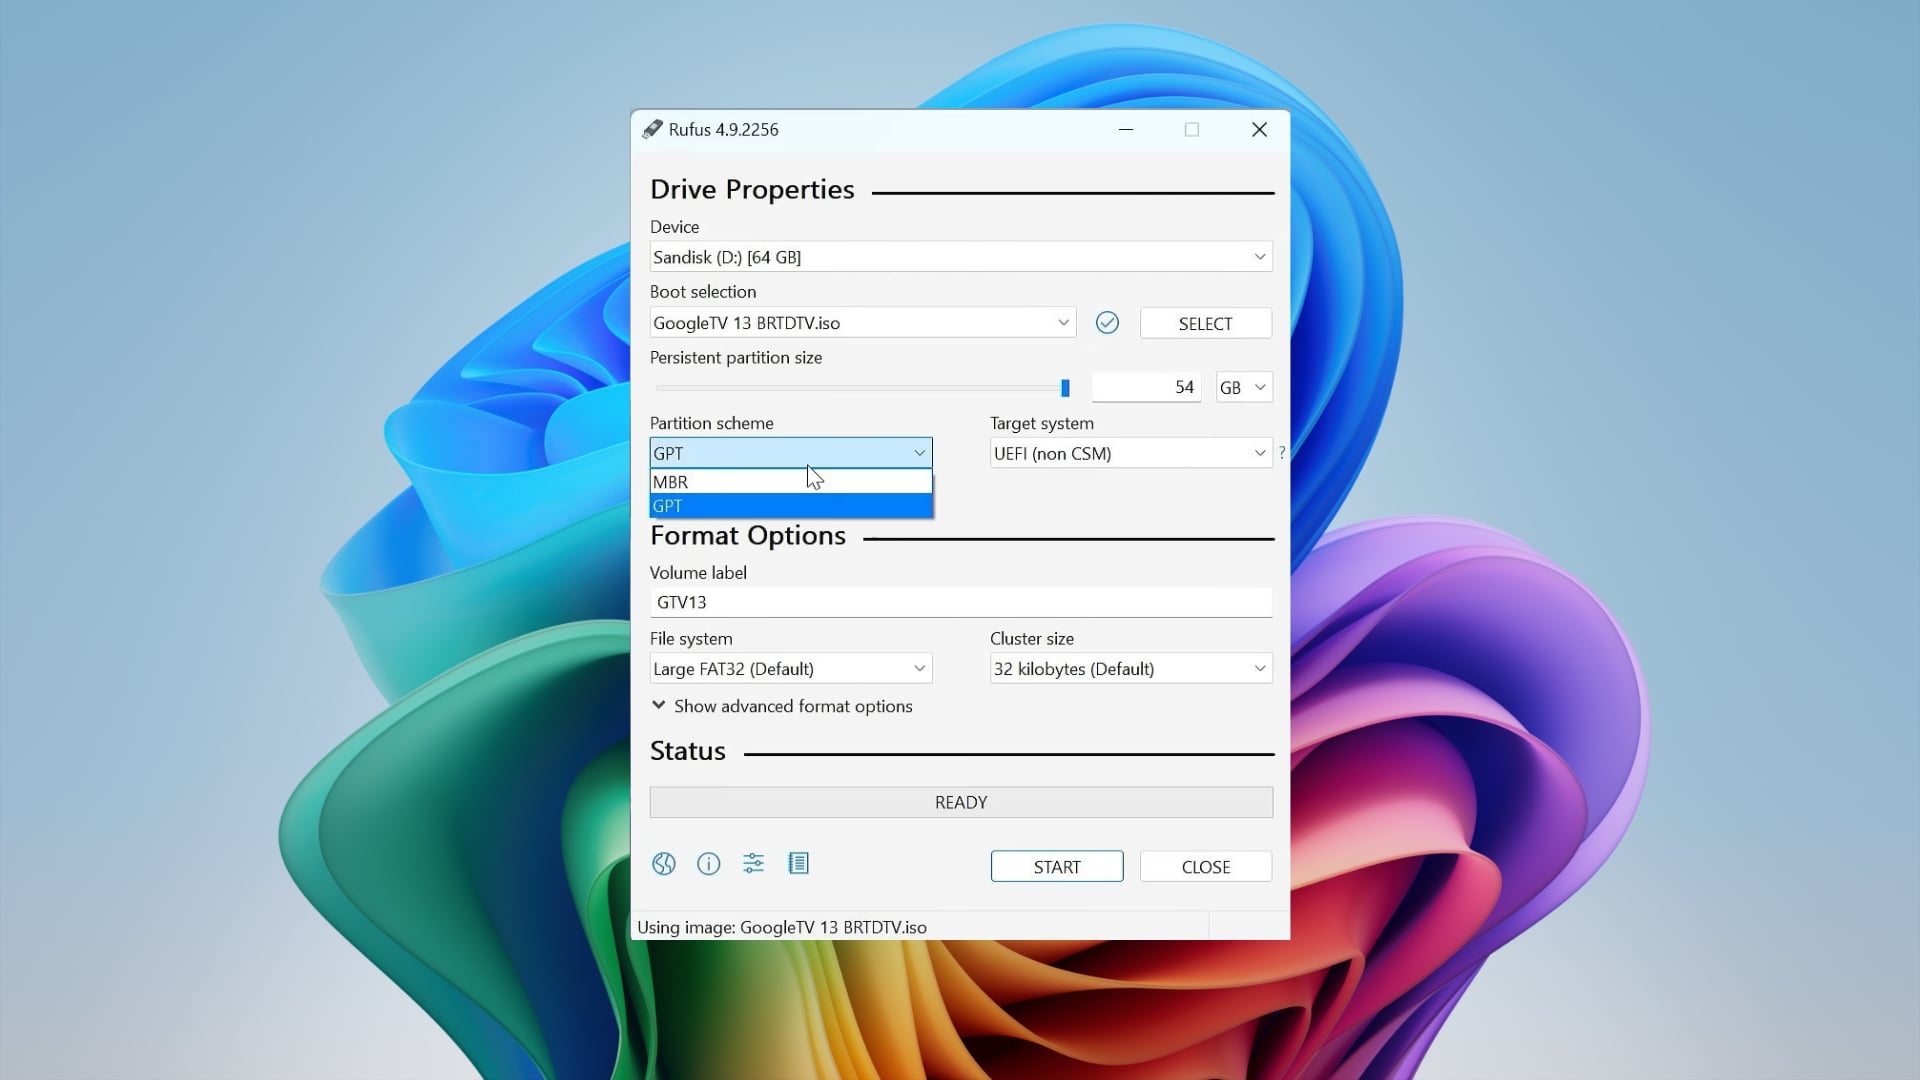
- In the Partition Scheme section, you can select GPT for newer computers (UEFI) and MBR for older computers (BIOS).
- To start flashing, press the Start button. If a confirmation window pops up, accept it to remove all data on the USB drive.
Step 2: Switch format to exFAT
Rufus formats the storage space as FAT32, limiting the file size to 4GB. For installing Google TV OS, you need to switch to exFAT. Here’s how you can do it:
- Open the Windows Start menu by pressing the Windows button. Search for and open Disk Management.
- Find your USB drive in the list.
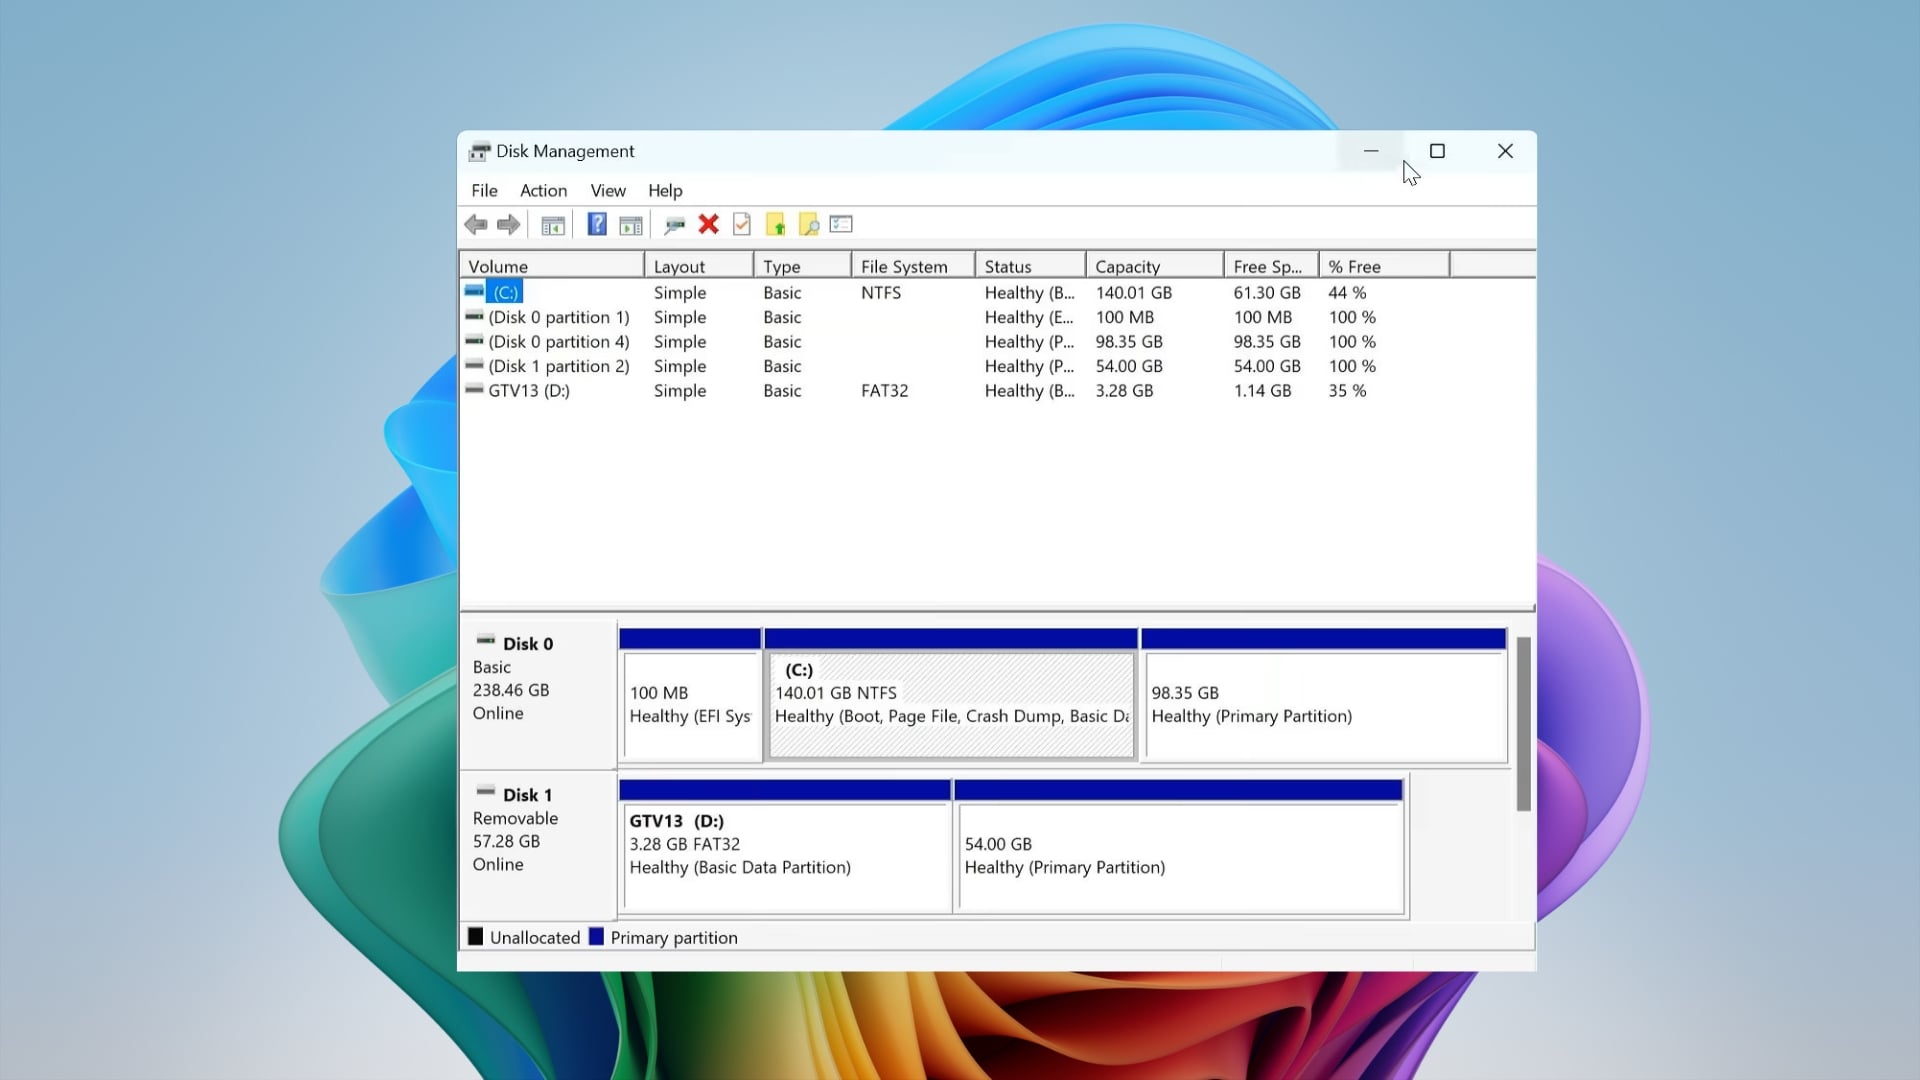
- Right-click on the persistence volume and choose Delete Volume.
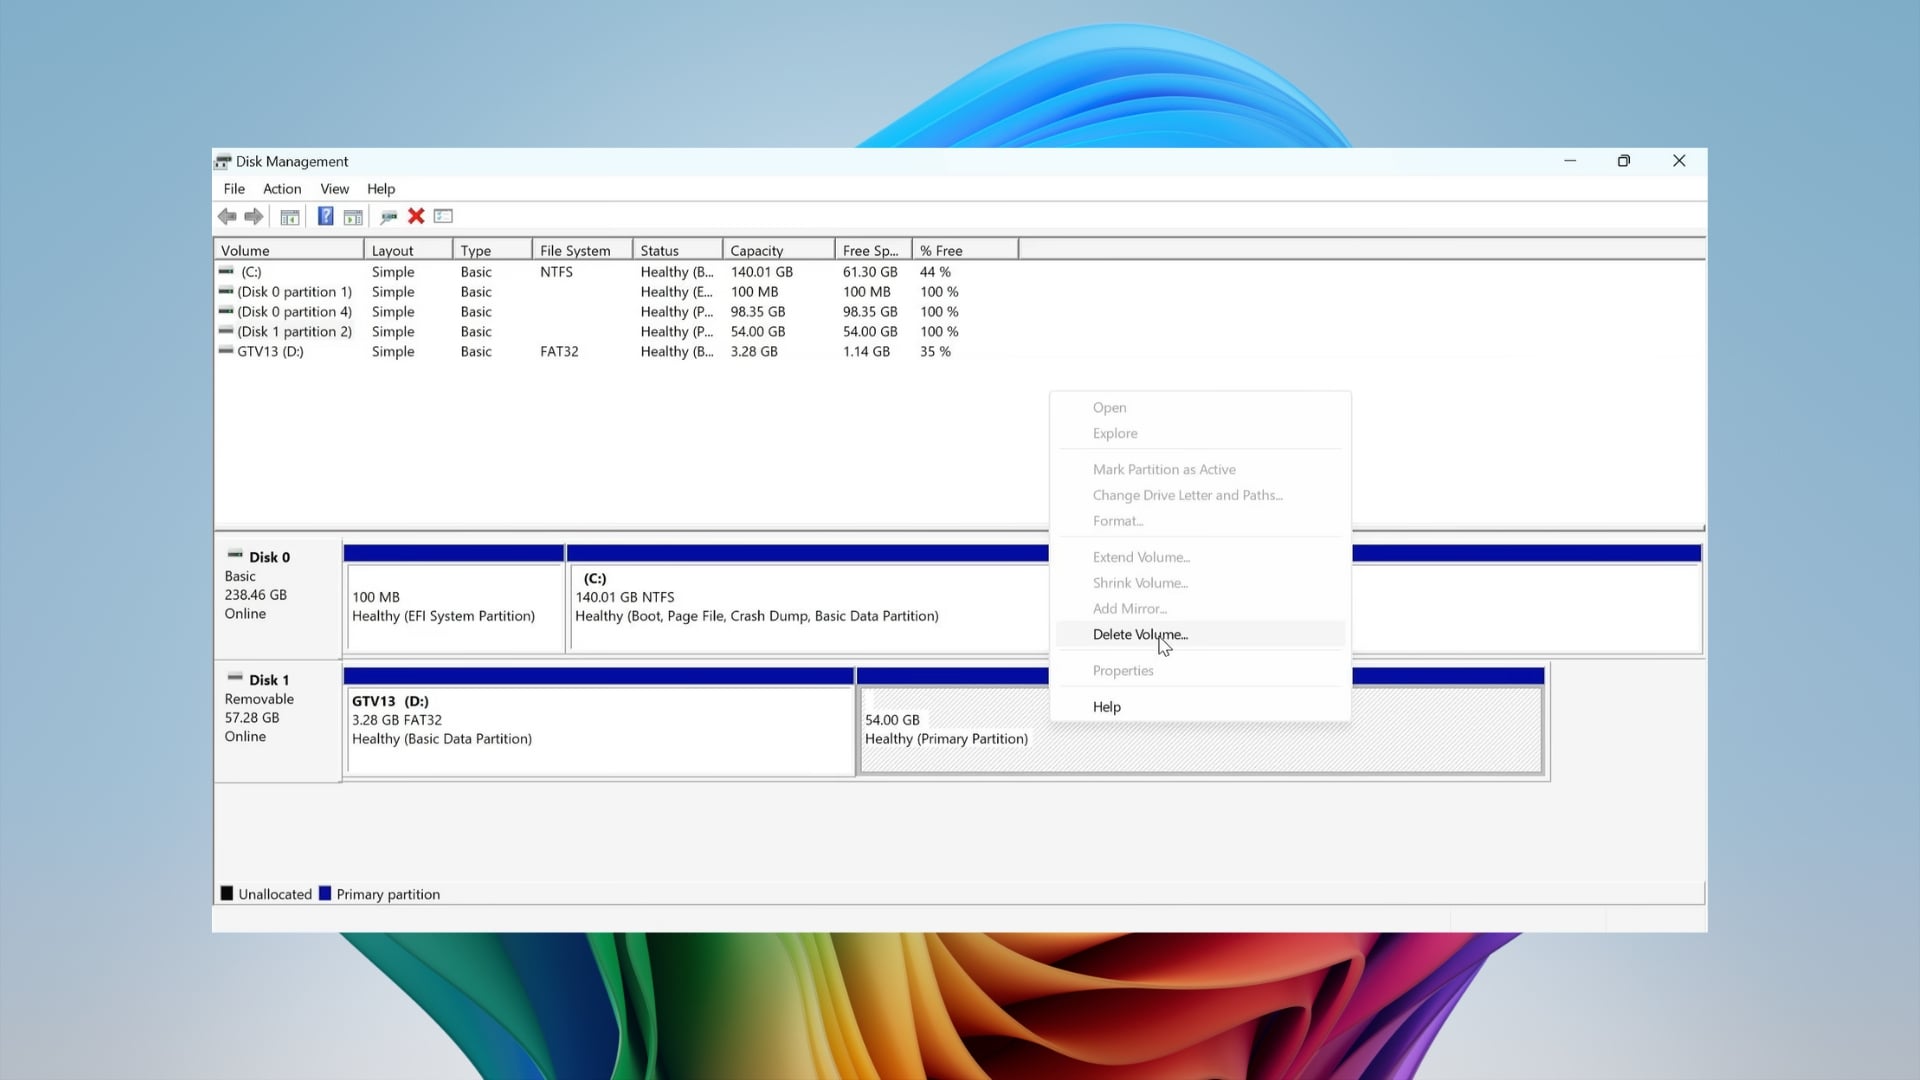
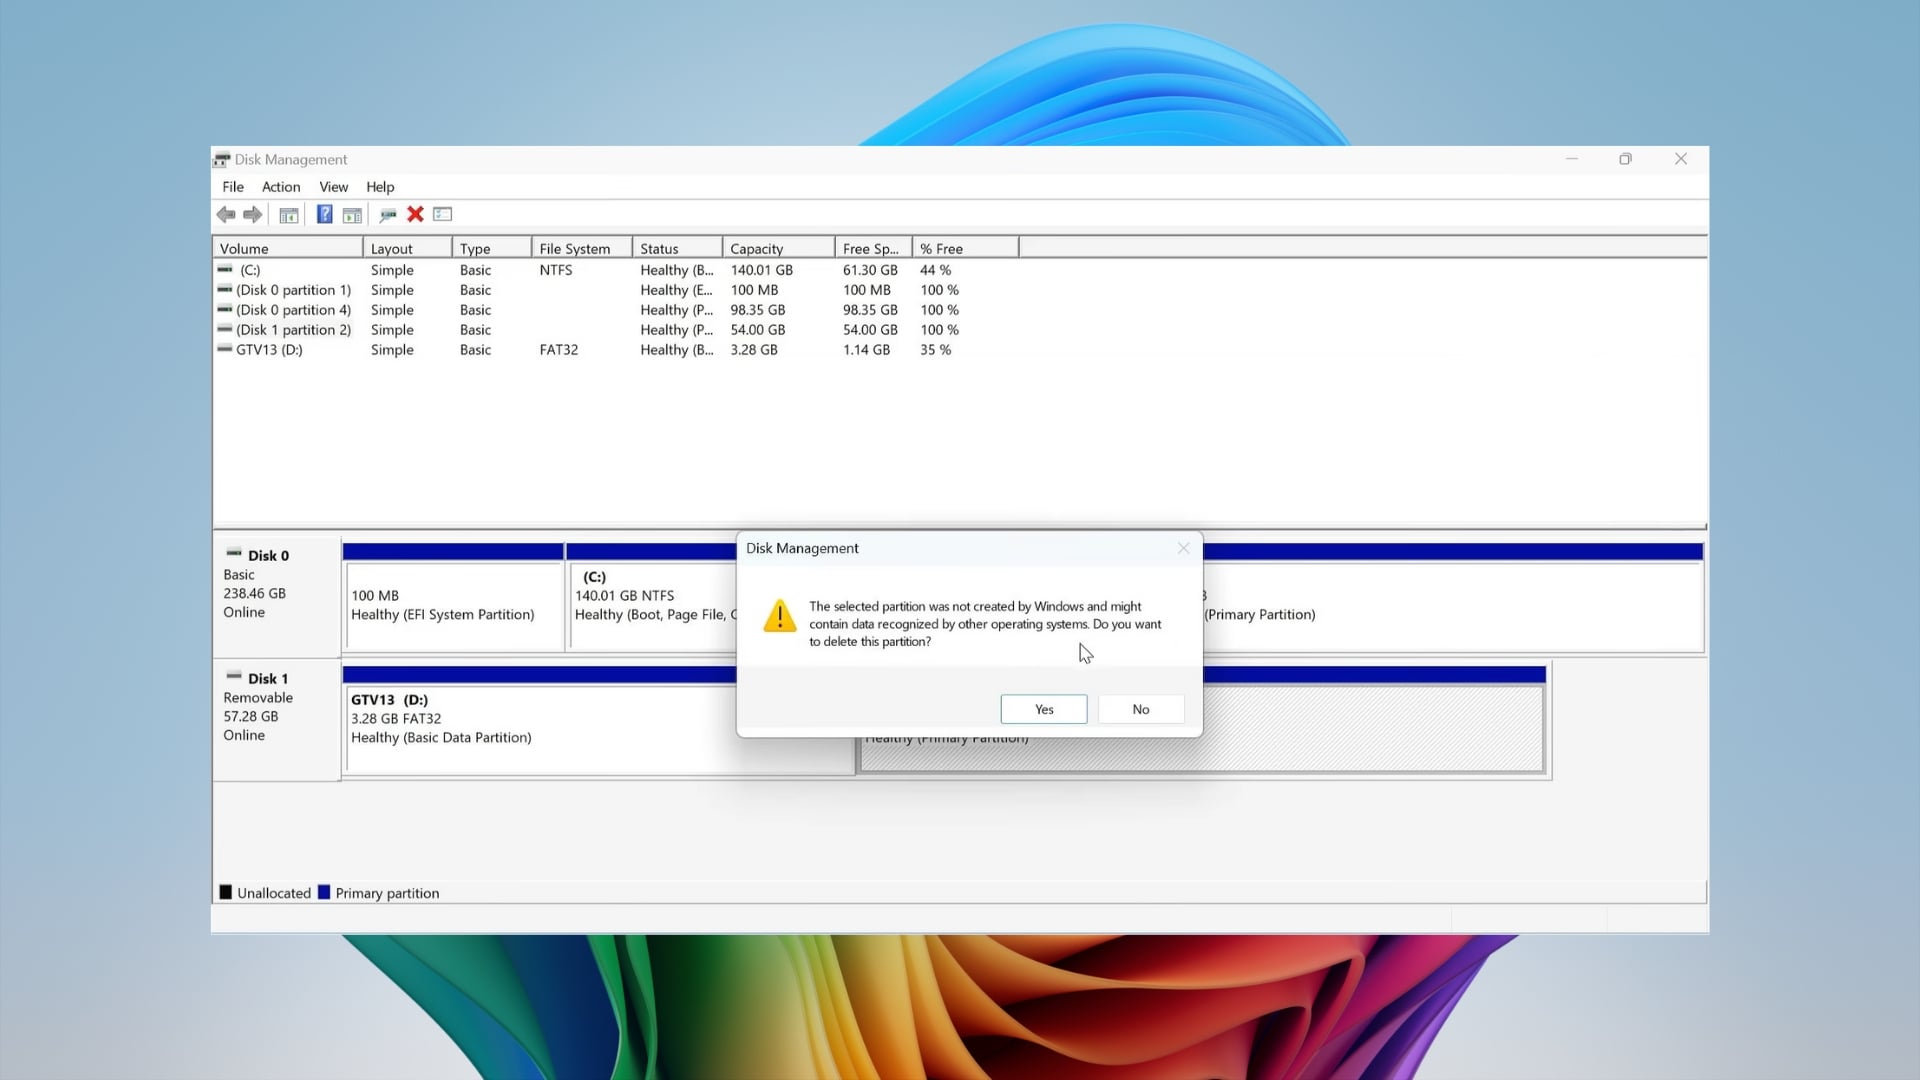
- Choose Yes to delete the partition.
- You will now see Unallocated space. Right-click on it and select New Simple Volume.
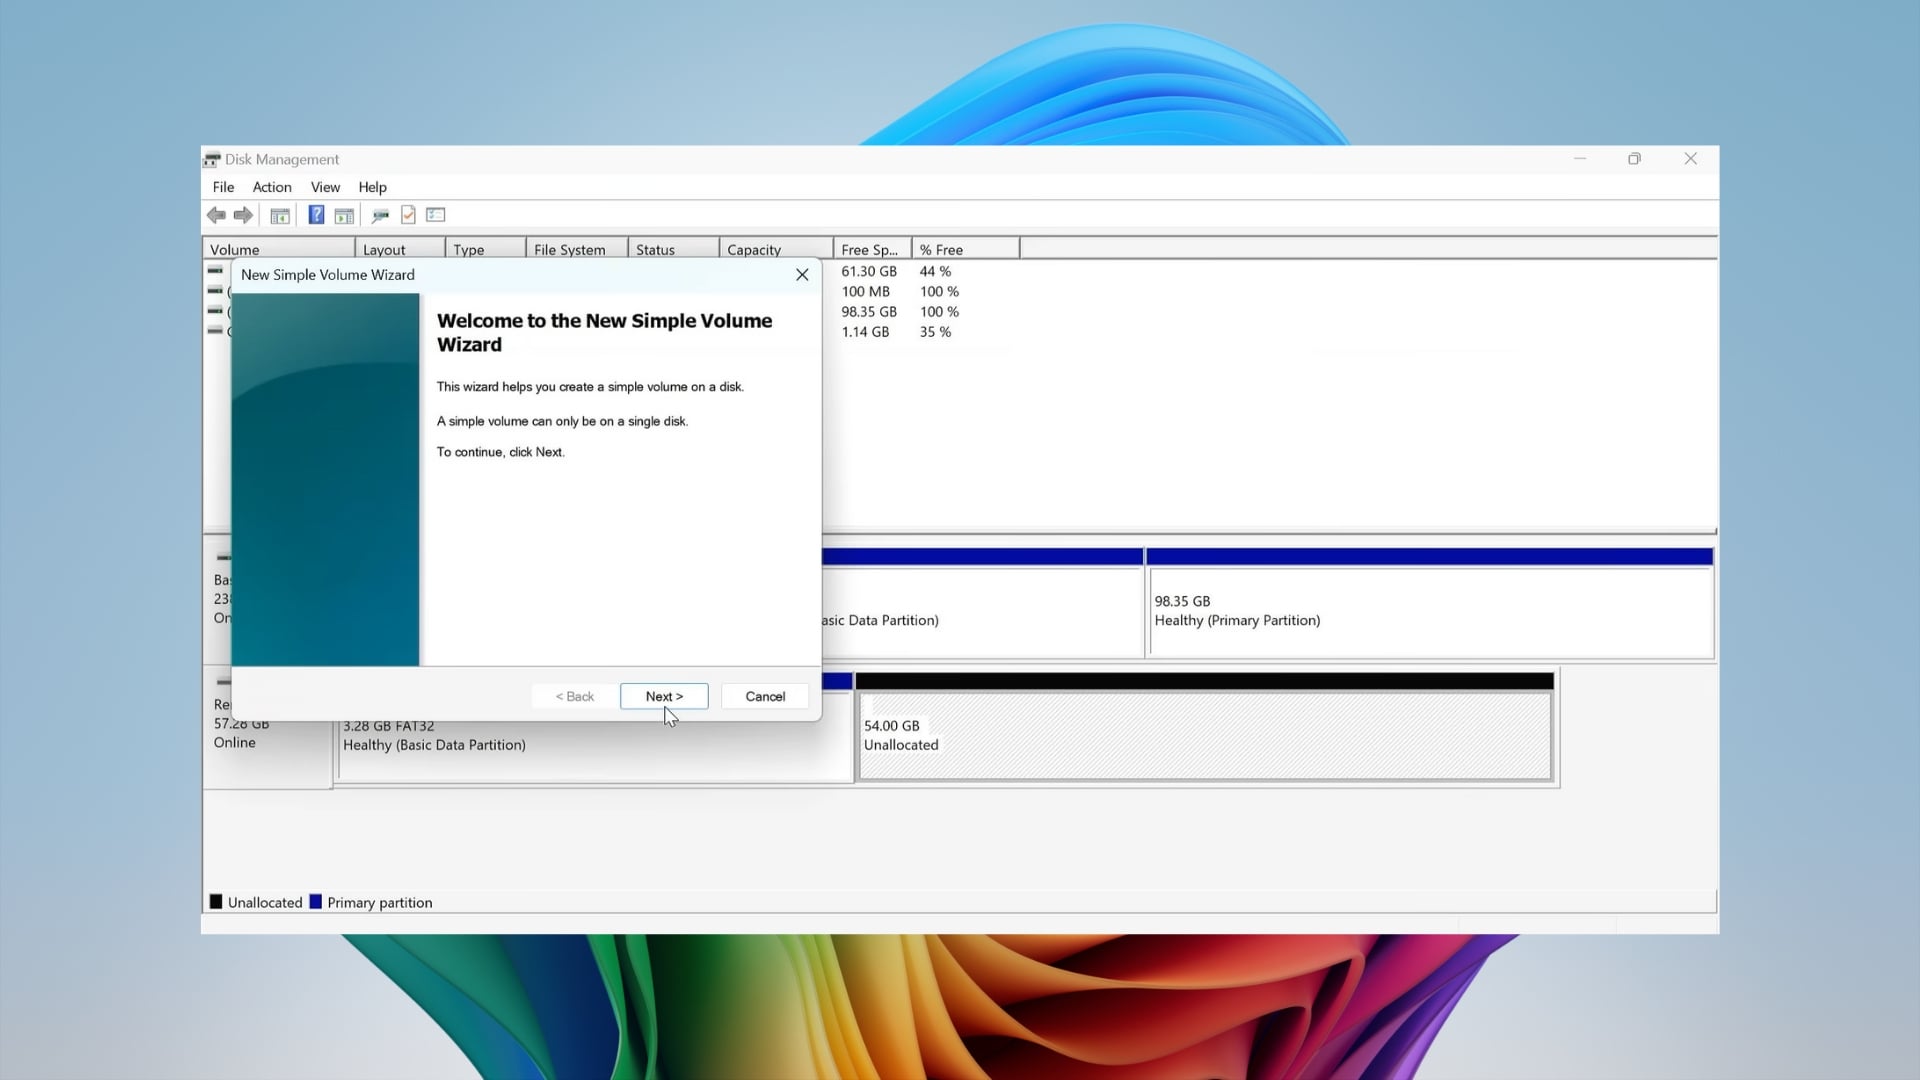
- Click the Next button through the pages until you reach the Format settings.
- Change the File System from FAT32 to exFAT.

- Change the label to something like System.
- Finish the process.
Step 3: Moving Google TV OS
Now this step involves moving the Google TV OS onto the USB drive that you just prepared.
- Launch File Explorer by pressing the Win + E keys or the traditional method of double-clicking This PC on the home screen.
- Head over to the boot partition of your USB drive.
- Find the system.sfs file.
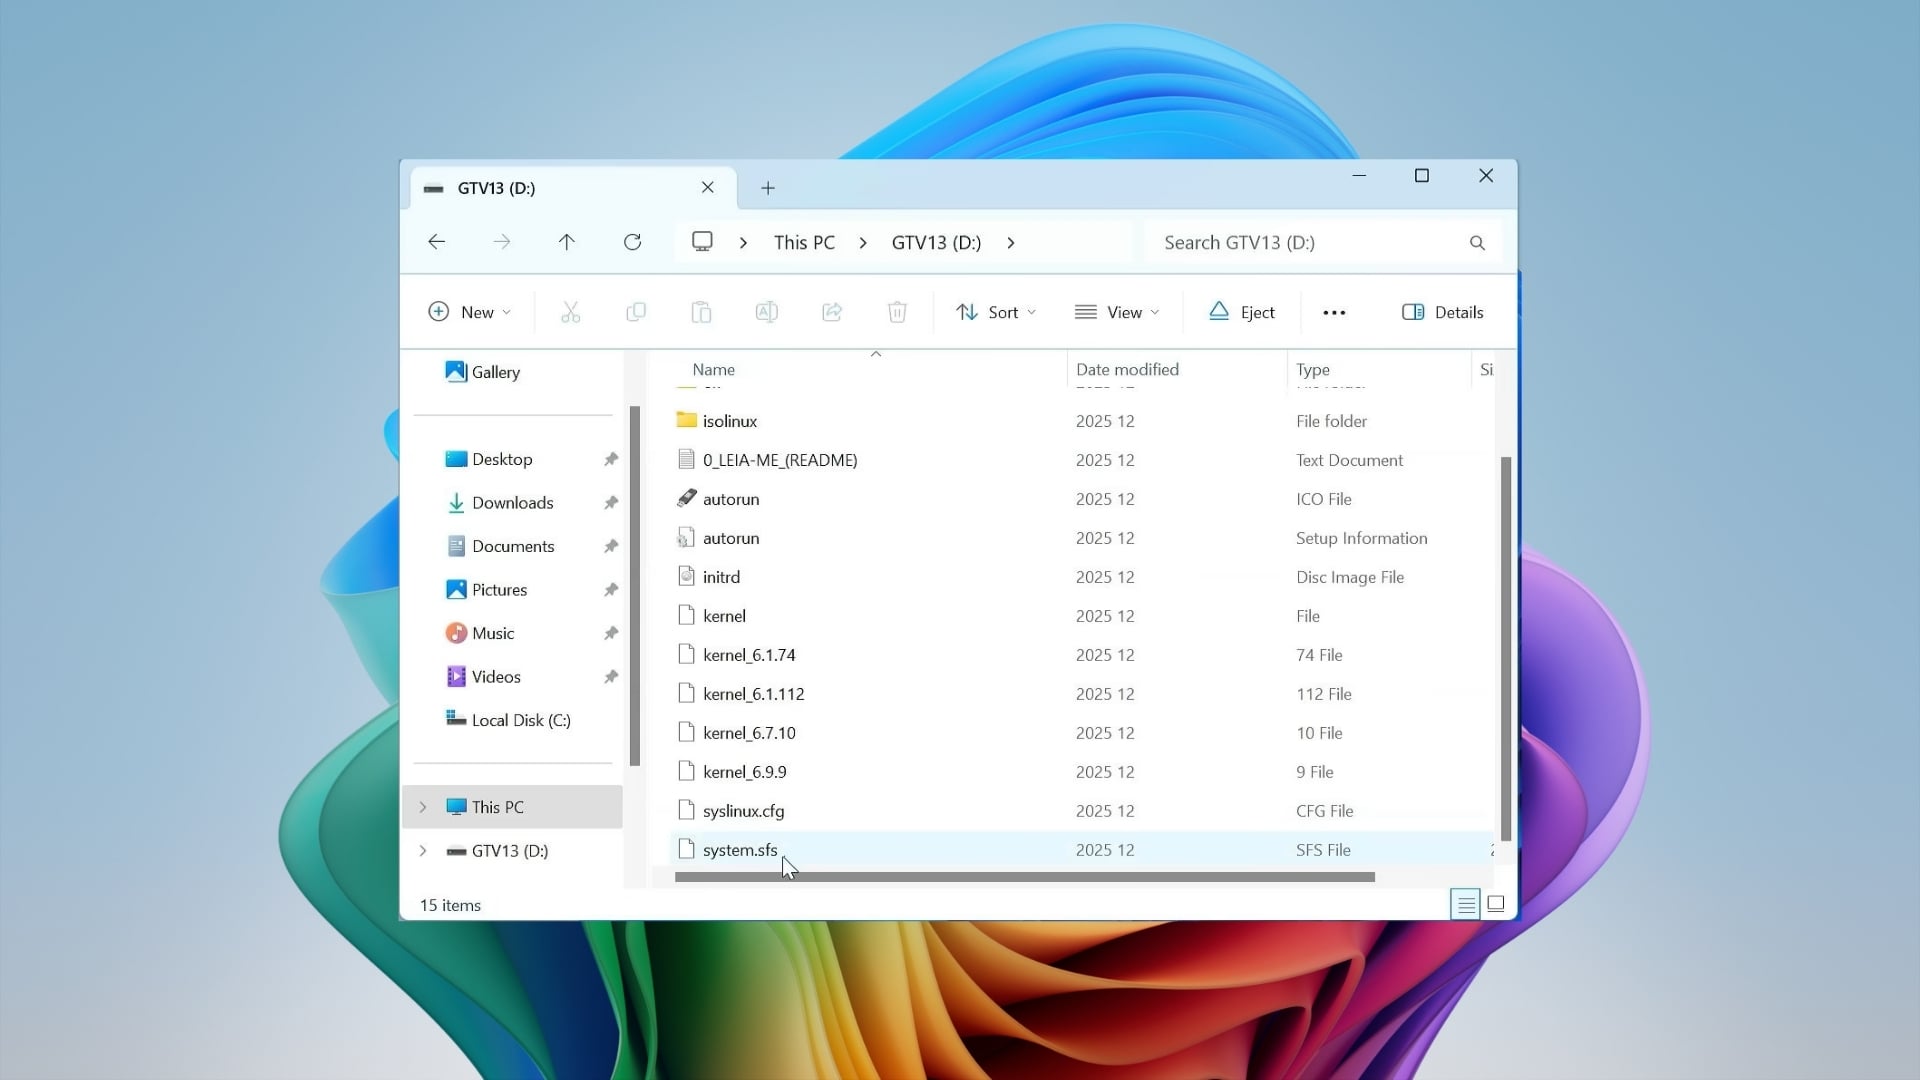
- Cut it by pressing Ctrl + X.
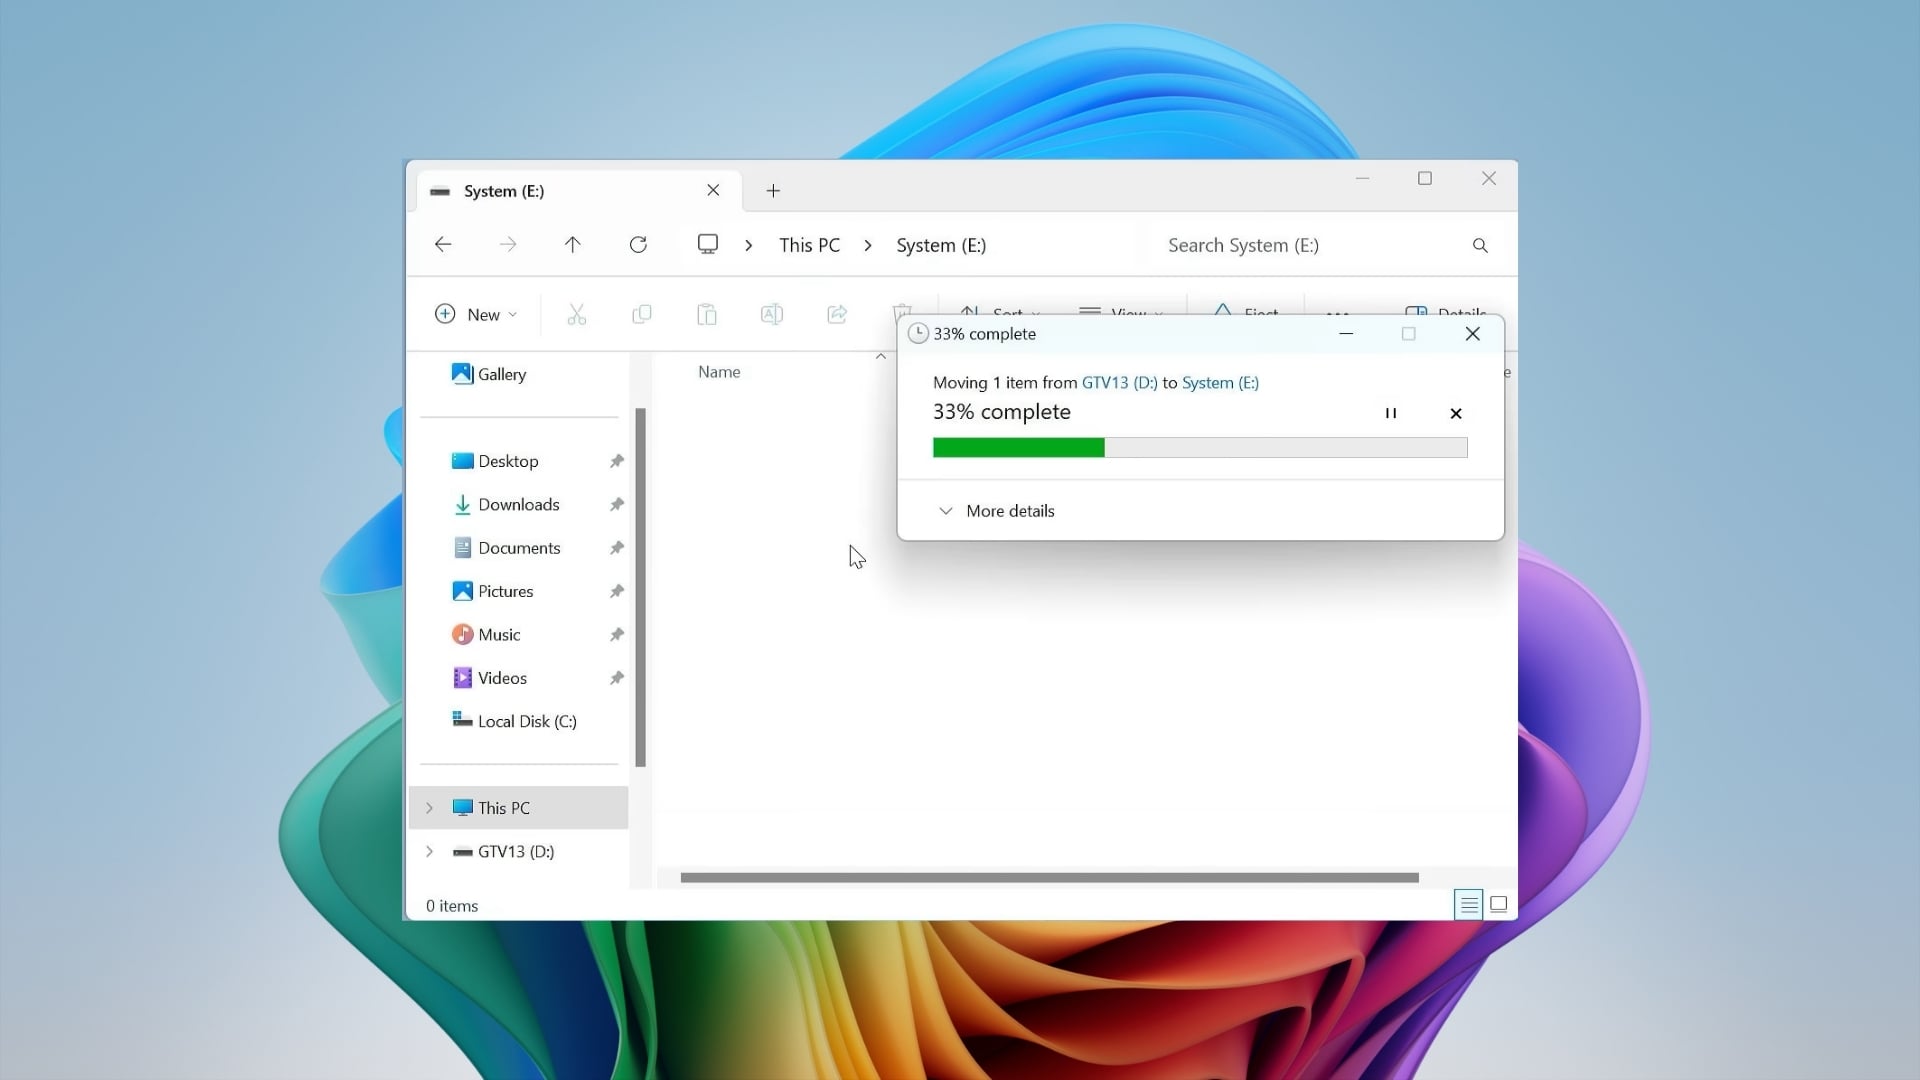
- Go to your new system partition (exFAT) and press Ctrl + V to paste the file there.
- Head back to the Storages folder (you created in Step 1) and pick a data file based on your USB drive’s capacity:
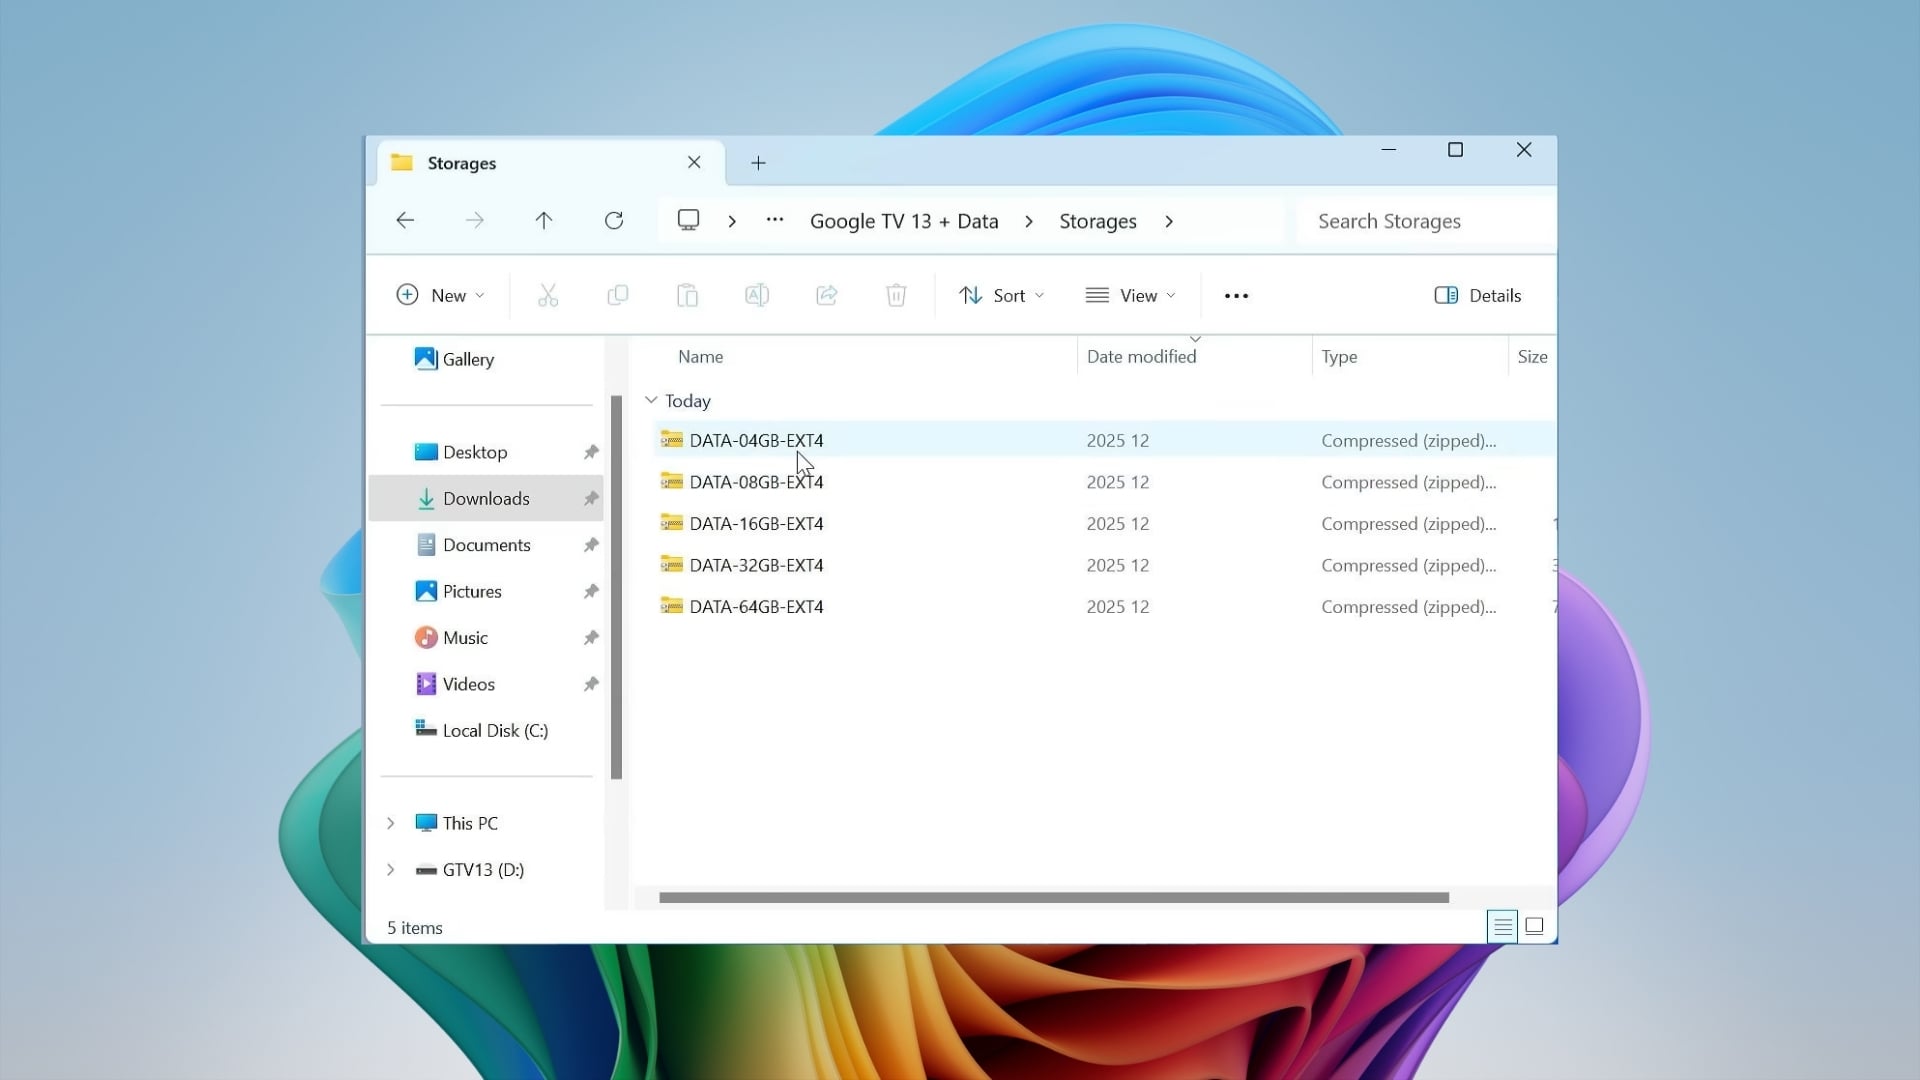
- Using a 64GB USB: Use the 32GB data file.
- Using a 32GB USB: Use the 16GB data file.
- Using a 16GB USB: Use the 8GB data file.
- Extract the specific ZIP file you want to use, and you will get the data.img file.
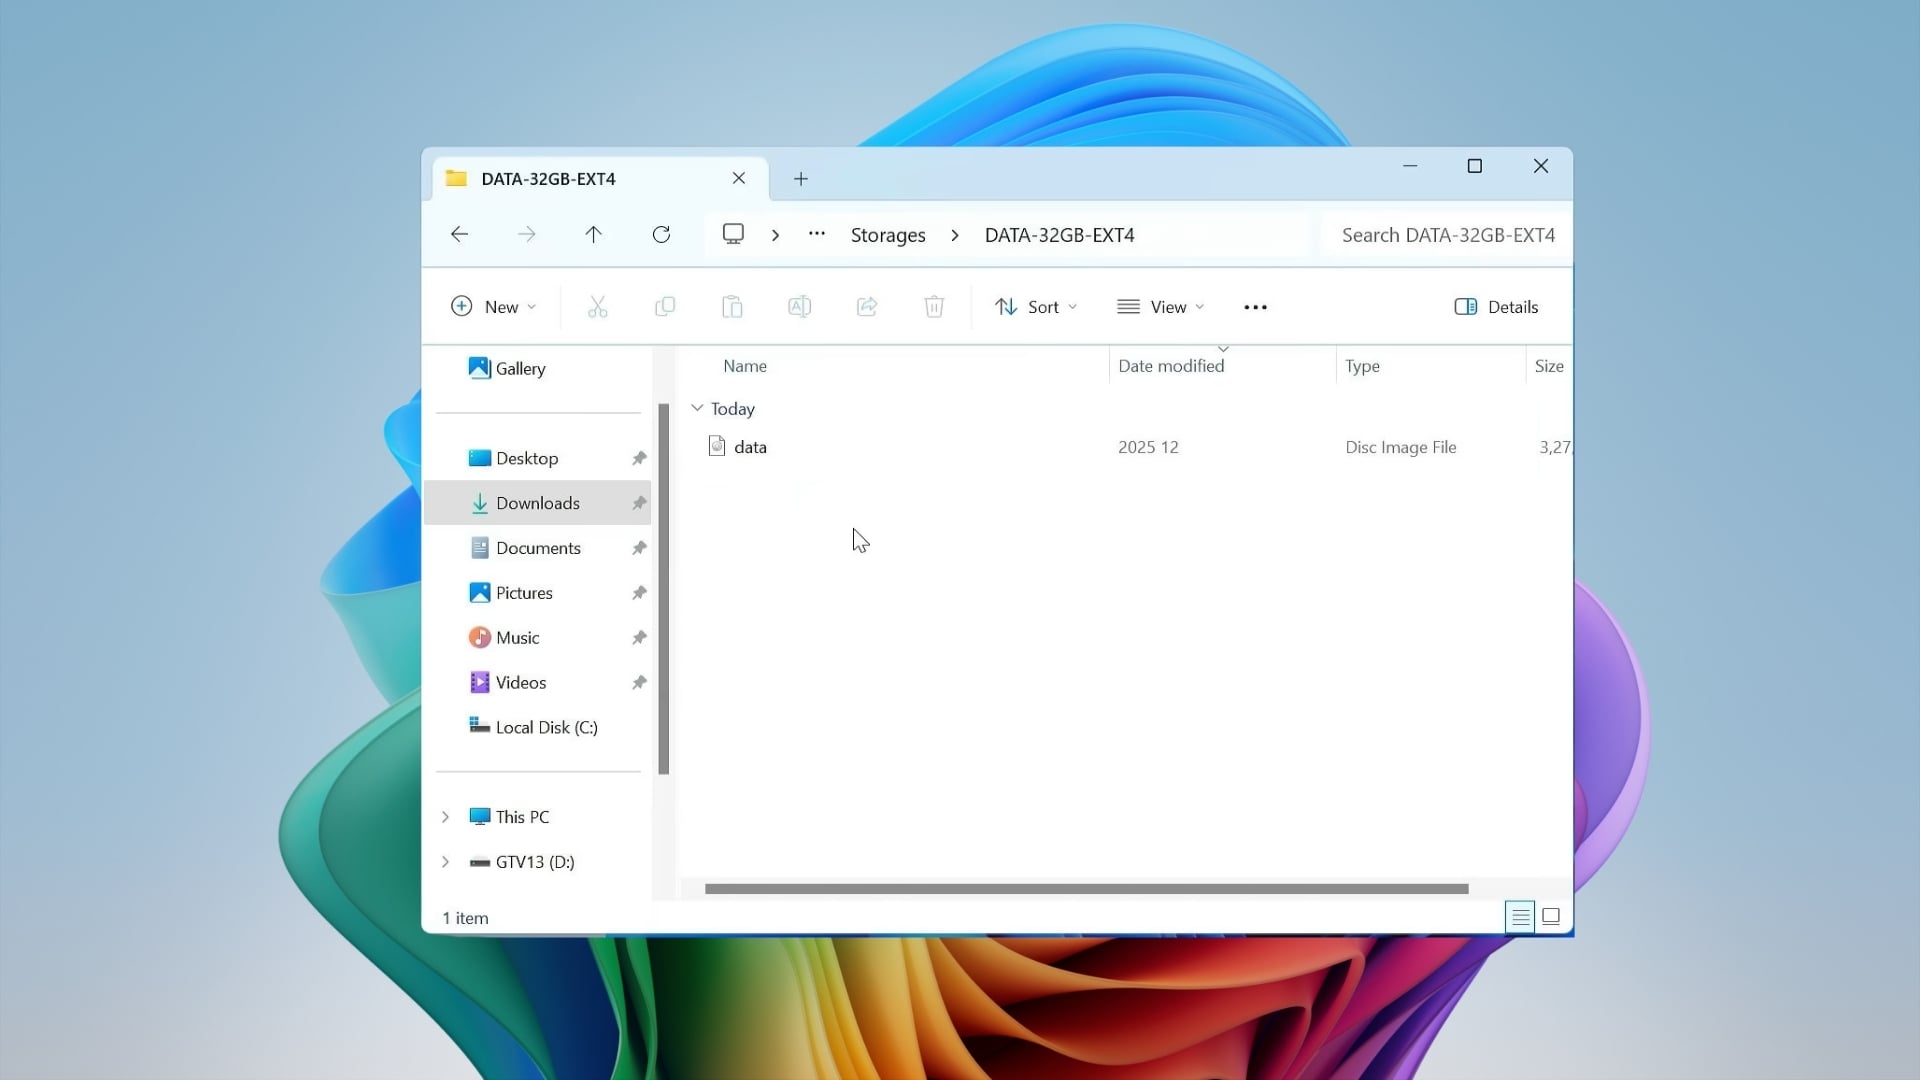
- Copy the data.img file and paste it into your System partition.
Step 4: BIOS Settings and booting up
- Restart your PC and open the BIOS menu by pressing the F2, F12, or Del button. Please check your manufacturer’s website to know about the default BIOS key.
- Find Secure Boot and set it to Disabled. Save and exit.
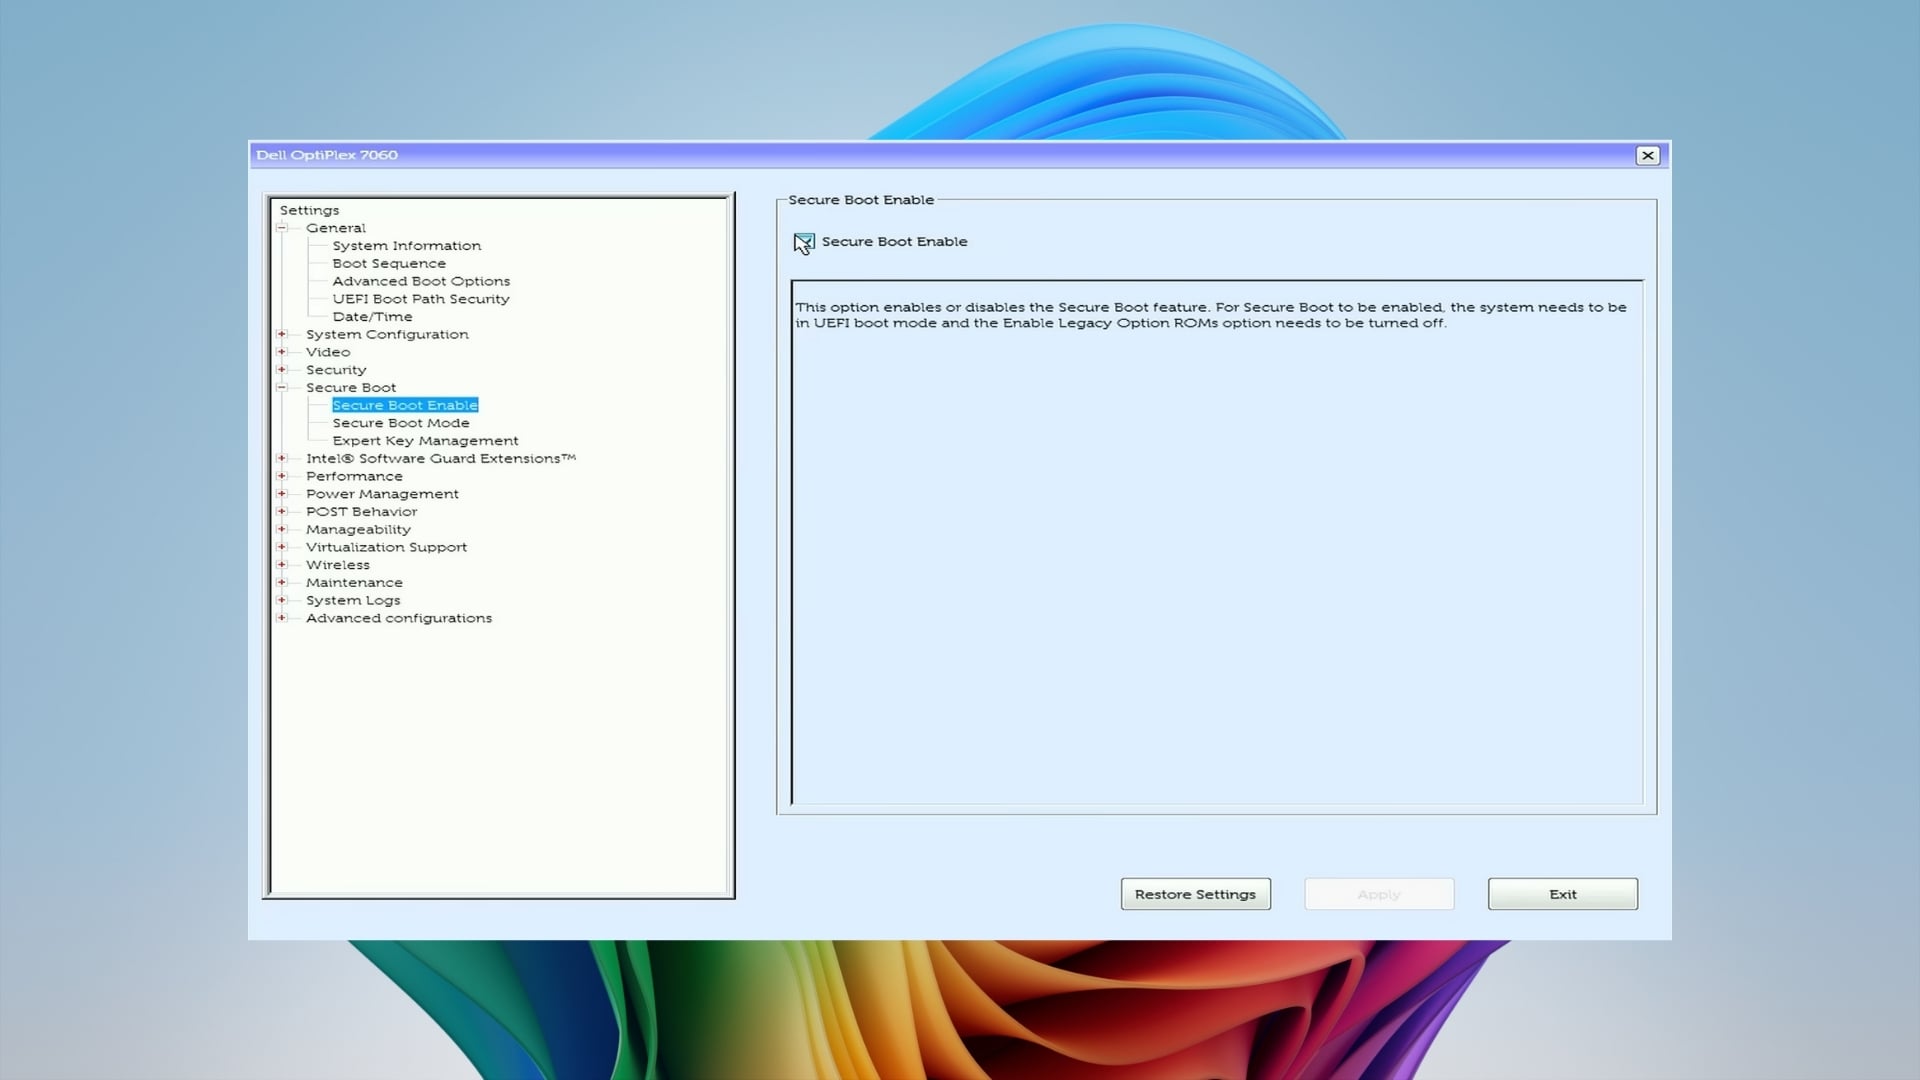
- Restart your PC and boot into the BIOS menu.
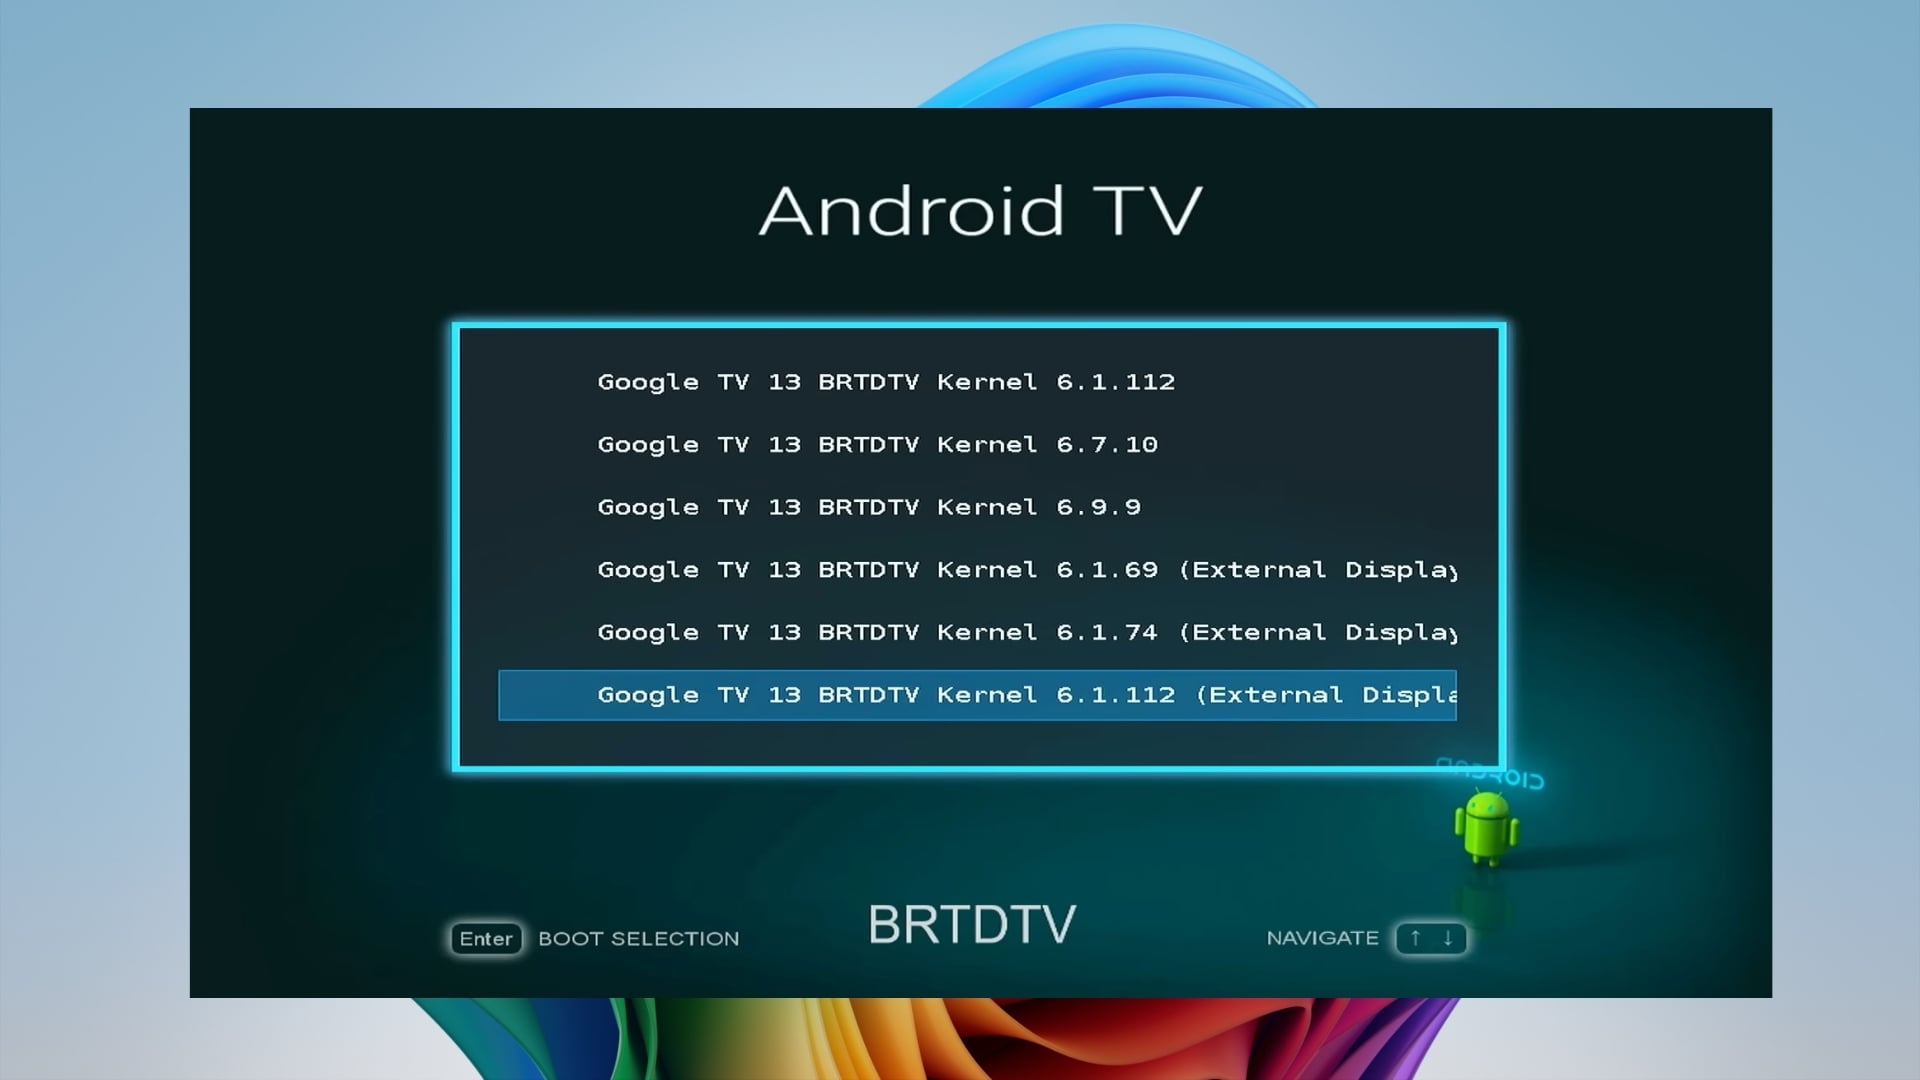
- Select USB drive.
- Now, you need to select the kernel. For standard laptops, choose the first option. For plugging into the TV via HDMI, choose the External Display option.
Step 5: Set up and enjoy
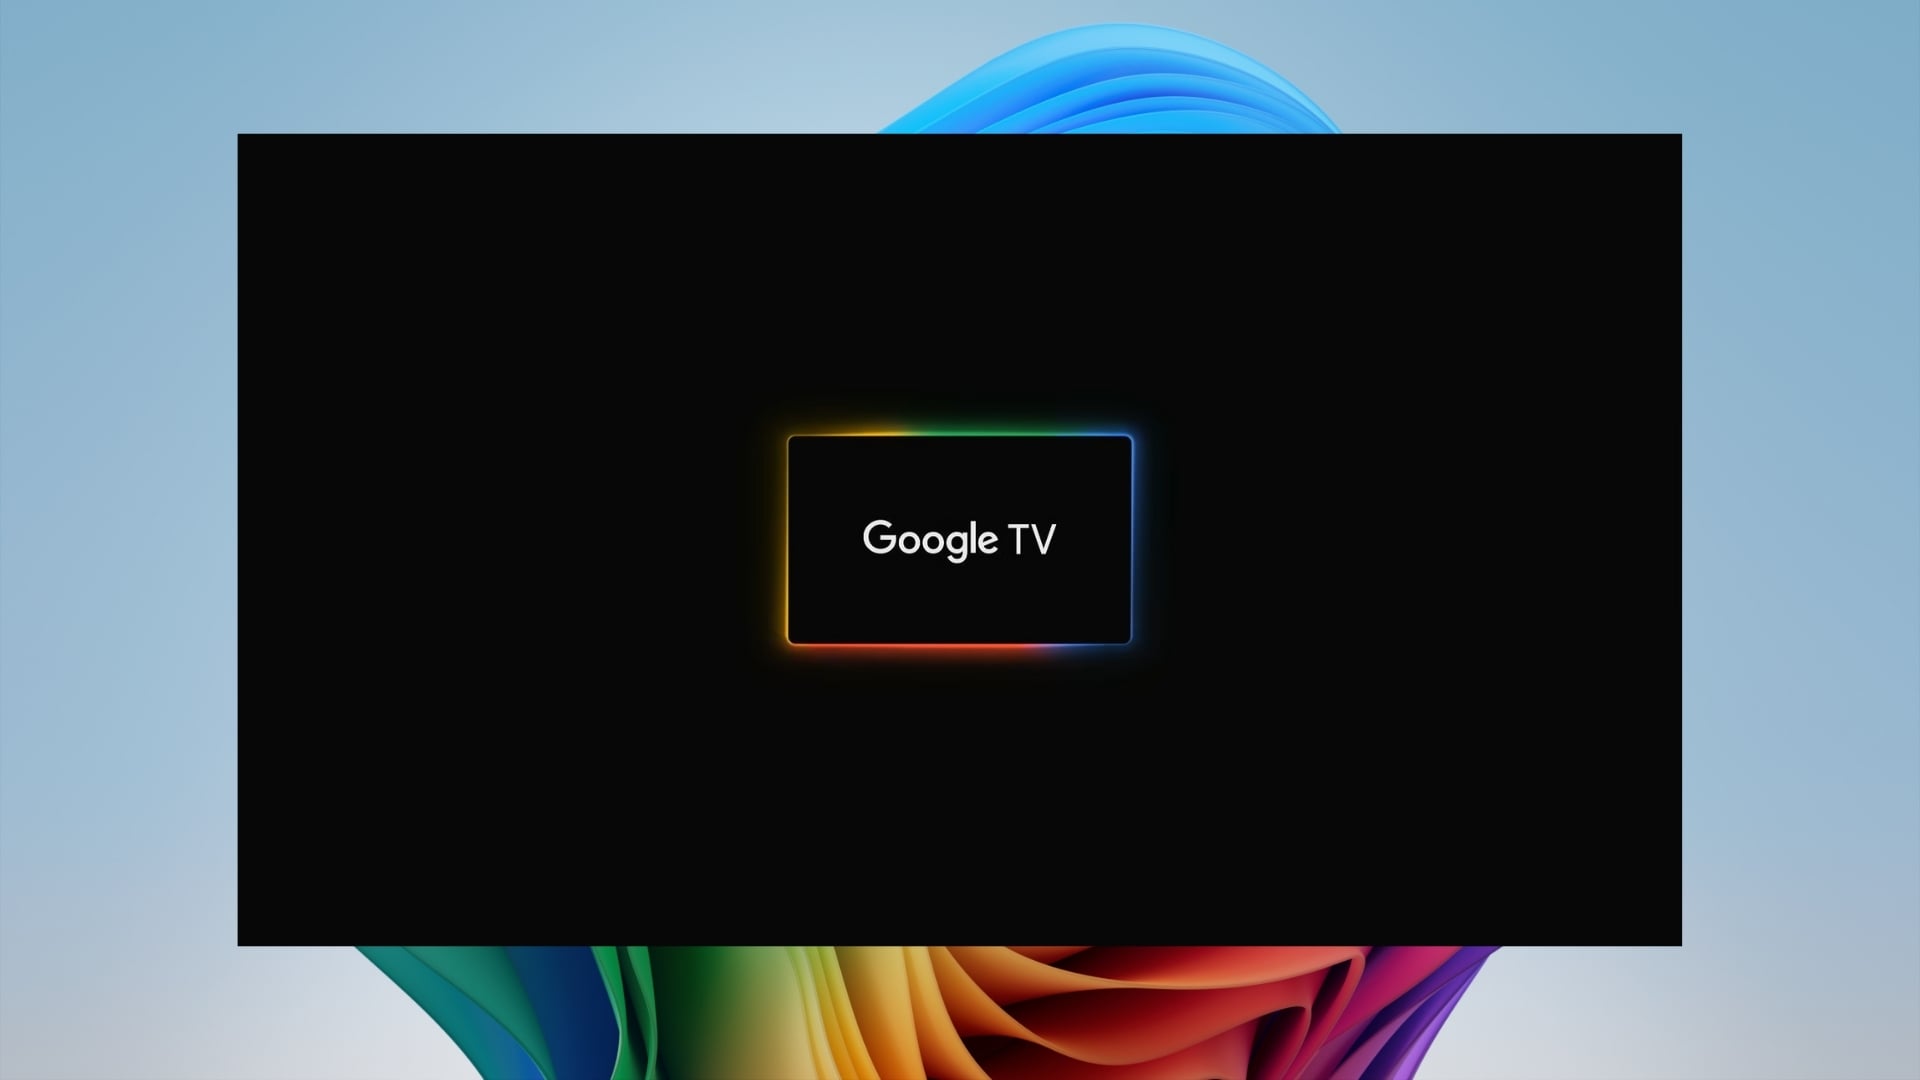
- The first boot will take some time but once it completes booting it will load the interface.
- Go through the standard Google TV setup.
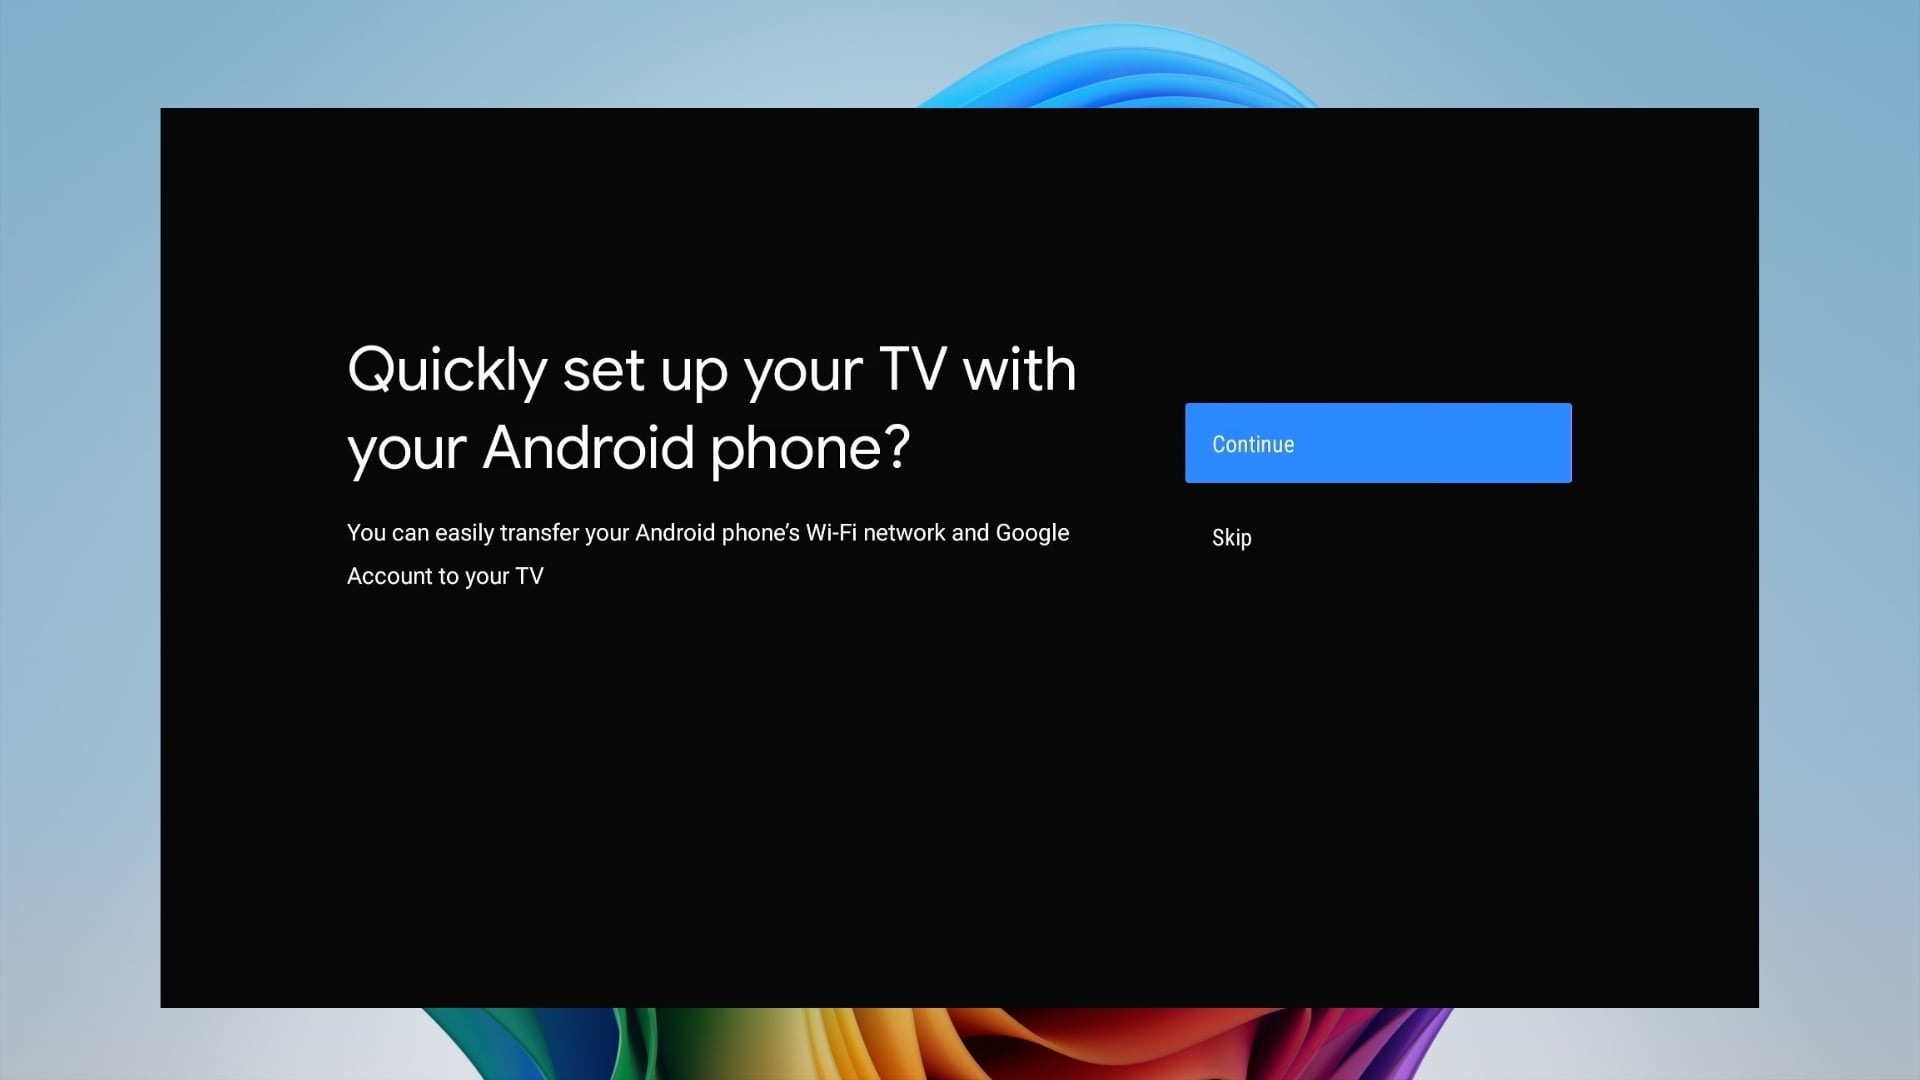
- Connect to Wi-Fi and sign in with your Google Account.
- Head to the Play Store and start downloading your favorite apps.
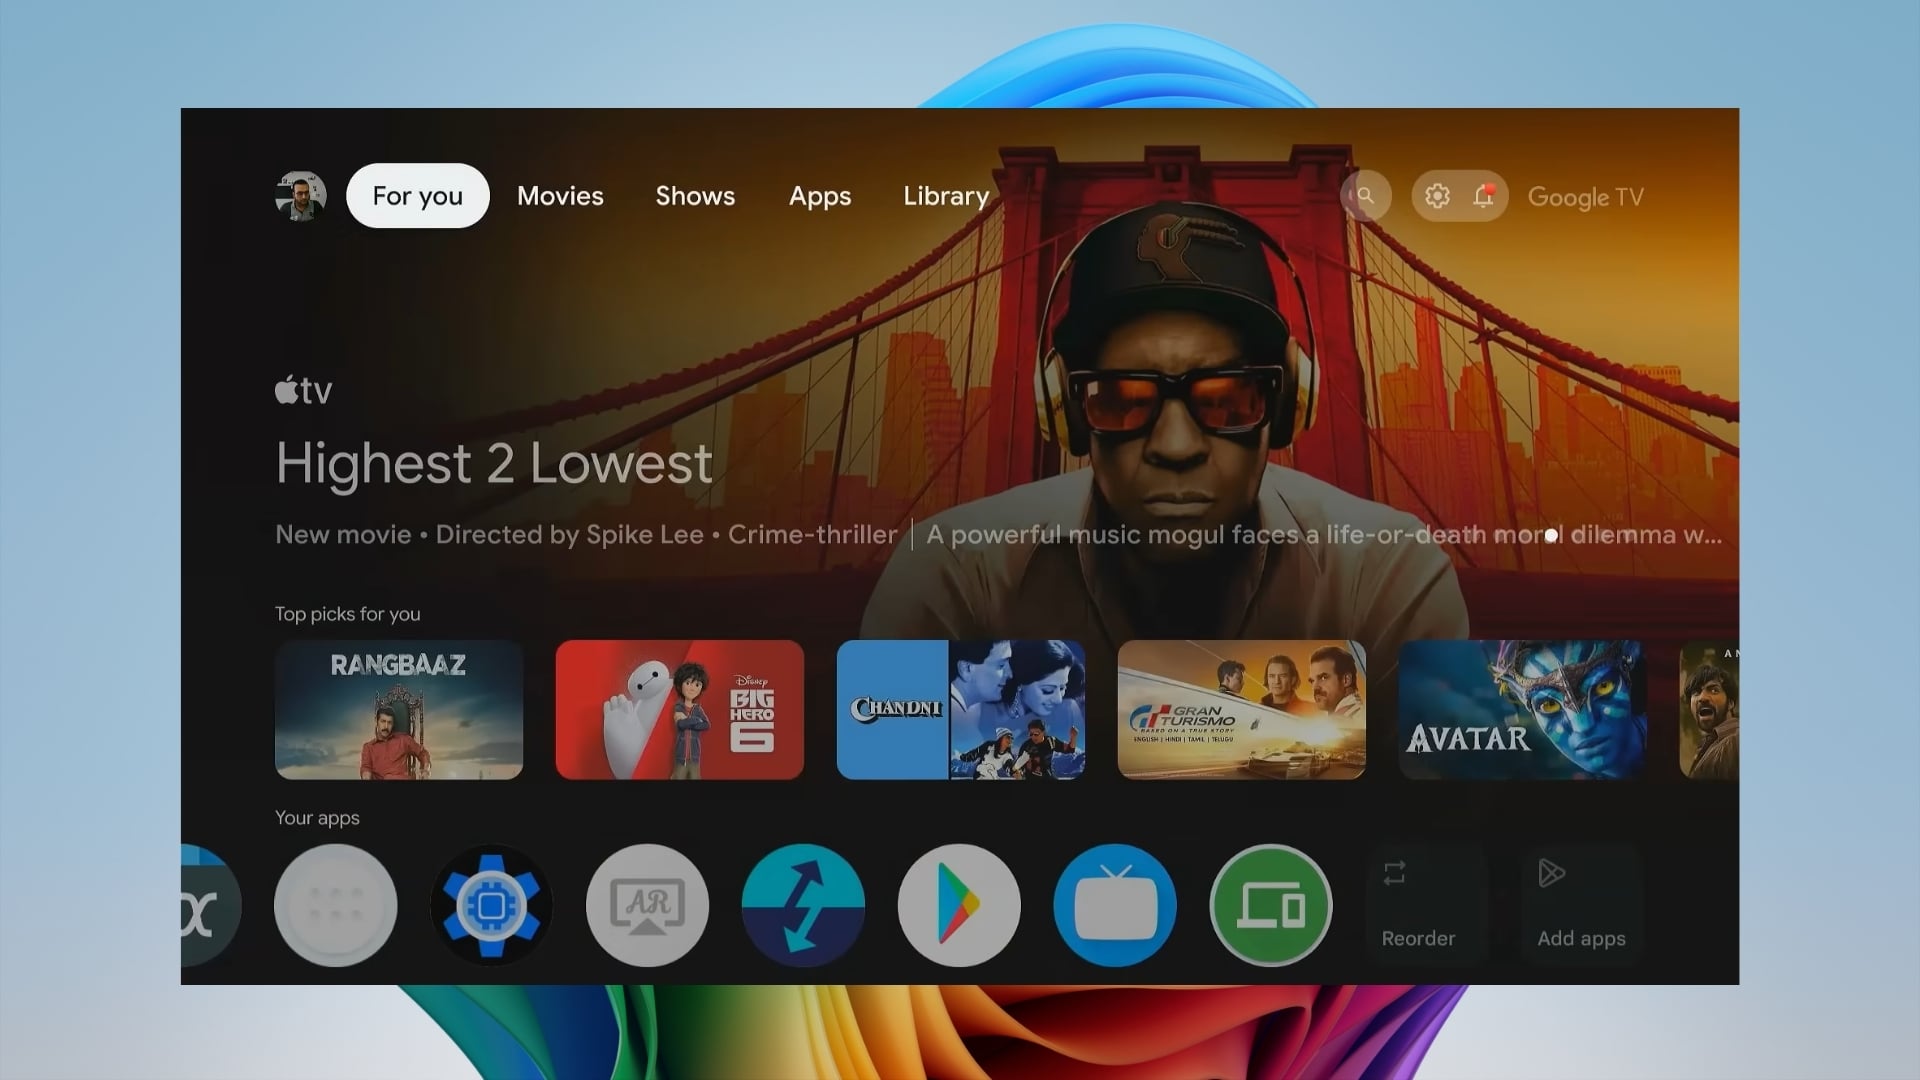
Since we have chosen exFAT as the format, you will get plenty of storage for different apps and even some games.
That’s it! You now have a portable Google TV USB stick that you can carry with you wherever you go. The benefit? It will have all the apps that you love, logged in with your account, and all other settings that you have personally enabled or disabled.
