Quick Answer
The whole idea behind securing your Apple ID is to ensure you make it very tough for anyone to hack into your Apple ID account.
- Start with setting up a passcode for your device and a really strong password for your Apple ID.
- Never share your Apple ID with anyone and log in with your Apple ID on any unknown device.
- Use Two-factor authentication and setup Apple ID recovery key for emergencies.
Apple products or services such as iCloud, Apple Music or Apple TV Plus require an Apple ID, which serves as a gateway to the Apple ecosystem for all Apple devices. Your Apple ID serves as a hub for all your Apple devices and manages services and information. It is therefore important that you take additional precautions to protect your Apple ID from possible attacks.

Although Apple has an advanced security system for its users and is one of the best around. But fraudsters are also becoming more advanced. They use technical tricks to hack users’ Apple IDs. That’s why you should make your Apple ID even more secure by following the sixteen methods we’ve mentioned. So, without further ado, let’s get started.
Table of Contents
16 Ways to Secure Your Apple ID on Your iPhone
Explore these working methods to ensure the security of your Apple ID. Each method plays a crucial role in protecting your Apple ID in different scenarios. These methods have proven to be effective, so you should try each one. Keep in mind that you should only try these methods yourself and not involve anyone else in this action. It’s about your safety, and using these methods in front of others could increase the risk.
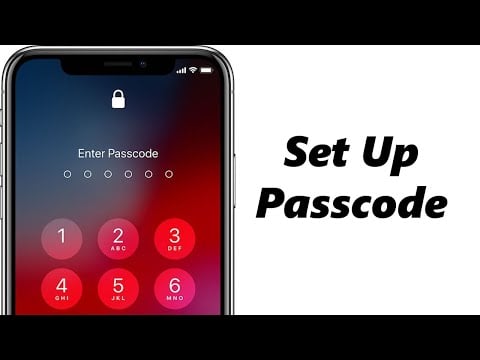
Set a Passcode on Your iPhone
To ensure the security of your Apple ID and the important information stored on your iPhone, the first and most effective step is to use a screen password to unlock it.
This not only secures your Apple ID, but also protects important information about applications such as payment apps. So follow the steps below to set a passcode for your iPhone.
Use a Strong Password for Your Apple ID
A strong password is the first line of defense for your Apple ID on your iPhone. It protects your data and access to important services like iCloud, App Store and Apple Pay.
Find out how to protect your Apple ID with a strong password here:
1. Your password should consist of at least eight characters, including upper and lower case letters, numbers and special characters. Also, avoid using personal information or common words. This makes it harder for fraudsters to guess or crack using brute force methods.
2. Avoid using the same password for your Apple ID as for other accounts. A data breach on another platform could jeopardize your Apple ID if they use the same password.
3. Avoid using easy-to-guess patterns such as your birthday, pet names or words from the dictionary. Fraudsters often try these common patterns first.
Keep Your Account Information up to Date
If you forget your password or someone tries to hack your Apple ID, it’s important to have accurate information to recover it. If your phone number or email address is incorrect, it’ll be difficult to recover access.
So make it a habit to check and update your details regularly. You should also change your Apple ID password if you created it a long time ago.
- To keep your account information up-to-date, visit the official Apple ID website.
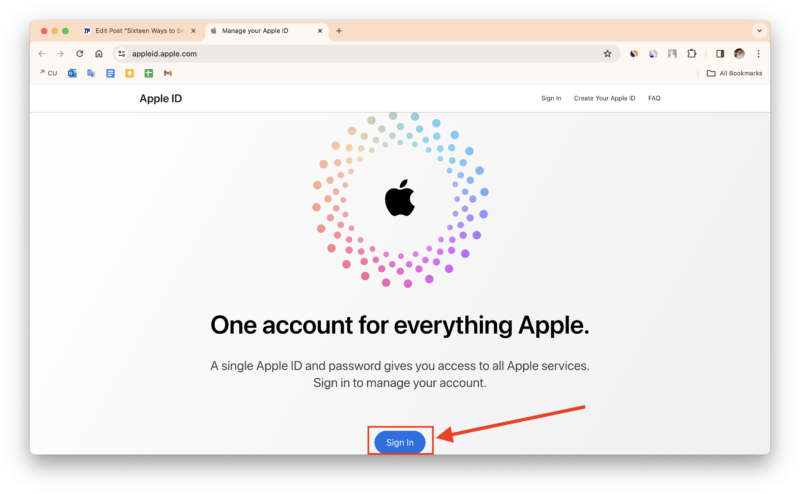
- Enter your Apple ID and password to log in securely.
- Once you’re logged in, you’ll have access to a dashboard that contains all the important information about your Apple ID. Take a moment to review each section thoroughly.
- If you notice any outdated information, you should change it immediately.
- If you’ve asked security questions in the past but can’t remember the answers, it’s important that you update them immediately. This will ensure that your account recovery options are up to date and effective.
- Review the list of trusted phone numbers associated with your Apple ID. If you come across unknown or unused numbers, you should delete them immediately to get the correct contact information.
Related Read: How to Recover Your Disabled Apple ID
Don’t Share Your Apple ID Password With Anyone
Sharing your Apple ID password is like handing over the keys to your personal space. It gives you access to all your personal data, including photos, emails, messages and much more. To protect your data, you should never share your password with anyone, including friends and family.
Never share your Apple ID password under any circumstances, even if someone calls claiming to be from Apple Support and asks for it. Apple takes security seriously and will not request your password for verification.
The person on the phone may claim to be from Apple Support and ask to verify your Apple ID. While this may sometimes seem legal, you should not give out any information that could compromise your account, such as passwords, verification codes or recovery keys.
If someone insists on getting such information from you, it’s definitely a scam. Don’t fall for their tricks and avoid such calls.
Don’t login your Apple ID on Anyone’s device You Don’t Know or Blindly Trust
This can be a very simple but important way to protect your Apple ID. And if you avoid signing in your Apple ID on a device you don’t know or blindly trust, it becomes even more secure.
And if you happen to be forced to sign in to your Apple ID on someone else’s device, don’t save your Apple ID password on their device.
When you sign in to your Apple ID on a new device, you’ll see a box labeled “Remember me”. If you check this box or tap the Save password option after logging in, your Apple ID password will be saved on that device. This can be risky for the security of your Apple ID. This is because other people can use the saved password to log in to your Apple ID later and access your data.
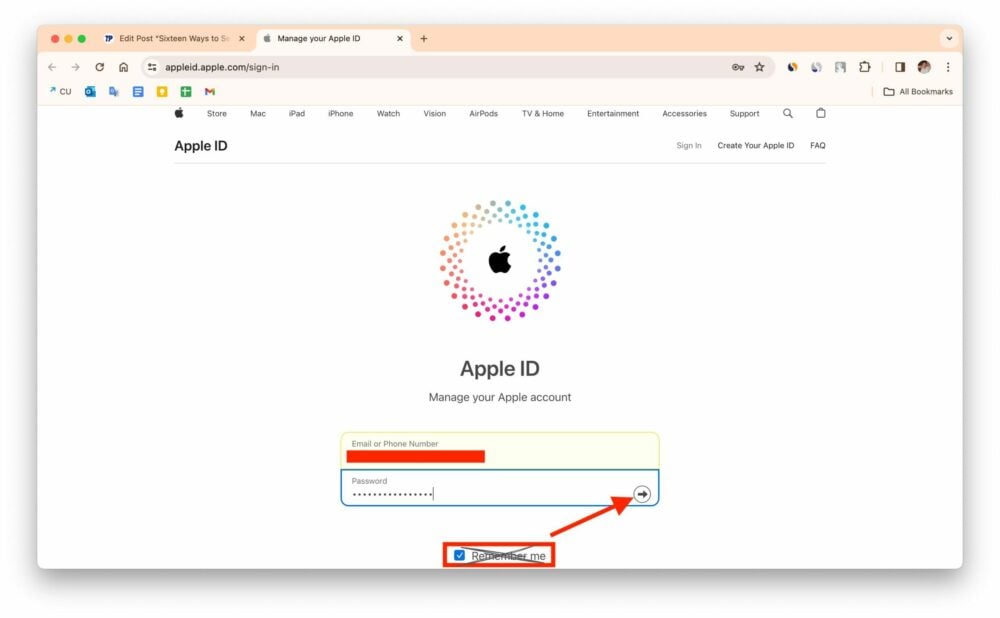
When you have finished your work, please log out of your Apple ID carefully.
Regularly Update Software
Ensure the security of your Apple ID by regularly checking and installing software updates on your iPhone. Apple releases updates that fix security issues and improve stability. To do this, follow the steps below:
- Open Settings on your iPhone.
- Tap on General.
- Click on Software Update.

- If there’s an update, tap Download.
- Allow the update to download and tap Install once the download is complete. Your device will then restart and ensure that your iPhone has the latest iOS update installed.
Review Apps Using Your Apple ID
Over time, you may have granted different apps access to your Apple ID for different reasons, such as to synchronize data, access iCloud, or use other Apple services. It’s important that you regularly review and manage these permissions to ensure that your account remains secure and that only trusted apps can access your personal data.
- Launch the Settings app on your iPhone.
- Tap the name of your Apple ID at the top of the settings page.
- Tap Sign-In & Security.
- You may need to sign in with your Apple ID password.
- Tap Sign in with Apple. This will display a list of all apps that currently use your Apple ID.

- Swipe left to the app that you want to revoke access to your Apple ID.
- Click Stop using when the confirmation pop-up prompts you to do so.

Related Read: How to Change Apple ID to a New Email Address
Use Two-Factor Authentication for Apple ID

To increase the security of your Apple ID on your iPhone, it’s important to activate two-factor authentication. This ensures that no one can access your Apple ID without a verification code, even if you disclose your password and even afterwards.
Two-factor authentication requires a one-time password (OTP) or a code that is sent to your trusted device that is connected to your Apple ID login. Follow the steps below to enable two-factor authentication.
- Open Settings on your iPhone.
- Tap on your name or Apple ID.
- Go to Sign-in and Security.
- Tap on Two-Factor Authentication.

- Activate it if the option is available. If not, you have either already activated it or your Apple ID is automatically secured.
Make sure you verify at least one trusted phone number to receive the verification code via SMS or automatic calls. This is important because there may be situations where none of your devices have your Apple ID login and a trusted number will ensure that you still receive the code. To do this, follow the steps below.
- Select Two-Factor Authentication.
- Enter the correct number and press Done.
- If you want to change an existing number, click on the edit icon.
- Enter your iPhone Passcode.
- Enter the phone number and tap either Text Message or Phone Call. This will ensure that you want to receive the verification code.

Each time you try to log in from a new device, a code will also be sent to the trusted phone number you added some time ago.
Never Share the Apple ID Verification Code
Your Apple ID verification code is a digital key, in other words, it grants someone access to your Apple ecosystem. Treat it like you treat your house key. Never share it under any circumstances, even if someone claims to be from Apple Support.
With the verification code, scammers can easily access your Apple ID account to steal your personal information, make unauthorized purchases, and even lock you out of your own devices.
If your Apple ID is also linked to your payment methods, such as credit cards and bank accounts, thieves can mess with your finances, make fraudulent purchases and withdraw your money.
And your iCloud account, where your photos, contacts, emails and other sensitive data are stored, is also at risk if your verification code is leaked.
Use a Recovery Key
An Apple ID Recovery Key is a unique 28-character alphanumeric code that serves as your backup password. Since you cannot change this code yourself, it’s important that you always keep it safe.
Suppose you’re on vacation, your phone is stolen and you have forgotten your Apple ID password. In this situation, you might panic, of course, but if you suddenly remember that you have set a recovery key, and if you remember this recovery key or manage to retrieve it from anywhere, you can restore access to your Apple ID.

Therefore, setting the recovery key is a smart move to secure your Apple ID on your iPhone. Follow the steps below to set the recovery key for your Apple ID.
- Open Settings.
- Tap on your name at the top, and then choose Sign-in & Security.
- Tap on Account Recovery.

- Tap on the Recovery Key again.
- You’ll probably need to sign in to your Apple ID the first time you set the recovery key with your Apple ID.
- Activate the toggle switch to the right of Recovery key and tap Use recovery key when a small window appears.

- Now, enter your iPhone passcode.
- Once you have entered the passcode, a 28-digit alphanumeric recovery key will be displayed on the screen. Write it down carefully and keep it safe.
- Tap Continue.
- Enter that Recovery Key and click Next in the top right corner.

- Wait until it verifies the Recovery Key.
Related Read: How to Remove Device from Apple ID
Use Security Keys
Security keys go one step further by replacing the code with a physical device that is used to complete the login process. This is the next level of security that makes it much harder for attackers to gain access, even if they steal your password. For security keys on the iPhone, there are a few requirements you need to fulfill:
- Make sure your iPhone is running version iOS 16.3 or higher to support security keys.
- You’ll need two Apple-recommended FIDO-certified security keys that work with Lightning, USB-C or NFC (near-field communication) for wireless pairing. Popular options are YubiKey and Feitian.
- Keep Bluetooth enabled for initial setup and pairing of your security key.

Follow the steps below to set up security keys on your iPhone:
- Launch Settings on your iPhone
- Tap on your name and then click on Sign-in & Security.
- Tap Two-Factor Authentication.
- Click on Security Keys.
- Now, tap on Add Security Keys and Continue.

- Enter your iPhone Passcode.
- Connect your security key via the Lightning or USB-C port. If you have an NFC key, hold it near your iPhone.
- Follow the instructions onthe screen to pair your key.
- Choose whether you want to stay logged in on all your devices or log out of trusted devices that you haven’t used recently.
Use Family Sharing Instead of Sharing an Apple ID
Sharing your Apple ID with friends or family to make subscriptions or purchases can compromise security and lead to loss of access. Instead, use Family Sharing, which allows up to 5 family members to use Apple services securely.
If you have already shared your Apple ID with others, quickly change the password and use Family Sharing for more security.
- Launch Settings on your iPhone.
- Click on your name.
- Tap on Family Sharing.
- Follow the on-screen instructions to set up Family Sharing.

Add Recovery Contacts
If you have forgotten your password, you can request a password reset via your iPhone. Apple will send a temporary recovery code to your trusted contacts, who can then share it with you privately. This eliminates the need for security questions.
Even if someone gains access to your iPhone, they won’t be able to reset your Apple ID password without the recovery code from your trusted contacts. This makes it harder for hackers or malicious actors to take over your account.
Here you can find out how to do this on iOS 15 or a newer version:
- Open the Settings app on your iPhone.
- Tap on your name at the top.
- Go to Sign In, Security, and select Account Recovery.
- Click on Add Recovery Contact twice.

- Unlock your device with Face ID or Touch ID.
- If you’re part of Family Sharing, the members will be suggested automatically. If you want to select them, simply tap their name to add them as your recovery contact.
- If you prefer to select a different contact, select a contact and tap Add in the top right corner.

- Select the send button and tap on Done.


As soon as the contact accepts your request, you’ll receive a notification and your recovery contact is set from then on. This will make the recovery process even smoother if required.
Sell or Pass Your iPhone Carefully
Before you sell your old/new iPhone to get some extra cash or upgrade to a newer model, you should take these steps to protect your Apple ID:
- Back up your iPhone.
- If you’re using an Apple device, unpair it; do the same for any other connected devices.
- Remove the old iPhone from your list of trusted devices.
- Finally, erase all content and settings on your device by performing a factory reset. This will ensure that your personal data is deleted before you sell it.
Report to Apple
If you notice something suspicious about your Apple ID, such as someone asking for personal information or a fake iOS password field appearing on a website, report it to Apple Support as soon as possible. Call, chat or email reportpublishing@apple.com. Provide all the details of when the problem occurred and what steps you have taken. The support team will advise you and take action to resolve the issue and prevent future problems.
Recognize and Avoid Phishing Scams
Protecting your Apple ID is crucial, and one important aspect is to protect yourself from phishing scams. These scams can come in various forms, such as suspicious messages, fake support, phone calls or even pop-ups on your iPhone asking for your Apple ID password. It’s important to stay vigilant and take steps to protect yourself.
If you come across a potential scam, such as strange messages or calls, you should act immediately. Simply send an email to reportphishing@apple.com to report the problem to Apple. Also consider the following tips for dealing with fraudulent messages, calls or pop-ups:
- Legitimate prompts from Apple usually appear within Apple’s official apps or settings. If the pop-up appears outside of this context, it may be a phishing attempt. Avoid entering your password.
- Before giving out information by phone or email, check the identity of the caller. If you have any doubts, hang up and contact Apple directly using the official contact details.
Increase Difficulties for Scammers
Securing your Apple ID is crucial for both personal data protection and financial security. Unauthorized access can lead to fraud and compromise the security of your bank account associated with your Apple ID. It’s important to take steps to protect your Apple ID, especially if it’s linked to credit cards or Apple Payments.
In this article, we’ve outlined 16 different ways you can increase the security of your Apple ID. If you have implemented all of these steps, your Apple ID will undoubtedly be much more secure from now on.
FAQs about Securing Apple ID
Is using a VPN on my iPhone with my Apple ID an extra security measure?
Yes, using a VPN on your iPhone can provide an extra layer of security, especially when accessing your Apple ID on public Wi-Fi networks. A VPN encrypts your internet connection and makes it harder for third parties to intercept your data. However, it’s important that you choose a reputable VPN service to increase protection.
I received a suspicious notification about my Apple ID being used in a new location. What should I do?
If you receive a notification that your Apple ID is being accessed from an unknown location, you must act immediately. First, change your Apple ID password and then enable two-factor authentication for an extra layer of security. Review your recent account activity in the Apple ID settings and contact Apple Support if you notice any unauthorized actions.
Can I use third-party password managers for my Apple ID, and how secure are they?
You can use third-party password managers for your Apple ID. Many reputable password managers offer secure options. These tools use advanced encryption methods to store and manage your passwords. Always choose a well-reviewed password manager, and use two-factor authentication for extra security, no matter which app you choose.
