Quick Answer
To set up your personal dashboard using Glance, install it via Docker on Windows or Mac, create a glance.yml config file, and add widgets like weather, RSS, system stats, and more. Once configured, access it locally through your browser at localhost:8080. Glance is lightweight, fully private, and easily customizable.
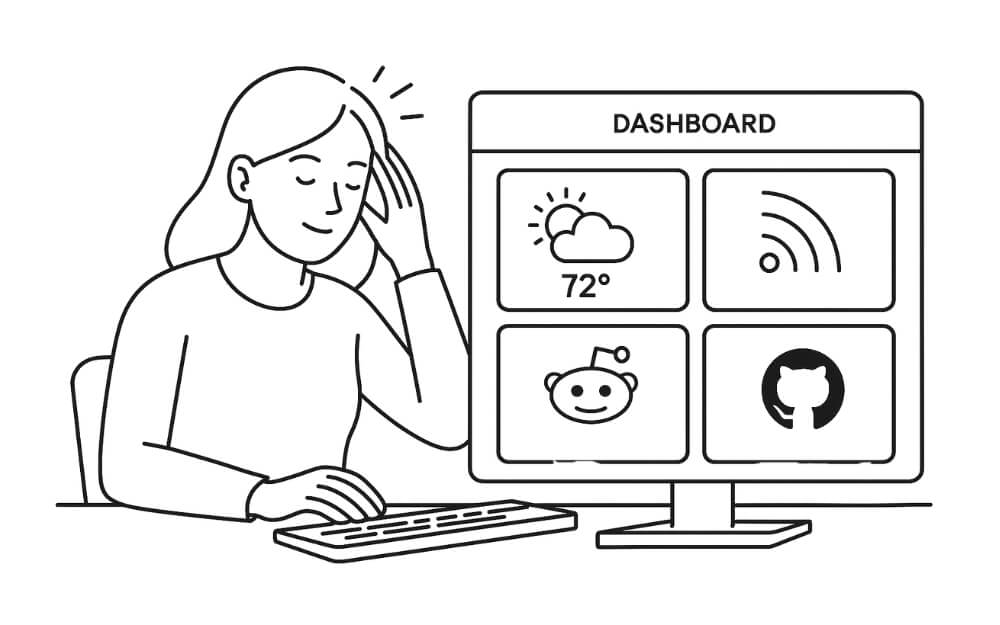
Using the personal dashboard, you can create a digital board where you can view all your essential information in one place. You can add different widgets such as a calendar, your to-do list, or if you want to follow news, weather, stock prices, YouTube feeds, and more.

If you are a developer, you can also add system or server status and notes, or bookmarks. Having all this information in a single place can easily eliminate the need to switch between apps like Gmail, Calendar, YouTube, News, and Notes, and can also help enhance your workflow and save a lot of time.
The personal dashboard niche is growing rapidly, with plenty of players already. However, Glance, which is a free and fully private, fast, and self-hosted dashboard, stands out from the rest because of its no-algorithm feed, simple ad-free interface, and personalized experience based on your preference.
Table of Contents
What is Glance?
Glance is an open-source personal dashboard that lets you create your own personal dashboard and get a sneak peek of all your information in one place, such as your weather, YouTube feeds, RSS news and more, in a single place.
Glance is free to use and also available on all major platforms. It is so lightweight that the entire app is under 20 MB and uses less memory, which also makes it a great choice for low-end PC requirements.
How to Install Glance?
S.no | Steps | Mac | Windows |
|---|---|---|---|
Step 1 | Install Docker | Go to docker.com and Download & install for your OS | Go to docker.com and Download & install for your OS |
Step 2 | Create project folder | Open Terminal and use this commands: mkdir glance-dashboard and use cd glance-dashboard | Go to Step 3 |
Step 3 | Create Docker Compose file | Use these commands: nano docker-compose.yml | for Windows, Open Notepad and Save as docker-compose.yml |
Step 4 | Add this code to Docker config file you created in the step 3 | version: "3" services: glance: image: glanceapp/glance container_name: glance restart: unless-stopped ports: - 8080:8080 volumes: - ./config:/app/config | version: "3" services: glance: image: glanceapp/glance container_name: glance restart: unless-stopped ports: - 8080:8080 volumes: - ./config:/app/config |
Step 5 | Create config folder & file | Use these commands, cd config nano glance.yml in max terminal to create file and folder | For windows you can create glance.yml in Notepad |
Step 6 | Add this code to the config file that you created in the Step 5 | pages: - name: Home columns: - size: full widgets: - type: weather location: "Visakhapatnam" unit: c - type: rss title: Tech News feeds: - url: "https://techcrunch.com/feed/" - url: "https://www.theverge.com/rss/index.xml" limit: 5 | pages: - name: Home columns: - size: full widgets: - type: weather location: "Visakhapatnam" unit: c - type: rss title: Tech News feeds: - url: "https://techcrunch.com/feed/" - url: "https://www.theverge.com/rss/index.xml" limit: 5 |
Step 7 | Start Glance | Use the command to start docker on your mac: docker-compose up -d | Use the comnand to start docker docker-compose up -d |
Step 8 | Open in browser | Visit http://localhost:8080 on your browser | Visit http://localhost:8080 on your browser |
There are two ways you can install Glance on your PC: one is using Docker, which is often the best and most reliable method, and the alternative is to install it directly without Docker.
There is also an optional build from the source for development. You can install Go on your system, and you can also build it from your source. It is for advanced technical users looking for an advanced Glance setup.
First, Glance is available on all major operating systems, including Linux, Windows, and macOS, and it can also run on home servers, VPS, and even a local PC. Also, ensure that your system has met the minimum operating requirements.
Install Glance Using Docker
If you want to install Glance with minimal effort, installing it with Docker is highly recommended since it doesn’t require you to install any dependencies like Go or even manage file paths manually. Plus, it is so easy that you can install the Glance in a single command and run smoothly without any issues inside a simple Docker file.
However, installing and setting up Glance using Docker requires some technical knowledge. To make it easy, here is a step-by-step process that is suitable even for beginners.
First, you need to install and set up Docker on your Mac or Windows, depending on your device.
On Mac:
Step 1: Install Docker on your device
Go to www.docker.com and download the Docker file for your Mac, and you can install the app using the regular method. Open Docker and create your account; you can sign in or sign up for your new account.
Now, open the Docker app on your Mac and ensure it is running in the background.

Step 2: Create Glance Folder

Now you need to create a Glance folder to install it. For this, you can use the following command.
mkdir glance-dashboard
cd glance-dashboard
Step 3: Create the Docker Compose File

Next, you can use the following command to create Docker Compose YAML and paste this code.
nano docker-compose.yml
Step 4: Add this code to the file

version: “3”
services:
glance:
image: glanceapp/glance
container_name: glance
restart: unless-stopped
ports:
– 8080:8080
volumes:
– ./config:/app/config
Press Control + O and then Enter to save, and then Control + X to exit
Step 5: Create a Config Folder
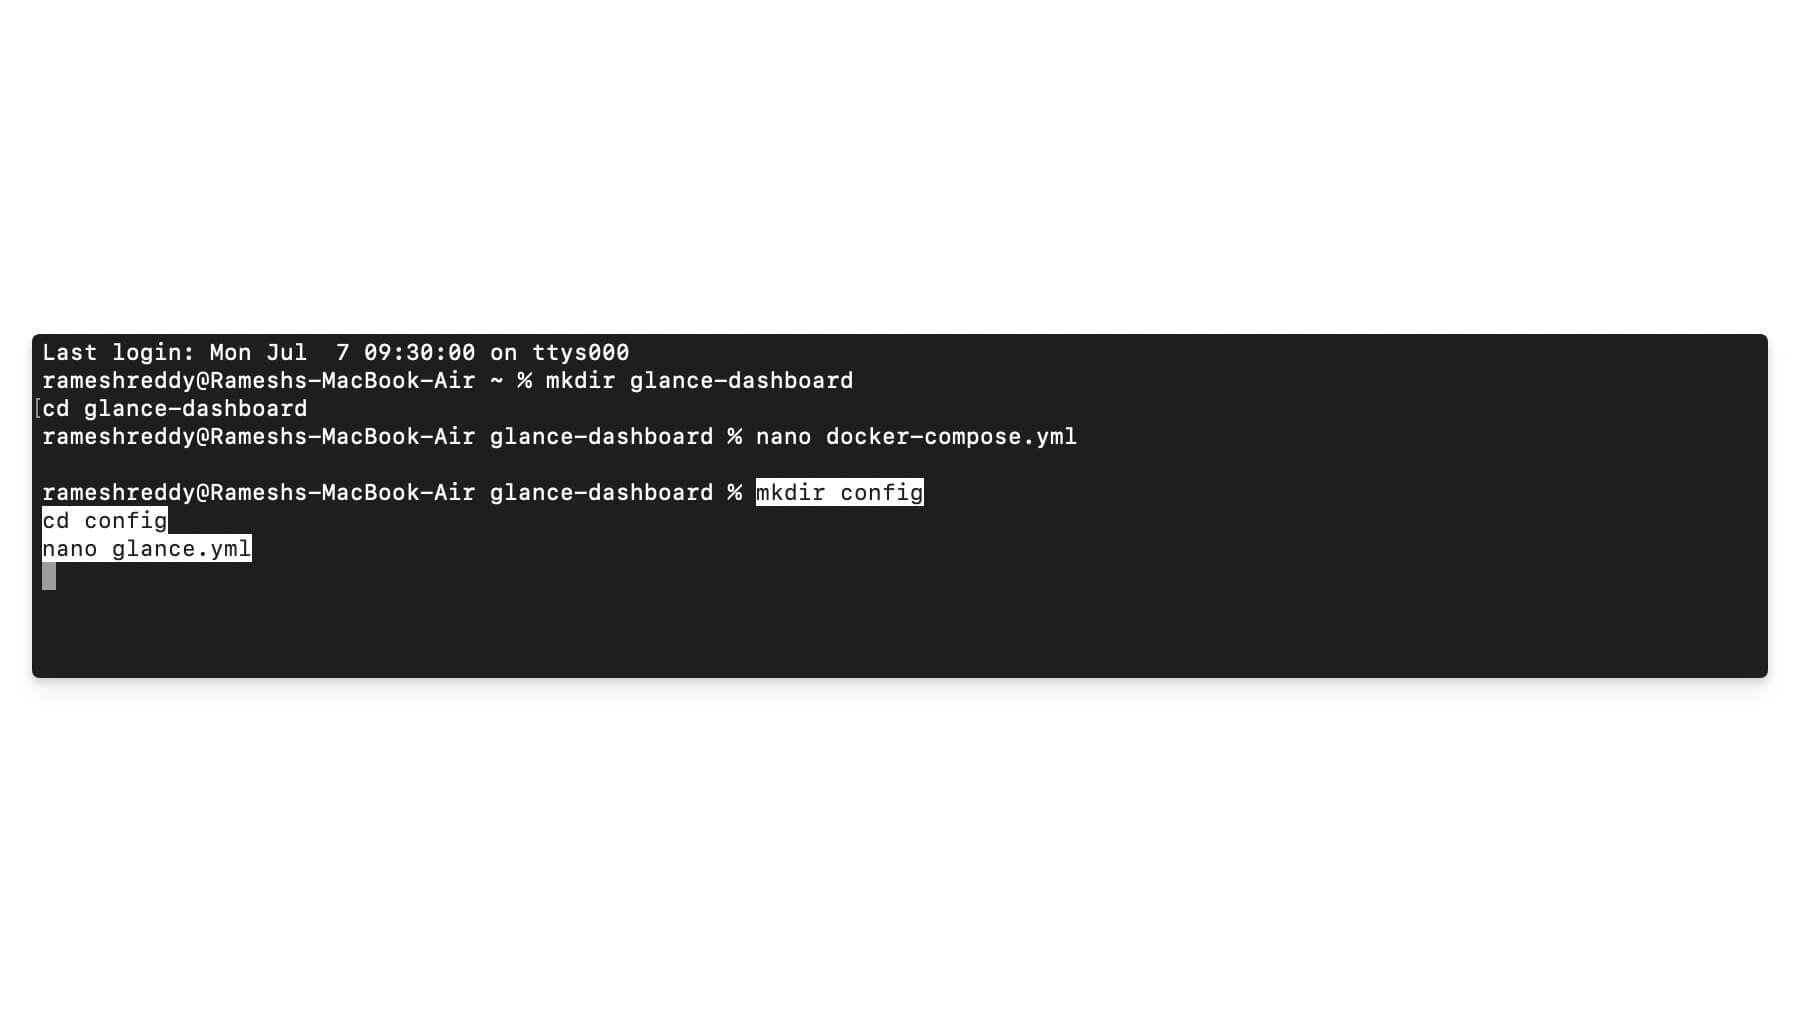
Next, create a basic config folder using the following commands
mkdir config
cd config
nano glance.yml
Step 6: Paste this code
Now, paste this code inside the config file that you have created in the previous step: nano glance.yml
pages:
– name: Home
columns:
– size: full
widgets:
– type: weather
title: Weather
location: “Visakhapatnam”
unit: c
– type: rss
title: Tech News
feeds:
– url: “https://techcrunch.com/feed/”
– url: “https://www.theverge.com/rss/index.xml”
limit: 5
Press Control + O and then Enter to save, and then Control + X to exit
Step 6: To run the Docker container locally on your device, you can access the Glance dashboard by going to your local host. Now open any browser on your device and visit this link: http://localhost:8080/, and that’s it, now you will see a glance dashboard running on your device.
If you face any errors:
Ensure Docker is running in the background. You can use this command: docker ps

Next, you use logs to find the root cause of the issue. Use the following command to check logs: docker logs glance
How to install and set up Glance on your Windows
Step 1: Visit www.docker.com and download and install Docker on your Windows. If prompted, restart your Windows device. Next, open Docker on your Windows and use the following command to create a Glance folder.
Step 2: Now, use Notepad to create a new file and name it docker-compose.yml, and paste the following code.
pages:
– name: Main
columns:
– size: small
widgets:
– type: rss
title: Tech News
limit: 5
url: “https://www.theverge.com/rss/index.xml”
– type: reddit
title: r/technology
limit: 5
subreddit: “technology”
– type: weather
title: Weather
location: “Visakhapatnam,IN”
units: metric
hour-format: 12h
– size: full
widgets:
– type: group
widgets:
– type: hacker-news
– type: reddit
subreddit: selfhosted
show-thumbnails: true
– type: rss
title: GitHub Updates
limit: 5
url: “https://github.blog/changelog/feed/”
– type: markets
title: Market Prices
markets:
– symbol: BTC-USD
name: Bitcoin
– symbol: AAPL
name: Apple
– symbol: MSFT
name: Microsoft
– size: small
widgets:
– type: docker
title: Docker Containers
– type: system
title: System Stats
– type: custom
title: My Notes
content: “This is a custom widget. You can write anything here!”
Move this file to the created glance folder and save the file.
Step 3: Now, create a compose folder using the following command: docker-compose.yml
version: “3”
services:
glance:
image: glanceapp/glance
container_name: glance
volumes:
– ./glance.yml:/app/config/config.yml
ports:
– “8080:8080”
Step 5: Finally, start Docker using the following command: navigate to the folder: cd C:\Users\YourName\glance-dashboard
Step 6: Start the glance using this folder: docker-compose up -d
Now open your browser and visit your http://localhost:8080 to get access to Glance locally on your device.
So this is how you can install and set up Glance locally on your device. Now, once you have set your access, here are a few things that you should know about Glance if you are a beginner or are using Glance for the first time.
Basics of Using Glance
If you are a beginner or if you are using Glance for the first time, here are a few things that you need to know. As I said, Glance is a self-hosted web app that can be hosted and run locally on your device.
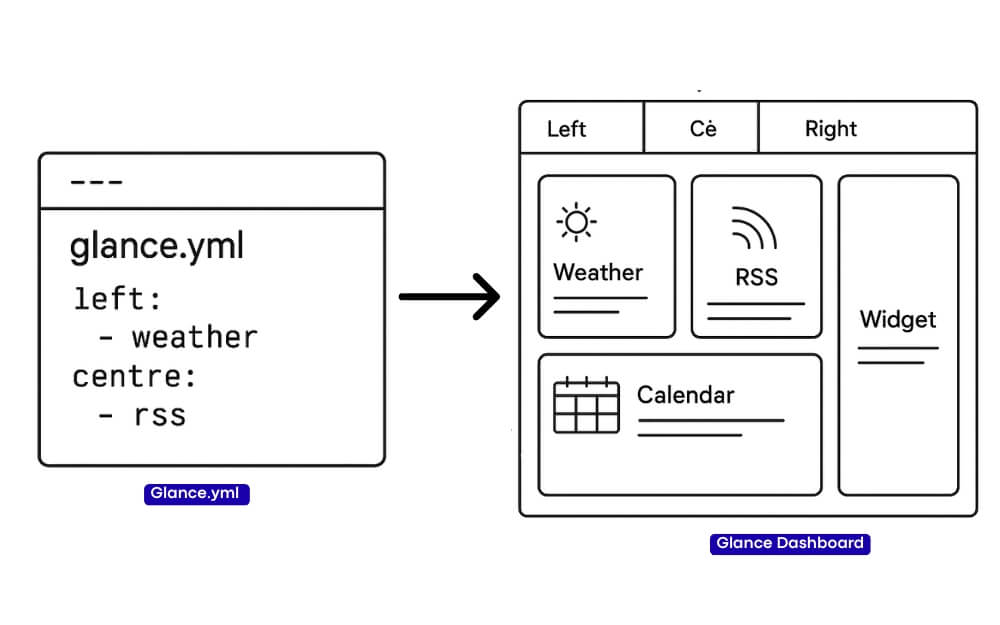
For more customization, you can simply edit the glance yml file. However, before that, learning how Glance works can help you to customize it based on your preference without any issues.

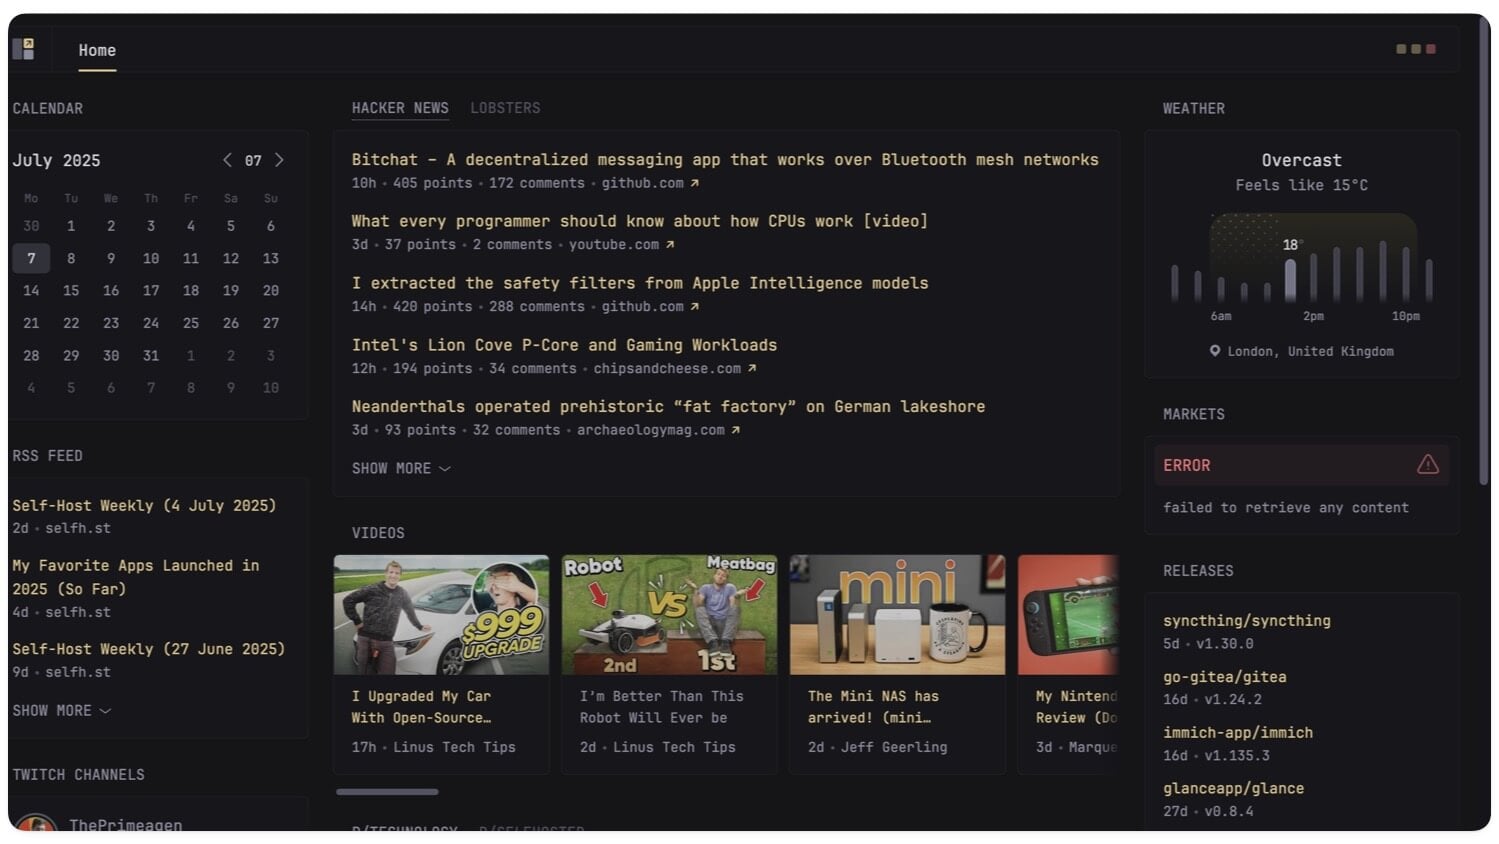
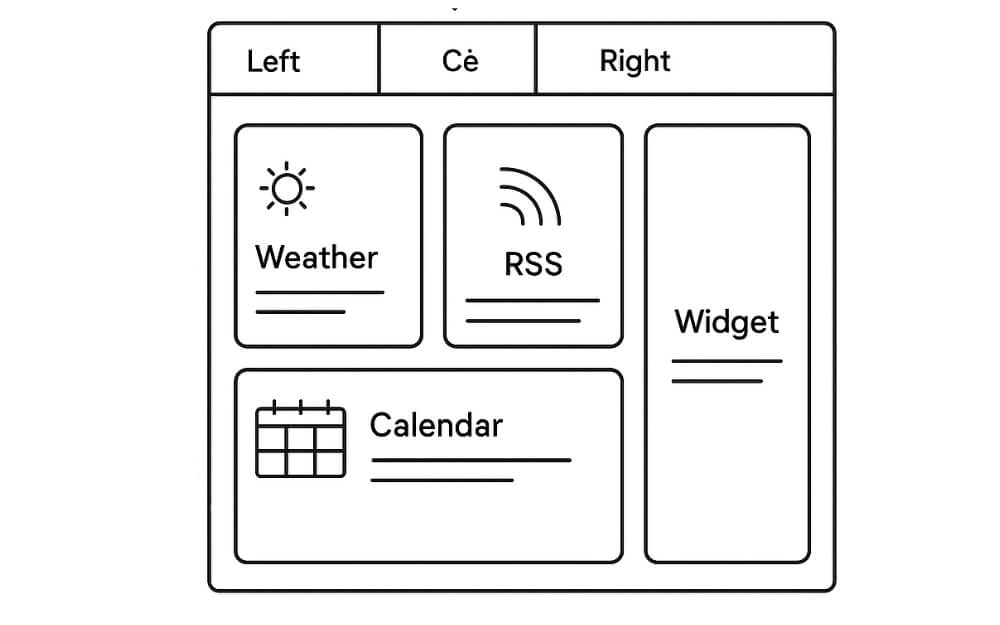
So basically, Glance works in a three-layer method. First, it contains pages that you can think of as each tab or a separate page, such as Home, news, and others, where you can name the page.
Next, each page is divided into 3 columns, including Left, Center, and Right, and in each column, you can add widgets such as Weather, RSS, Calendar, and more. You can also add single-to-column layouts to the pages.
To remove or add sections or widgets, you need to edit and customize the text file glance. yml.
Glance does not support drag-and-drop and also customization using the graphical user interface.
If you want to customize, you can edit the glance. yml file. This approach might not be suitable for people who prefer a graphical UI, but it is significantly faster and also lighter than most custom dashboards.
For instance, if you want to add a new page in the Glance folder, you can edit it. YAML file. Plus, you can also edit how many columns each page should contain and what feature should go in each column using simple parameters.
But to be honest, customizing the Glance dashboard is the hardest part of using Glance if you are a beginner. If you are not a fan of customizing it through the command line interface, or if you prefer a graphical UI, there is an easy way to customize your Glance dashboard using AI.
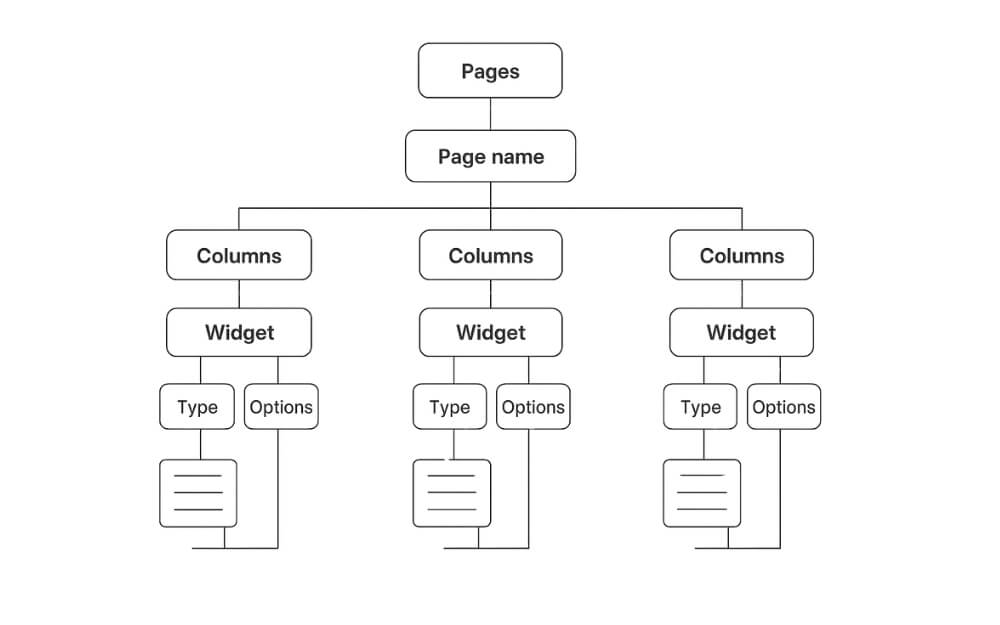
You can use any LLM and ask it to generate a good blueprint for the design and structure you want. For instance, here is the demo YAML structure overview used by Glance. Basically, Glance uses a simple hierarchy starting with the pages and again with the page name, followed by columns.
Each page has 1-3 columns, and each column has a list of widgets, and each widget has a type and specific options.
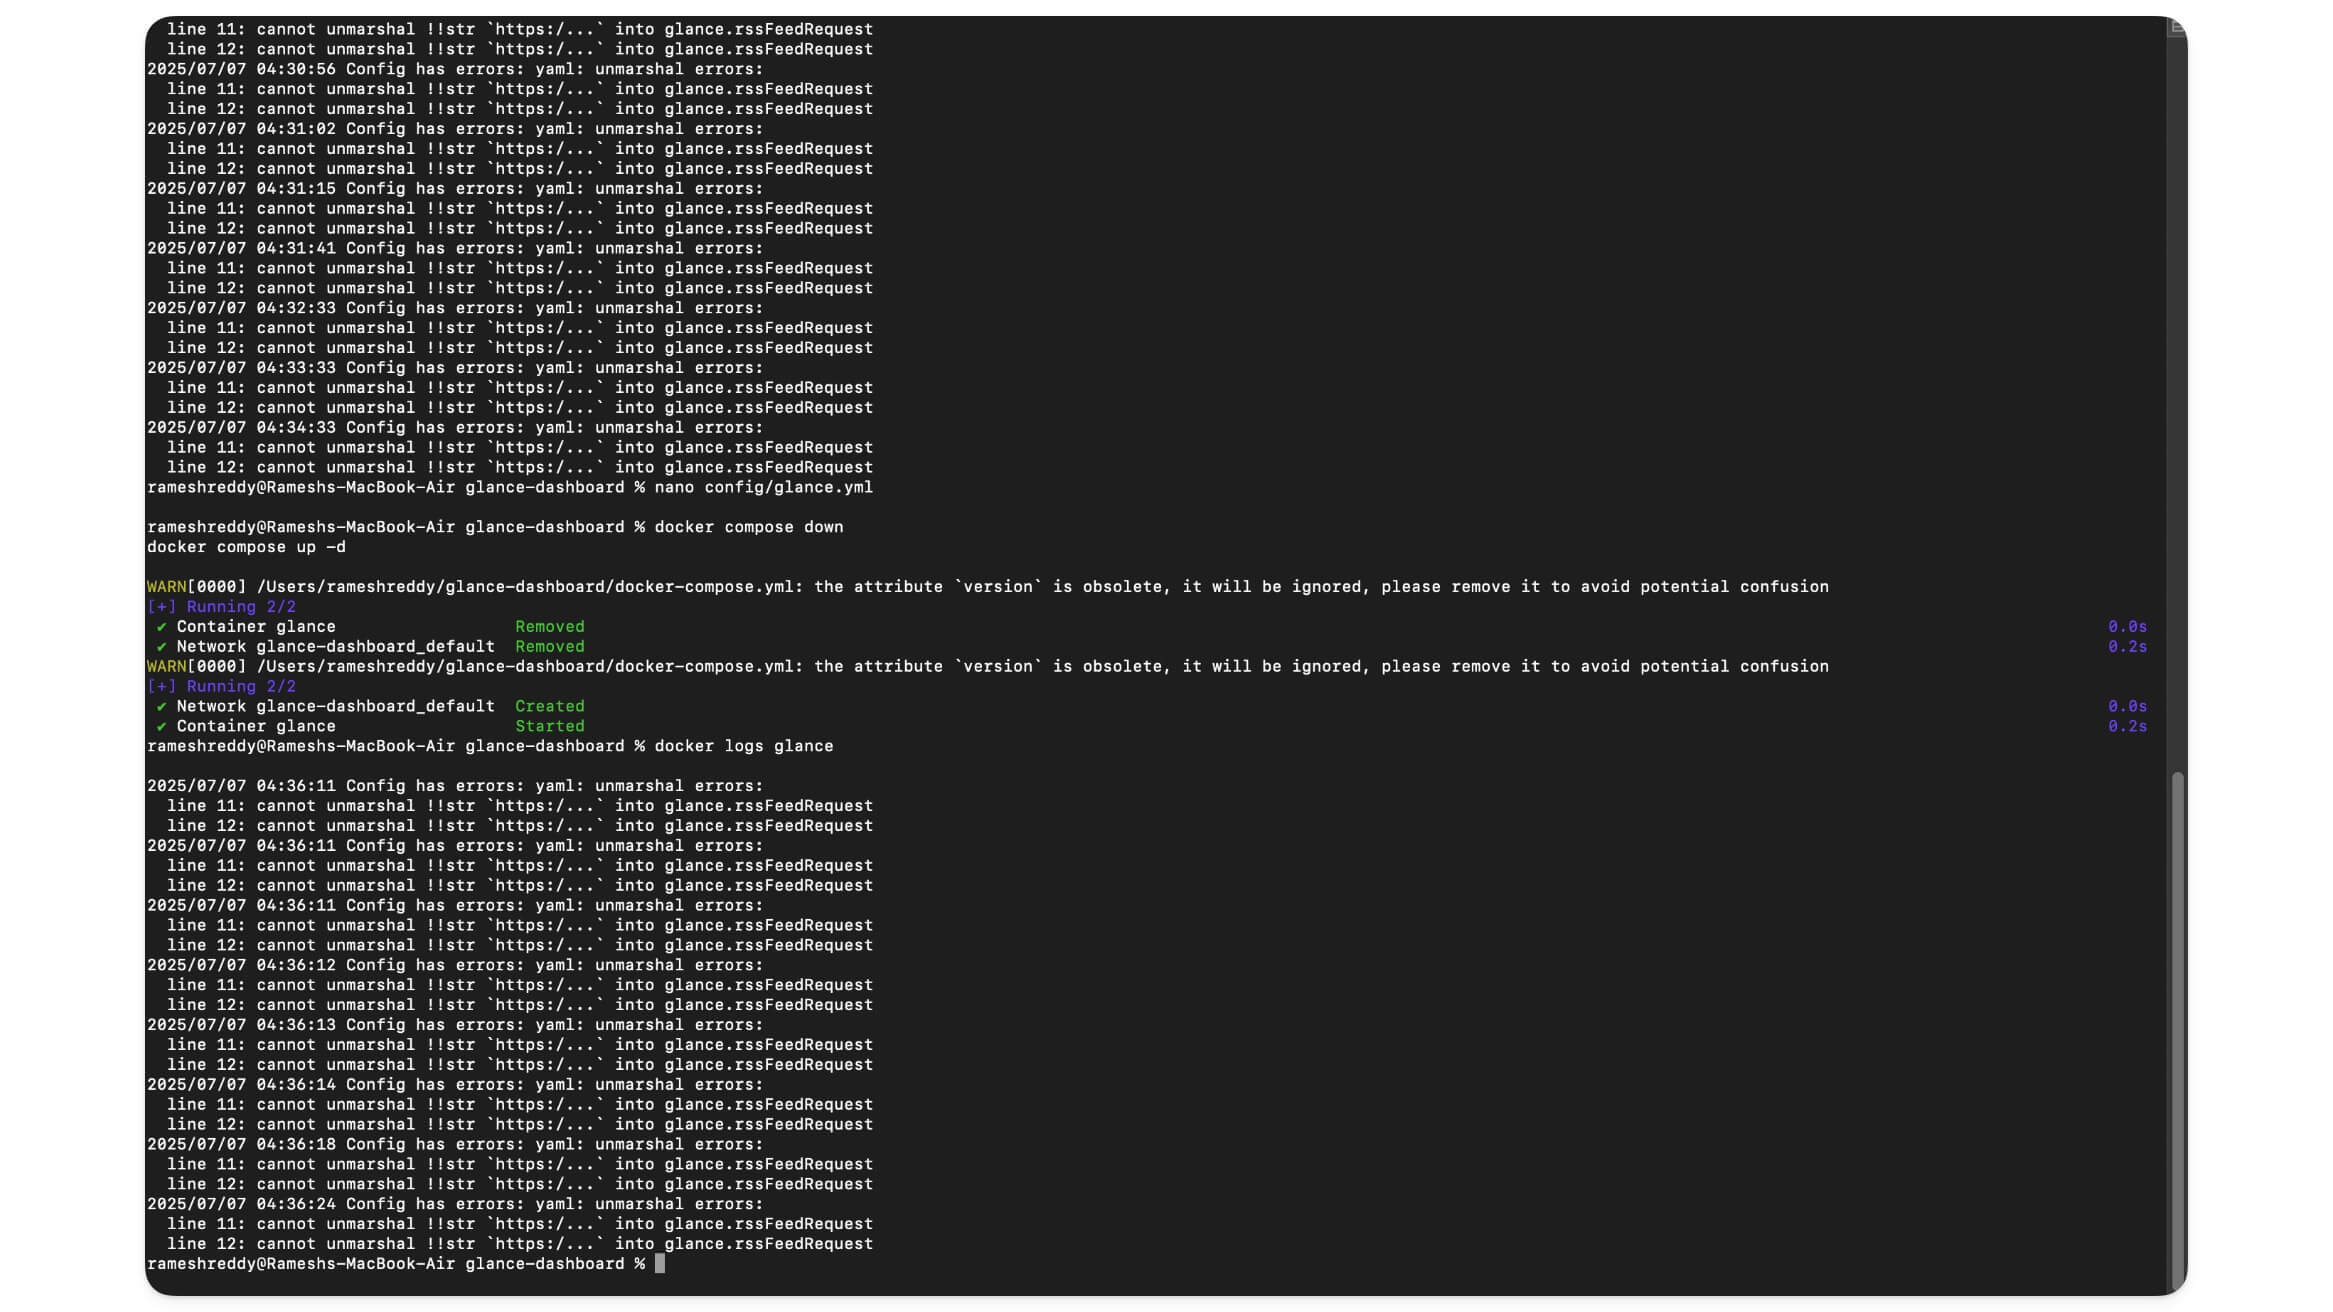
So, what happens if you misalign the code and there is an error? A glance shows an error in the browser or the logs, and for the best experience, it will also ignore the broken parts and try to load the rest.
However, thanks to the AI, you can also avoid these mistakes. And here is how you can use AI to create a simple Glance customization file. But before that, let’s talk about the manual process of creating your own dashboard with Weather and RSS news feeds from different sources, so that you will get a basic overview of how you can customize it in the future. Without any further ado, let’s get started.
How to Edit and Customize the Glance Dashboard
To help you begin, here is a step-by-step process on how I created a Glance dashboard with Weather plus RSS feed from different news sources.
However, you can use it as a base and configure your own personal dashboard.
Step 1: Open the Config file
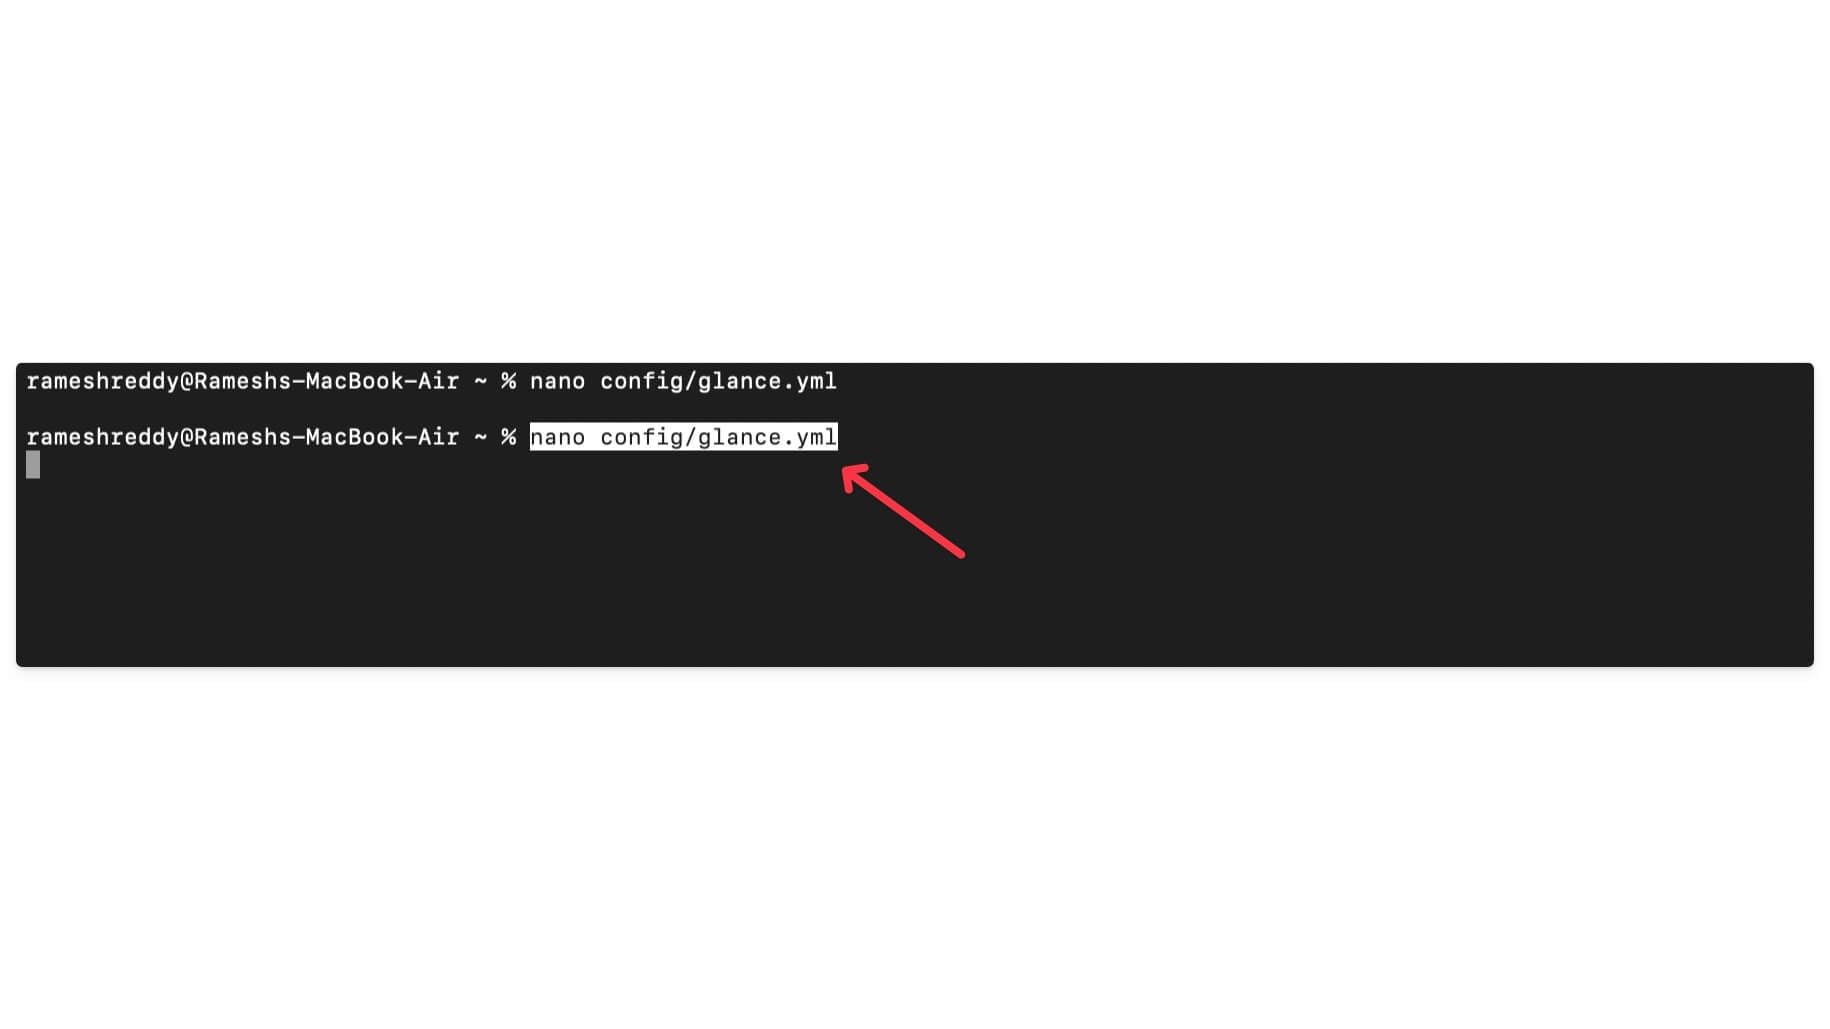
You can use a Terminal on your Mac or Windows. Use the following command to go to the Glance dashboard config file. First, go to the glance dashboard using this command: cd ~/glance-dashboard, and then use this command: cd ~/glance-dashboard, and then run: nano config/glance.yml
Now edit the config file.
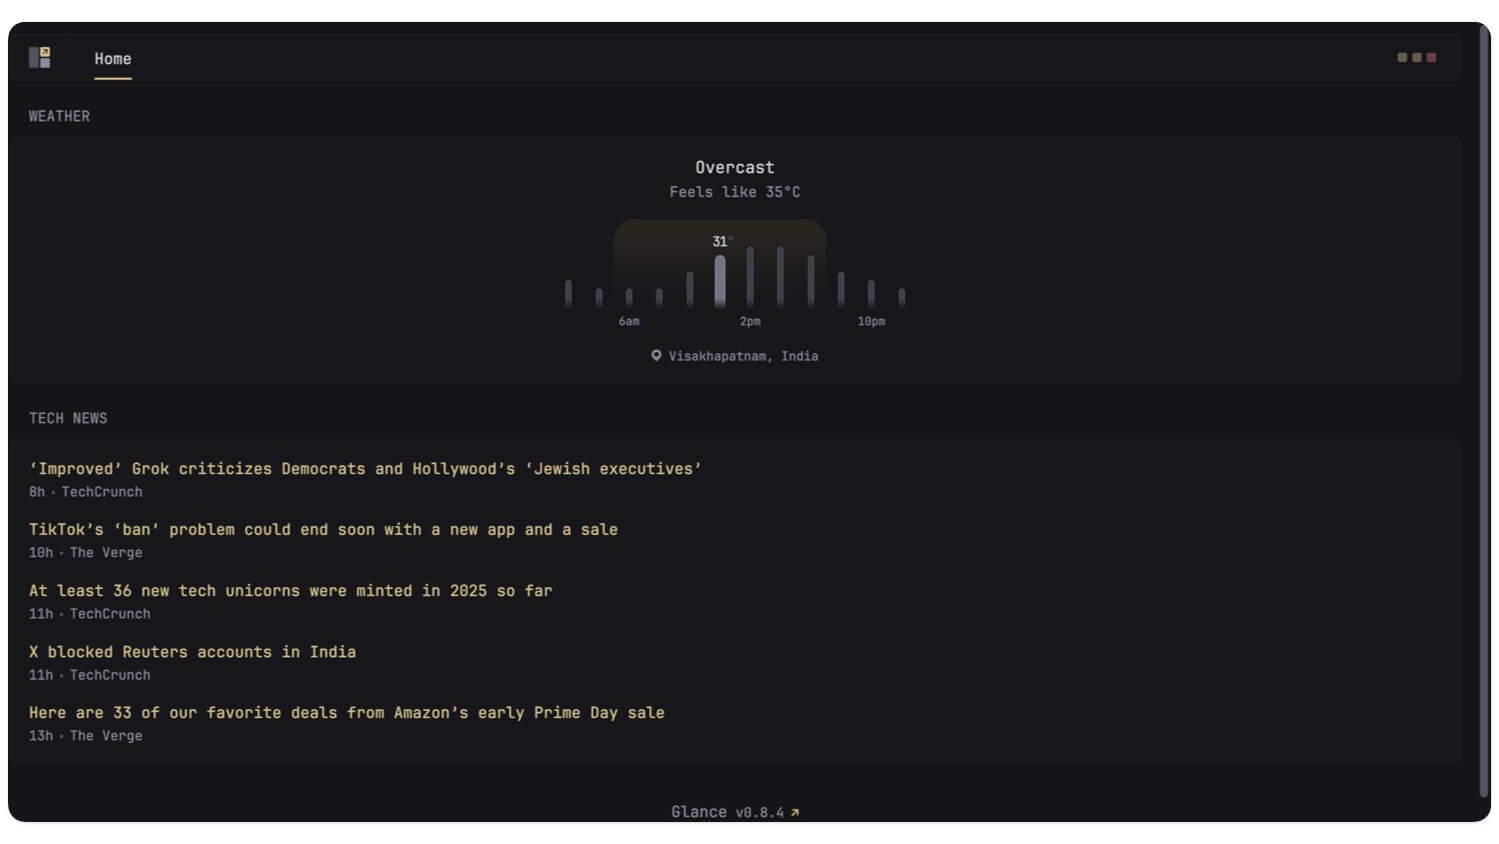
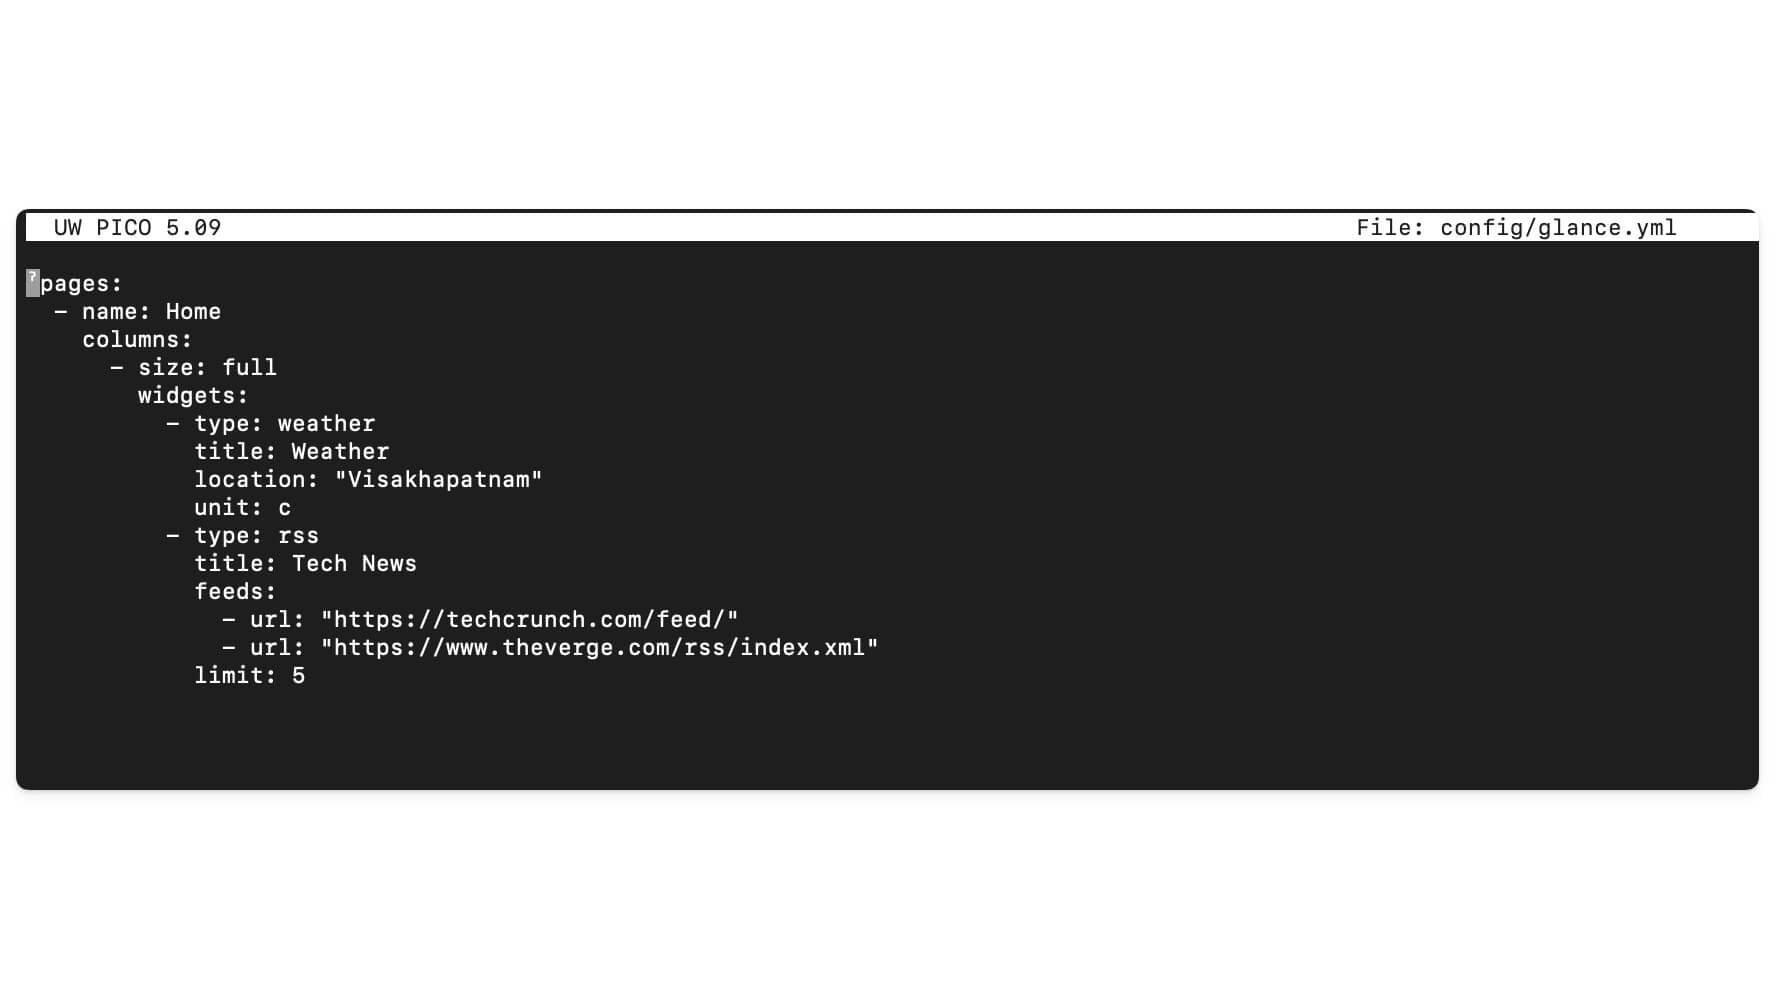
A basic, simple starting file contains a hierarchy starting with the basics, page name, and columns with the sizes and types of widgets that you should have. Each widget has different parameters. For instance, the Weather widget contains the type, location, unit, and format. The RSS feed, which is currently Tech News, contains the feeds, and here you can add the URL.
Along with it, you can also add URLs from other sources like TechCrunch. It also comes with other parameters to help you limit the number of sources you want to see. For this case, I have set the limit to 7.
Here is the default config file format you can follow:
pages:
– name: Home
columns:
– size: small
widgets:
– type: calendar
first-day-of-week: monday
– type: rss
limit: 10
collapse-after: 3
cache: 12h
feeds:
– url: https://selfh.st/rss/
title: selfh.st
limit: 4
– url: https://ciechanow.ski/atom.xml
– url: https://www.joshwcomeau.com/rss.xml
title: Josh Comeau
– url: https://samwho.dev/rss.xml
– url: https://ishadeed.com/feed.xml
title: Ahmad Shadeed
– type: twitch-channels
channels:
– theprimeagen
– j_blow
– piratesoftware
– cohhcarnage
– christitustech
– EJ_SA
– size: full
widgets:
– type: group
widgets:
– type: hacker-news
– type: lobsters
– type: videos
channels:
– UCXuqSBlHAE6Xw-yeJA0Tunw # Linus Tech Tips
– UCR-DXc1voovS8nhAvccRZhg # Jeff Geerling
– UCsBjURrPoezykLs9EqgamOA # Fireship
– UCBJycsmduvYEL83R_U4JriQ # Marques Brownlee
– UCHnyfMqiRRG1u-2MsSQLbXA # Veritasium
– type: group
widgets:
– type: reddit
subreddit: technology
show-thumbnails: true
– type: reddit
subreddit: selfhosted
show-thumbnails: true
– size: small
widgets:
– type: weather
location: London, United Kingdom
units: metric
hour-format: 12h
– type: markets
markets:
– symbol: SPY
name: S&P 500
– symbol: BTC-USD
name: Bitcoin
– symbol: NVDA
name: NVIDIA
– symbol: AAPL
name: Apple
– symbol: MSFT
name: Microsoft
– type: releases
cache: 1d
repositories:
– glanceapp/glance
– go-gitea/gitea
– immich-app/immich
– syncthing/syncthing
Finally, if you want to customize a further column, you can customize it further with different parameters. You can view all the widgets and their parameters from here.
Once you have configured and customized the file, you can save the file using Ctrl + O, then enter, and Ctrl + X. If you’re using VS Code, save as usual.
Now go to your localhost and refresh your dashboard. Now you can see the new Glance dashboard with the Weather and also the News feed.
How You Can Use AI to Customize Your Glance Dashboard
You can use AI to uplift all your efforts to customize your Glance dashboard using a simple prompt. Just use any LLM like ChatGPT, Claude, or even Google Gemini.
This also works for the free version. You can paste the sample code and ask the LLM to customize the code based on your preference.
For instance, you can paste this code and ask LLM to add a new widget, such as a calendar and a simple to-do list, to your column. You can also further customize it by telling the specific parameters, and also the column, section, and pages you want to add to this widget, and more.
In this case, I am using ChatGPT to customize my Glance interface using a simple prompt.
First, go to ChatGPT.com directly goes to ChatGPT. com and paste the following code and enter the prompt below. And that’s it. Now, copy the code and go to your Glance config file.

You can use the terminal and the following command to open or create a glance. yml file and paste the code directly into the Glance folder and save it. That’s it.
Open the terminal and use this command: ensure Docker is working in the background. Use this command: nano config/glance.yml and then open the file and paste the code you generated from ChatGPT, click on the control + o and Enter, and control + x, and then exit from the file and save it.
Now go to the browser and then refresh the page, and your changes will be automatically applied; if not, you have to restart the glance. You can use the following commands:
docker compose down
docker compose up -d
Remember, to get error-free output, you have to provide more content to the LLM you are using; since Glance is very strict about format, even one mistake or a missing colon in a single line might break the widget. You can view all the widget formats and code from the official GitHub page, paste the code, and ask the AI to change it. I have experienced more errors while using ChatGPT than manually, so take it as a nice-to-have option instead of completely depending on it.
Your Glance dashboard will now be customized simply using a simple AI like ChatGPT. You can also further customize it with your own styles and custom selection, and also add different widgets from the available widget list.
Here are the most common errors that occur when customizing your Glance dashboard
Since Glance is configured manually using YAML, it is very strict about formatting and identification of the different elements, and since YAML files entirely depend on precise spacing and structure, one wrong space or colon can make the whole file unreadable, which can easily cause errors while customizing your Glance dashboard.
Unfortunately, as I said, there is no visual builder to avoid such errors. But to help you out, here are the most common errors that occur during the Glance customization process and how you can easily fix them:
First is a YAML syntax error, which occurs due to wrong spacing, missing colons, and also using tabs instead of spaces. Fortunately, there is a YAML linting tool to check its formatting. If you face an error, you can also use AI to fix formatting issues without manually editing each line.
Another common error that many users complain about is the widgets not showing, which can happen due to missing or incorrect type parameters in the widget configuration. To fix this, you need to double-check the widget name, configuration, type, and parameters while setting it up. AI can help fix this easily.
Another common issue is “unable to start” and crash error, which can happen due to an invalid or unreadable glance. yml file. For this, ensure Docker is running successfully in the background and also check your Glance logs to fix any formatting issues.
Many users also face other issues like the Weather widget not working, UI not loading, changes not applying, or port 8080 already in use. These all occur due to incorrect configurations. If port 8080 is not working, it might be because another app is already using this port. You’ll have to stop that app to fix the issue.
Top 5 Features of Glance Dashboard
Due to the increase in information consumption and usage of a wide variety of apps, getting information from these apps has become a hassle over time.
Many people have been tired of switching between apps, for instance, an app to check a calendar, a different app to check the weather, a different one to check the news, and a different one to keep track of the stock market to stay updated with the latest news. This can take a lot of effort and can be distracting, especially if you switch often to stay updated with different apps.
Fortunately, there is an easy solution, like Glance, that can help you stay updated without switching between apps. Here are five reasons why Glance is the best option compared to others.
Self-hosted and Private
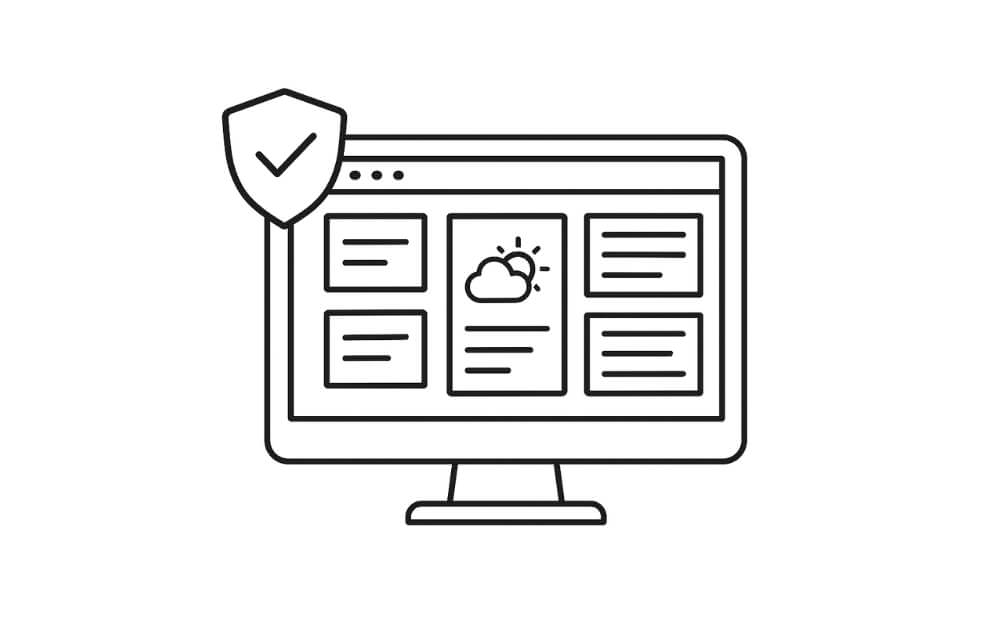
Self-hosting your personal Glance dashboard locally on your device has more benefits than you might think. First, all your data will stay on your device. If you care more about privacy and security, and you are the full owner of your dashboard. Further, it also comes with further customization options that you can customize based on your needs.
And since it is hosted on your device, and also unlike the cloud dashboards, it is fast, loads faster, and also without any issues. And since it is hosted locally, there are no advertisements, and there is no data transferred between your devices. You can use Glance completely offline without any issues.
Super Lightweight

The entire Glance app runs on a 20 MB binary file when your container is used. Since it doesn’t need a heavy stack like NodeJS or Python, it can easily run on older devices, and it is also faster compared to any other cloud dashboard.
I have installed Glance and I have been using it for over a week without noticing any battery drain issues, especially when I am running it on the Google Chrome browser, and haven’t noticed any significant battery drain.
Advanced Customization Options

Since Glance is hosted locally on your device, you have full control to customize it based on your needs. However, if you are a beginner or you are someone who doesn’t like to deal with code or errors, you might find it hard in the beginning. But you can use AI to easily customize your Glance personal dashboard based on your preferences.
Since AI is faster and also has more context than you, it can easily edit hundreds of lines of code. There are plenty of widgets and customization options available for Glance, which you can use for free locally on your device to edit and customize your personal experience.
Huge Widget Library
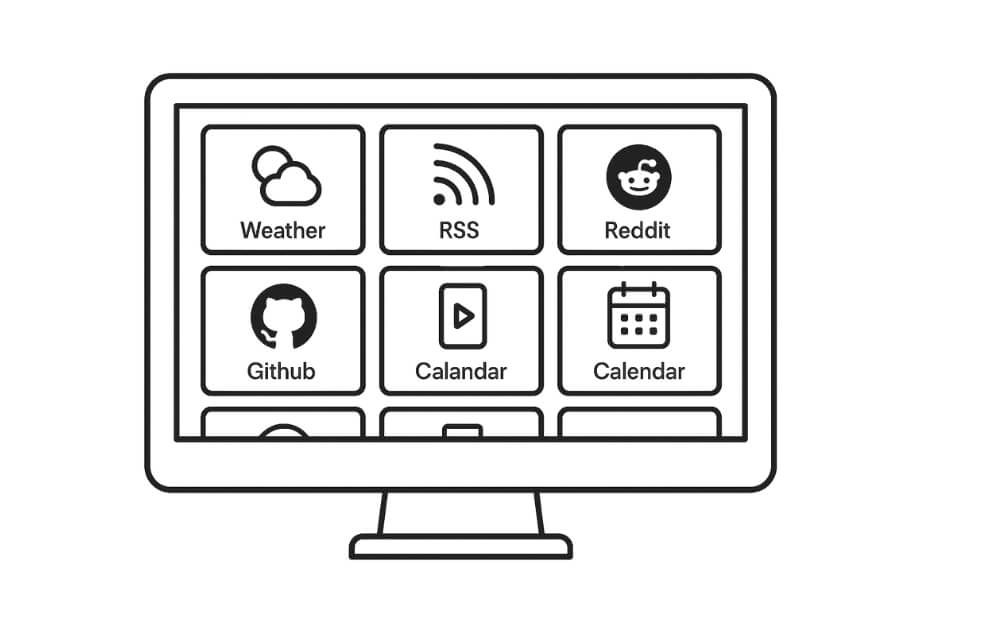
Another top feature of Glance is its wide widget library, which lets any user use a wide variety of features on their Glance dashboard. While writing this post, as of now, Glance supports more than 40 widgets, including Weather, RSS, Reddit, GitHub, YouTube Shorts, Calendar, Clock, Bookmark, and more. The best part is that all these widgets work instantly without any setup or complex API.
Reduces Mental Overload
The primary use case of this personal dashboard is to reduce your mental overload and access all your information in a single place, which also saves you time and effort by switching between different apps. With its advanced customization options and support for pages, columns, and widgets, you can organize all your data in a simple format, the way you need.
Thanks to the wide widget support, such as Weather, RSS, Reddit, GitHub, Shorts, and even YouTube, it can be valuable for the majority of users using these services. The best part is that all these features work without any complex API setup, which makes it suitable even for casual users to create and use their personal dashboards and get all their information in real time.
Organize Your Digital Life
So those are the detailed steps on what Glance is, how you can set it up on both Windows and Mac, and also how to use AI to reduce the manual work. Also, the common errors and fixes that you need to know, plus the top five features that make Glance stand out from the rest.
I have been using Glance for the past week, and it makes it easy for me to access all the information in a single place rather than switching between different apps and tools to stay updated.
Since it is free and easy to set up, even for beginners, anyone can easily set up a Glance dashboard. However, if you are a beginner, the steps might be complex, but we ensure that these steps are simple even for beginners.
FAQs on Installing Glance on Your Device
1. Can I access my Glance dashboard from my phone or tablet on the same network?
If your mobile is connected to the same network, you can access your Glance dashboard at http: //your-IP-address on your browser. You can find your IP address using the ipconfig command on Windows and ipconfig on Mac terminals.
2. How do I add authentication or password protection to my Glance dashboard?
Currently, Glance doesn’t support login or password protection. However, you can lock specific tabs or even your browser using an external extension.
3. Can I share my dashboard with someone else without giving full access to my system?
Yes, you can share it over your network using port forwarding or remote access. Or, you can also host it on any VPS and share it.
4. Can I add widgets that require API keys, like Google Calendar or Notion?
You can use widgets without requiring API integration in Glance, you can embed your widgets using iframe, or even custom HTML widgets. You can also use external APIs with a custom widget and API token via one environment variable.
5. Is there a way to back up my Glance config and restore it later?
You can simply glance backup glance.yml file to back up your Glance personal dashboard.
6. Does Glance support dark mode or visual themes? Can I style it with CSS?
Yes, Glance comes with a built-in dark mode. You can use the dark mode toggle in the top right corner of the screen to switch between dark and light modes.
