Quick Answer
Before selling your iPhone, you must protect your data and unlock the device for the next owner. First, back up your data using iCloud or a computer, and unpair your Apple Watch. Next, remove Apple Wallet cards, take out your physical SIM or delete your eSIM, and turn off iMessage and FaceTime if switching to Android. Finally, turn off Find My, sign out of your Apple account, and perform a factory reset by erasing all content and settings.
If you are trading in your iPhone or selling your old iPhone, the first thing you would probably do is reset it. It is the most common and efficient way to remove your data from your iPhone and help the new owner start fresh.

However, it may not be the best solution every time. Especially if you straightforwardly reset it without following a proper procedure for a smooth transfer. Additionally, most users forget to back up their iPhone before resetting, and they even forget to turn off some critical Apple features, such as signing out of the Apple iCloud account, backing up important data, turning off Find My iPhone, and even forgetting to remove the SIM from the old iPhone. If this sounds like you, don’t worry. You are not alone, and most people are not aware of these methods.
So, to make it easy for you, we have also created an interactive iPhone transfer checklist that you can check one by one if you are planning to sell or trade your iPhone. And in this guide, I explain in detail the procedure you need to follow before resetting your iPhone, including how to remove Apple Account, turn off Find My, remove eSIM, remove Wallet cards, unpair Apple Watch, and check Activation Lock before handover, and much more. So, without further ado, let’s get started.
Table of Contents
Things to Do Before Selling Your iPhone
- Back up your important data
- Unpair your Apple Watch
- Remove Apple Wallet cards and passes
- Remove your physical SIM and delete eSIM
- Turn off iMessage and FaceTime if you are moving to Android
- Turn off Find My iPhone
- Sign out of your Apple account
- Factory reset your iPhone and erase all content and settings
- Check Activation Lock before handing over the iPhone
Back Up Your Important Data First
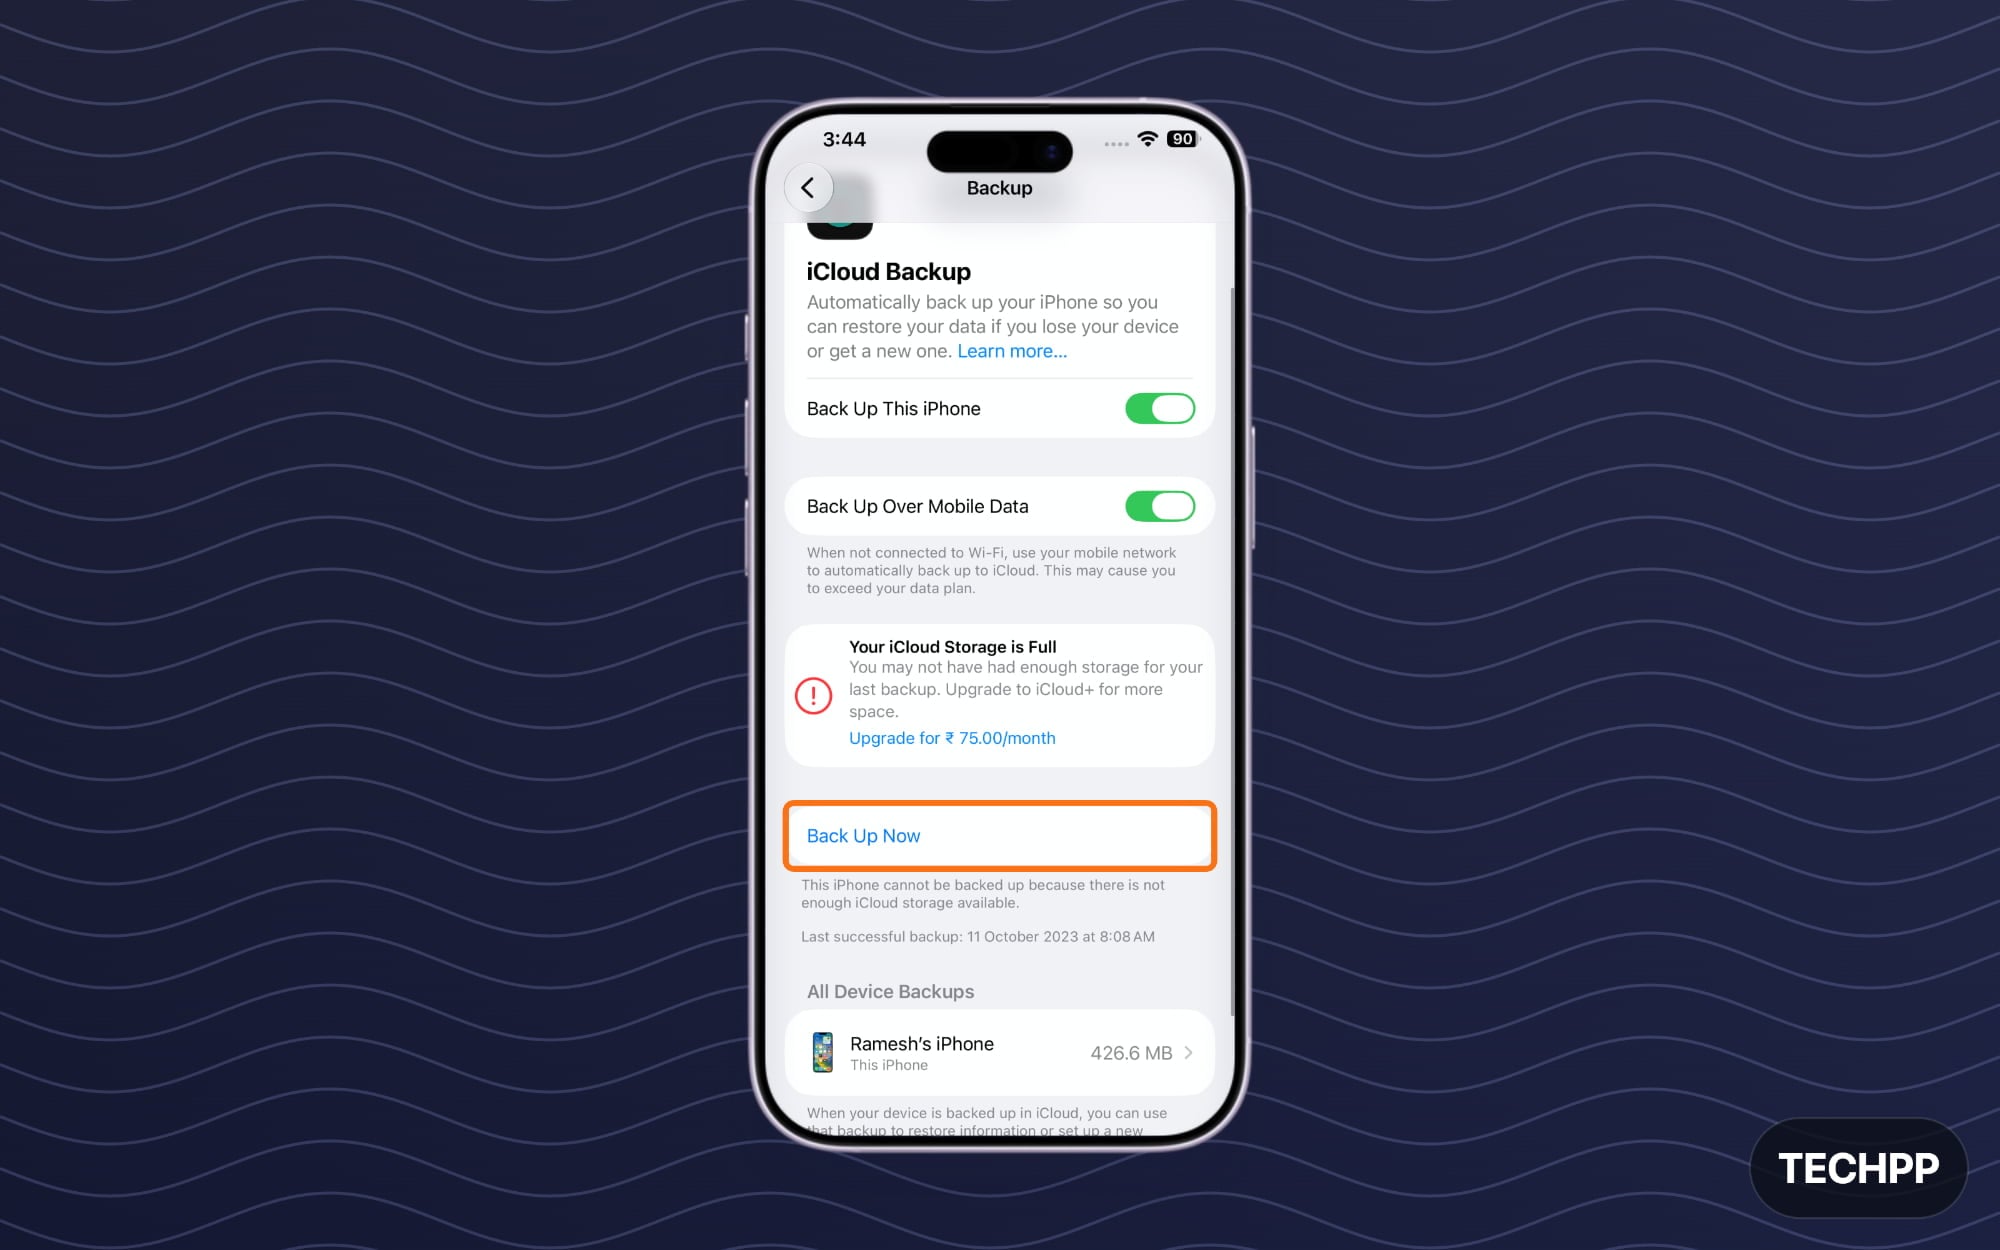
Before resetting your iPhone, the most important thing you need to do is back up your important data first. There are plenty of ways to back up the data on your iPhone. The easiest way if your overall iPhone backup size is less than 5 GB is by using free iCloud Storage, which Apple offers fr evert apple user.
Apple also offers temporary iCloud storage if your data exceeds 5 GB to transfer all your data to a new iPhone. It even works for old iPhones starting fresh. You will have 21 days to restore that backup on your new iPhone. If you want, you can also extend it for another 21 days using an old iPhone.
If you don’t want to use iCloud, you can transfer your old data to the new iPhone using the Transfer to iPhone option. If you own a MacBook, you can also back up your data to your MacBook.
We will create all the sub-guides for all those backup methods in the future, but for now, here is how to back up your iPhone using iCloud.
How to back up your data on iPhone using iCloud:
Step 1: Open Settings on the iPhone you want to back up data
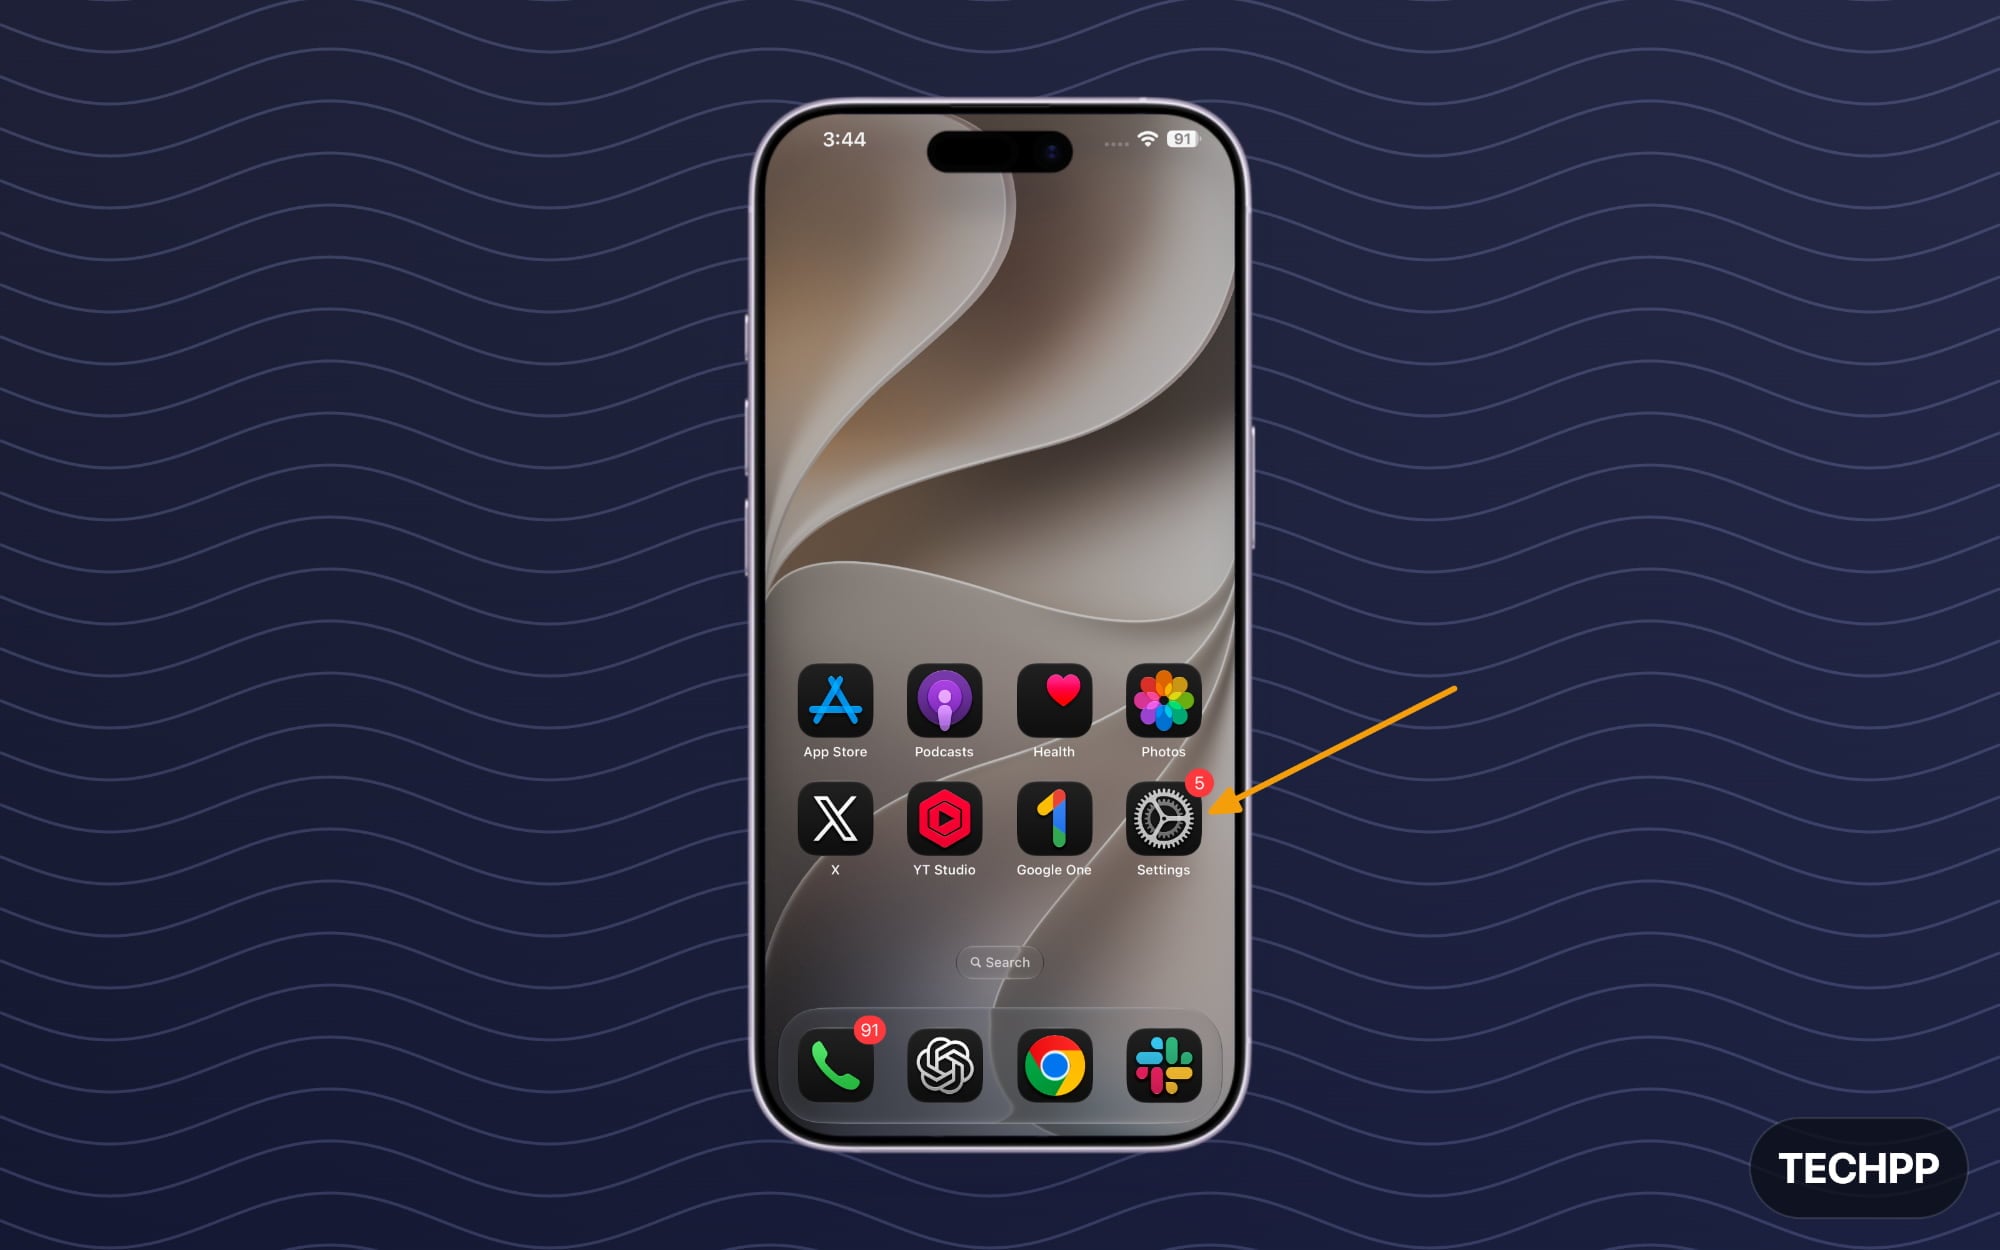
Step 2: Tap on your Apple account at the top
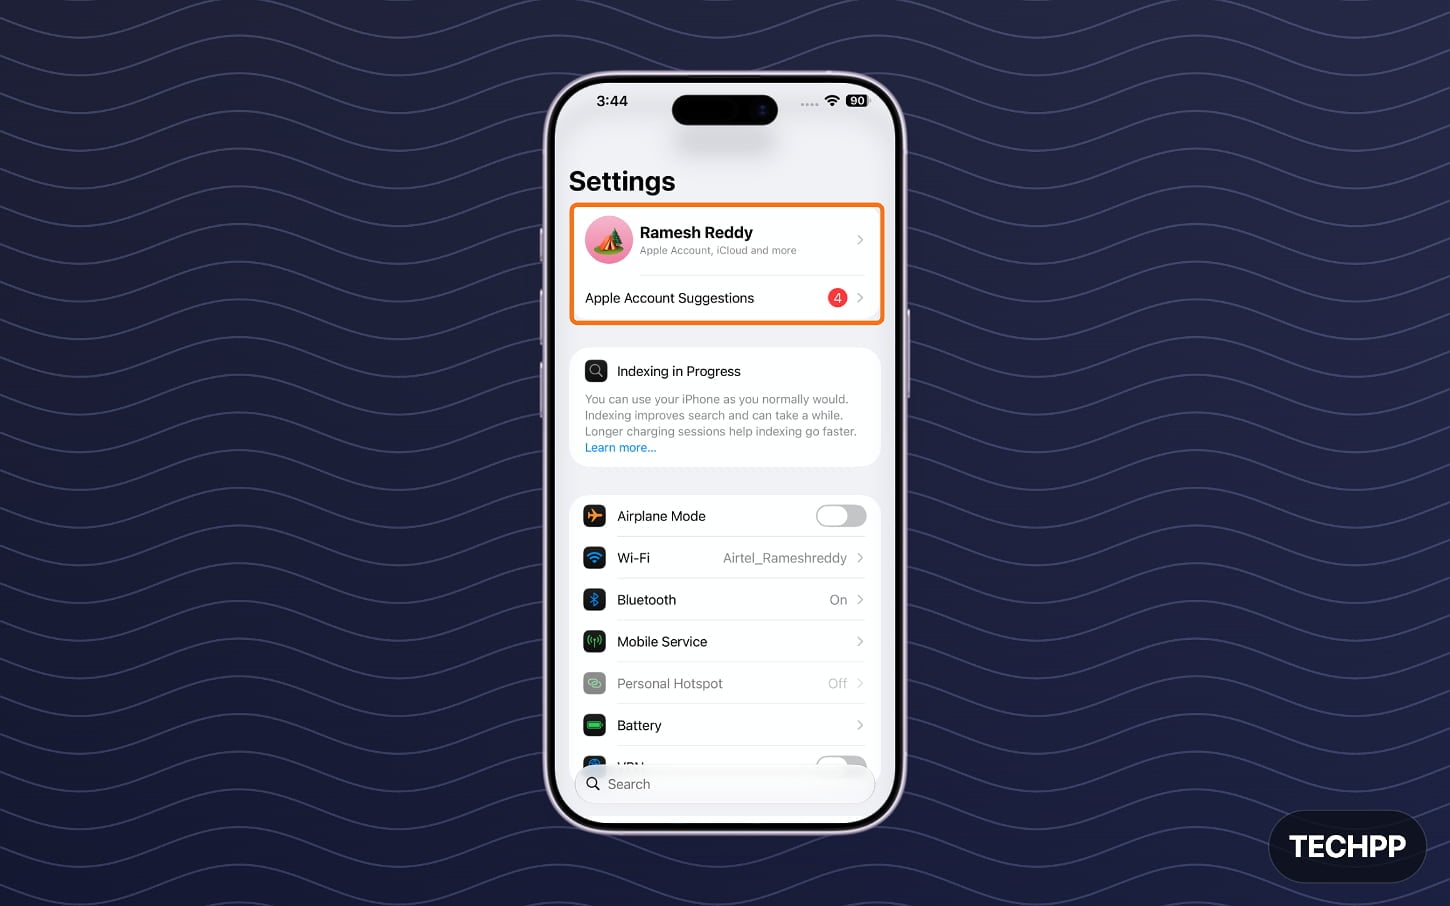
Step 3: Scroll down and tap on the option called iCloud.
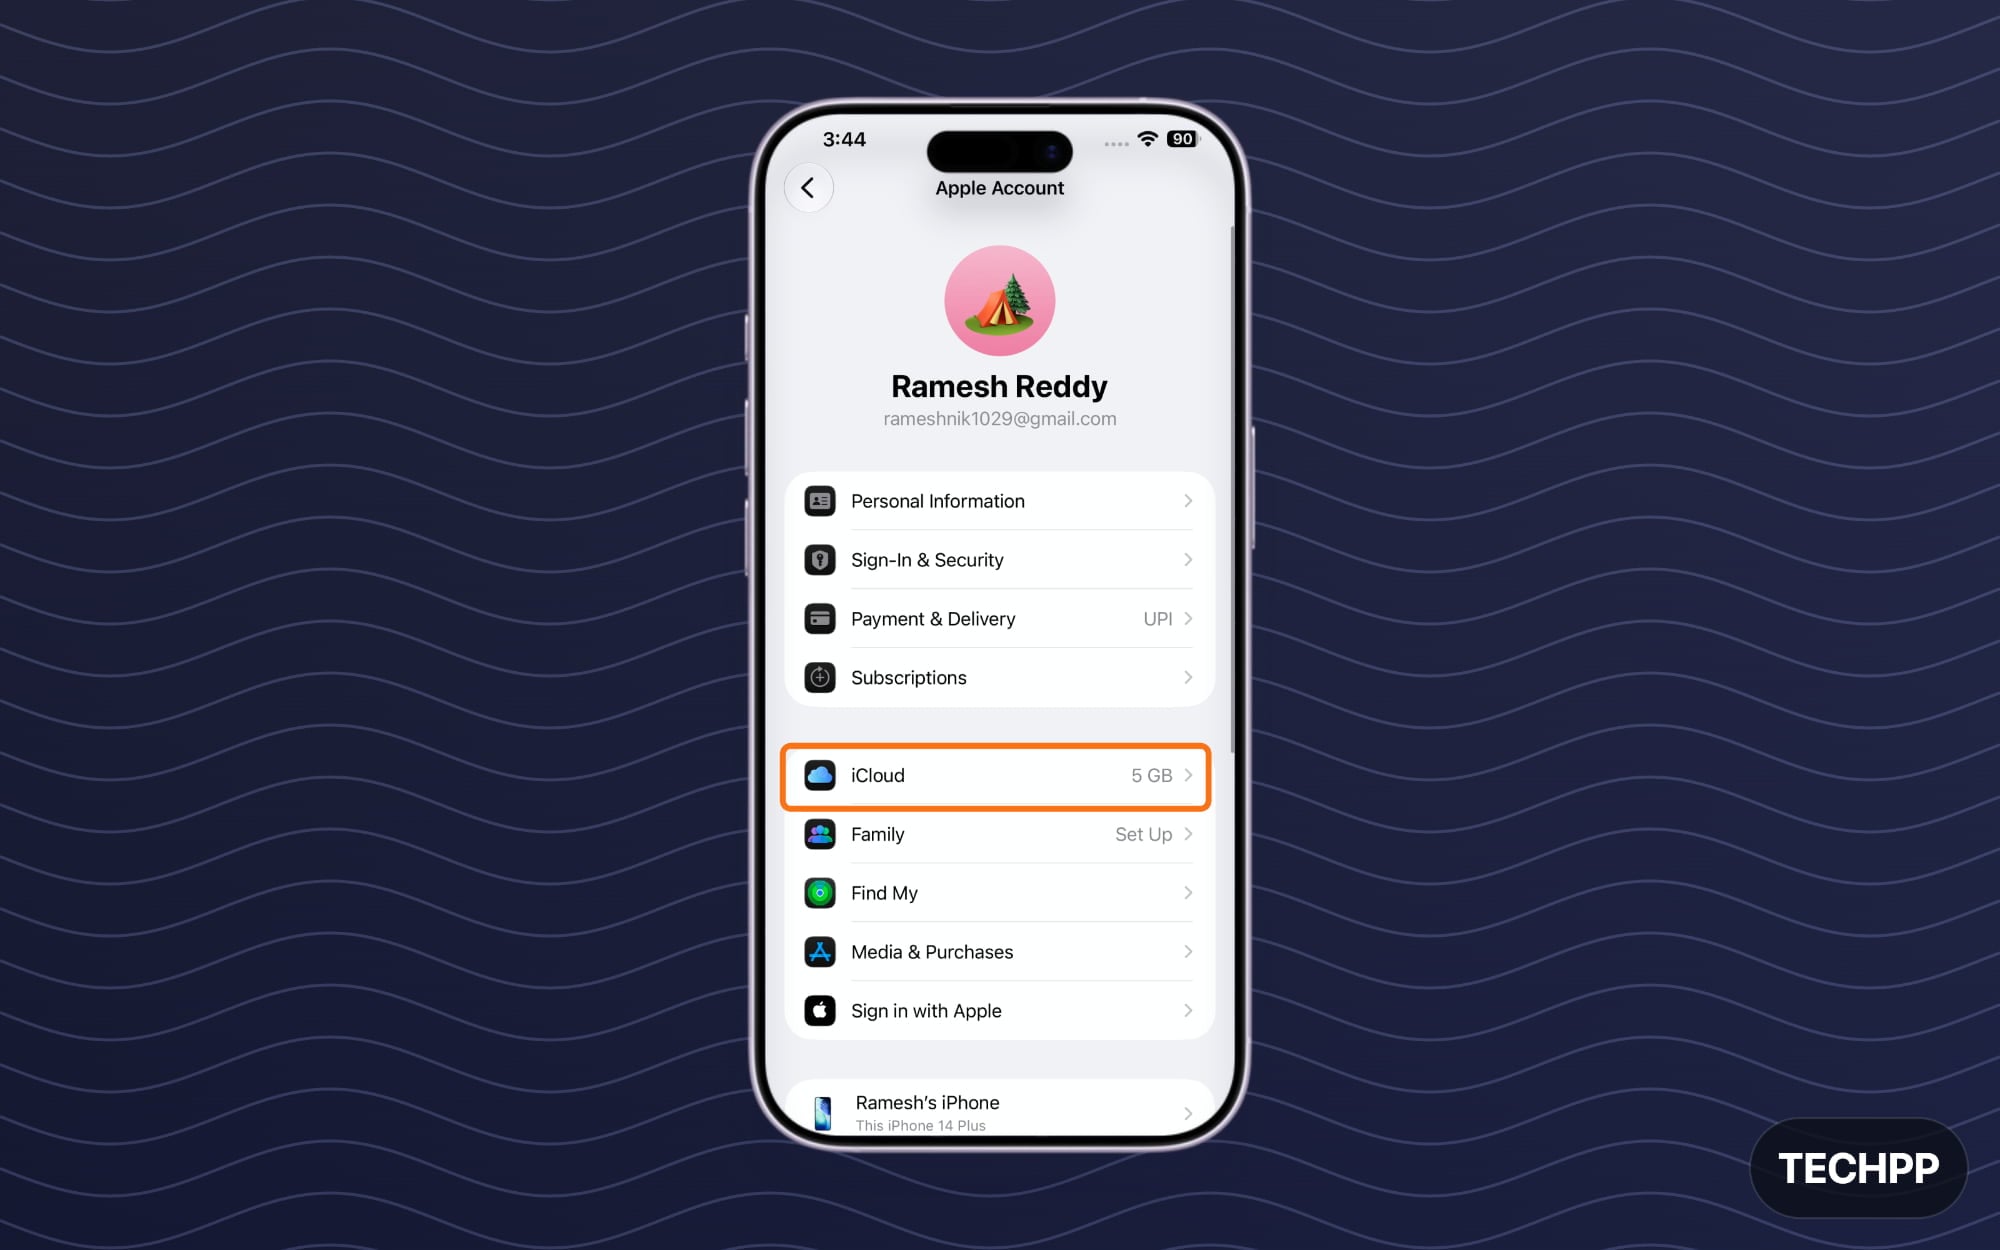
Step 4: Scroll down and, from here, tap on the backup.
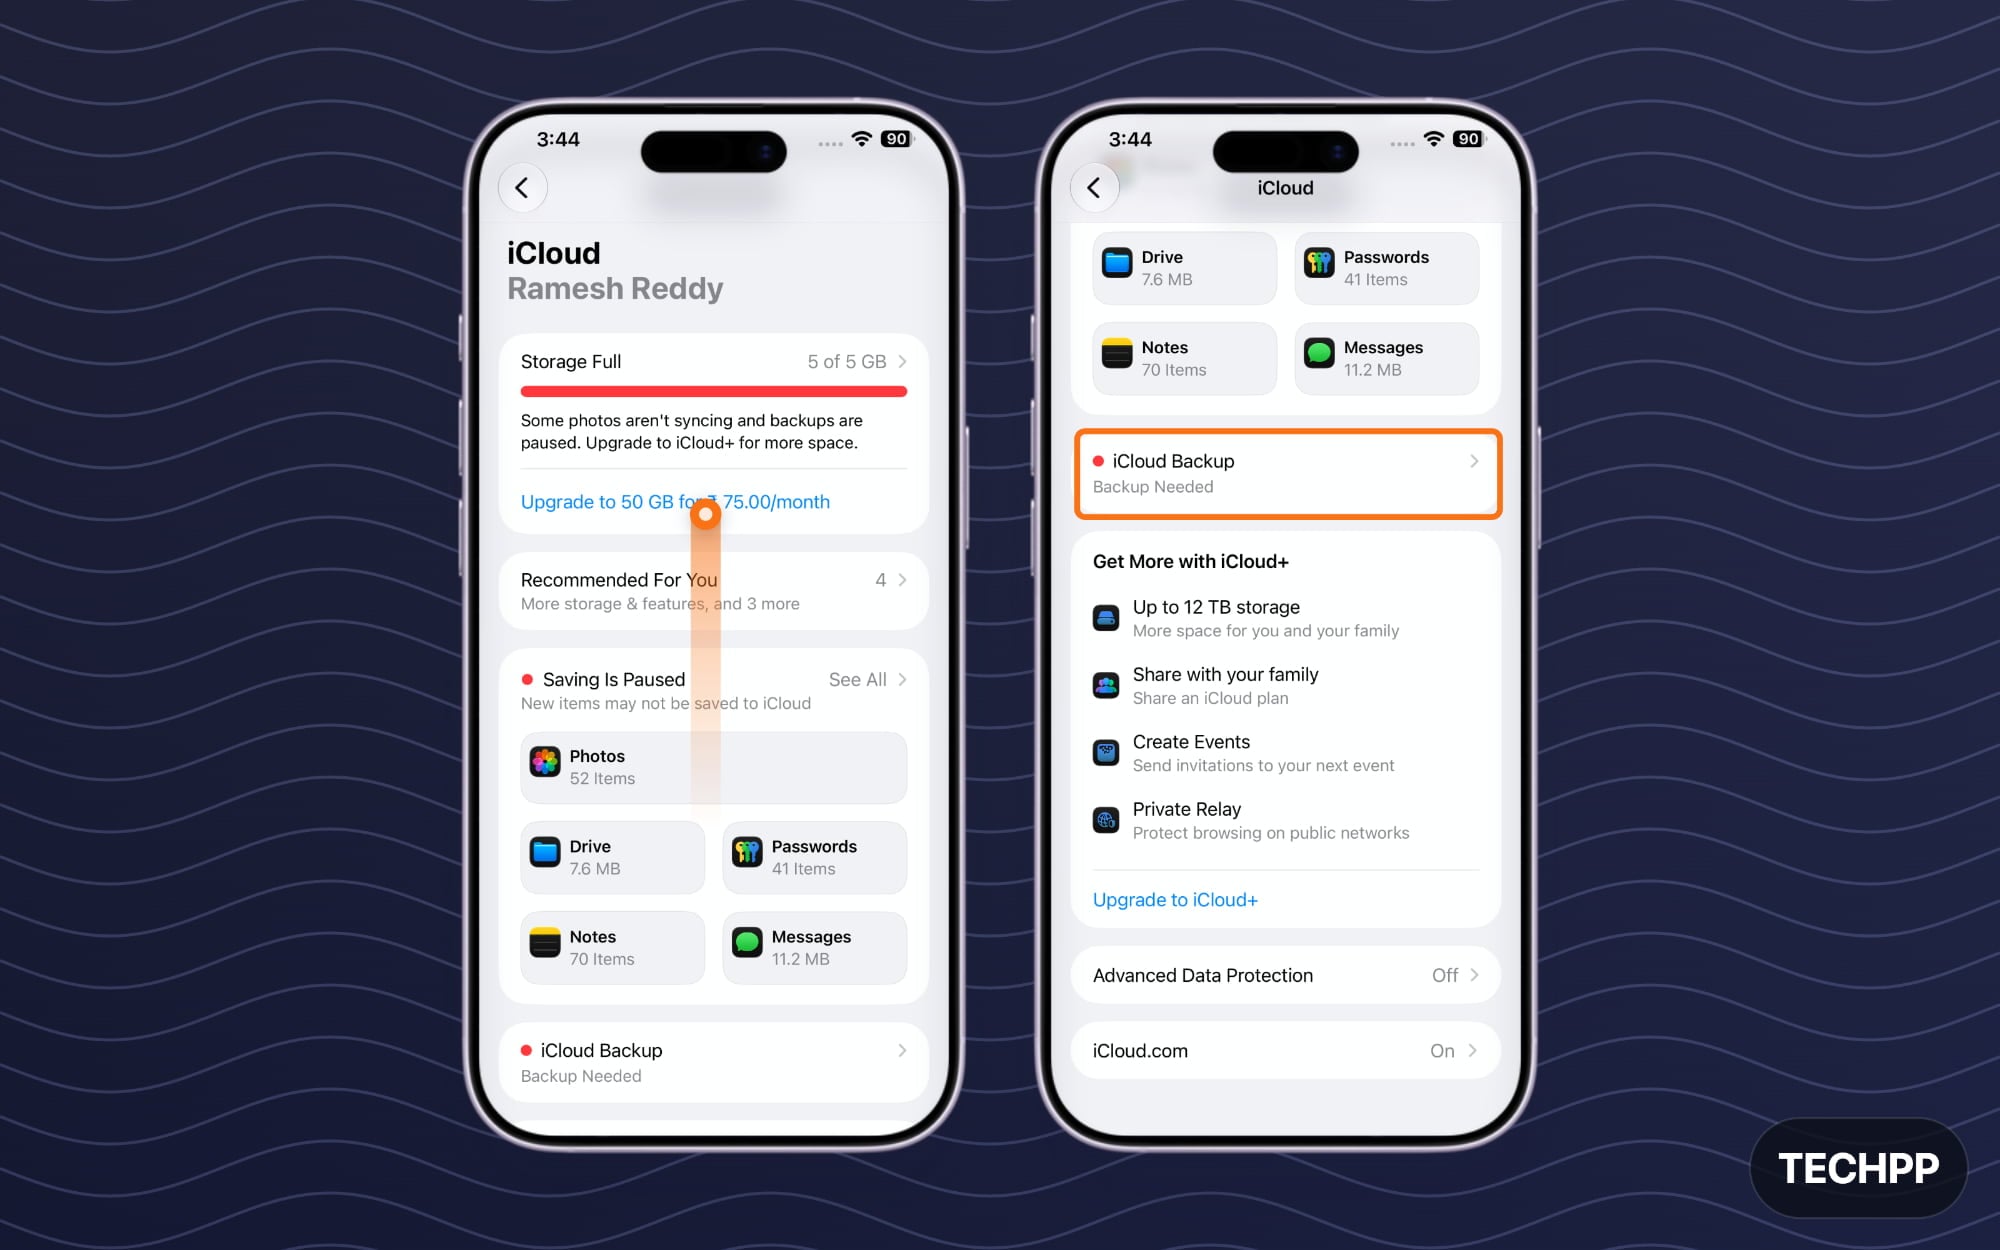
If you have enough storage, all the data on your iPhone will be successfully backed up to iCloud.On your new iPhone, you can just sign up with your iCloud or Apple account to get the data back.
If you want to transfer more than 5 GB using temporary iCloud data, follow the steps below:
Step 1: On the iPhone you want to back up data, open Settings
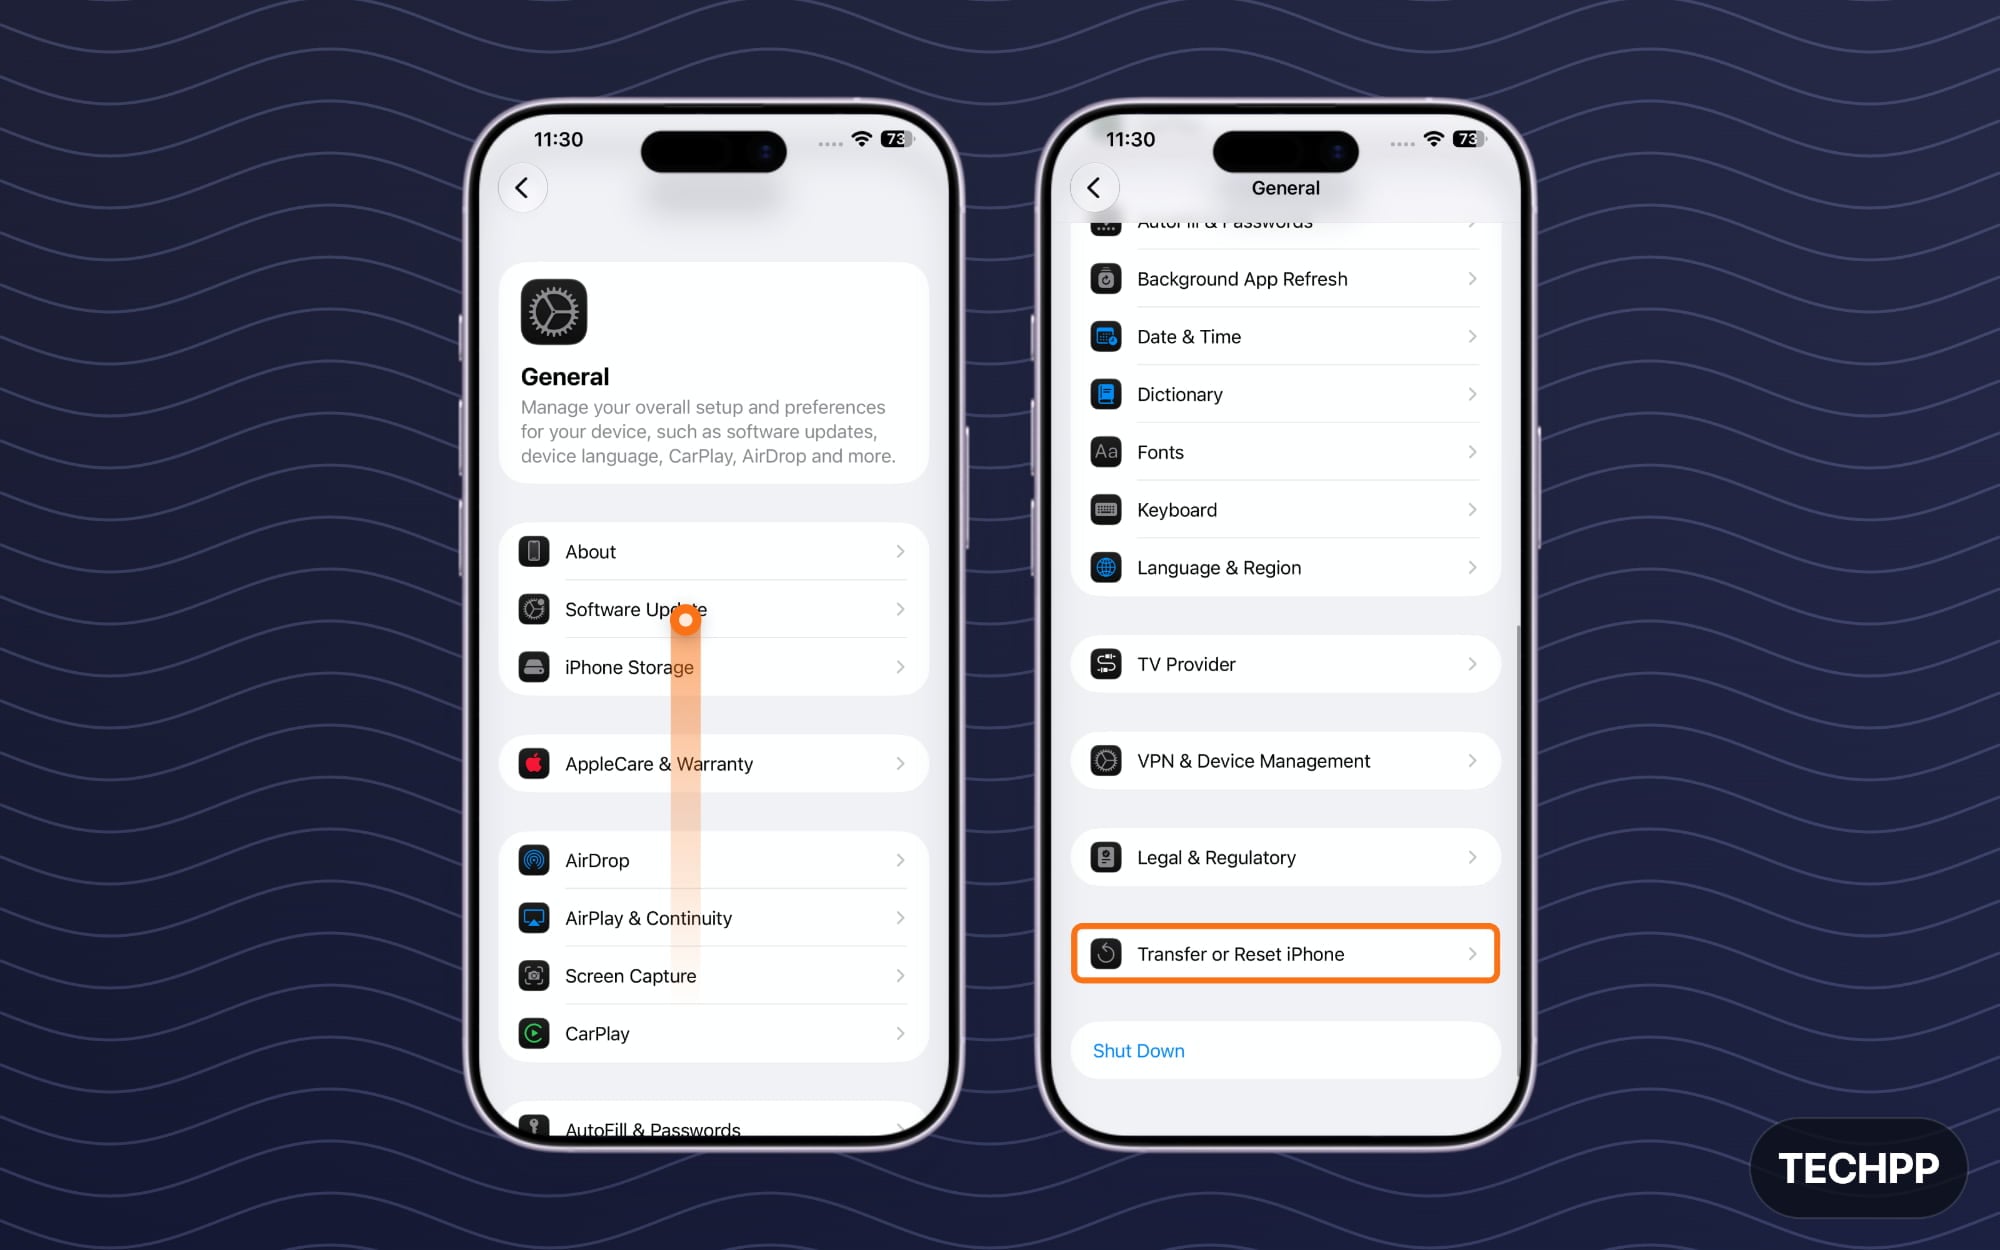
Step 2: Scroll down and tap on the General option.
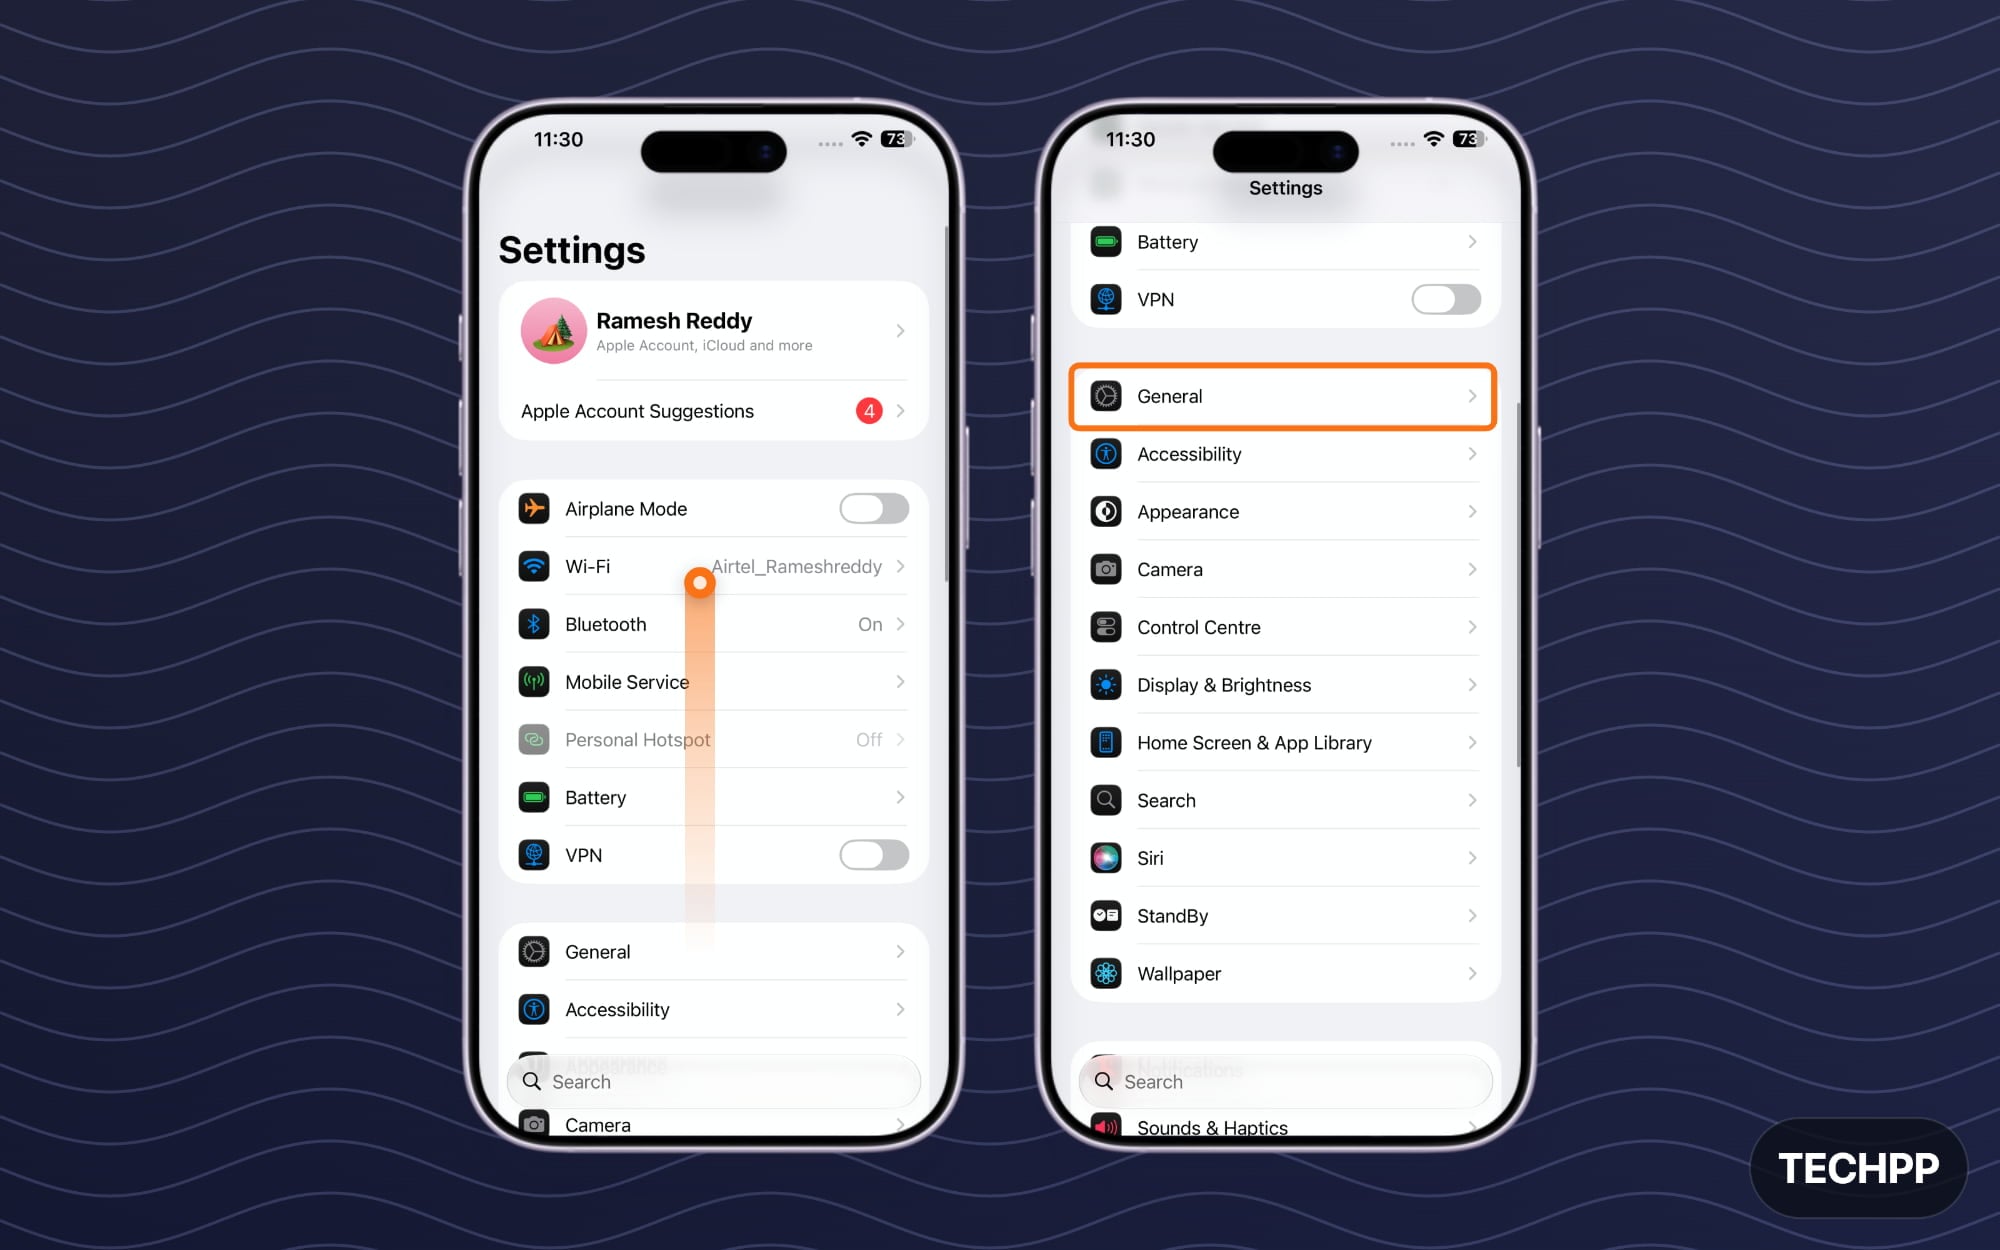
Step 3: Scroll down and tap on the Transfer or Reset iPhone option.
Step 4: From here, tap on Set Up New iPhone. If you are eligible, you will see a prompt saying that you are eligible for temporary iCloud storage. Tap on Get Started.
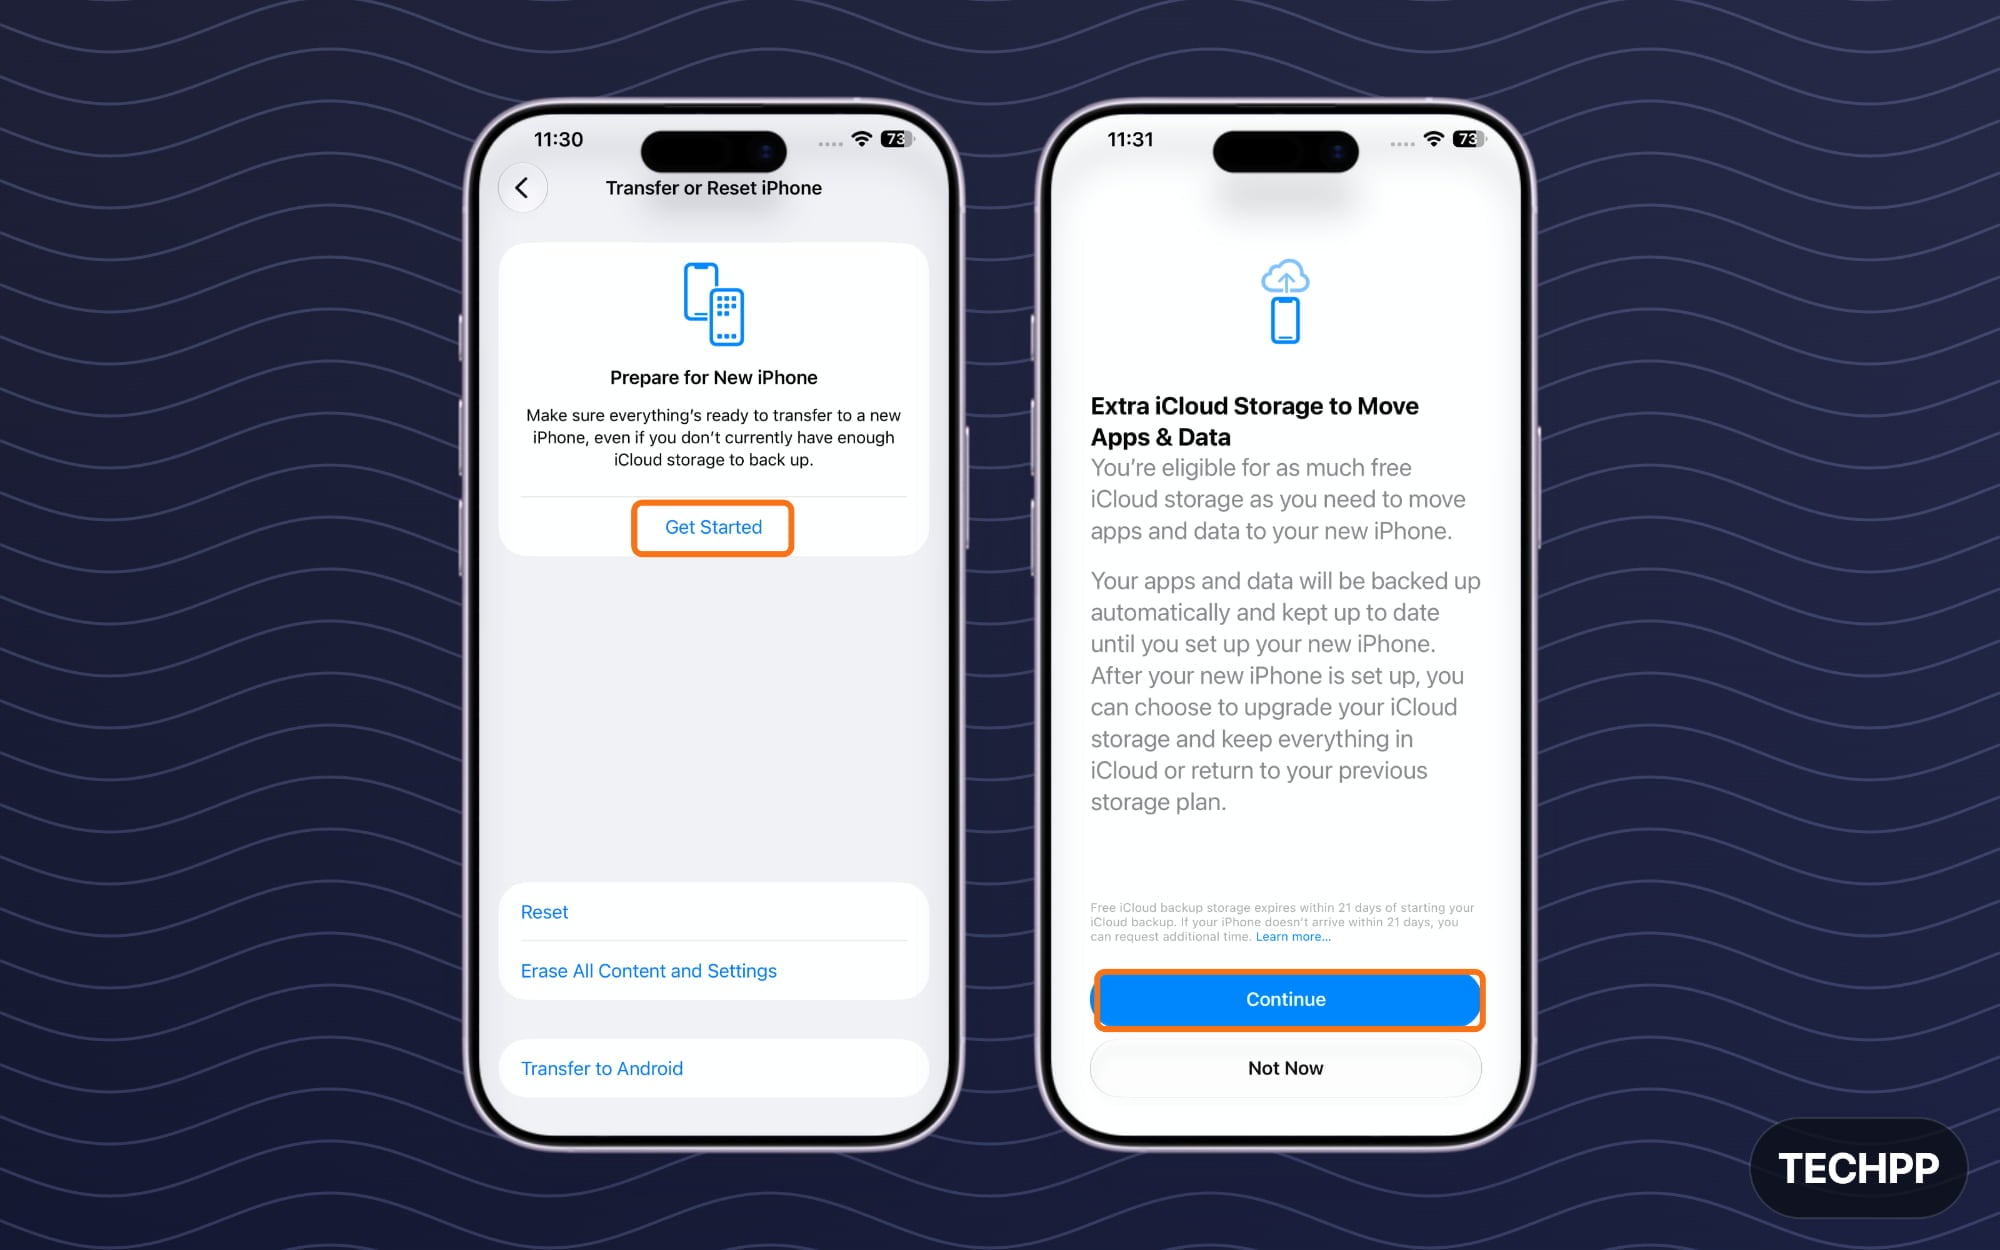
Step 5: Next, follow the onscreen instructions to select which data you want to back up. Once the backup is ready, log in with the same Apple ID on your new iPhone to retrieve all your data from your existing phone.
Once the data is transferred, ensure that your photos, contacts, WhatsApp chats, notes, and important files are available on your new iPhone.
Also, ensure you back up data from important apps. For apps like WhatsApp that store your data locally, it uses iCloud storage as a backup location by default, but sometimes it might not be turned on by default. Ensure you go to WhatsApp and back up your data first.
Additionally, if your WhatsApp data exceeds the storage limit, your WhatsApp data may not be fully backed up to iCloud. In that case, you will need to manually transfer your data to your new iPhone using the ‘transfer your WhatsApp backup data to iPhone’ method.
Also, remember that your iCloud backup will not back up all your local files on your iPhone. This can include PDFs, downloads, GIF files, documents, audio files, project files, and much more. However, you can manually move them to the iCloud Drive if you have space, or use an alternative cloud storage method to back them up. Alternatively, you can manually copy, paste, and transfer them to your new iPhone.
Unpair Your Apple Watch (Optional if You Don’t Have an Apple Watch)
If you own an Apple Watch, you have to unpair it from your old iPhone before selling your iPhone. Even though factory resetting your iPhone disconnects your Apple Watch from your phone completely, your Apple Watch still relies on your old iPhone data. Apple officially recommends unpairing your Apple Watch before selling or trading your iPhone.
However, before unpairing your Watch, ensure the backup of your health data from Apple Watch and from your Apple Health app first. If your Apple Watch and iPhone are already connected, most of the data will already be synced with your iPhone. Using the iCloud methods I described above.
This is important because once your Apple Watch is unpaired, the watch is completely erased and restored to factory settings with Activation Lock removed. However, all the watch data is backed up to your iPhone. Once you back up your watch data through your iCloud or any other method when transferring to a new iPhone, you can pair the watch with your same iCloud account on the new device, and all your watch data and health data will then be automatically restored on your new iPhone. This won’t work if you are using an Android phone.
However, please note that some of your data will not be backed up when you factory reset and restore your data on your Apple Watch. It includes Bluetooth devices connected to your Apple network, Apple Pay, and debit cards, specific watch settings, such as watch shortcuts, and much more.
Remove Apple Wallet Cards and Passes
Factory resetting will remove all your cards and data from your Apple Wallet app, and signing out of your iCloud also removes Apple Pay from the iPhone, it is better to do it manually or back up your information if there is any important data that you require immediately.
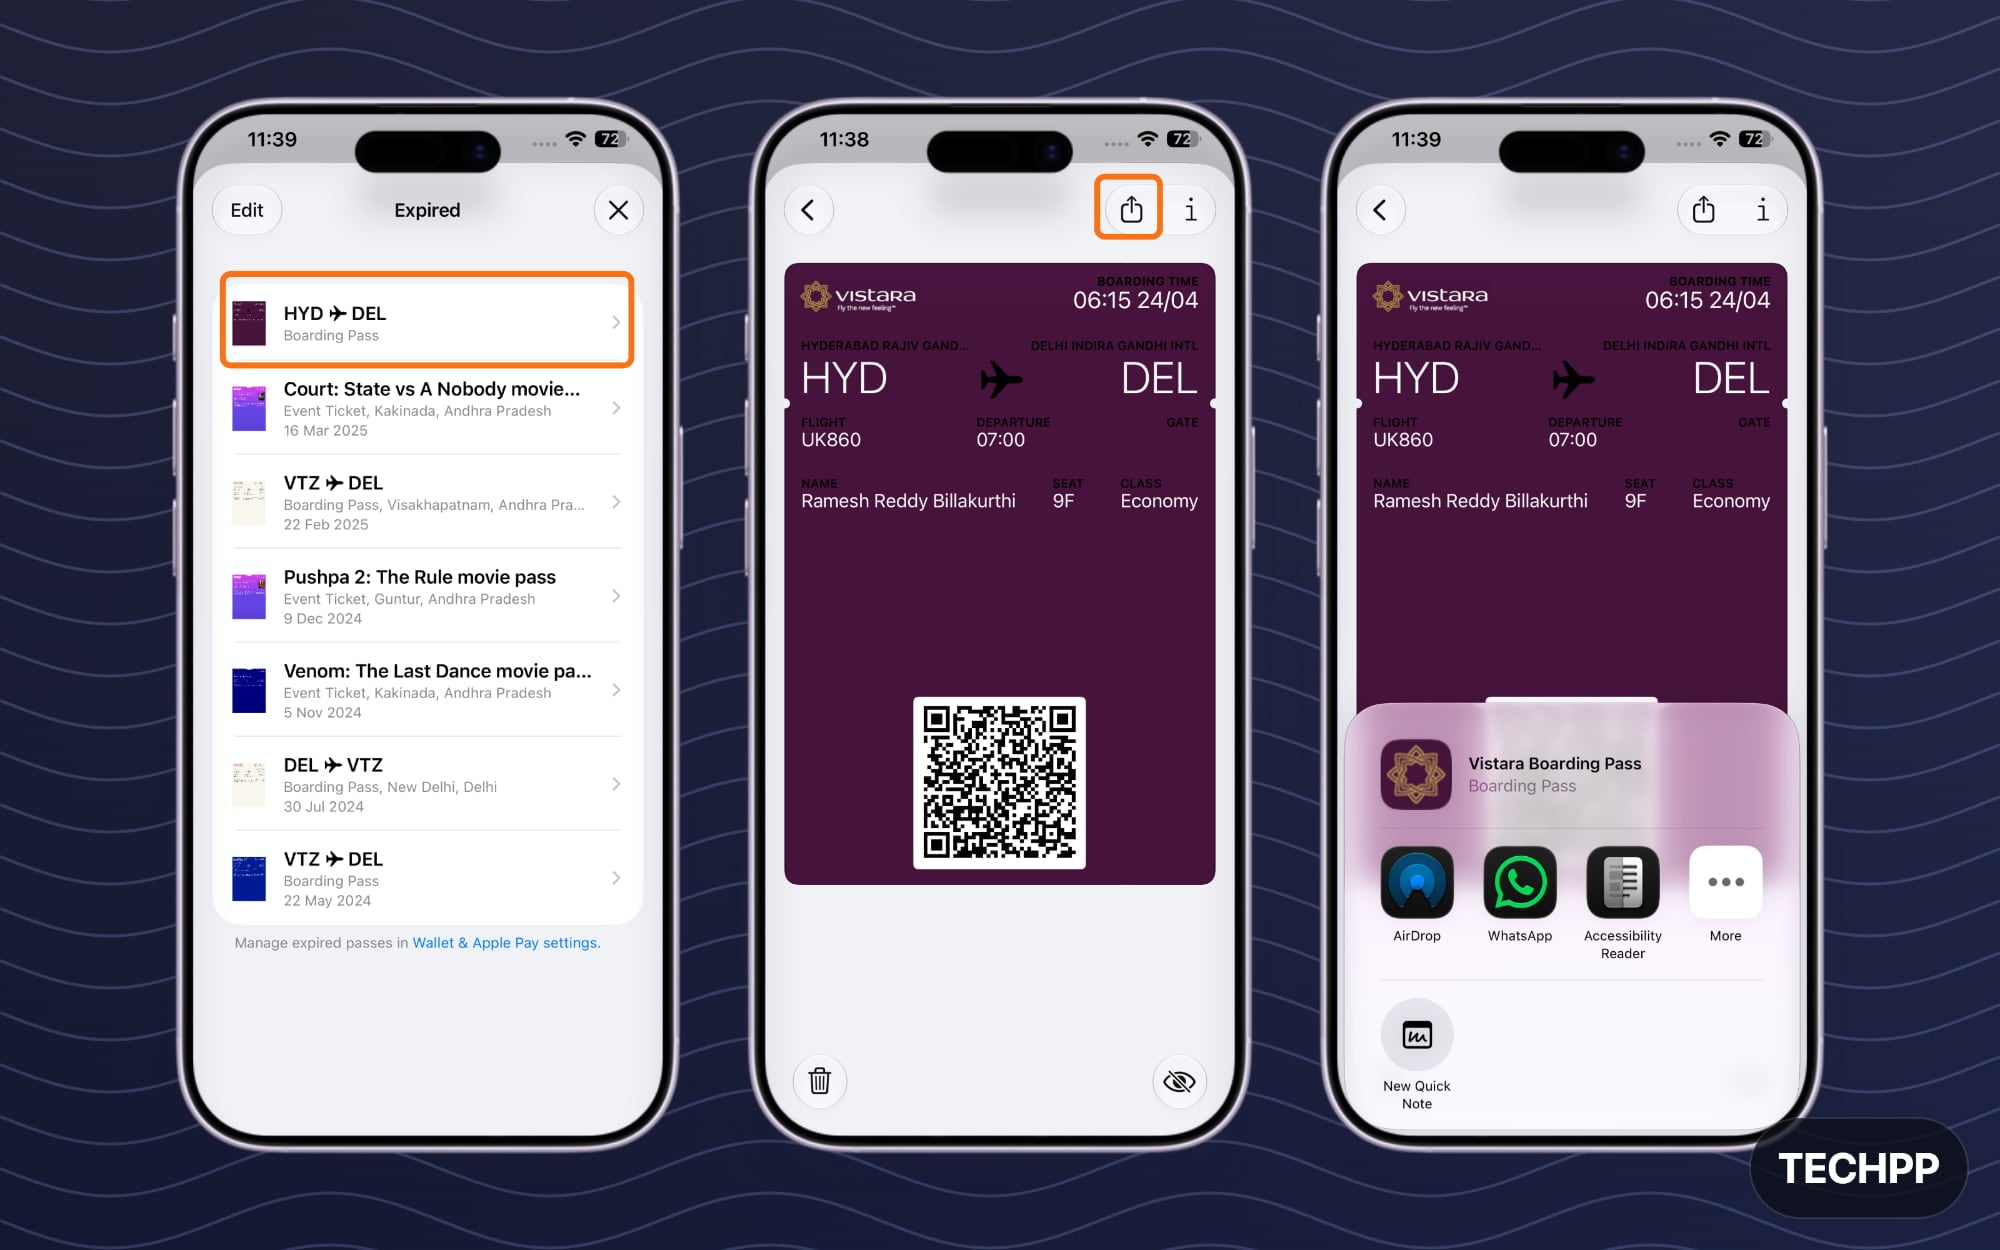
Step 1: To check, you can open the Apple Wallet app. To delete a card or pass:
Step 2: Tap on the More button
Step 3: Tap on Card Details
Step 4: Tap on Remove Card or any passes or delete button, or if you want to save it manually, you can tap on the Share option at the top and share it with others.
Remove Physical SIM and Delete eSIM
If you are using a physical SIM on your iPhone, ensure you don’t forget to remove it from your device before selling it or giving it away to others. Since the SIM is not directly visible outside the phone, most people forget to remove it from their phones when selling.
If you are using a combination of an eSIM or only using eSIM on your iPhone, ensure you first link your eSIM to your new mobile number.
However, if you don’t have your new iPhone yet, you can delete the existing eSIM profile on your phone to avoid any future problems. Since eSIMs are bound to your iPhone, they sometimes won’t unlink quickly even if you perform a factory reset. Before factory resetting or signing out of iCloud, ensure that you delete your eSIM profile from your smartphone first and transfer it to your new iPhone.
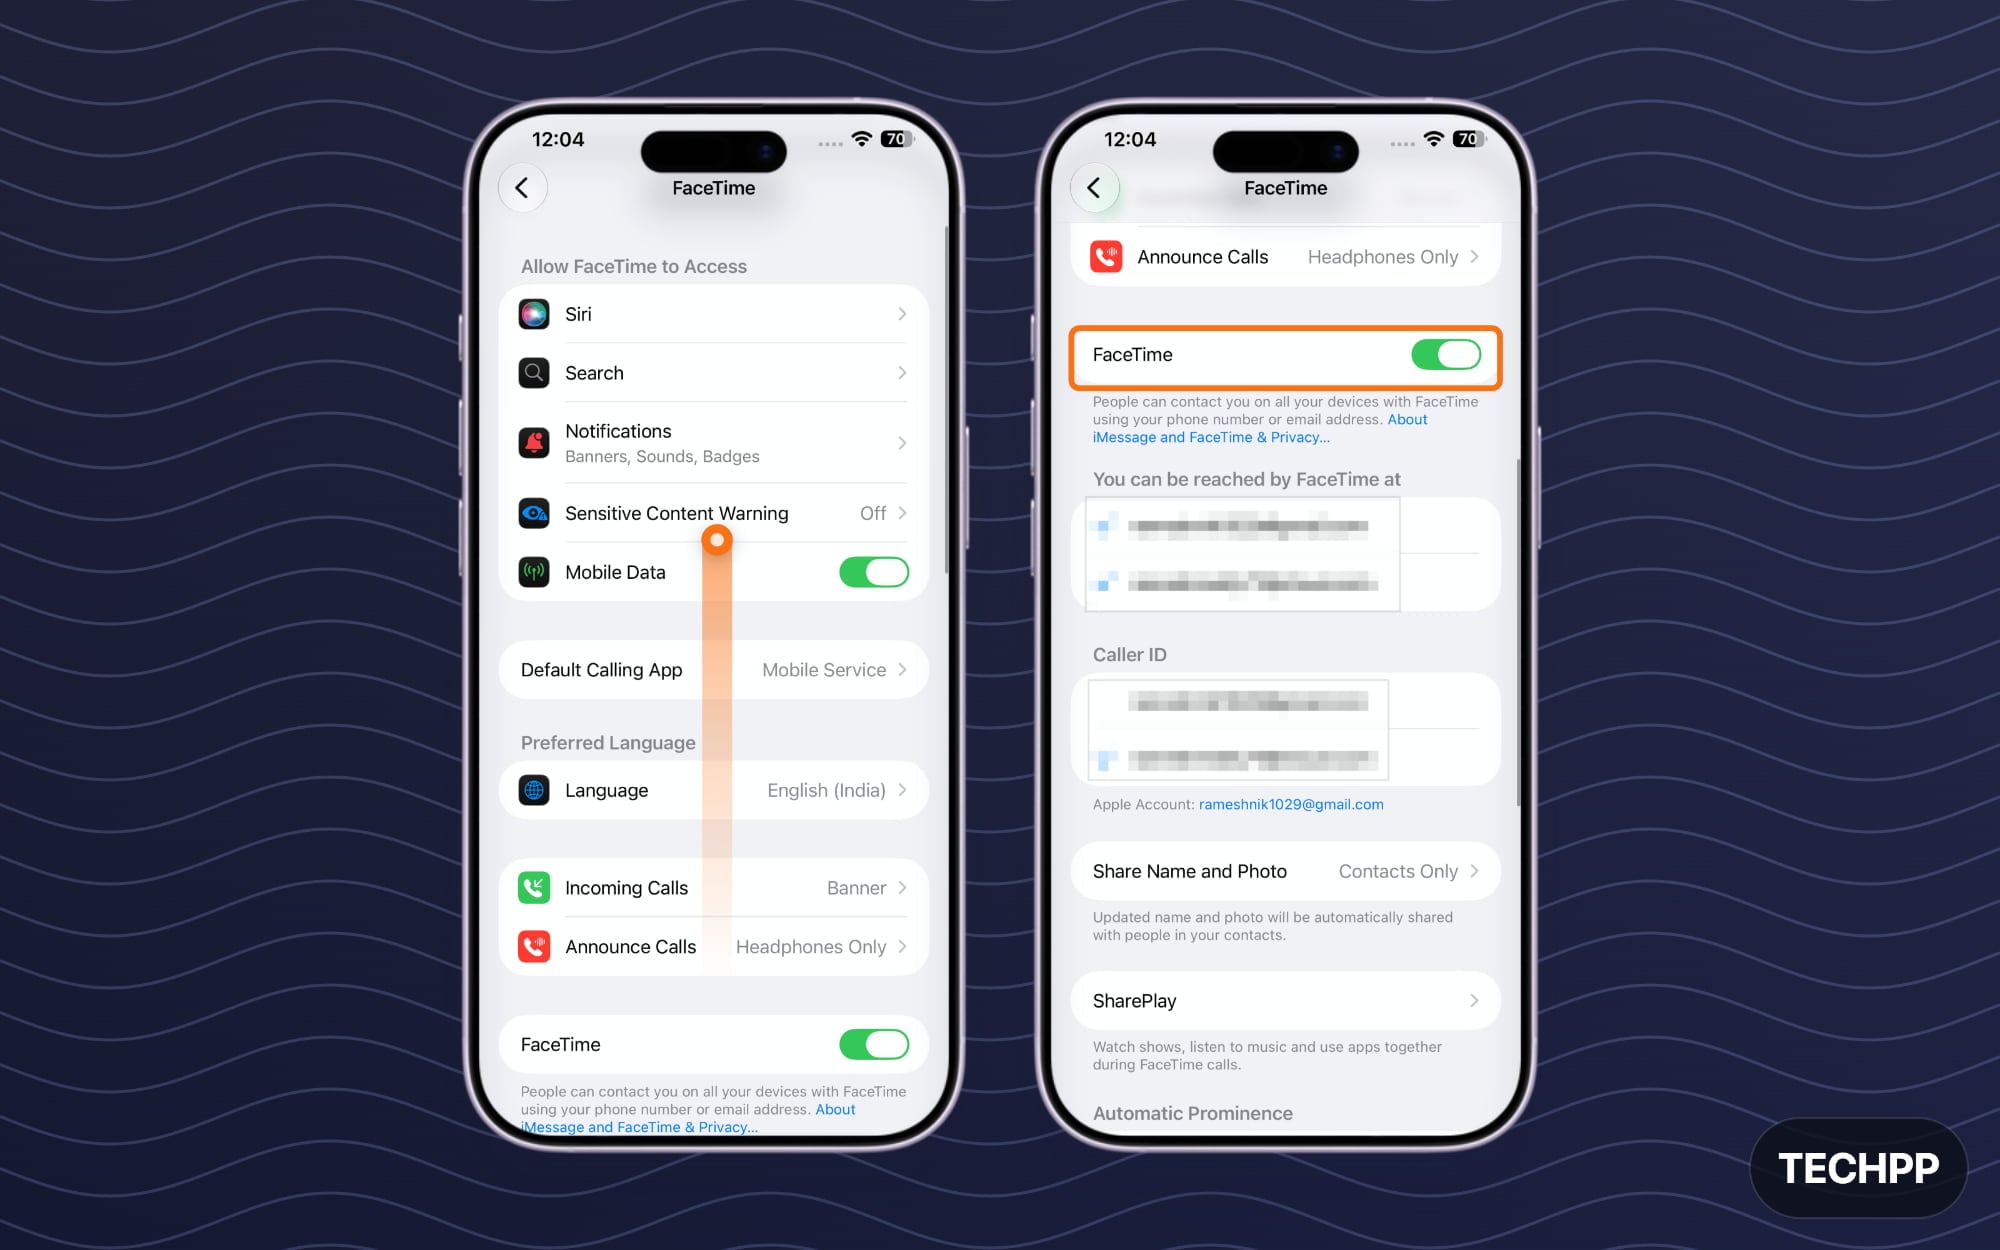
Turn Off iMessage and FaceTime When Moving to Android
This is a required step if you are moving from your iPhone to an Android phone. Both iPhone and Android use completely different messaging services, and all your messages on your iPhone are delivered through iMessage.
Since the iMessage service is not available on Android, if you haven’t unlinked your iMessages from your number, some of your messages from your iPhone friends might still be redirected through iMessage. Ensure you first unlink iMessage from the settings. While doing so, you should also unlink FaceTime from the settings.
Before that, ensure the SIM is active on your iPhone. If you don’t have an iPhone with you, you can deregister your iMessage phone and remove your number from iMessage. This should work instantly. Visit this page using this link: Apple Deregister iMessahe page.
Step 1: Open Settings on your iPhone
Step 2: Scroll down and tap on apps.
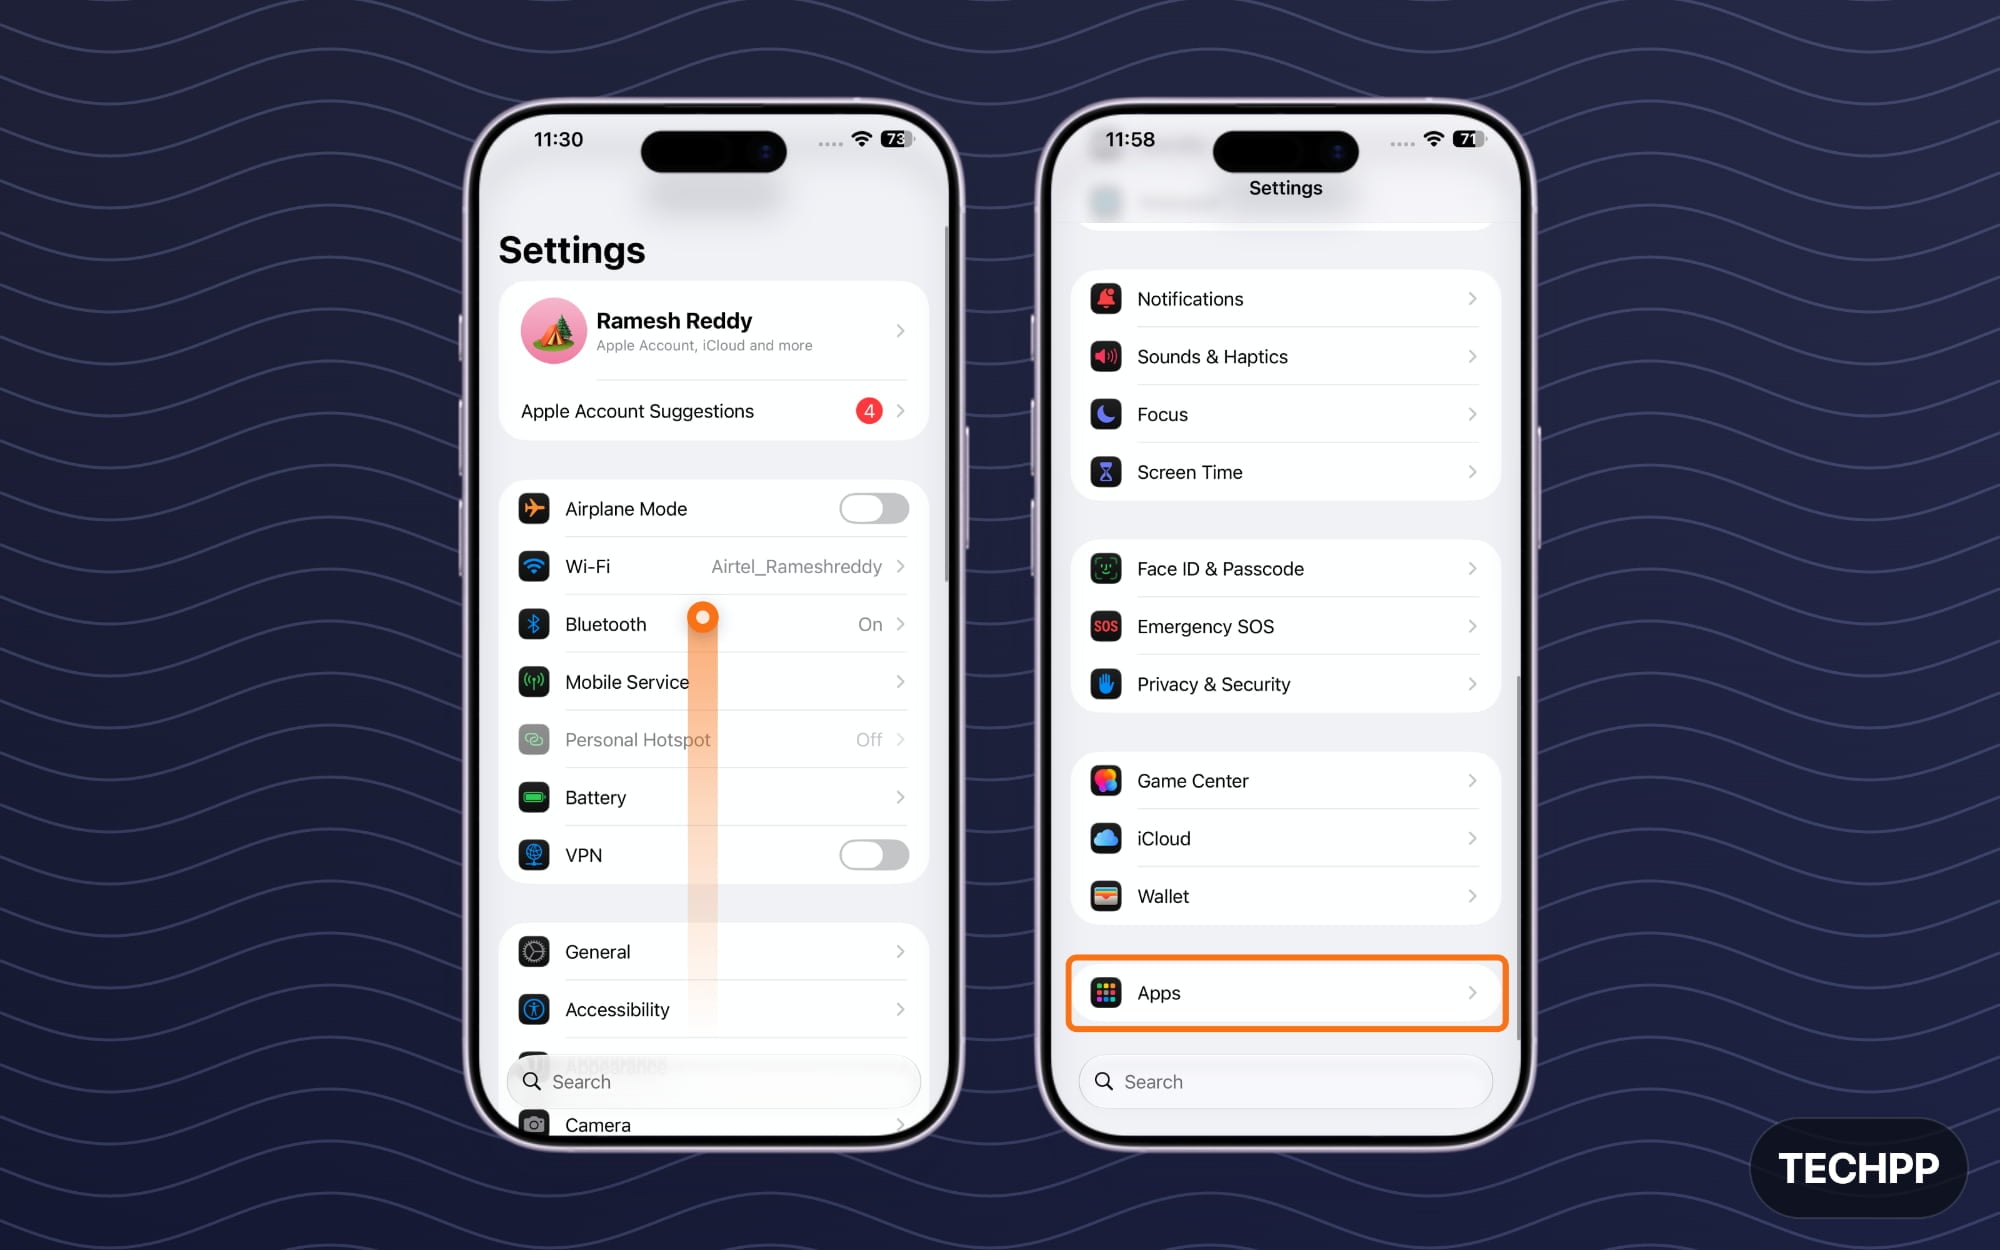
For older iPhones: If you are using an older version of iOS 26 or below, you can find the iMessage option in the main settings itself. Scroll down and tap on the iMessage.
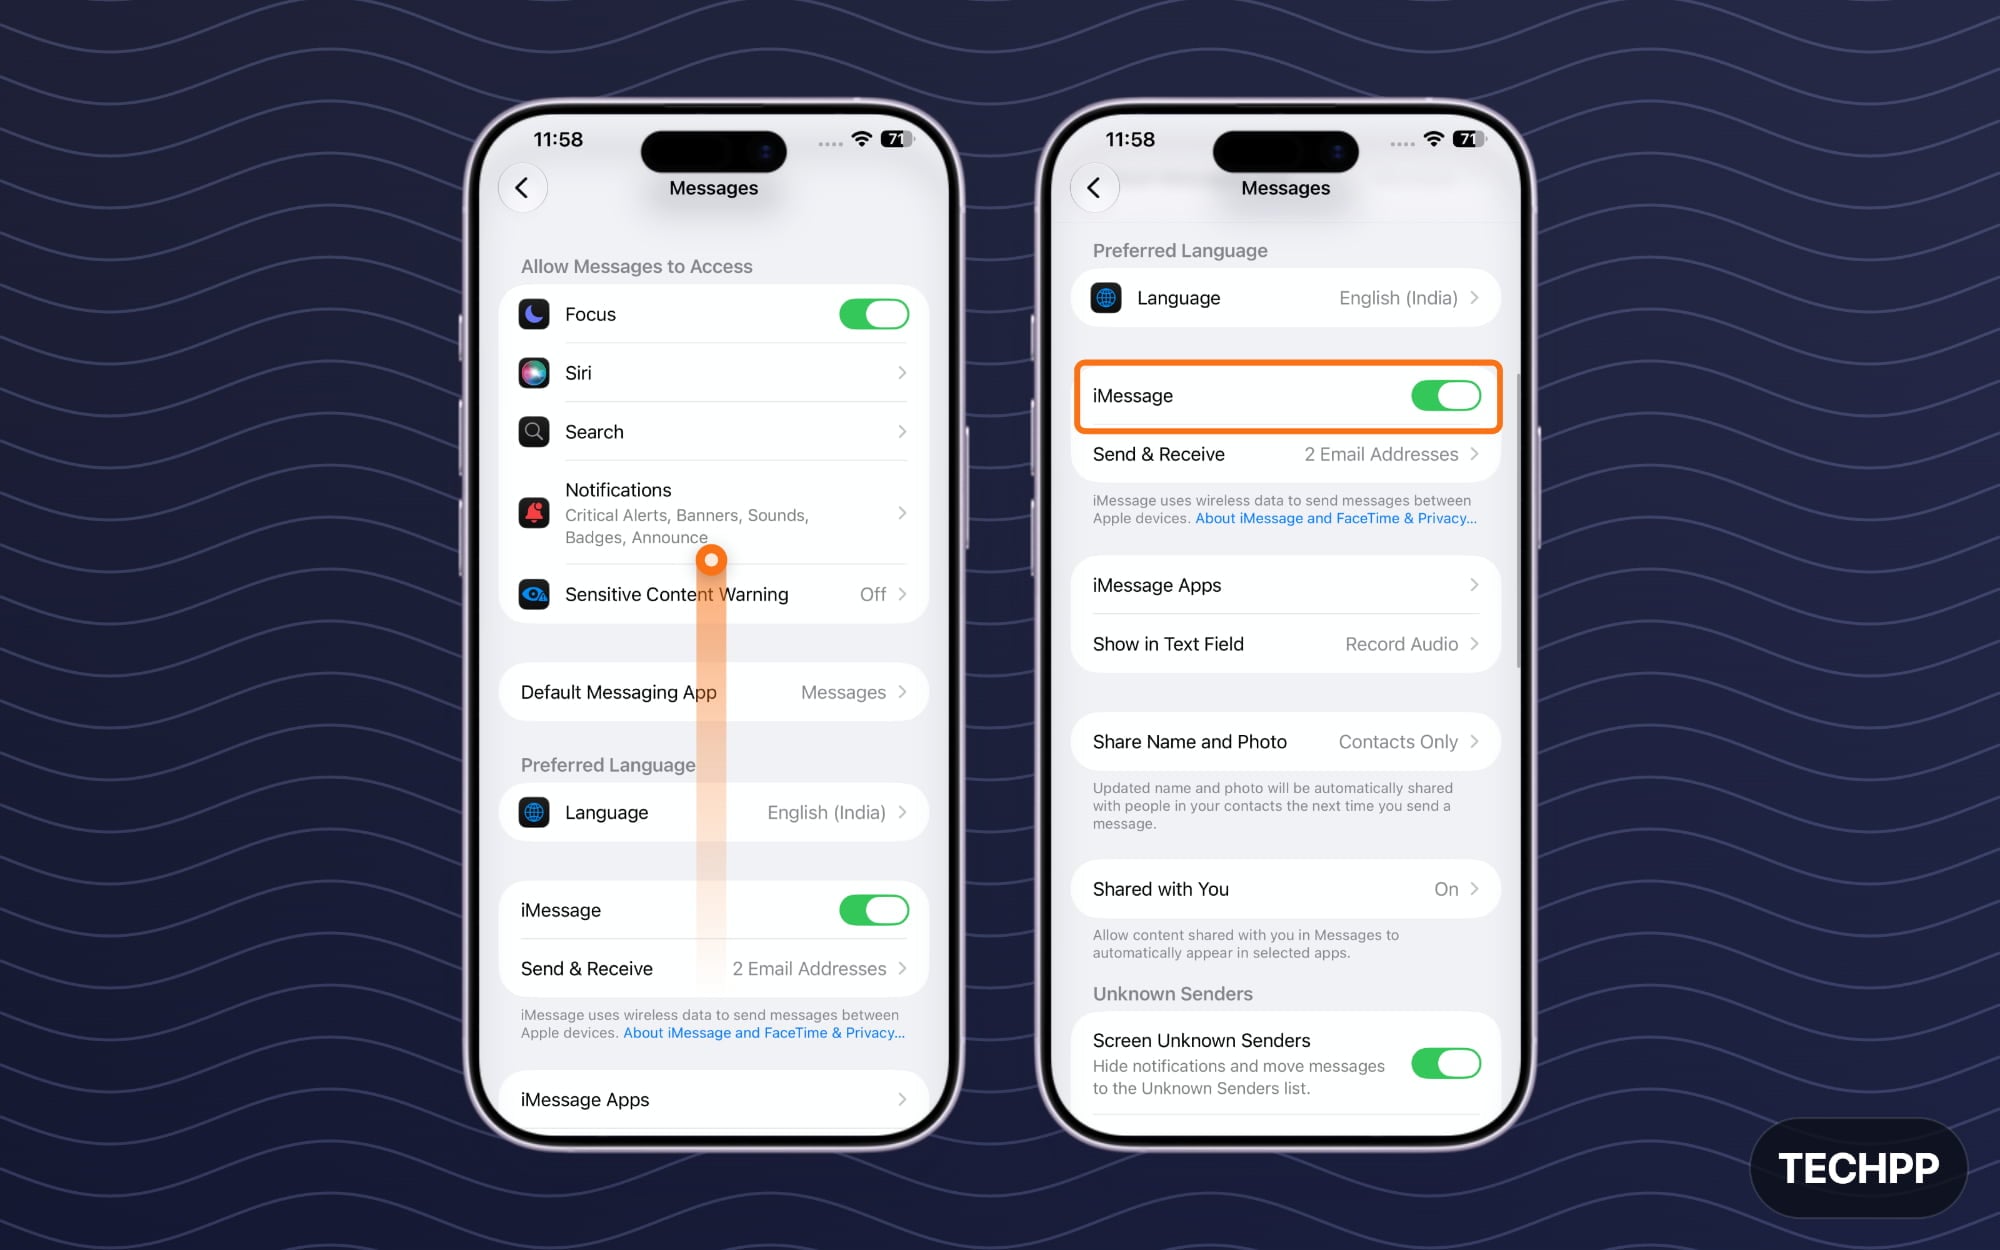
Step 3: Now search for the iMessage app

Step 4: Scroll down and turn off iMessages options
To Turn off the Apple FaceTime
Step 1: Open Settings on your iPhone
Step 2: Scroll down and tap on Apps again
For older iPhones, you can see the option in the main Settings itself.
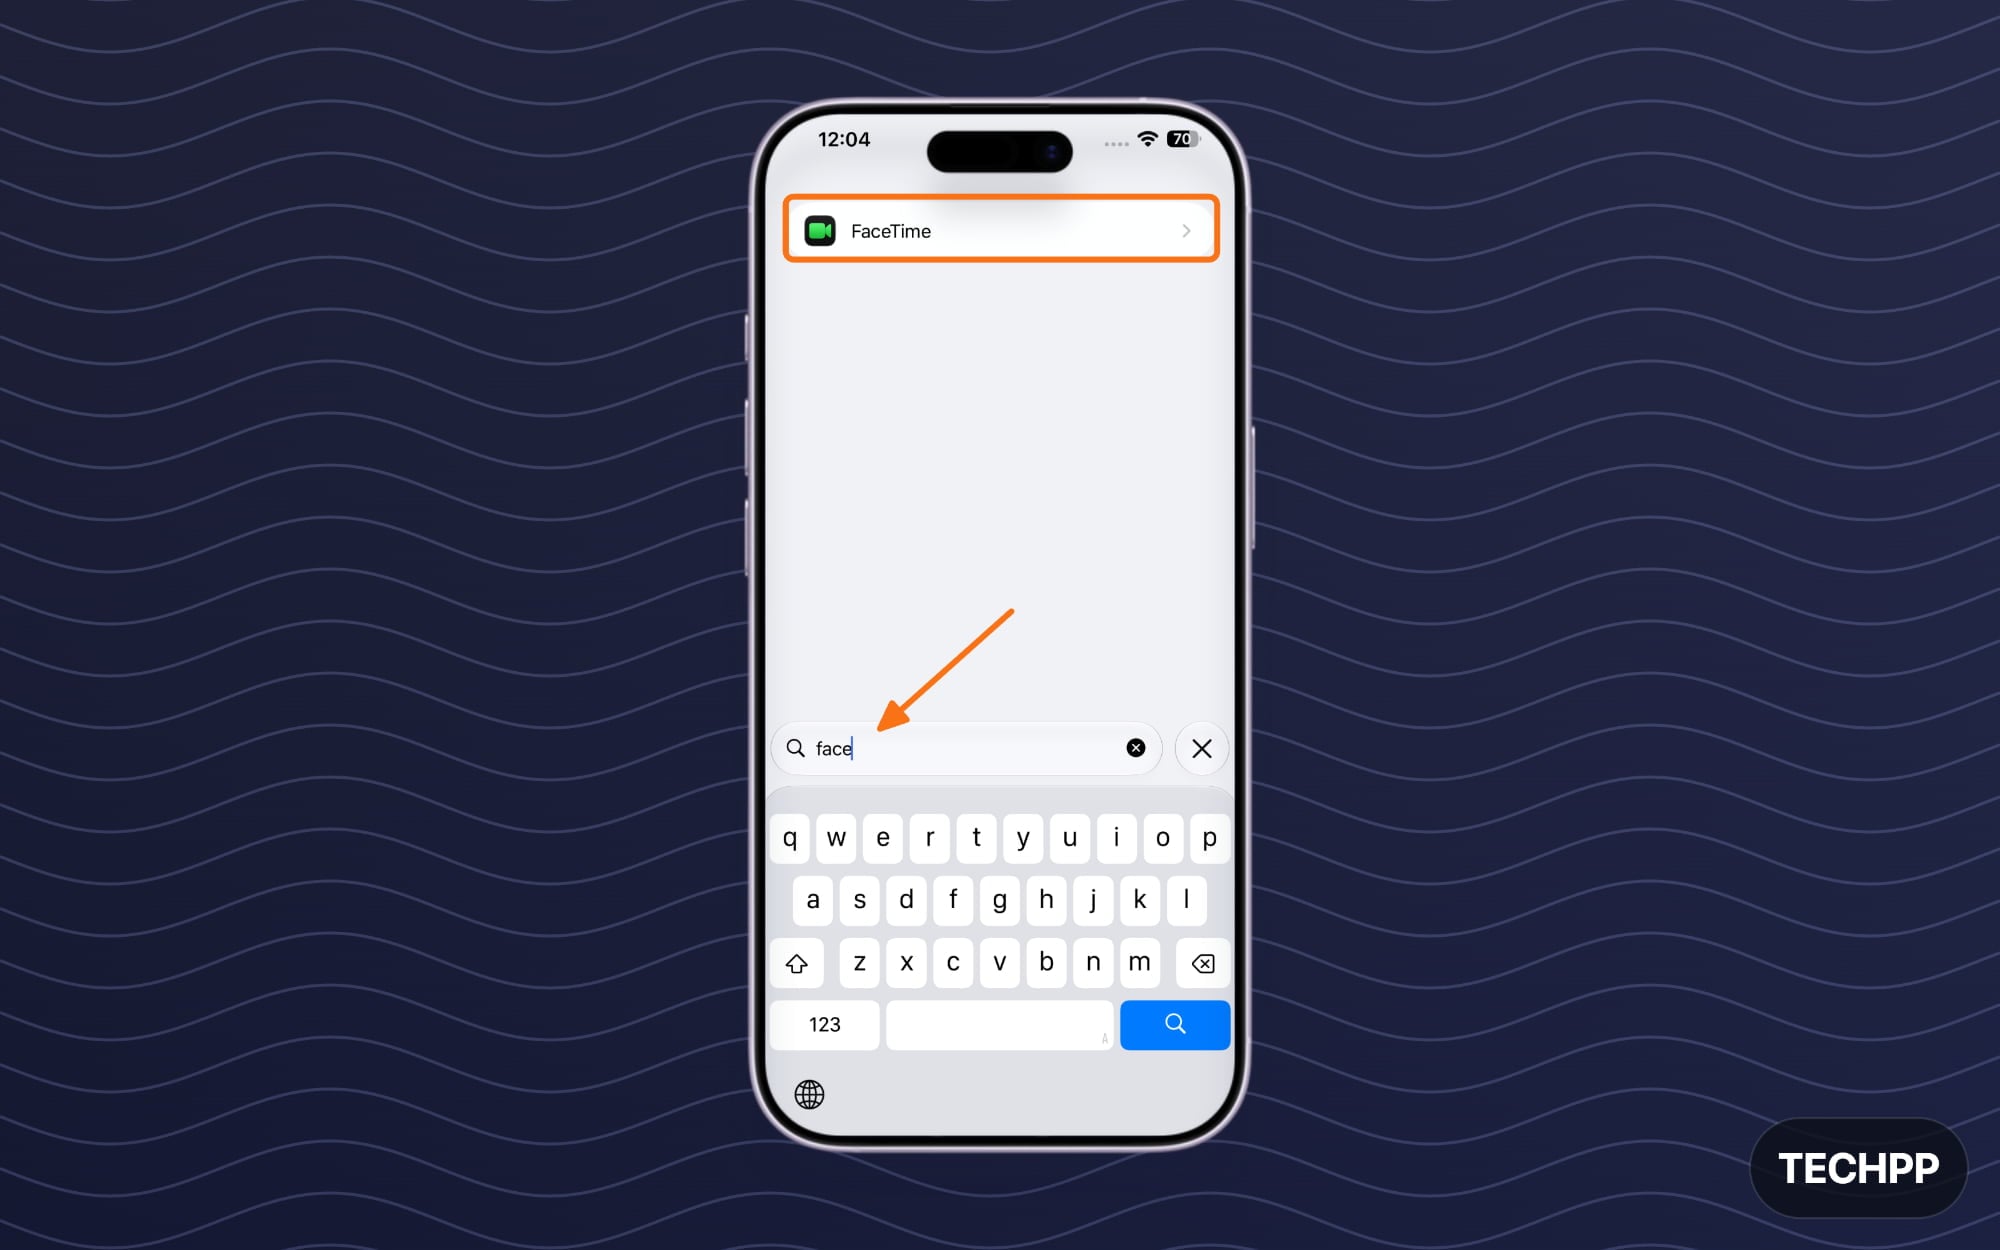
Step 3: Search for FaceTime.
Step 4: Scroll down and turn off the option that says FaceTime.
Once you ask someone with an iPhone to send an iMessage text message, it should work, or else you can use Apple’s iMessage deregister service to unlink your iMessage from their phone
Turn Off Find My iPhone
This is the most important step if you are selling your iPhone to others. Find My iPhone is Apple’s device security and finding service that allows you to find your iPhone if it’s lost, and also lock it remotely.
For security, if the user resets the device, Apple will ask for an iCloud activation before activating the iPhone.When erasing all content or factory resetting, you should also turn off Find My and Activation Lock on the iPhone.
However, sometimes you may still need to enter your Apple ID and password to reactivate the device. To make it easy for the new user, I highly recommend that you turn off Find My iPhone from the settings first.
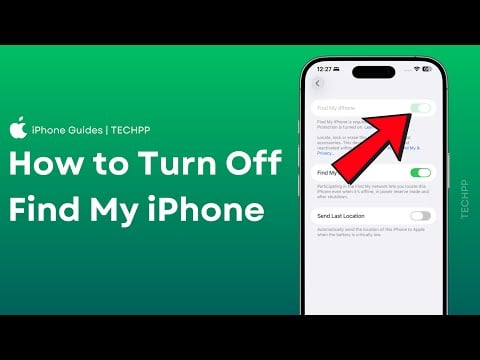
You can check my detailed video guide below to turn off Find My on your iPhone:
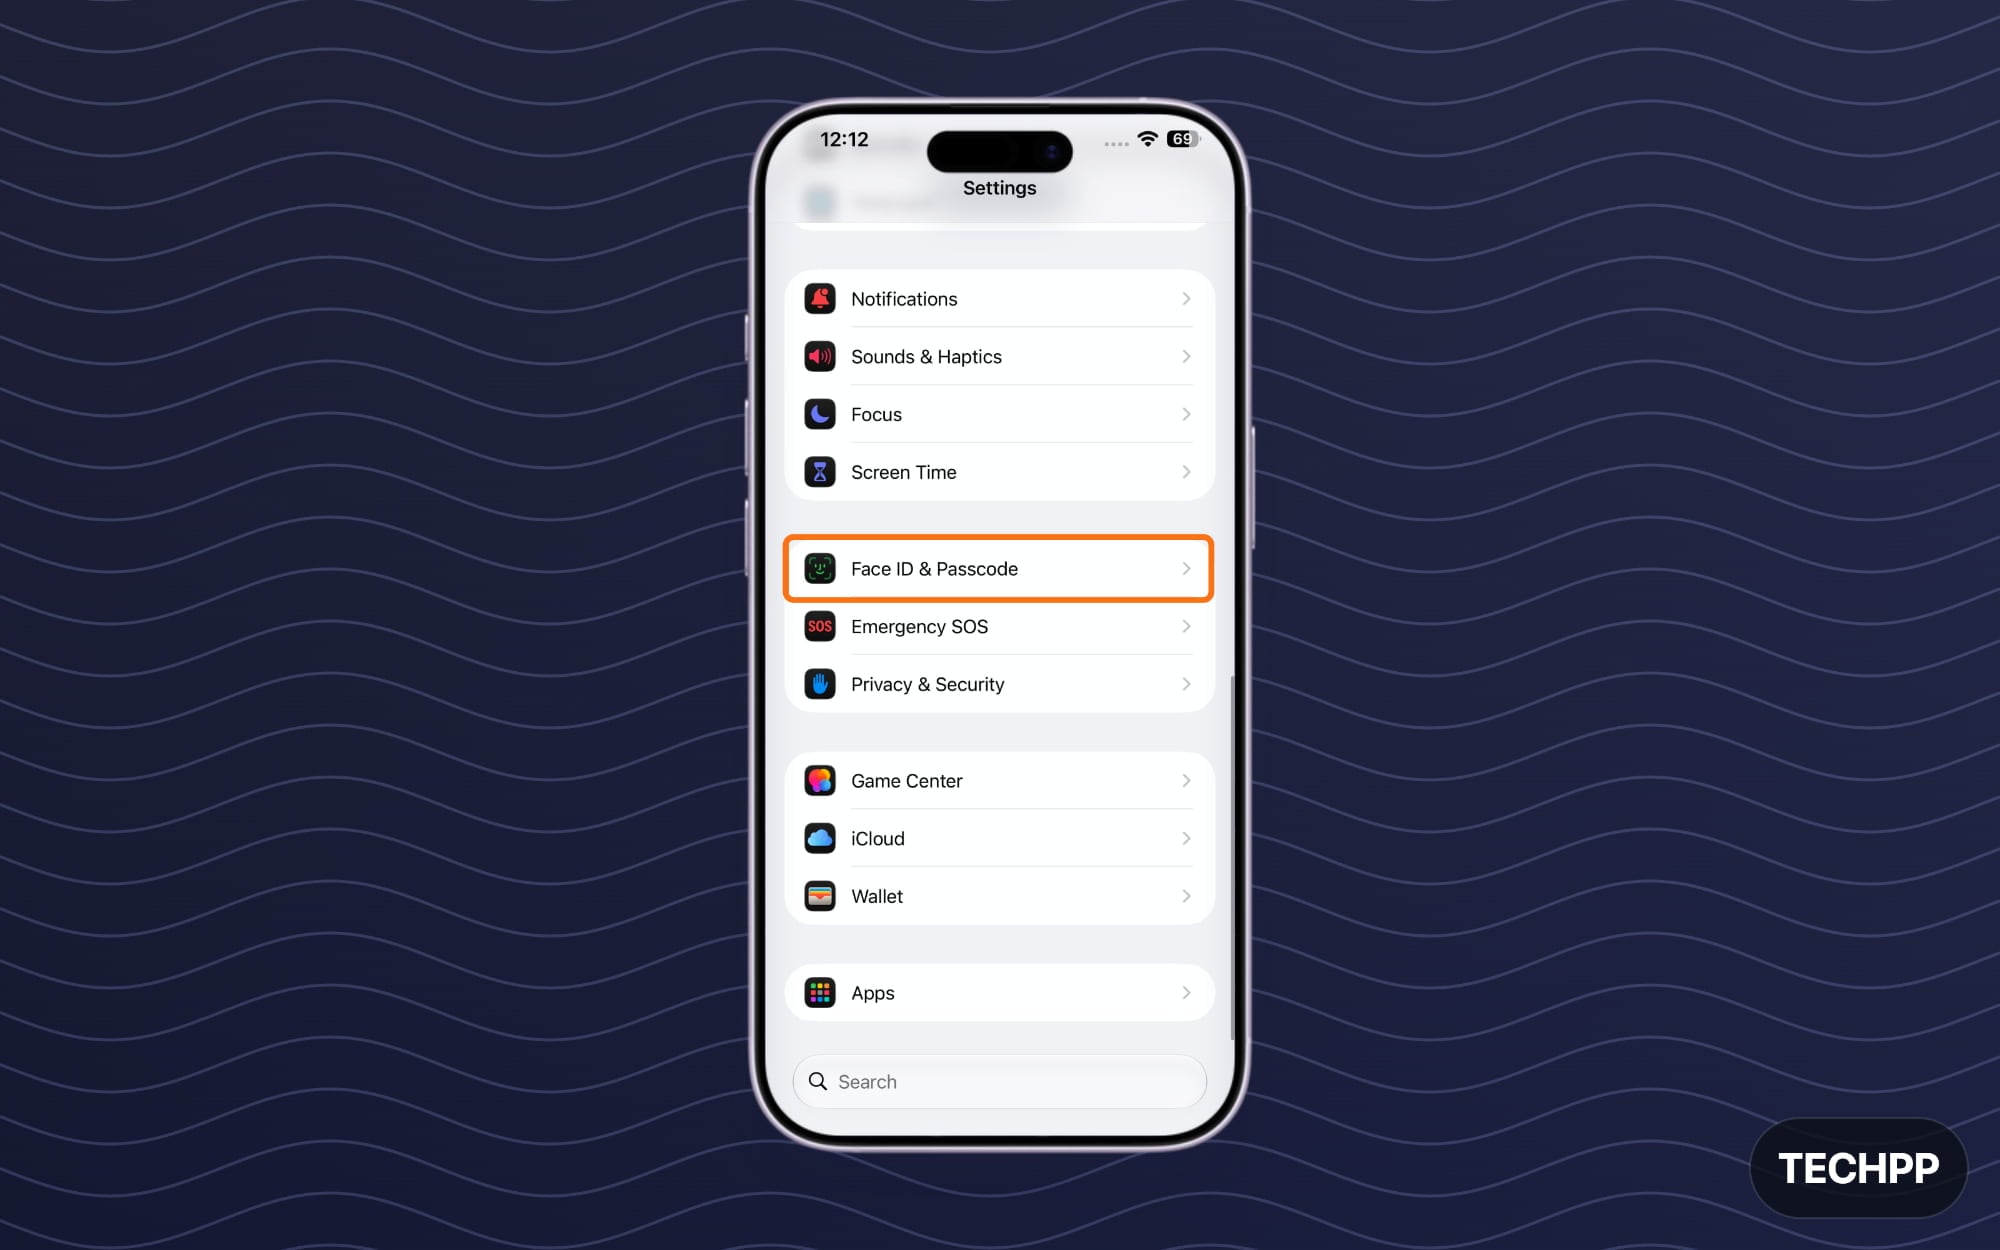
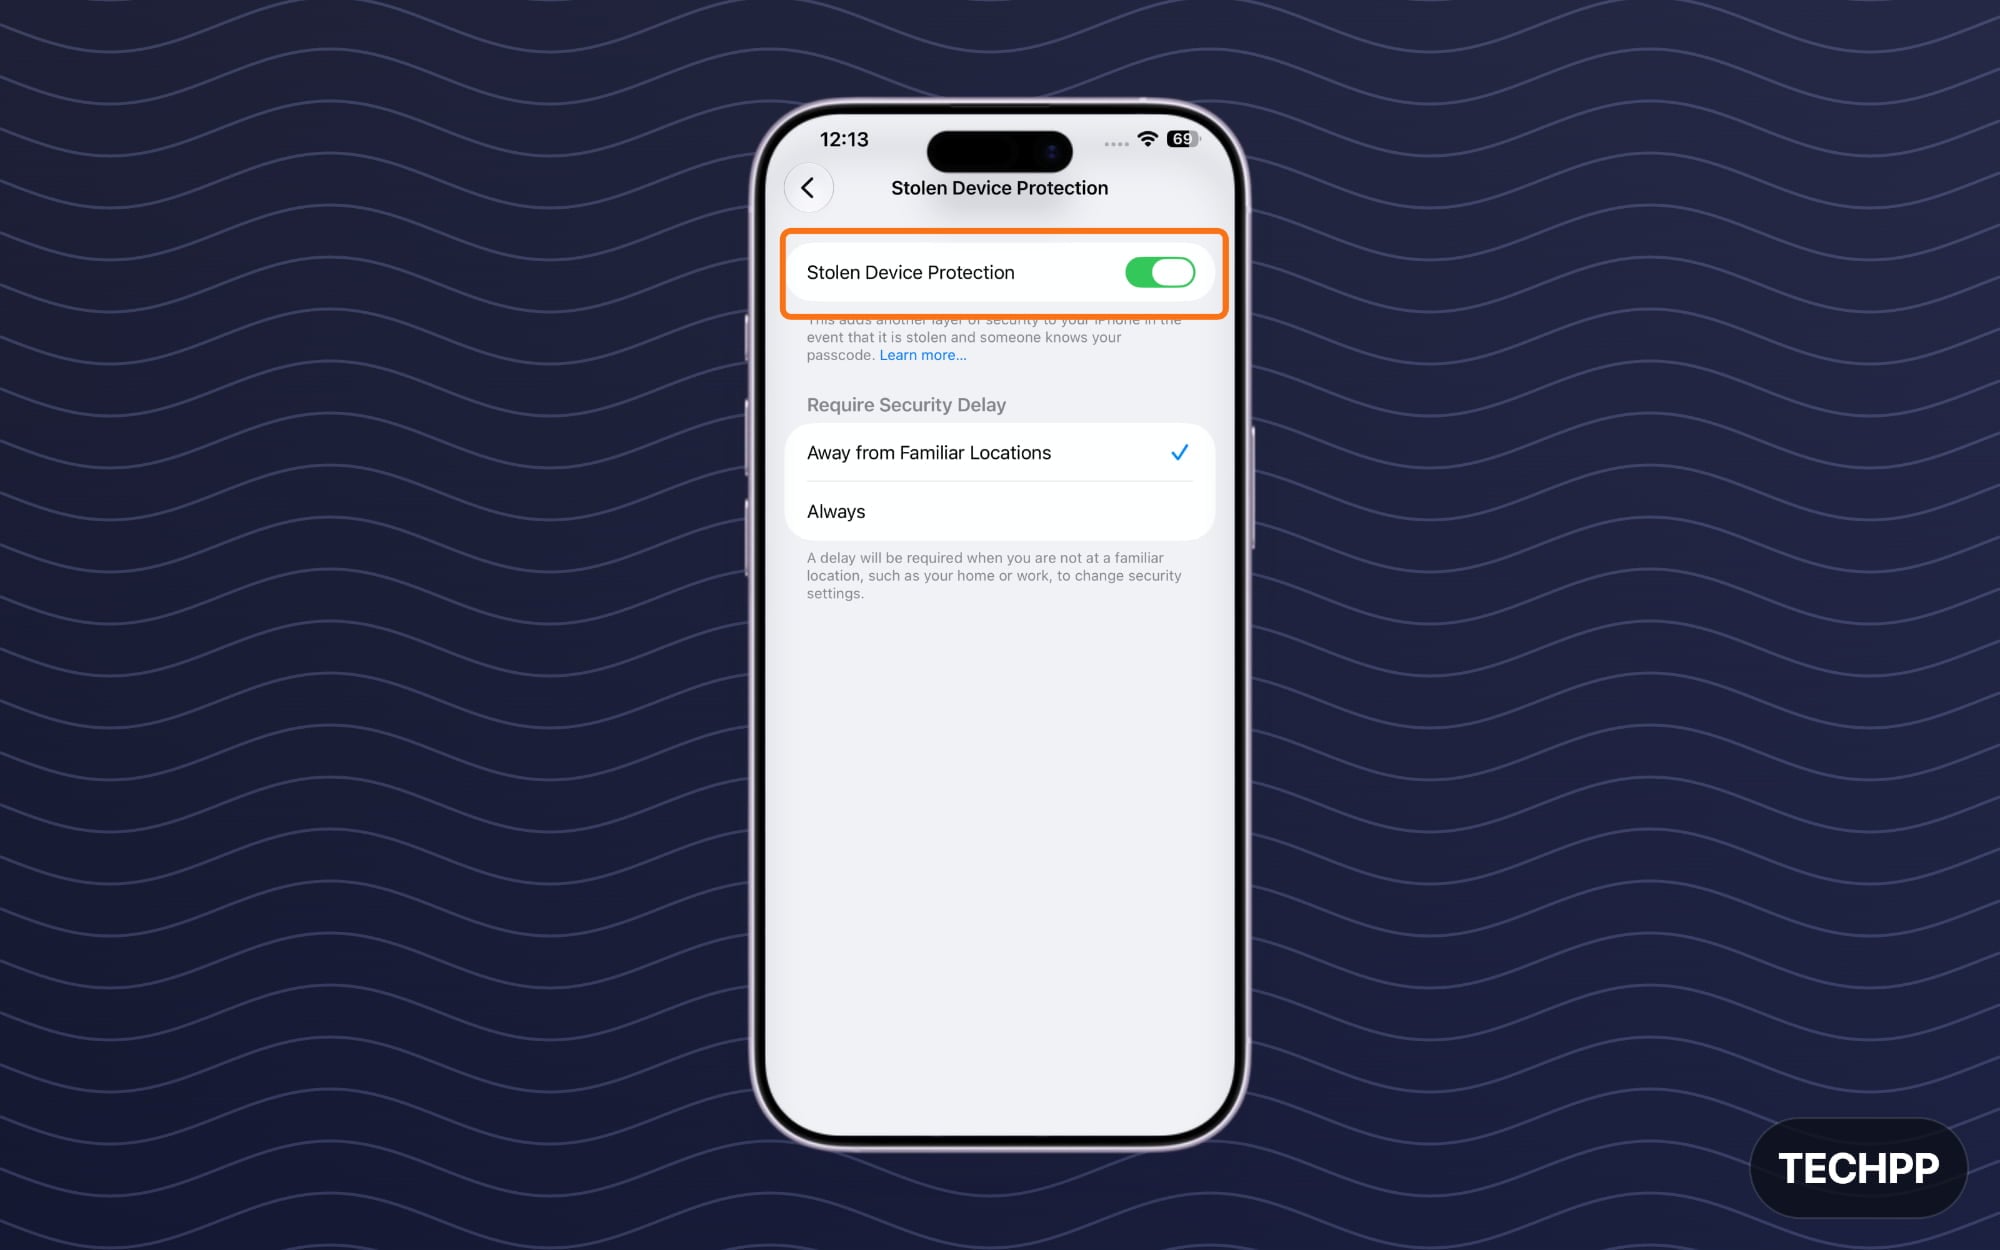
Step 1: Open Settings on your iPhone
Step 2: Scroll down and tap on FaceID and Passcode
Step 3: Scroll down and tap on Stolen Device Protection
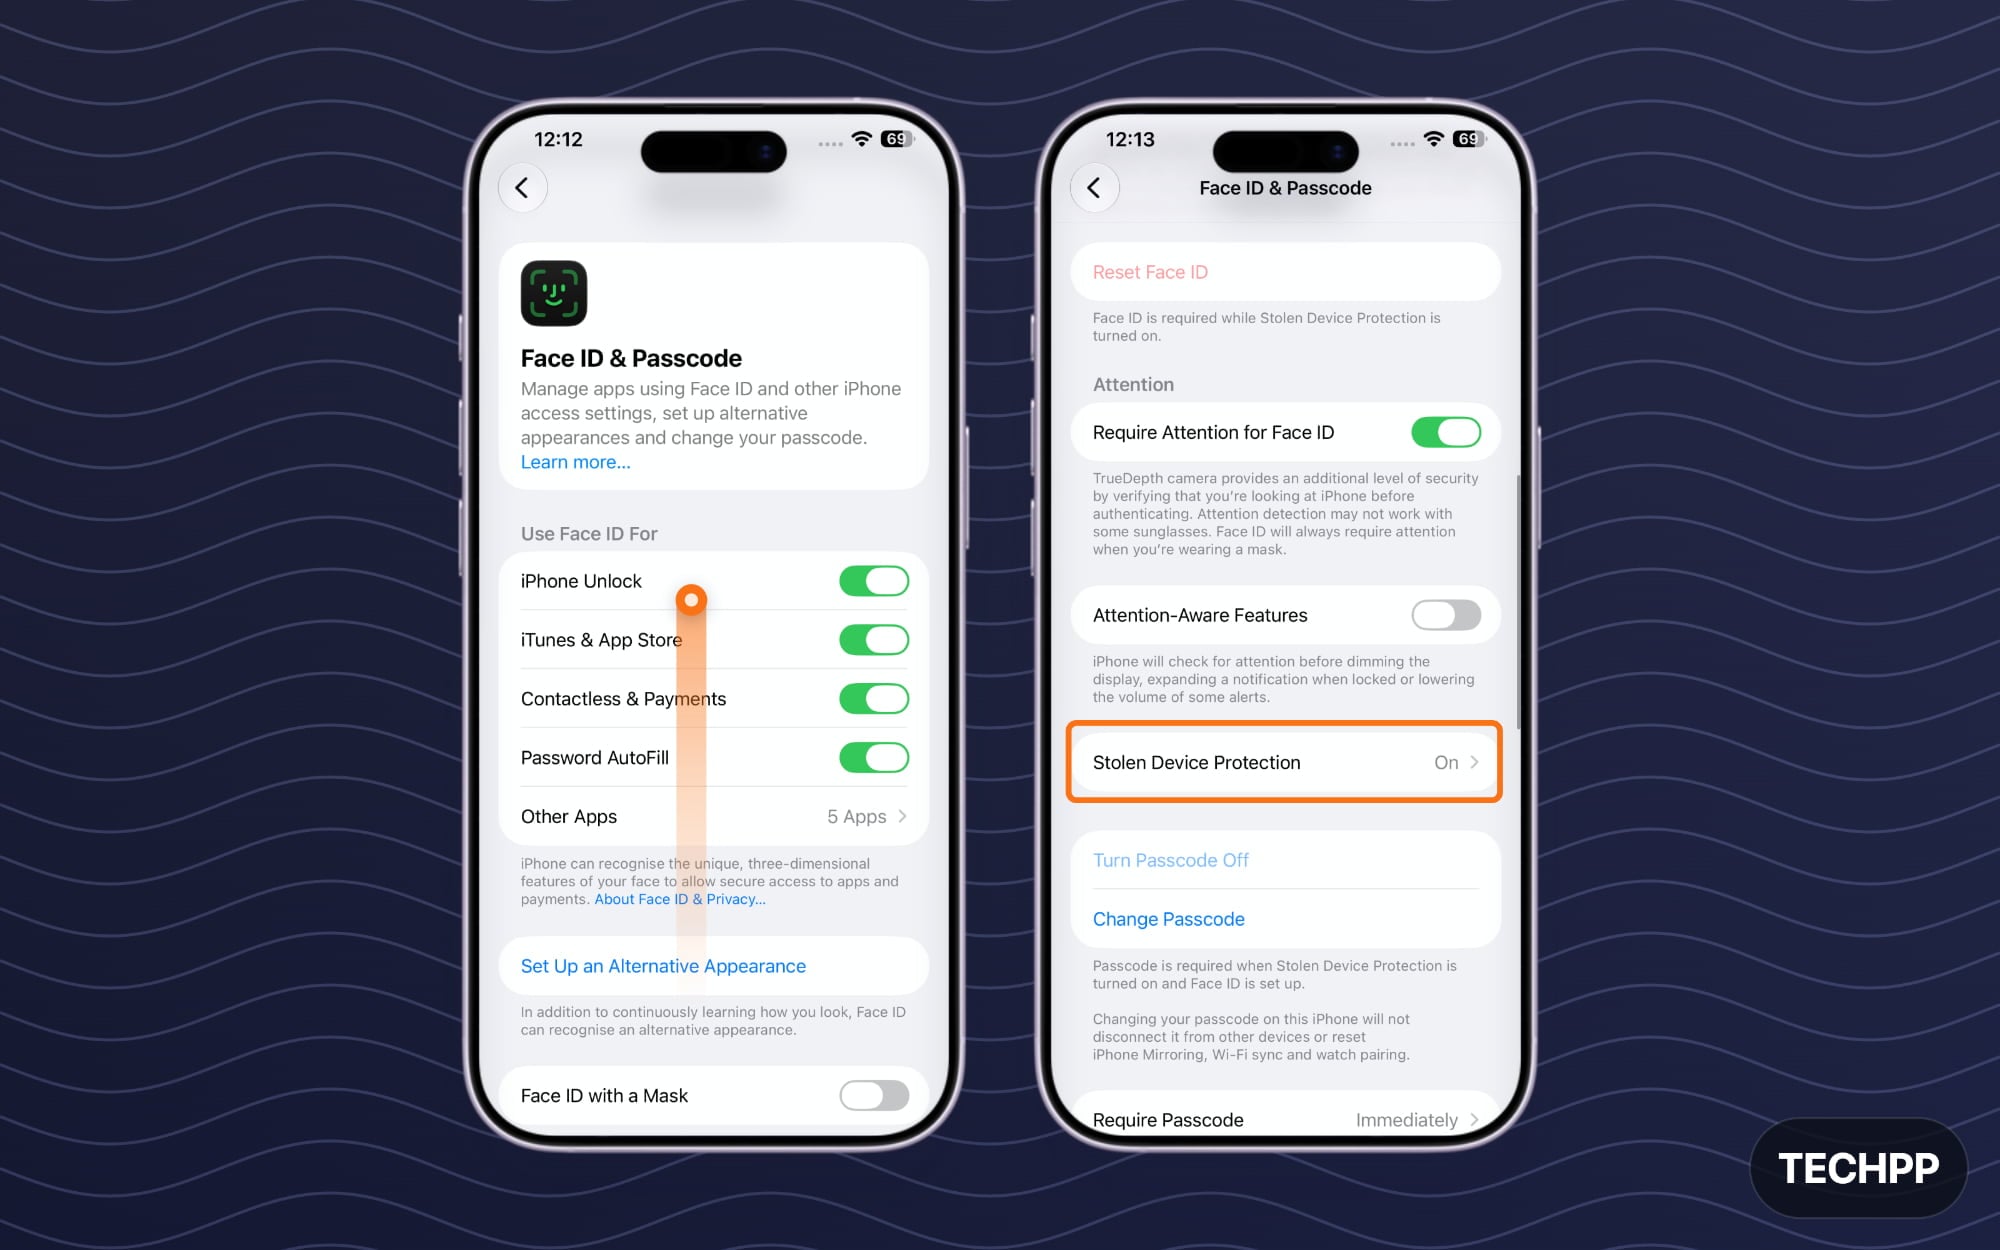
Step 4: Now, turn off stolen device protection settings
You can also use it to remove all your old iPhones, including any existing iPhone that you are selling. It also removes your iPhone from the trusted devices. So in the future, if you are signing in to any new Apple account service, it won’t use your old iPhone as a trusted device or share codes with it.
Now, Sign Out of your Apple Account on iCloud
Once you have removed the activation lock and followed all the steps, it is now time to remove your Apple account and iCloud account from your current iPhone.Erasing and factory resetting your device completely removes the linked Apple account; however, doing it manually gives you more control to see which services are currently using your Apple ID and iCloud.
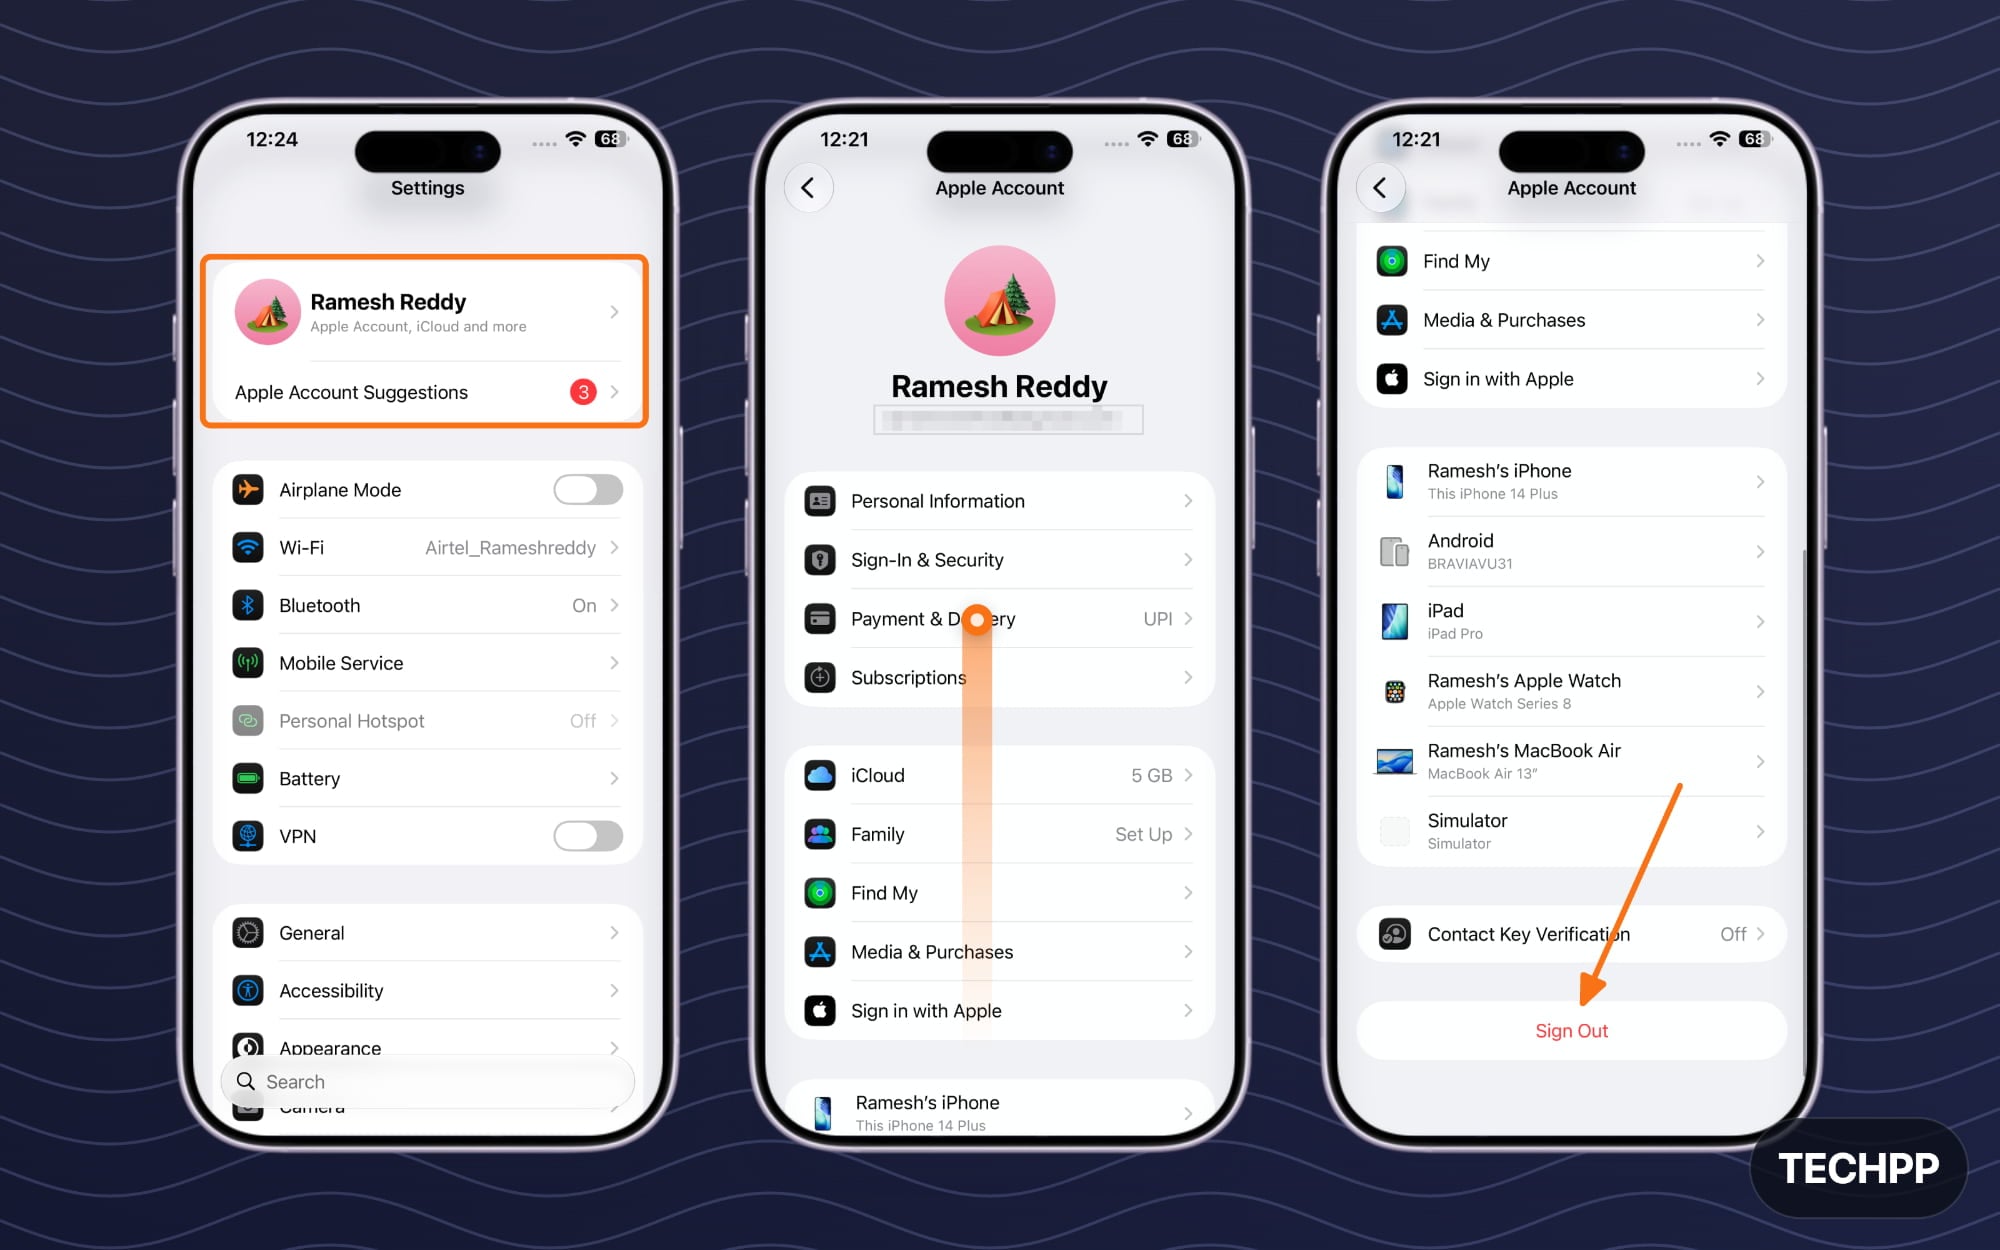
To remove your Apple ID, Apple account, or iCloud account from your iPhone, go to Settings and then sign out.
Step 1: Open Settings on your iPhone
Step 2: Tap on your Apple account section and scroll down, tap on the sign out, and confirm.
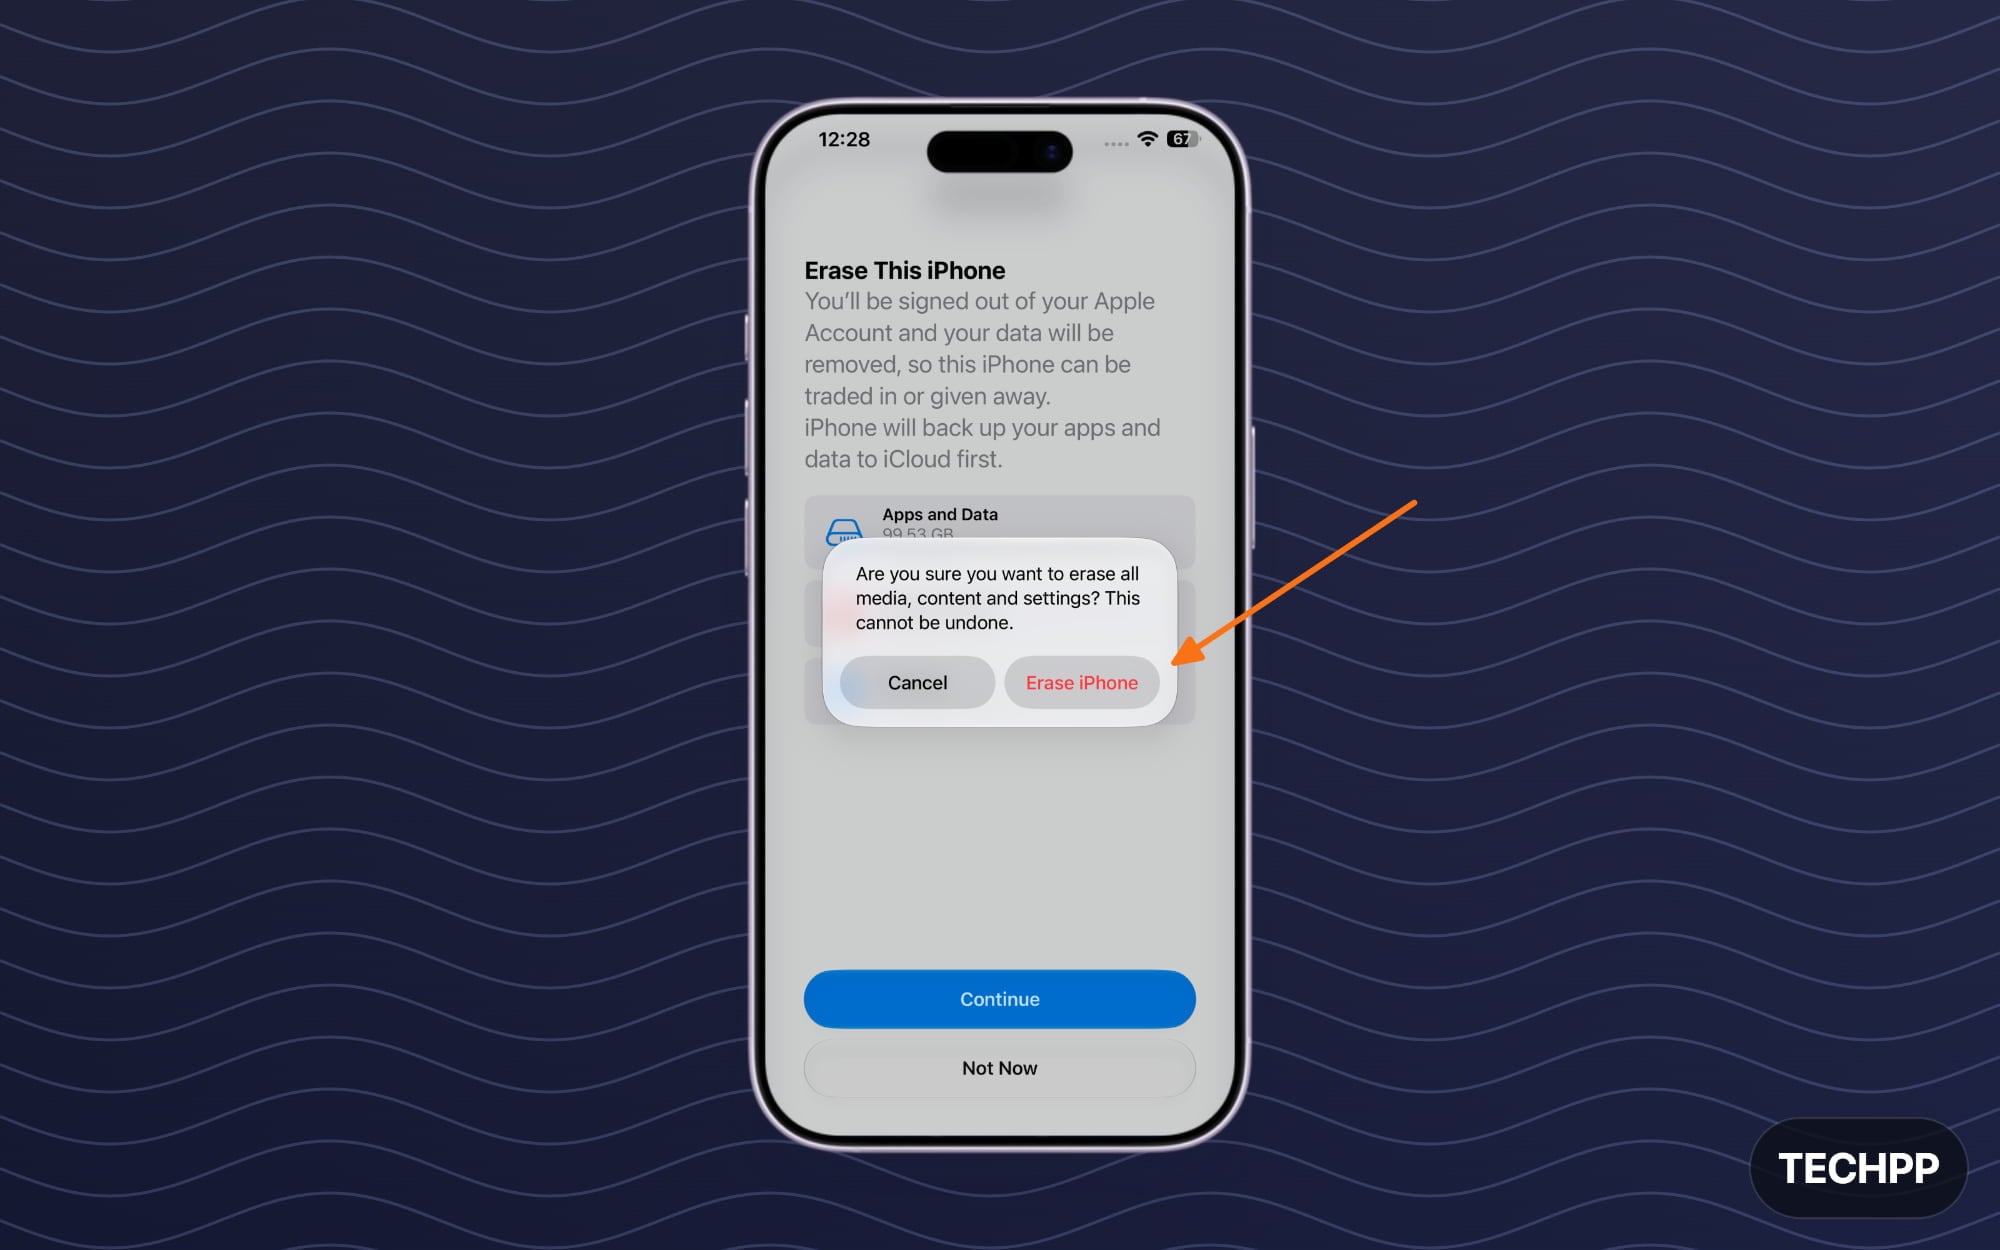
Finally, Factory Reset Your iPhone and Erase All Content and Settings
Finally, factory reset your iPhone to make it work completely as new. While factory resetting, ensure you select the option that says Erase All Content and Settings. This removes all your local data and prepares your iPhone for the next owner. Remember that you should only follow these steps once you have completed all the previous checklists:
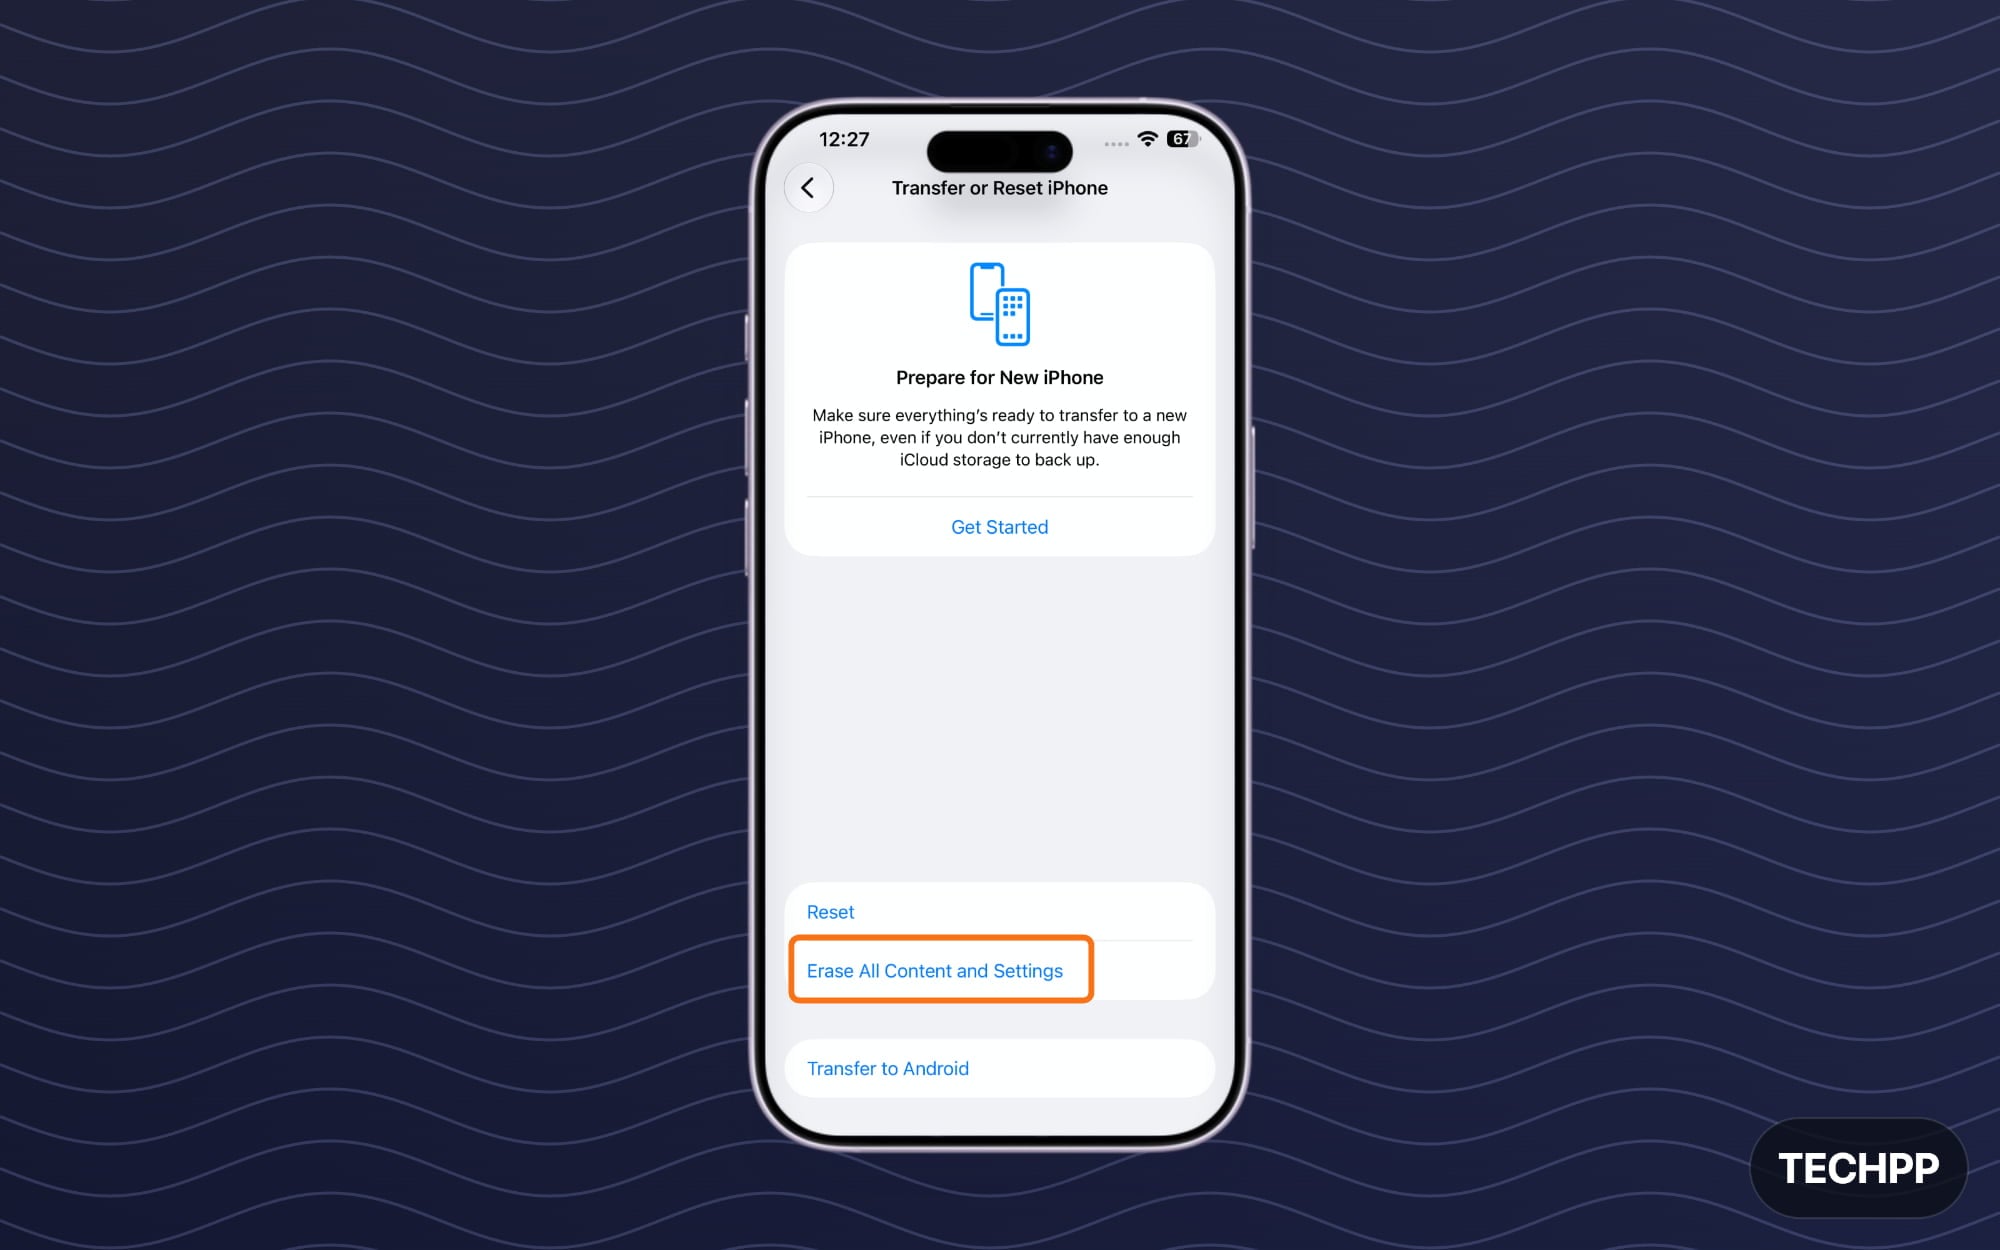
Step 1: Open Settings on your iPhone
Step 2: Scroll down and tap on General
Step 3: Scroll down again and tap on Transfer or Reset your iPhone
Step 4: Tap on Erase All content and Settings option
Step 5: Tap on Continue
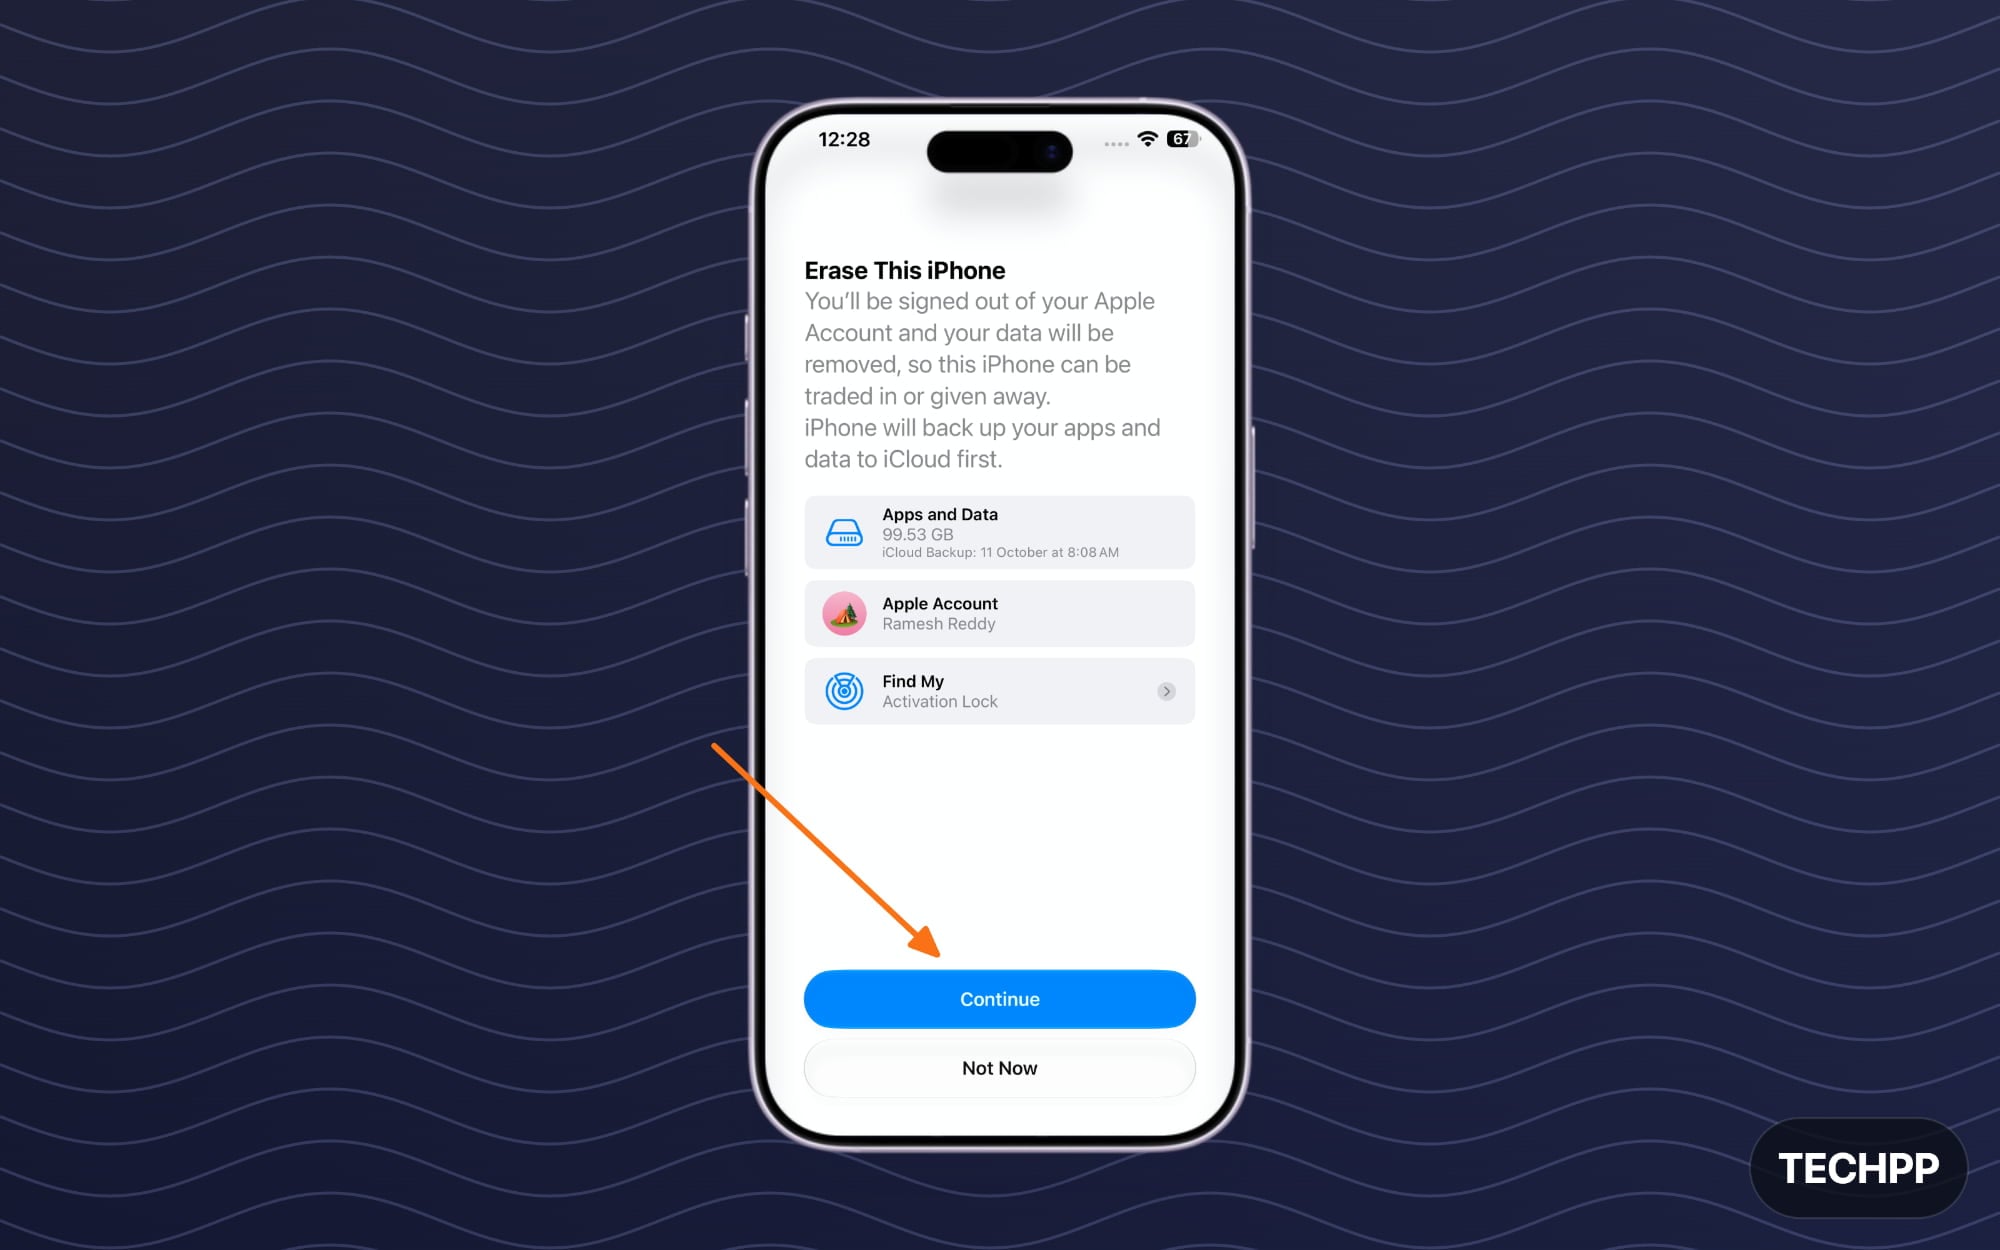
Step 6: Tap on Erase iPhone and confirm.
Once you have done these and much more, you can proceed. Follow the steps below to completely reset your iPhone and make it ready for the next owner. This is a simple checklist that you can follow every time you are looking to sell your old iPhone.
To make it easy for you, we have provided a simple checklist with an interactive checklist, where you can check each checkbox for smoother transfers. I hope you find this guide helpful. If you have any questions, you can check our FAQ, and you can also comment below if you still have questions or if any process isn’t working for you.
FAQs on Things You Should Follow Before Selling Your iPhone
1. How do I confirm that my iPhone is fully erased before giving it to the buyer?
After the reset, when you set up the iPhone screen, it should show you the Hello setup screen. Follow the setup and ensure that it doesn’t ask for an Apple account and that the activation lock is removed. This confirms that your iPhone is fully erased.
2. Can the new owner access my iCloud photos after I factory reset my iPhone?
No, if you successfully factory reset your account and your Apple ID is completely removed from your old iPhone, the new iPhone owner won’t see your iCloud photos.
3. Should I remove the old iPhone from my Apple account after selling it?
You should remove your old iPhone from your Apple account after selling it. This way, your account verification codes or any trusted messages won’t be shared with your old iPhone.
4. What happens if the buyer sees Activation Lock after I sell the iPhone?
If the buyer sees Activation Lock after you sell your iPhone, that means the reset wasn’t successful, and your iPhone is still linked to your Apple account. To remove your iCloud account, you can sign in with your Apple account on your old iPhone and follow the checklist we have listed above.
5. What should I do if my old iPhone screen is broken and I cannot reset it manually?
If you have a broken screen, you can use iCloud/findmy to reset it. However, there are a few requirements, Your iPhone needs to be online to factory reset and even though the data is completely erased, the activation lock still remains on for security.
Related iPhone Guides You May Find Helpful
- iPhone Transfer Checklist Tool
- 7 Easy Ways to Fix iPhone Not Backing Up to iCloud
- How to Backup Your iPhone Without iCloud
- iPhone Storage Full? Here is How I Freed Up Space Without Losing Data
- How to Buy More Storage on iPhone
- 9 Easy Ways to Access iCloud on Android Phones
- How to Share Files Between Android and iPhone Using Every Reliable Method
- 10 Fixes for Last Line No Longer Available iPhone Error
- How to Fix Common iOS 26 Issues on Your iPhone
- How to Factory Reset Android Without Losing Messages & Calls
