Emails are still of great value in the age of instant replies, voice calls, and video conferencing. Although messaging apps like WhatsApp and Telegram have a monopoly in the messaging world, you can’t deny the importance of emails, especially for official communications, important documents, job applications, and more. An email makes your appearance much more professional and appealing.

With so much weight on their backs, email apps can’t afford to let you down and stop working in the middle of the day. But what if they do? In this article, you’ll find 20 practical tips on how to get Apple Mail working again on your Mac. Let’s go!
Table of Contents
Troubleshooting “Apple Mail Not Working” Issue
Cross-Check Your Mac’s Wi-Fi Settings
Mistakes can happen because you may have tried to send an email without your Mac being connected to an internet network. This usually happens if you are not on your home network and have not set up the available networks in your area. Here, you can find out how to set up a new network.
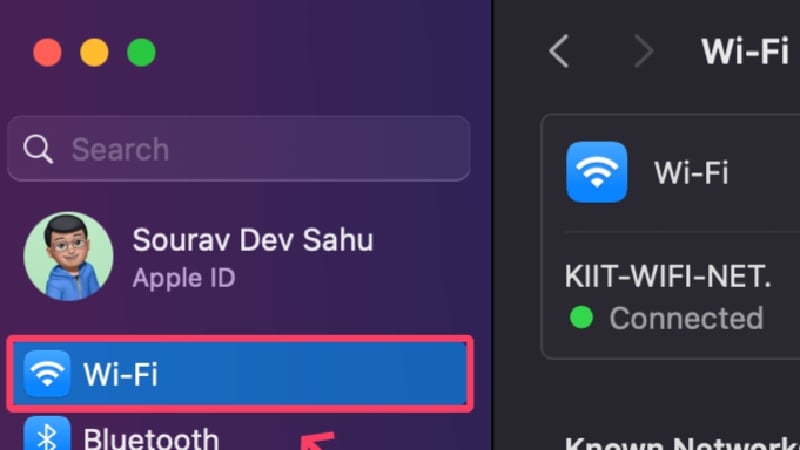
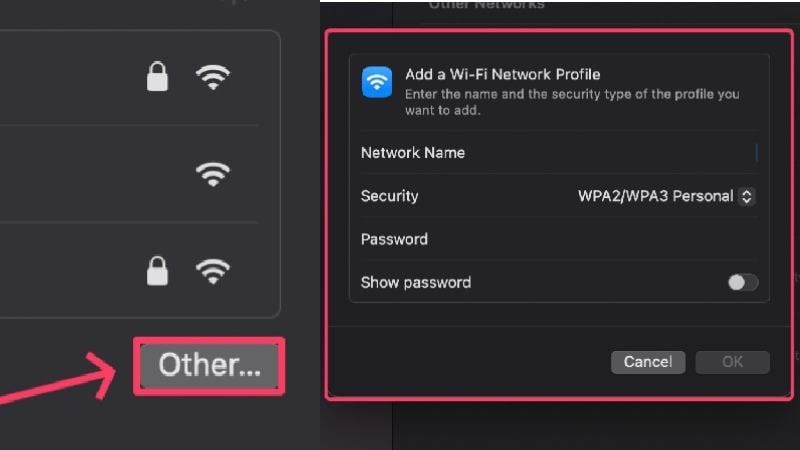
- Open your Mac’s System Settings and select Wi-Fi from the left pane.
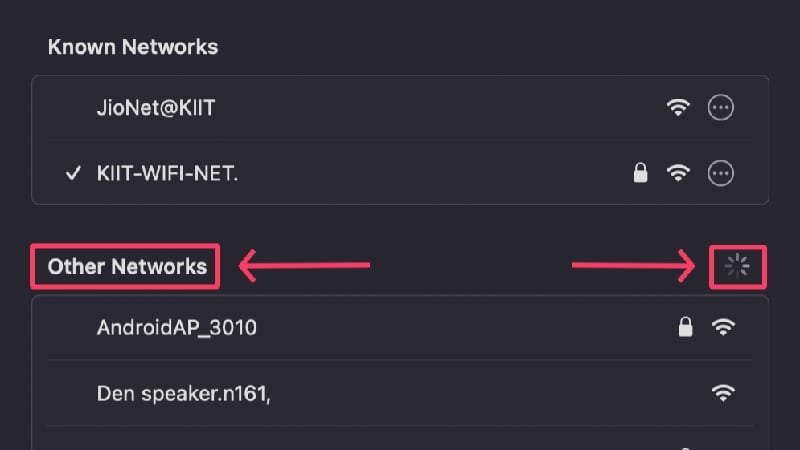
- New and unknown networks will be shown under Other Networks. The spinning wheel depicts that your Mac is scanning for nearby networks.
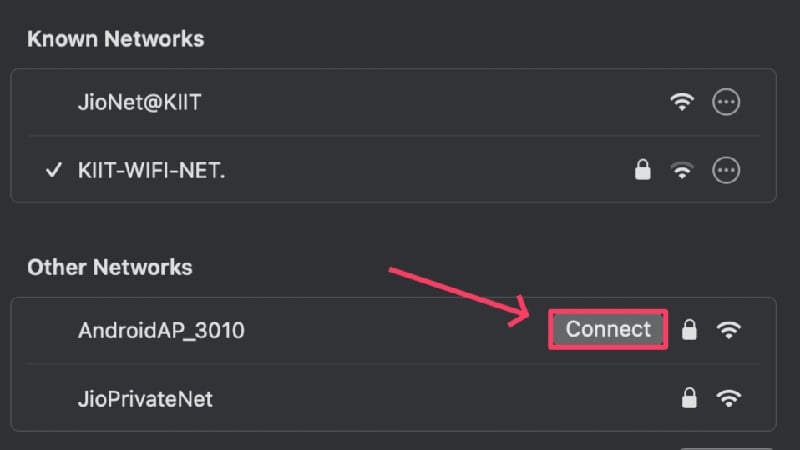
- Click on Connect beside the Wi-Fi network you want to connect to.
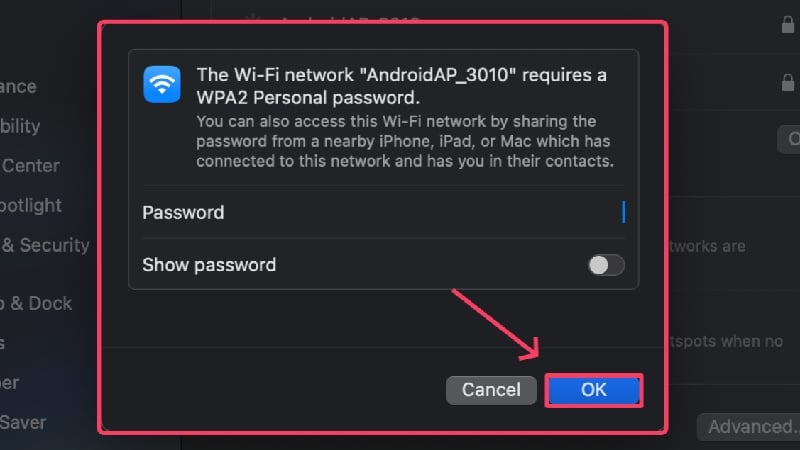
- Enter the network credentials and hit OK.
Alternatively, you can also set up a new network manually by clicking on Other. You must connect to public or free Wi-Fi networks safely, as they are often insecure and vulnerable to cyber-attacks.
Update the Mail App
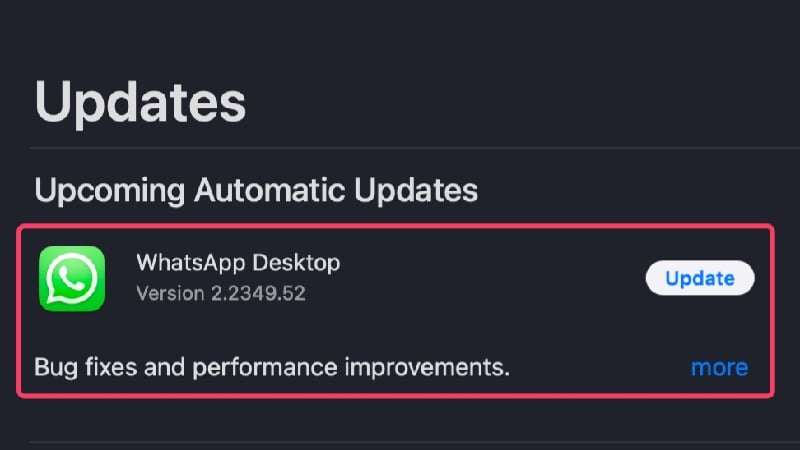
The Mail app on your Mac could be out of date and causing the problem. In some cases, faulty app builds, bugs, or glitches prevent the app from working optimally. The developers don’t take the time to fix such problems. Therefore, check whether an app update is waiting for you in the App Store. Follow the steps:
- Open the App Store.

- Select Updates from the left pane.

- Check for updates and update the required apps.
Check Your iCloud Storage Levels
Apple Mail uses your existing iCloud storage to store the emails you receive or send. With a capacity of only 5 GB, your iCloud could already be filled to the brim. In such cases, the Mail app prohibits you from composing emails and restricts the receipt of new emails. To know your iCloud’s storage stats,
- Open System Settings.
- Click on your profile icon or name in the left pane.
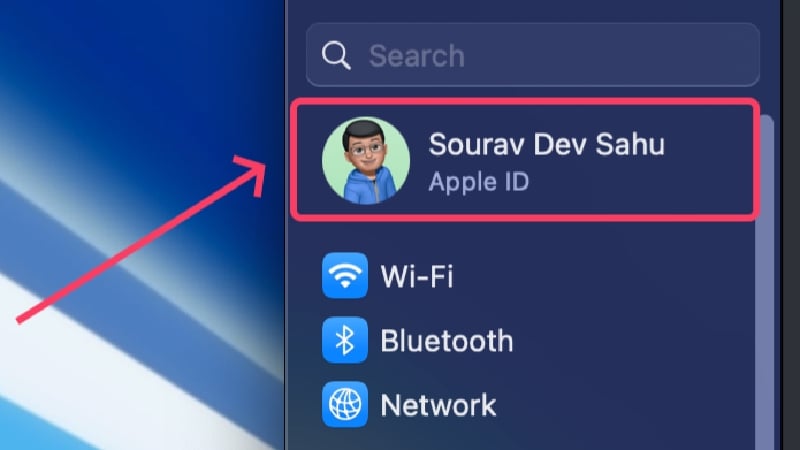
- Select iCloud. You can view the amount of storage available in your iCloud Drive from here.
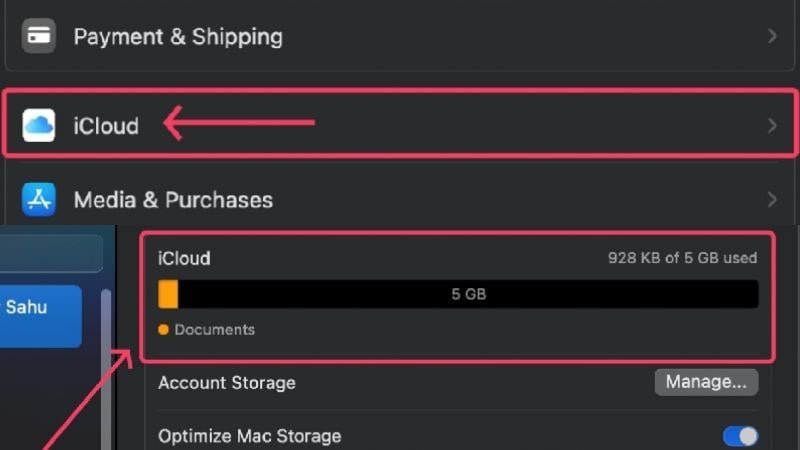
If the news is confirmed, you must start freeing up your iCloud storage to make space for new emails and other essential things to be stored. Otherwise, Apple also allows you to purchase more iCloud storage by paying a monthly or annual fee, which can be a viable option if you have nothing unimportant to delete.
Re-enable Mail Accounts
Apple Mail allows you to save multiple email IDs and switch between them, but the mail you’re trying to access may have been disabled. If not, it can’t hurt to re-enable an already-enabled email ID to make sure no problems are caused from that side.
- Open the Mail app using Spotlight Search (shortcut: command + space) or from Launchpad.
- Select Mail from the status bar.
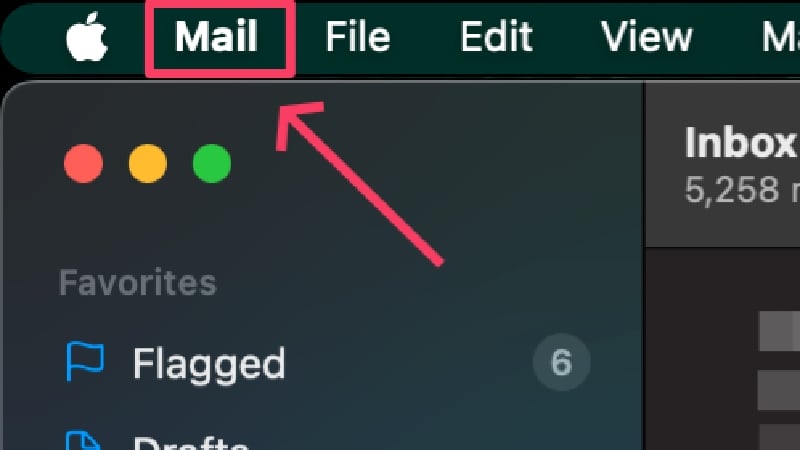
- Click on Settings.

- Switch to Accounts from the top section.
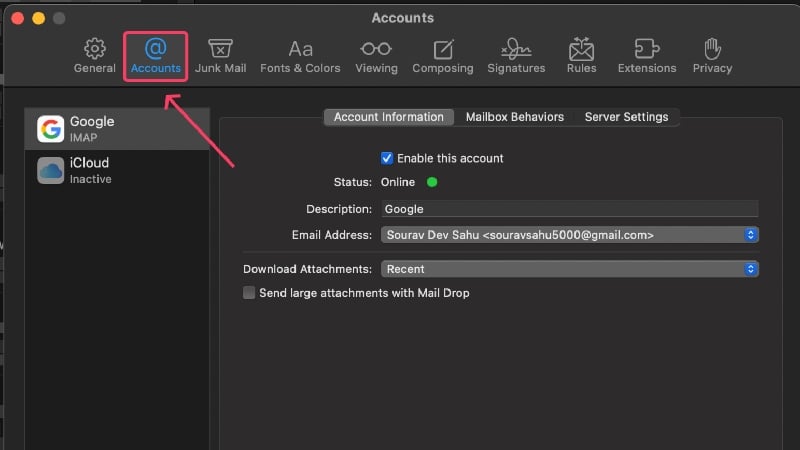
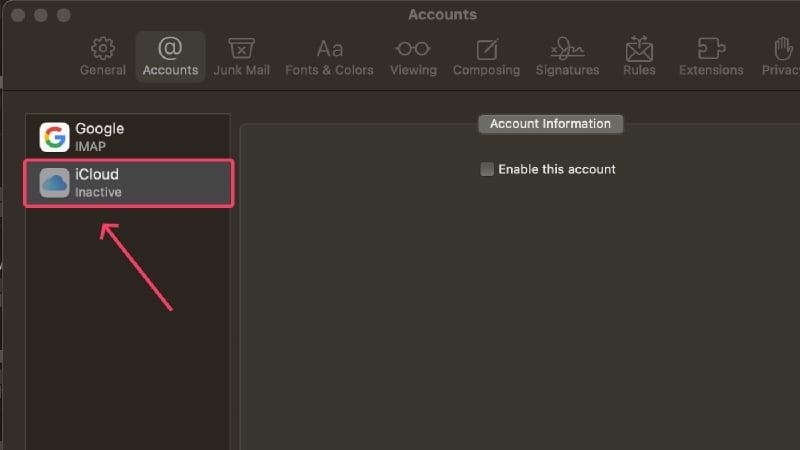
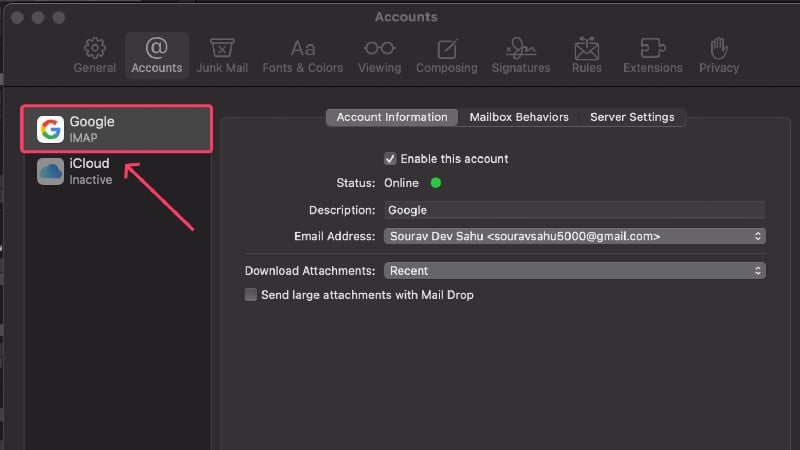
- Select the grayed-out IDs in the left pane. If there are none, this means that all your email IDs are activated and working. In this case, click on the ID you want to re-enable.
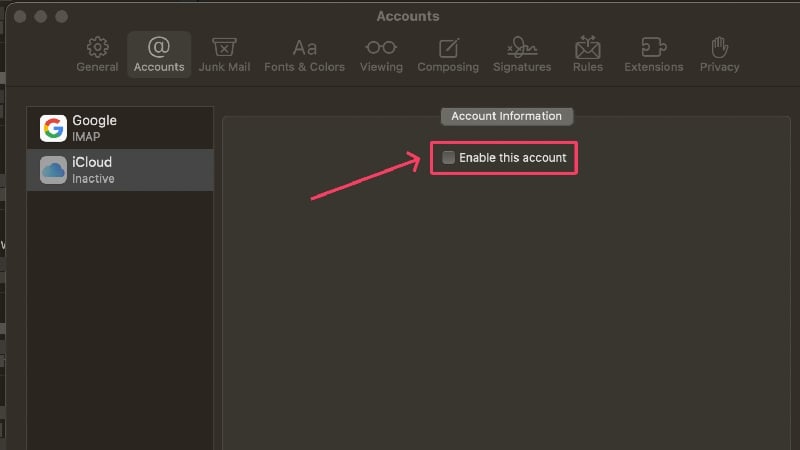
- Click on Enable this account to enable the selected account.
Check if Your Email ID Is Set for Outgoing
If you have added multiple email IDs in your Mac’s Mail app, they may not all be enabled as outgoing mail accounts. This prevents these accounts from sending emails and could be the reason why you can’t compose new emails. Here, you can find out how to set an ID as an outbox account.
- Open the Mail app using Spotlight Search or from Launchpad.
- Select Mail from the status bar.
- Click on Settings.
- Switch to Accounts from the top section.
- Select the required account from the left pane.
- Click on Server Settings.
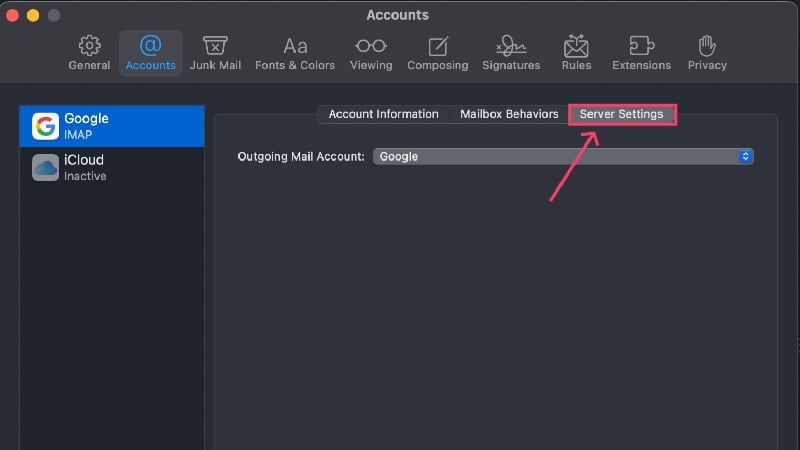
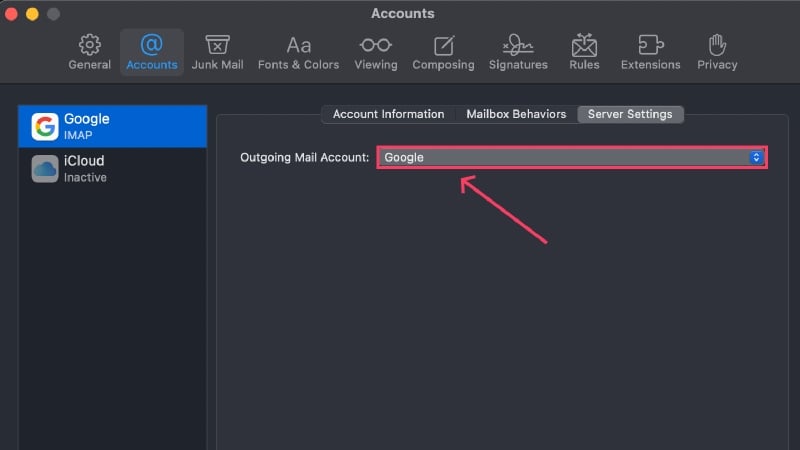
- Check whether the required email ID is enabled from the dropdown menu.
Prevent Adding Large Attachments
In case you don’t know, Apple Mail has a maximum attachment size limit of 20 MB. Attachments over 20 MB and up to 5 GB are sent via Mail Drop. The Mail app may not work if you try to send emails with large attachments.
You can send a large file by uploading it to iCloud or Google Drive and attaching the share link instead. This way, you don’t have to attach files and worry about the file size limit; you can even share attachments larger than 5GB. Websites like Transfernow and Send Anywhere and other services like DropBox, Microsoft OneDrive, and Samsung QuickShare also allow the same functionality.
Check for Status Warnings
Apple Mail has a handy feature that alerts you to problems with the Mail app or your account with warning icons. Such icons are displayed on the left side of the home screen and usually contain a thunderbolt icon or a warning triangle. You can click on the icon to find out more, and here you can find out what the different warning messages mean:

- Network Offline – This message is usually displayed when your Mac has problems with the network, such as poor Wi-Fi strength or a faulty connection.
- Login Failed – This is displayed when your email account isn’t set up correctly, and you need to log in again.
- If Mail is rejecting passwords, there may be a problem with your email provider. Contact your provider’s help page and make a request.
Check for Service Outage
Sometimes, it’s not your fault – a website outage isn’t uncommon. When a website is down, access is often denied while developers search for the problem and repair the site.
It’s not always Apple Mail that might be facing an outage; Gmail and Outlook could instead be facing the issue, so if you have linked your Gmail or Outlook accounts, check if the problem persists on their end. To check for system outages, visit the system status pages of Apple (Apple Mail), Google (Gmail), and Microsoft (Outlook).
Use Webmail in the Meantime
Every email client has a web version available for on-the-go access. If Apple Mail isn’t working and you need to compose an urgent email, you can visit iCloud’s web version and complete your work. Gmail, Outlook, and other email clients have their respective web versions, which are just as easy to access and use.
Force Quit Mail App and Restart Your Mac
As a precautionary measure, you should force quit the mail app and restart your Mac subsequently. There’s no reason for it, but a simple yet quick restart fixes most of the issues you might be facing. You can quit the mail app using the shortcut command + Q. Alternatively, to quit an app, you can right-click the app icon in the dock and select Quit from the menu.
If an app isn’t closing, you can force it to quit using the following methods.
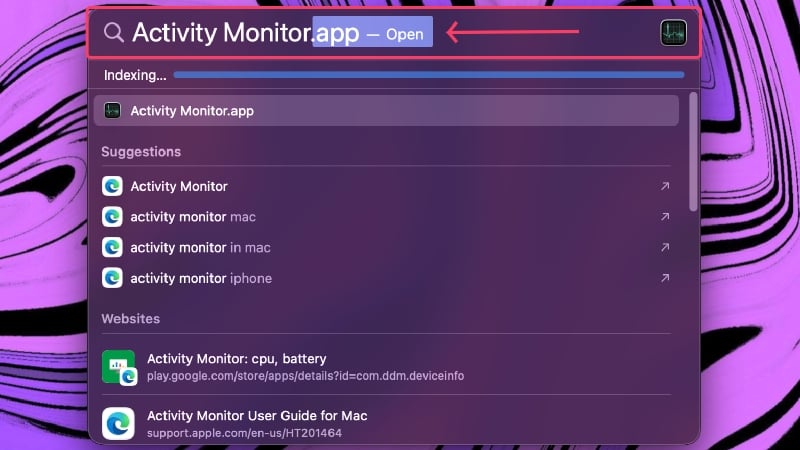
- Summon Spotlight Search using the shortcut command + space.

- Search for Activity Monitor and hit return.
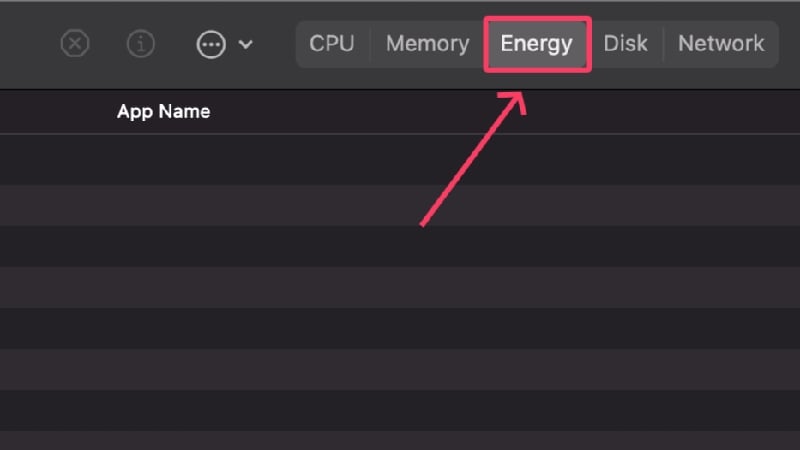
- Switch to Energy from the top section.
- Select Mail from the list of apps.

- Click on the cross icon from the top section.
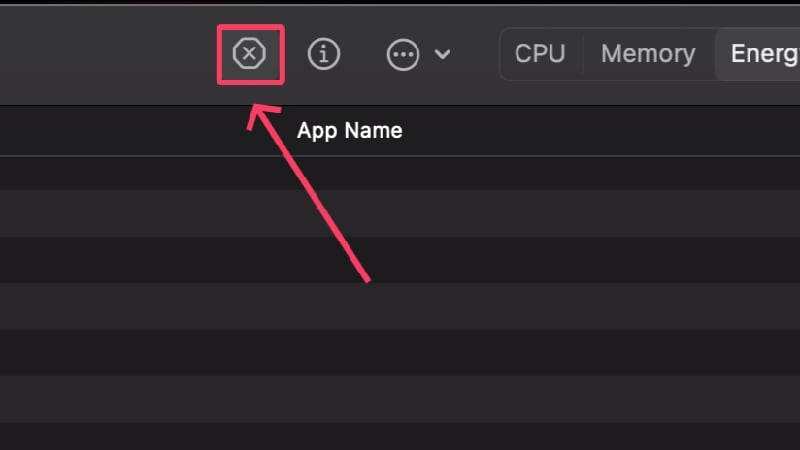
- Select Force Quit.

Re-add Your Accounts
To ensure that no account-specific problem is causing the issue, it’s best if you remove your accounts and add them back again. Account removal is an uncomplicated process and can be done in a matter of minutes using the following procedure,
- Open the Mail app using Spotlight Search or from Launchpad.
- Select Mail from the status bar.|
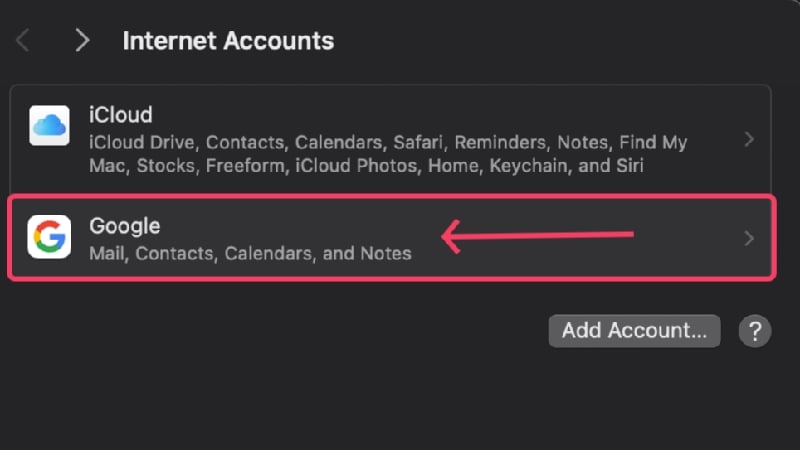
- Select Accounts from the dropdown menu.

- Click on the account you want to remove.
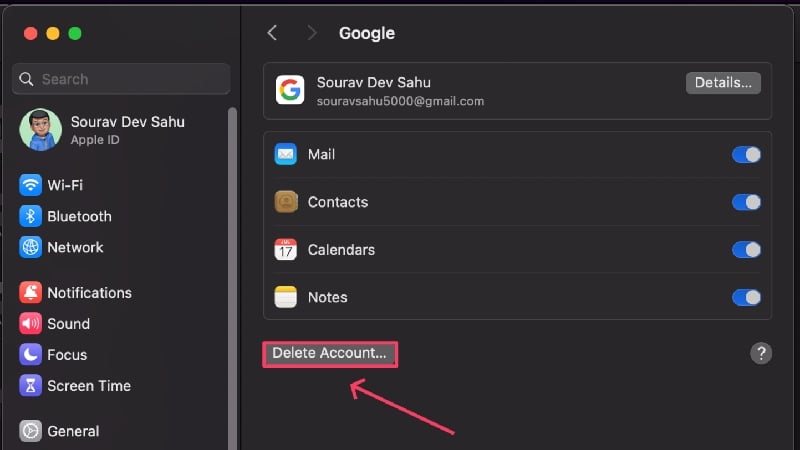
- Hit the Delete button at the end of the page to remove the selected account.
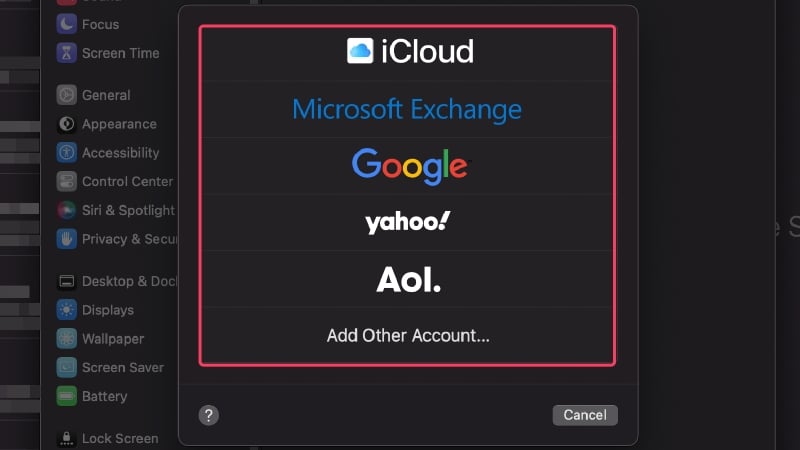
- To add an account again, click the Add Account option in step 4.

- Select the type of account you wish to add and proceed accordingly.
Delete Heavy Emails
Even though this may not be the reason why Apple Mail isn’t working for you, it’s worth trying. Heavy emails can put a strain on your system, which in turn can cause Apple Mail not to work properly. By deleting them, you not only free up valuable disk space, but you can also check whether this is the cause of the problem.
Sorting emails by size is a good way to find the emails that take up the most disk space. This is how you proceed,
- Open the Mail app using Spotlight Search or from Launchpad.
- Select View from the status bar.

- Hover the cursor over Sort and click on Size. Delete the required emails after that.

Reset Mail Preferences
Sometimes it can happen that certain mail settings cause an error, and Apple Mail no longer works. So your mail preferences, thus, could be the reason for the problem. Fortunately, resetting your Mail settings can fix the problem, and here’s how to do it:
- Open Finder.
- Select Go from the status bar and select Go to Folder.
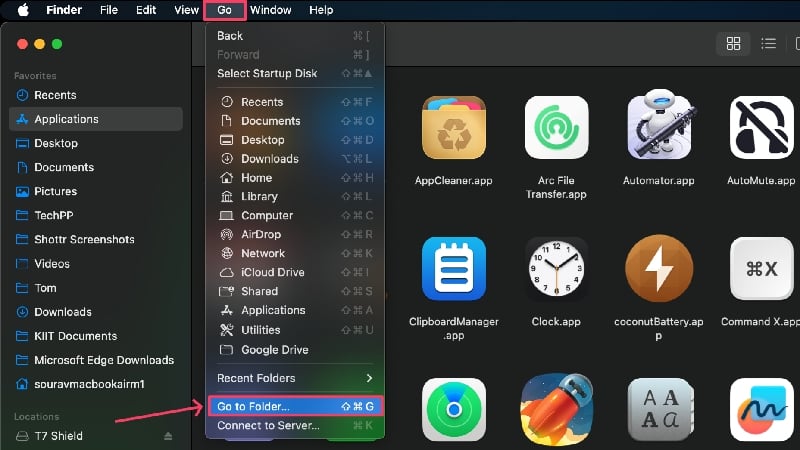
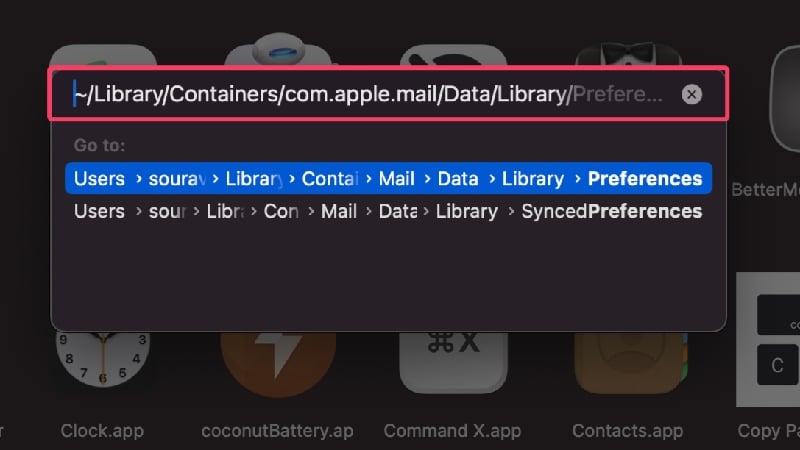
- Paste the following path and hit return.
~/Library/Containers/com.apple.mail/Data/Library/Preferences
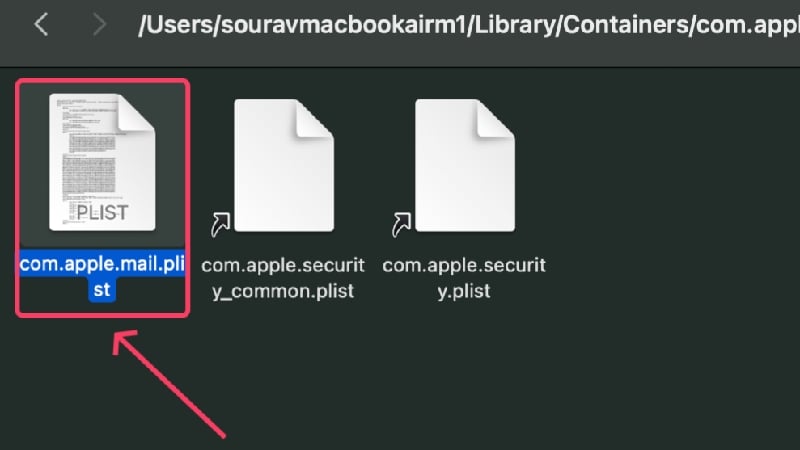
- Select the file with the name com.apple.mail.plist and drag it to your desktop. Alternatively, you can delete the file to reset your mail preferences.
- Restart your Mac.
- Open the Mail app and check if the problem persists. You may need to set Mail’s preferences once again.
- If the problem isn’t fixed, drag the file back to its original location.
Reset Apple Mail
If resetting mail preferences didn’t work for you, this surely will. Resetting something ultimately reverts it to its original, untouched version. Performing a reset is a guaranteed fix for most issues so that you can have high hopes for this method. To reset the mail app on your Mac,
- Open Finder.
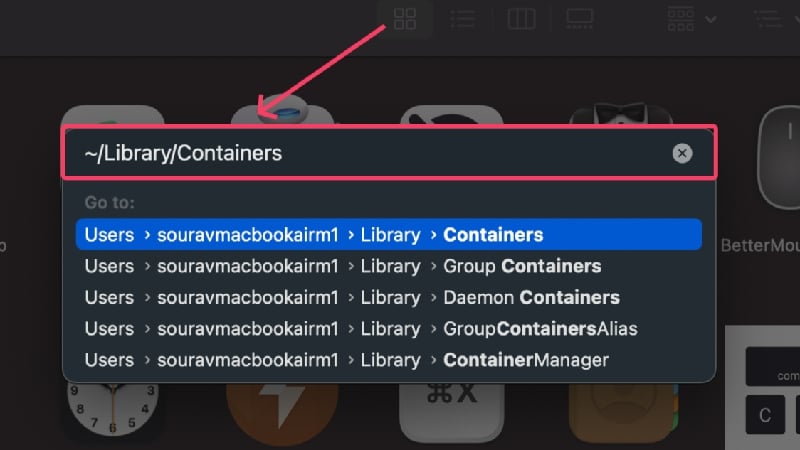
- Select Go from the status bar and select Go to Folder.
- Paste the following path and hit return. It will lead you to your Mac’s system files and app folders.
~/Library/Containers
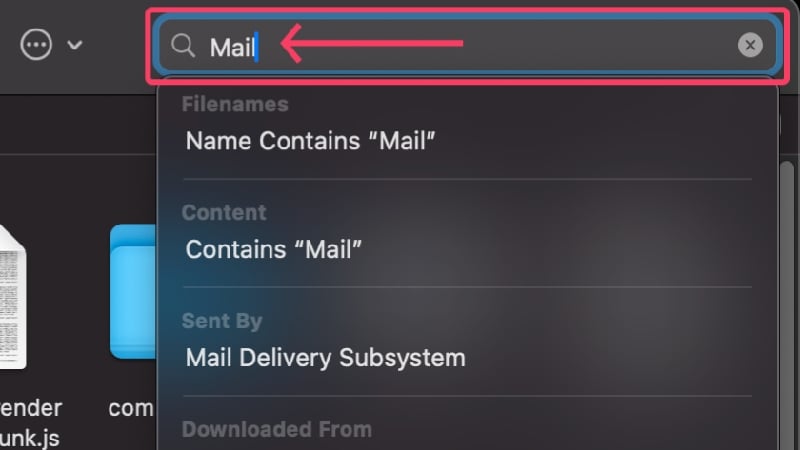
- In the search box present in the top-right corner, type in Mail and hit return.
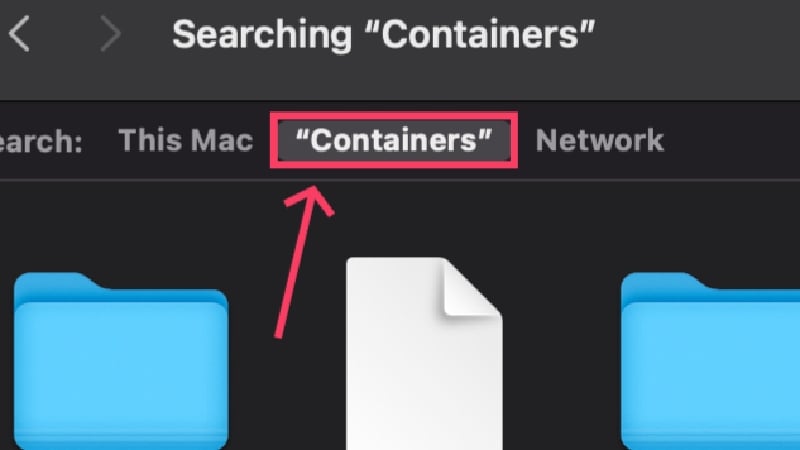
- Switch to Containers from the top panel.
- Use the shortcut command + A to select all files and put them in the trash using the shortcut Command + delete.

- Click on Go in the status bar and select Go to Folder to switch folders. Enter ~/Library/Mail in the entry field and hit return.
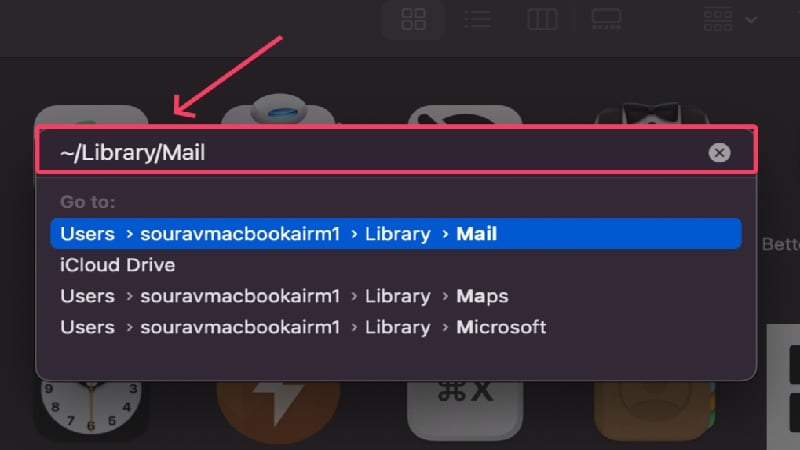
- Search for Mail in the search box present in the top-right corner. Repeat step 6 to select all files and delete them.
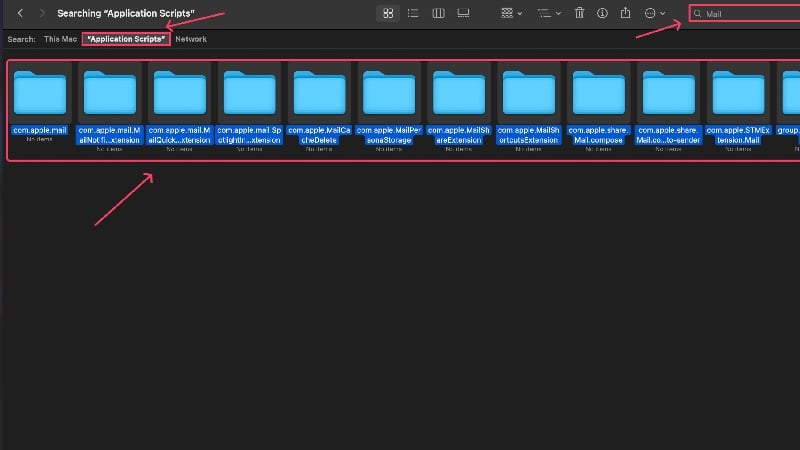
- Click on Go in the status bar and select Go to Folder to switch folders. Enter ~/Library/Application Scripts in the entry field and hit return.

- Search for Mail in the search box present in the top-right corner and switch to Application Scripts from the top pane. Repeat step 6 to select all files and delete them.
- Restart your Mac and relaunch the Mail app. Don’t worry; macOS will automatically create all the necessary files again to compensate for the deleted files.
Rebuild Your Existing Mailbox
Sometimes, Apple Mail may fail to work following syncing issues, which usually occurs when you have recently added a new account or due to a poor internet connection. You can rebuild your mailbox and fix the syncing issues to tackle this. To do so,
- Open the Mail app using Spotlight Search or from Launchpad.
- Select Mailbox from the status bar.
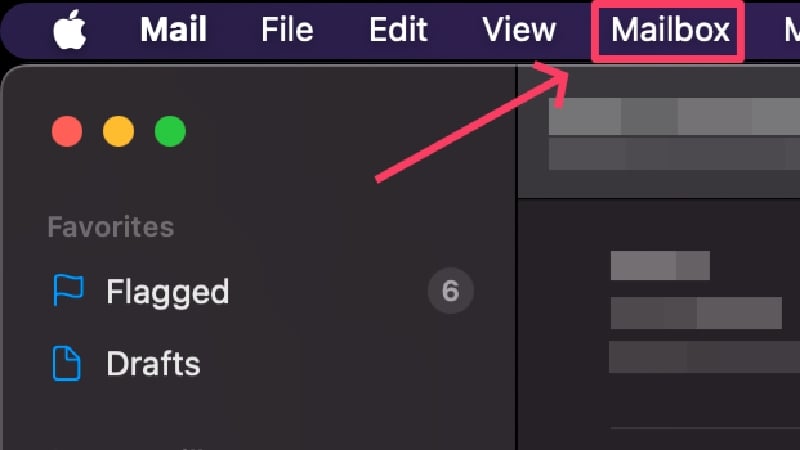
- Click on Rebuild.

Delete Junk Emails and Trash
Junk emails and trash are often left unattended, and while they are mostly harmless, a broken email is enough to cause Apple Mail not to work. Plus, it’s a good practice to clear junk emails and trash periodically, so consider it a routine check to keep your inbox free of harmful emails.
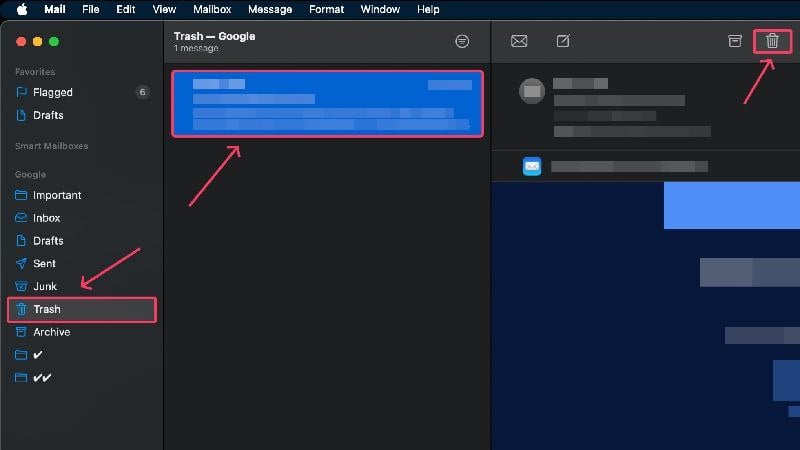
To delete junk emails, head to the Junk subsection from the left pane and select all the emails you want to delete by dragging the cursor over them. Then, click the trash icon in the top menu bar to remove the selected emails. Deleted emails are moved into the trash, which can be cleared by following the same procedure. Remember, you cannot restore the emails after they are emptied from the trash.
Remove Faulty Emails
You may have heard of phishing attacks and data theft attempts via email links. Such faulty emails not only jeopardize your online presence but can also damage your system and cause apps to malfunction. Such emails should be deleted immediately.
The problem lies in searching such emails, which is as tricky as finding a pin in the sand. We suggest using CleanMyMac X, an Apple notarized software with the unique ability to scan and eliminate broken emails, faulty attachments, and emails containing suspicious links.
Reset Envelope Files of the Mail App
If the problem was caused by faulty envelope files in the Mail app, resetting and reindexing these files can solve the problem. The procedure is a bit complicated but can be done easily if you follow it carefully.
- Open Finder.
- Select Go from the status bar and select Library.

- Open the folder named Mail, or search for it if you can’t find it.
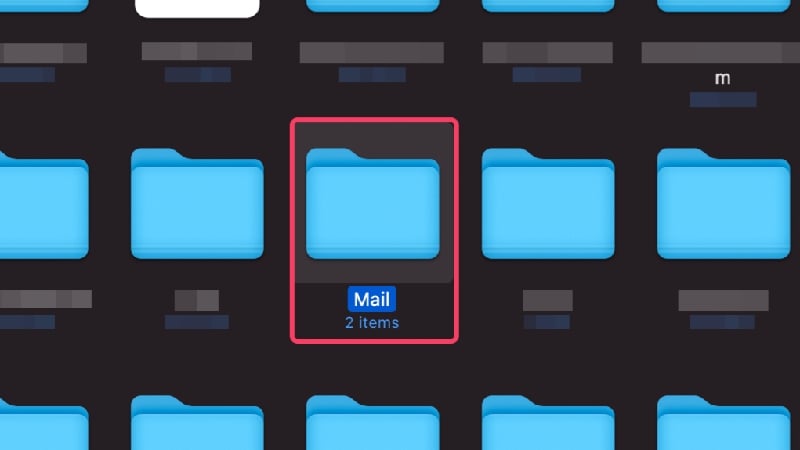
- In there, open the folder named V10. (The name may vary for older macOS versions.)
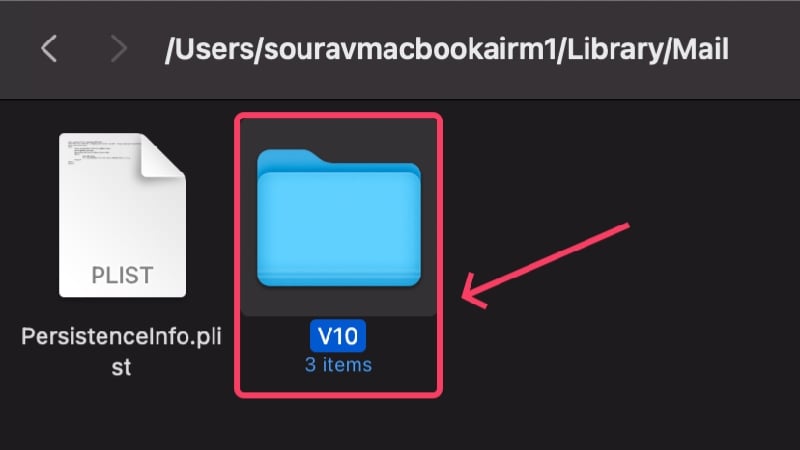
- Open the folder named Mail Data.

- Look for files named Envelope Index-shm, Envelope Index-wal, and Envelope Index.

- Select and Copy the files to your desktop. Delete the original files using the shortcut command + Q or by dragging them into the trash after performing the action.

- Reopen the Mail app and check if the problem persists. If it’s fixed, delete the copied files.
Run Mail in Safe Mode
If you run an app in safe mode, you can check whether a startup program is causing the problem. It’s a great way to test an app because no other apps will interfere with the app’s functions. The procedure differs for Apple silicon-based and Intel-based Macs, so you should carefully follow the steps below.
For Apple silicon-based Macs
- Shut down your Mac and wait for some time.
- Press and hold the power button until you see the Apple logo (). It should also read the message – Loading startup options.

- Identify your Mac’s SSD and select it by pressing the Shift key.
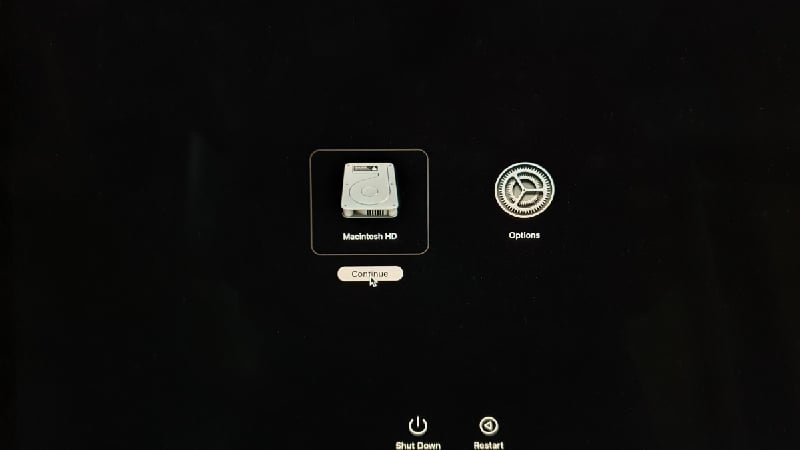
- Select Continue to enter into Safe Mode.

For Intel-based Macs
- Shut down your Mac and wait for some time.
- Press and hold the power button and Shift key together until you arrive at the login page.

- After logging in, your Mac will run in Safe Mode, which will be indicated in your Mac’s status bar.
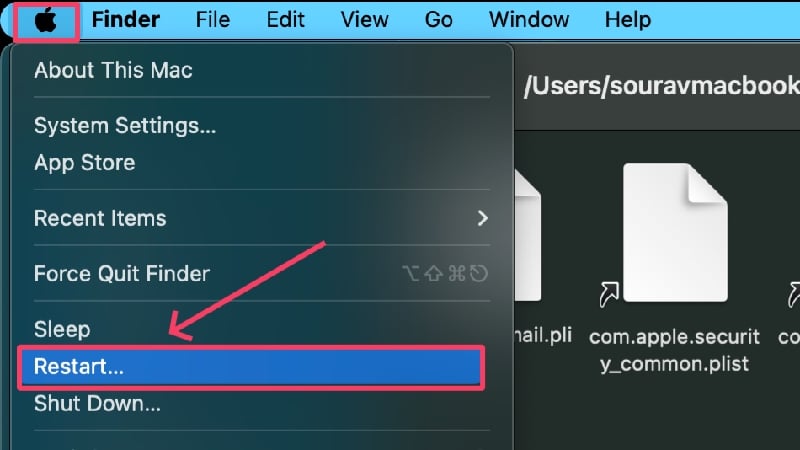
After entering safe mode, start the Mail app and check it for anomalies. If no problems are found, the Mail app has probably already been repaired on its own. You can now exit safe mode by performing a simple restart. To do this, click on the Apple logo () in the top left corner and select Restart.

Switch to Alternative Email Clients
You can switch to other email clients if Apple Mail doesn’t work. Some email clients are not only better than the default option, but offer a variety of features in comparison that will take your email experience to a whole new level. Here’s a list of the best email clients for Mac.
Don’t Let Apple Mail Betray You
Not being able to send emails in the middle of work is the definition of a bad day, but we hope the above methods have been helpful. In most cases, the problem may not be that technical, but a simple restart works beautifully. If not, updating the app or re-activating your email accounts should fix the problem. Resetting the app is often a last resort, but it can be very helpful if nothing is working. Most importantly, you can switch to a different email client to solve the problem.
FAQs about Troubleshooting Apple Mail Issues
1. Why isn’t Apple Mail working for me?
There can be a variety of reasons why Apple Mail isn’t working for you, so it’s not easy to pinpoint a single cause. Common reasons for Apple Mail not working include network fluctuations, account-specific issues such as incorrect passwords or insufficient cloud storage, device-specific issues such as using an older app version, system slowdowns, and bugs. Since it’s difficult to find the cause of the problem, it’s also much more difficult to find a working solution.
2. How can I check if the problem persists on the server’s end?
Problems on the server side are rare because companies don’t waste time trying to fix the problem. However, Apple and other companies behind email giants like Google and Microsoft have system status pages that will tell you if their server is down, undergoing maintenance or having other problems. Here is the link to the system status pages of Apple (Apple Mail), Google (Gmail), and Microsoft (Outlook).
3. How do I know if my mailing account is enabled?
If your mailing account is disabled, you’ll not be able to access your inbox and perform other actions through Apple Mail on your Mac. To do this:
- Open Mail.
- Click on Mail in the status bar of your Mac and select Settings.
- Switch to Accounts from the top pane and select the greyed-out accounts.
- Click on the checkbox to enable the accounts.
4. How much is my iCloud Drive filled, and will it affect Apple Mail?
To check how much space is left in your iCloud account, open your Mac’s settings and click on the profile picture. There, open iCloud and check the space you need. If you don’t have much space left in your iCloud Drive, incoming emails won’t be saved, and you may not be able to compose new ones. It’s, therefore, important to empty your iCloud Drive regularly.
